How to Easily Square Wood by Hand: Step-by-Step Guide
To square a piece of wood by hand, use a handplane with a sharp blade and a straightedge for reference. Start with one face of the board and flatten it out, then use the straightedge to check for any high spots.
Continue to plane the high spots until the entire surface is flat. Flip the board over and repeat the process on the other face, making sure it is parallel to the first surface. This will result in a flat and square piece of wood.
For those new to woodworking, achieving a flat and square board may seem daunting, but with the right tools and technique, it is achievable. Hand-planing is a traditional and rewarding method for squaring a piece of wood by hand. Instead of relying on power tools, hand-planing allows the woodworker to truly feel the surface of the board, resulting in a more hands-on approach to the craft. This article will guide you through the process of hand-planing to square a piece of wood by hand.
Why Square Wood By Hand
To square a piece of wood by hand, square wood is necessary. This involves straightening the wood into a square shape, which can be done with simple hand tools like a hand plane and a saw. By square wood by hand, you can achieve precise and accurate cuts for your woodworking projects.
ng into woodworking and want to know how to square a piece of wood without these tools. Here are the benefits of squaring wood by hand.
Benefits Of Squaring Wood By Hand
Squaring wood by hand is a traditional practice that has a lot of benefits, including:
- Improved accuracy: Hand squaring allows you to have greater control over the process, making it easier to achieve a perfect square.
- More affordable: Squaring wood by hand requires fewer tools, making it a more cost-effective solution for those who are just starting with woodworking.
- Enhanced skillset: By learning how to square wood by hand, you can develop a new skillset and become a more versatile woodworker.
- Increased customization: When you square wood by hand, you can customize the process to your needs and preferences, allowing you to create unique and personalized pieces.
If you’re interested in woodworking and want to improve your skills, learning how to square wood by hand is a great place to start. Not only does it offer numerous benefits, but it’s also a fun and rewarding process that can help you create better quality pieces.
Tools Required For Squaring Wood
To square a piece of wood by hand, there are several necessary tools required such as a hand plane, a square, and a straight edge. You can use these tools to check the wood’s sides, which includes checking if the two sides are parallel and straightening them if needed.
frequently work with rough lumber, and was wondering what would be the best method to square the edges of a board without a tablesaw or jointer? In this section, we will discuss the tools required for squaring a piece of wood by hand.
List Of Essential Hand Tools
To square a piece of wood by hand, the right tools are essential. You cannot do the job without the right equipment, so it’s important to have a few tools handy. Here is a list of essential hand tools you’ll need:
1. Hand Planer – It is an essential tool to have for squaring a piece of wood. A hand planer is a tool that shaves off a thin layer of wood from the surface to make it straight.
2. Hand Saw – It helps to cut the wood to the right size and perfect shape. You’ll need to use it to cut the wood to a manageable size before squaring it.
3. Combination Square – It is used to check the squareness of the boards, and it is also used to set the depth of a cut, to mark a line or to determine the angle of a cut.
4. Chisels – They come in handy to clean up corners and remove excess wood material that’s making the board not square.
5. Sandpaper – It helps to smooth the surfaces of the wood after the squaring process is complete. You can use different grits of sandpaper to get a perfect finish.
Remember that using a sharp tool is always better than a dull one. Make sure you have sharpened your tools before starting the squaring process. With the right tools, the process of squaring a piece of wood by hand will become more manageable.
Step-by-step Guide To Square Wood By Hand
Learn how to square a piece of wood by hand with this step-by-step guide. Use the best tools you can afford and make a jig to straighten the uneven board for a more consistent and stable result.
Looking to square a piece of wood by hand? It’s a handy skill to have if you’re a woodworking enthusiast or simply enjoy DIY projects. While there’s no substitute for accurate measurements and good tools, knowing how to square a piece of wood by hand can save you time and effort. In this step-by-step guide, we’ll walk you through the process of squaring a piece of wood by hand. We’ll cover everything from preparing the work area to measuring and marking the wood. So, let’s get started!
Preparing The Work Area
Before you begin, make sure you have a flat and stable work area. This will ensure that your wood lays flat and doesn’t move while you work on it. If you’re using a workbench, make sure it’s level and stable. Next, ensure that you have good lighting to see the wood clearly and to make accurate measurements. Dust and debris can interfere with your work, so make sure to clean your work area thoroughly.
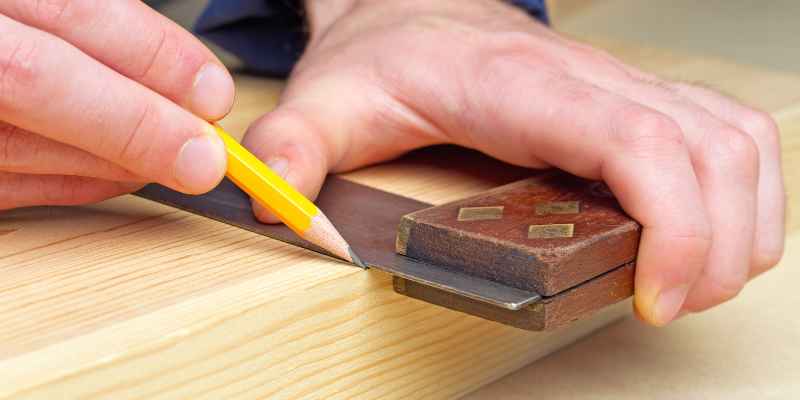
Measuring And Marking The Wood
Once your work area is ready, it’s time to measure and mark the wood. Use a straight edge to mark a straight line along one face of the wood. Then, flip the wood over and repeat the process, marking a line on the opposite face. These two lines should run parallel to each other. Use a combination square to mark lines perpendicular to these two lines at each end of the wood.
Planing The Wood
Now that you have marked your wood, it’s time to start squaring it. Use a hand plane to remove the high spots and bring the wood down to size. Begin with the face that has the highest point and work down from there. Use your marked lines as a guide and keep checking your progress with a straight edge or a level. As you approach your marked lines, begin pulling the plane at a diagonal angle to avoid over-cutting and creating a beveled edge.
Checking For Squareness
Once you’re happy that your wood is flat, it’s time to check to square. Take a square and place it against the edge of the wood, making sure it is perpendicular to your marked lines. If there’s a gap between the square and your wood, then it’s not square. If this is the case, continue planing the high spots until your square sits flush against the wood. Repeat this process for all sides of the wood until it’s perfectly square.
In conclusion, squaring a piece of wood by hand requires patience, a good eye, and the right tools. While a power tool can make the job easier, knowing how to square a piece of wood by hand can be a rewarding experience that can save you time and effort. Remember to take your time, double-check your measurements, and work on a flat and stable surface. With practice, you’ll be able to square wood by hand with ease.
Tips And Tricks For Squaring Wood By Hand
Learn how to square a piece of wood by hand with these tips and tricks. From using a marking gauge to creating a reference jig, this guide will have you creating perfectly squared pieces in no time.
n it comes to squaring a piece of wood by hand. However, with a few tips and tricks, it is actually easier than you may think. Below we have outlined some key tactics to help you get the job done, including tips on maintaining sharp blades, using a shooting board, and making small adjustments. By following these techniques, you can achieve precise, square cuts without the use of expensive machinery.
Maintaining Sharp Blades
One of the most important aspects of squaring a piece of wood by hand is ensuring your tools are sharp. The sharper your blade, the easier it will be to cut through even the thickest pieces of wood. To maintain sharpness, you should always use a honing stone to sharpen your blades before each use. Make sure to check the blade’s angle to ensure it is sharp and angled correctly. If the blade is too dull, it can lead to rough cuts and an uneven surface, making it difficult to square the wood.
Using A Shooting Board
Another useful tool for squaring wood by hand is a shooting board. A shooting board is essentially a flat board with a side stop and a fixed fence at a 90-degree angle. This tool is perfect for making precise cuts in thin pieces of wood, such as molding or trim. To use a shooting board, place the wood piece against the fence and slide it along the board to make a straight cut. This tool is also helpful when making small adjustments, as it allows you to make small changes in position to achieve a more accurate cut.
Making Small Adjustments
When it comes to squaring wood by hand, it’s important to be patient and take your time. Making small adjustments as you go can help ensure each cut is accurate and precise. One trick is to make small cuts at a time, using a bench plane to trim off small amounts of wood until you achieve the desired angle. Additionally, you can use hand-held saws, such as a Japanese pull saw, to help make finer cuts. With practice, you’ll be able to make small adjustments with ease and achieve near-perfect square cuts every time.
In conclusion, squaring wood by hand may seem overwhelming at first, but with the right tools and a few helpful tips and tricks, it is easier than you may think. By maintaining sharp blades, using a shooting board, and making small adjustments, you can achieve precise, accurate cuts every time. Whether you are a seasoned woodworker or just starting out, these techniques will help you achieve the perfect square every time.
Common Mistakes To Avoid While Squaring Wood
When squaring a piece of wood by hand, there are common mistakes to avoid. These include not marking the wood accurately, not using a square or straightedge properly, and rushing through the process. Proper technique involves taking time to measure and pencil-mark the wood, using a square or straightedge to guide the saw, and ensuring that cuts are made accurately.
should use a jointer plane versus a jack plane. It seems that a jack plane can do the job of both, but want to hear from more experienced folks. Thanks!
When it comes to woodworking, squaring a piece of wood is essential, especially if you plan to use the wood for any furniture or other projects. However, many people make common mistakes when trying to square a piece of wood by hand. Before you know it, you can end up with an uneven edge or simply damage the entire piece of wood. In this section, we’ll discuss the most common mistakes to avoid when squaring a piece of wood.
Using Too Much Force
One of the most common mistakes to avoid when squaring wood is using too much force. This is especially true when you’re using a hand plane. It’s important to remember that a hand plane is a precision tool, and it requires a delicate touch to get the right results. When you apply too much force, you can easily take off too much wood, leaving a rough edge or making the board too small. Instead, make sure you’re using a sharp blade and using even, light strokes to shave off small amounts of wood. Take your time and don’t rush the process.
Not Checking For Squareness
Another mistake people often make is not checking for squareness while they’re working on the wood. It’s essential to make sure that the edge you’re creating is perfectly perpendicular to the face of the board. If it’s not, you’ll end up with an uneven edge, which can cause problems when you’re joining the board to another piece of wood. To check for squareness, you can use a framing square or even a combination square. Measure and mark the board to make sure that the edge you’re creating is perfectly perpendicular. Don’t rush this step, as a mistake here will cause you problems later on in the project.
Skipping Steps
Finally, make sure you’re not skipping steps in the process. It’s important to follow a certain sequence of steps when squaring a piece of wood by hand. Skipping steps can cause problems later on, and it can also make the process take longer than it needs to. For example, make sure you’re starting with a board that’s close to square if possible. This will reduce the amount of work you need to do later on. Also, make sure you’re using the right tools for the job. Each tool has a specific purpose, and using the wrong one can cause problems.
In conclusion, squaring a piece of wood by hand can be a challenging process, but by avoiding these common mistakes, you can ensure that you get the best results possible. Remember to use a light touch, check for squareness, and follow the necessary steps in the process. With a little practice, you’ll be able to square a piece of wood by hand with ease.
Frequently Asked Questions For How To Square A Piece Of Wood By Hand
How Do You Make A Piece Of Wood Perfectly Square?
To make a piece of wood perfectly square, you can create a jig that serves as a reference point to straighten uneven boards. Alternatively, you can use the best tools you can afford and aim to cut the wood as straight as you can.
However, it is important to note that wood is always moving with changes in humidity, so achieving a perfectly square piece may be difficult.
How Do I Make Sure Two Pieces Of Wood Are Square?
To ensure two pieces of wood are square, you can use a square tool, carefully measure the dimensions, make accurate and straight cuts, and check for any gaps or unevenness. Additionally, you can make a jig by using a reference point to straighten the uneven board to ensure it is firmly aligned while working.
How Do You Square Wood Hand Tools?
To square wood by hand, you need to use a framing square or combination square for measuring. Use a hand saw or plane to shave off wood that’s sticking out until the wood piece is square on all corners. Make sure the square is held tightly to the face of the board while measuring and cutting.
How Do You Square The End Of A Piece Of Wood?
To square the end of a piece of wood, follow these steps:
1. Measure and mark the desired length on the wood.
2. Use a square to draw a line across the wood at the marked length.
3. Cut along the line with a saw or a chisel to make a straight, square edge.
4. Check for squareness using a square or a straight edge.
5. Sand or plane as necessary for a smooth finish.
Conclusion
Squaring a piece of wood by hand may seem challenging at first, but with the right tools and techniques, it can become an effortless task. Woodworking is a craft that requires dedication and patience, and mastering the art of squaring wood by hand is a skill that will pay off in the long run.
By following the step-by-step process and taking the necessary precautions, you can safely and accurately square a piece of wood by hand and take your woodworking skills to the next level.