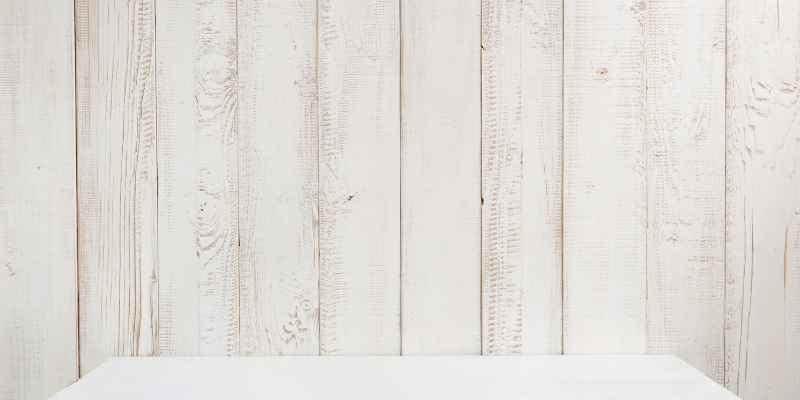
How to Stagger Wood Planks on Wall: Step-by-Step Tutorial
To stagger wood planks on a wall, start by laying a level starter row and then stagger the end joints as you work your way up and down the wall, using the cut-off piece from one row to start the next row. This technique creates a visually appealing look and minimizes waste.
For tongue and groove walls, start the second row with a different length board and ensure that the joint is at least two joists away from the joint in the first row. When installing wooden planks on the wall, it is important to level the boards and nail them into place.
This article will provide more information on how to stagger wood planks on a wall and install them properly to achieve a professional look for your home decor.
Marking And Preparing The Wall
Before installing wood planks on a wall, it is crucial to mark and prepare the wall properly. To achieve an aesthetically pleasing look, stagger the end joints of the planks as you work your way up and down the wall, using the cut-off pieces from one row to start the next.
Follow installation guides and avoid matching end joints from row to row to create a beautiful and unique design.
When it comes to installing wood planks on a wall, it’s important to properly prepare and mark the wall before getting started. By ensuring accuracy in your measurements, you’ll have a beautiful and professional-looking finished product. In this tutorial, we will discuss how to locate and mark the studs, install window trim, and scribe lines for your wood planks.
Locate And Mark The Studs
First, it’s essential to locate and mark the studs on your wall. Studs are vertical wooden boards in the wall that provide structure and support. You can use a stud finder to locate them. Mark each stud with a pencil where the plank will be screwed in, so the placement is correct.
Install Window Trim
Before installing the wood planks, it’s necessary to install the window trim. Trim is the wooden material that surrounds windows, doors, or any other edge of a flat surface. The window trim should be level with the studs. If it is not level, you’ll need to adjust accordingly before moving forward with the planks.
Scribe Lines
Scribing lines are crucial because they help to ensure that you have a straight line to follow when installing the wood planks. To scribe lines, mark a vertical line at the beginning and end of the wall, ensuring it is level with the ground. Also, mark a horizontal line where the top plank will start.
Use a level to confirm that the lines are straight. Starting at the bottom, place the first plank on the wall while ensuring the ends align with the vertical lines. Then, place the second plank above the first and stagger the seams. Repeat this process, staggering the seams with each row, to create a stunning wood plank wall.
In conclusion, by following these steps and adhering to precise measurements, you can achieve a beautiful and unique wood plank wall that will add style and sophistication to any room. Remember to take your time in the planning process to ensure accuracy and a successful installation.
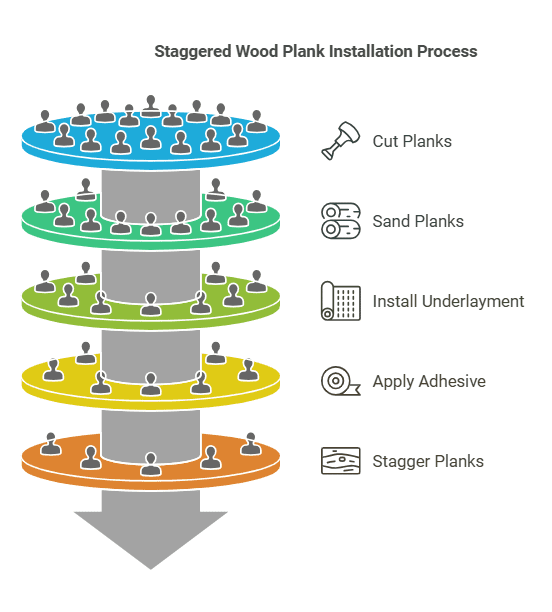
Cutting And Sanding The Planks
To stagger wood planks on a wall, you’ll need to cut and sand the planks to fit together perfectly. Be sure to stagger the end joints of each row to create a more natural, randomized pattern. To minimize waste, use cut-off pieces from one row to start the next.
Before you can install your wood planks on the wall, you need to make sure they are all cut to size and sanded. This step is very important, as it will ensure that your planks fit perfectly on the wall and have a smooth finish. Here’s a step-by-step guide on how to measure, cut, and sand your wood planks.
Measure and Cut Planks to Size
The first step in cutting your wood planks is to measure the length of your wall. Use a measuring tape to measure the distance from one end of the wall to the other. Once you have the exact measurement, you can then start cutting your planks to size. For this step, you’ll need a saw. It’s important to use a saw that is appropriate for the thickness of your planks. A circular saw or a jigsaw are both good options for cutting wood planks.
Start by marking the length of each plank on the wood. Once you have all your planks marked out, use your saw to cut them to size. Be sure to cut your planks slightly longer than the length of the wall. This will give you some wiggle room when installing them on the wall.
Sand the Planks
After you’ve cut your planks to size, it’s time to sand them. Sanding your planks will ensure that they are smooth and free from any rough edges or splinters. Begin by using a rough sandpaper to remove any large imperfections. Once you have a smooth surface, switch to a finer grit sandpaper to finish the job.
It’s important to sand each plank individually, ensuring that both the front and back sides are sanded. This will give your planks a more even appearance once they are installed on the wall.
In Conclusion,
Cutting and sanding your wood planks is an important step in the process of creating a staggered plank wall. By following these steps, you’ll be able to create planks that fit perfectly on your wall and have a smooth finish. Remember to take your time and be patient when cutting and sanding your planks, as this will ensure the best results.
Installing The Planks
To stagger wood planks on a wall, start with a level starter row and then stagger the end joints as you work your way up and down the wall. To minimize waste, use your cut-off piece from one row to start the next row, and make sure the joint is at least two joists away from the joint in the first row.
Follow these steps to create a beautiful and unique look in your home.
Install Underlayment
Before installing wood planks on a wall, it is important to install underlayment. This essentially acts as a barrier between the wood and the wall. Start by measuring the length and height of the area you want to cover. Cut the underlayment to size using a utility knife or a pair of scissors.
Once the underlayment is properly sized, apply a generous amount of construction adhesive to the back of the underlayment and press it onto the wall. Use a trowel to spread the adhesive evenly across the underlayment, ensuring that it adheres completely to the wall.
Apply Adhesive To Planks
Once the underlayment has been securely fastened to the wall, it’s time to start applying adhesive to the planks. Begin by applying adhesive to the back of the first plank, being careful to coat all edges thoroughly. Use a generous amount of adhesive to ensure that the plank sticks properly and does not warp over time.
Start With The Bottom Row
It is recommended to start installing the planks from the bottom of the wall and work your way up. This will ensure that the planks fit properly and are evenly spaced. Using a level, mark a level line along the bottom of the wall. Secure the first plank to the underlayment, making sure that it lines up with the level line. Once the first plank is in place, continue applying adhesive and securing the planks along the bottom row until it is complete.
Stagger The Planks
To achieve a natural and rustic look, it’s important to stagger the planks. This means that the end joints of adjacent planks should not line up with each other. To achieve this, cut the first plank of the second row to a length that is different from the last plank of the first row. Continue the installation process, alternating the lengths of the planks as you progress higher up the wall. Remember to use a level to ensure that the planks are straight and even.
Overall, installing wood planks on a wall can be a rewarding and cost-effective way to add some rustic charm to your home. By following these simple steps, you can achieve a professional-looking finish that will last for years to come. Always remember to take your time and be patient throughout the installation process for the best results.
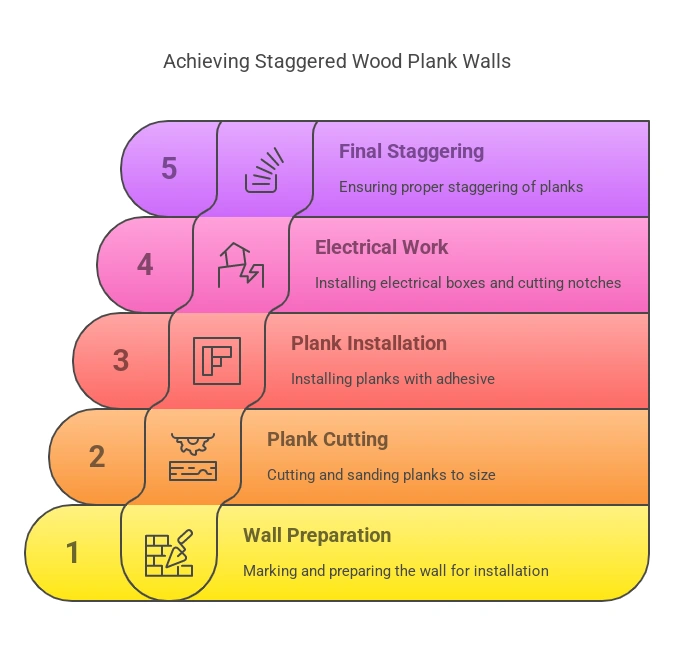
Installing Electrical Box And Cutting Notches
To install a wood plank wall, you must first stagger the planks. Begin with a level starter row, and then stagger the end joints as you work your way up and down the wall, using cut-off pieces to begin the next row.
Make sure to properly cut notches for electrical boxes and avoid overlapping or uneven planks.
Installing Electrical Box and Cutting Notches for Electrical Wire are crucial steps when installing wood planks on your wall. It’s essential to ensure that these steps are done correctly to avoid any inconvenience and ensure a smooth installation process.
Install Electrical Box:
Before installing wood planks, you need to install the electrical box. It is necessary to turn off the electricity before starting the installation process. Next, find the stud and mark the location for the electrical box. Using a drywall saw, cut through the drywall and carve out the hole.
Using the screws provided, attach the electrical box firmly to the stud. Keep in mind that the box must be flush with the wall’s surface. Once the electrical box is installed, you can start cutting notches for the electrical wires.
Cut Notches for Electrical Wire:
When cutting notches for electrical wire, you need to be extra cautious. First, mark the location where the notch needs to be cut. Using a jigsaw or a handsaw, carefully cut out the notch.
Ensure that the notch is deep enough to hold the wire securely but not too deep that it causes damage to the stud or electrical wire. Once the notch is cut, run the electrical wire through the hole and into the electrical box. Now you can install the wood planks on the wall.
By following these steps, you can safely install your wood planks on the wall without any errors. Remember to double-check your work before proceeding to the next step to avoid any complications.
Staggering The Plank Walls
When installing wood planks on a wall, it’s important to stagger the end joints as you work your way up and down the wall to achieve a more natural look. Use the cut off pieces from one row to start the next row and minimize waste.
Follow a tutorial or guide to ensure correct installation.
Staggering the Plank Walls
If you’re considering giving your walls a rustic yet contemporary makeover, installing wood planks is definitely a great way to achieve this look. Not only does it add texture and warmth to your space, but it’s also a relatively easy and affordable DIY project. However, to achieve a professional finish, you need to master the art of staggering the plank walls. In this article, we’ll guide you through the process, step by step.
Why Use Cross Members
Before you start, it’s important to understand why cross members are so crucial to the process. Cross members refer to horizontal pieces of wood that are fixed to the studs. They provide a strong base for the vertical plank installation, ensuring that your planks are securely attached to the wall. Without cross members, your planks could sag or detach from the wall over time.
Marking the Studs
Once you’ve attached your cross members, it’s time to mark out the studs. This step is important because it will help you to ensure that your planks are securely fastened to the wall. You can use a stud finder or a simple measuring tape to locate the studs. Mark the location of the studs with a pencil or chalk.
Adding the Third Course
Once you’ve securely fixed the horizontal row of planks, it’s time to begin staggering them. The best way to achieve this is to start your next row with a smaller piece of plank. This will ensure that the end joints don’t match up, giving your wall a more professional look. Use your cut off piece from one row to start the next row to minimize waste. Remember to use spacers between each plank to ensure even distribution of the planks. Once you’ve installed the second row, start the third course with a plank of the same length as the first course.
In conclusion, staggering the plank walls is a simple yet crucial part of the process when it comes to installing wood planks on your walls. By following these steps, you’ll be able to achieve a professional-looking finish that will enhance the overall look of your space.
Frequently Asked Questions Of How To Stagger Wood Planks On Wall
How Do You Stagger A Plank Wall?
To stagger a plank wall, start by laying a level starter row. Then, as you work your way up and down the wall, stagger the end joints so that they don’t match up from row to row. You can use cut off pieces from one row to start the next row in order to minimize waste and achieve the desired look.
For tongue and groove walls, start the second row with a different length to create the staggered effect, with joints at least two joists away from the first row. Install the boards by sliding the “groove” of the new board onto the “tongue” of the installed board and nail it into place.
How Do You Stagger Tongue And Groove Walls?
To stagger tongue and groove walls, start with a different size board on the second row to create the staggered effect. The joint should be at least two joists away from the joint in the first row. Cut the board to fit and slide the “groove” of the new board onto the “tongue” of the installed board.
Nail it into place. Continue staggering the boards row by row to avoid matching end joints.
How Do You Install Wood Planks On Walls?
To install wood planks on walls, begin by marking stud locations and install window trim and electrical boxes. Then, scribe lines and cut the planks to size, sand them, and apply adhesive to the back. Start at the bottom and work your way up, staggering the end joints and using cut-off pieces for the next row.
Alternatively, consider tongue and groove or shiplap installation methods. Follow manufacturer instructions and seek professional help if necessary.
Do You Start At The Top Or Bottom Of A Wood Plank Wall?
When installing wood planks on a wall, it is recommended to start at the bottom and work your way up with full pieces. Stagger the end joints as you work up and down the wall so that your joints do not match up from row to row.
Use your cut pieces from one row to start the next row.
Conclusion
Staggering wood planks on a wall is a great way to add texture and dimension to any room. Following the correct techniques and guidelines, the installation process can be easy and achievable for DIY enthusiasts. Always remember to start with a level base, use the appropriate tools, and stagger the planks as you work your way up.
With these tips in mind, you can create a unique and beautiful statement wall to showcase in your home. So, grab your tools and get started on your DIY plank wall project today!