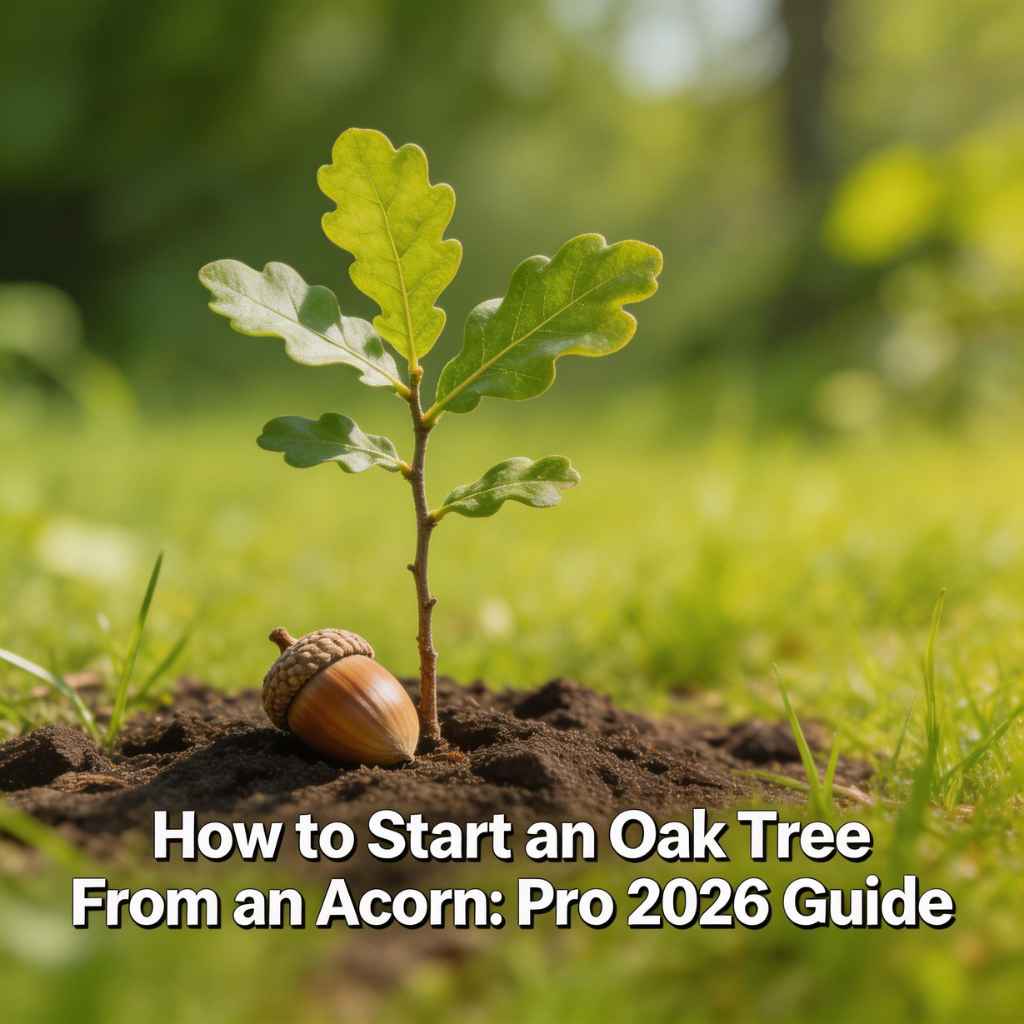
How to Start an Oak Tree From an Acorn: Pro 2026 Guide
Many people wonder about growing a mighty oak tree right from a tiny acorn. It sounds simple enough, but sometimes starting an oak tree from an acorn can feel a bit tricky for beginners. This guide, How to Start an Oak Tree From an Acorn: Pro 2026 Guide, is here to make it super easy.
We will walk you through every step, so you can successfully grow your own oak. Get ready to learn the best way to give your little acorn the best start.
Gathering Your Acorns The First Big Step
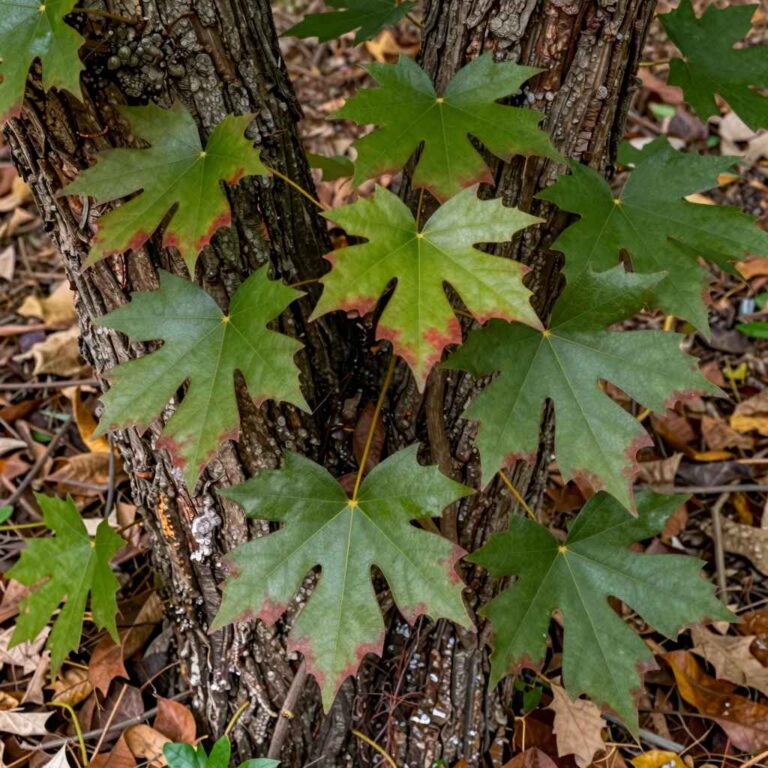
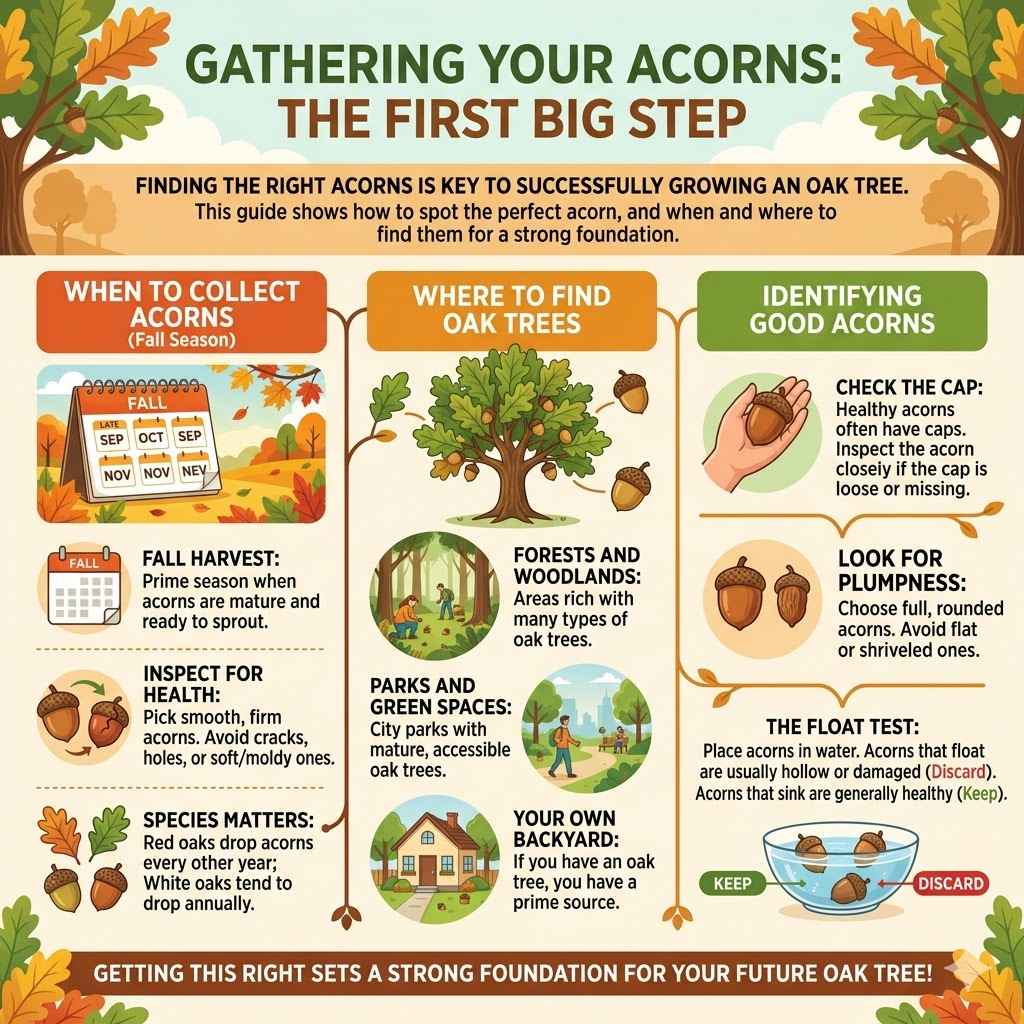
Finding the right acorns is key to successfully growing an oak tree. Not all acorns are created equal, and picking the best ones means you are already halfway there. You want acorns that are healthy, plump, and show no signs of damage or mold.
This section will cover how to spot the perfect acorn and when and where to look for them. We will also touch on different oak species and how their acorns might vary slightly, making your selection process even more informed. Getting this right sets a strong foundation for your future oak tree.
When To Collect Acorns
The best time to collect acorns is typically in the fall, from late September through November. This is when oak trees naturally drop their acorns. Look for acorns on the ground under mature oak trees.
- Fall Harvest: Autumn is the prime season for acorn collection. The acorns are mature and ready to sprout.
- Inspect for Health: Always pick acorns that are smooth and firm. Avoid any that are cracked, have holes, or appear soft and moldy. These are likely not viable for growing.
- Species Matters: Different oak species have different acorn cycles. Red oaks typically drop acorns every other year, while white oaks tend to drop them annually.
Where To Find Oak Trees
Oak trees are found in many places, often in parks, forests, and even suburban yards. Look for the distinctive lobed leaves and the characteristic acorn cups.
- Forests and Woodlands: These areas are rich with oak trees, offering a wide selection of acorns.
- Parks and Green Spaces: Many city parks have mature oak trees that are easily accessible for acorn gathering.
- Your Own Backyard: If you have an oak tree, you have a prime source for acorns.
Identifying Good Acorns
A good acorn will feel solid and heavy for its size. It should also be free from wormholes or signs of decay.
- The Float Test: Place your collected acorns in a bowl of water. Acorns that float are usually hollow or damaged and unlikely to sprout. Discard these.
- Check the Cap: Healthy acorns often have their caps attached. If the cap is loose or missing, inspect the acorn itself closely for any signs of damage.
- Look for Plumpness: Choose acorns that appear full and rounded. Flat or shriveled acorns are less likely to be viable.
Preparing Your Acorns For Planting
Once you have a good collection of acorns, it’s time to get them ready to grow. This involves a few important steps to ensure they are ready to sprout and have the best chance of success. We will cover how to stratify them, which is like giving them a little cold winter to prepare them for spring growth.
This process mimics what happens in nature and significantly boosts your chances of getting a sprout. Following these steps correctly is crucial for moving from acorn to seedling.
Stratification The Cold Treatment
Stratification is a process that mimics the natural winter conditions acorns need to break their dormancy. This cold, moist period signals to the acorn that it’s time to grow. Without it, many acorns won’t sprout.
- Why Stratify?: Acorns have a natural inhibitor that prevents them from sprouting too early. The cold treatment helps to break this inhibition.
- Moist Medium: You will need a material like damp peat moss, vermiculite, or even damp paper towels. This keeps the acorns moist without becoming waterlogged.
- Container Choice: Use a resealable plastic bag or a small container with a lid. This helps maintain the moisture level and prevents the acorns from drying out.
Example of Stratification
- Take your collected acorns and place them in a bowl of water. Discard any that float.
- Mix your chosen medium (e.g., peat moss) with water until it is damp but not soaking wet. It should hold its shape when squeezed.
- Place a layer of the damp medium in your container or bag.
- Arrange the viable acorns on top of the medium, making sure they are not touching each other too much.
- Cover the acorns with another layer of the damp medium.
- Seal the container or bag, leaving a small opening for air circulation if using a bag.
- Place the container in the refrigerator (not the freezer) for at least 4 to 12 weeks. Check the moisture level periodically and add a little water if it feels dry.
Checking For Sprouting
After the stratification period, you’ll want to check if your acorns are ready to grow. This is an exciting part of the process. You are looking for signs of life, specifically the development of a root.
- Visible Roots: The most common sign of a sprouting acorn is the emergence of a small root, often called a radicle. It will look like a tiny white thread.
- Cracked Shell: Sometimes, the acorn shell will begin to crack slightly as the root emerges. This is a natural part of the germination process.
- Moisture Check: Ensure the acorns and the stratification medium remain consistently moist. If they start to dry out, they can fail to sprout.
If you see a root, it’s time to plant!
Planting Your Acorn The Right Way
This is where your acorn officially becomes a seedling. Planting it correctly ensures it has the best environment to grow strong roots and a sturdy stem. We will go over the best pots, soil, and how deep to plant your acorn.
Getting this right means your little oak has a solid start for its life.
Choosing A Pot And Soil
The container and soil you choose play a big role in how well your acorn sprouts and grows. A good pot allows for drainage, and the right soil provides the necessary nutrients.
- Pot Size: Start with a pot that is at least 6-8 inches deep. Acorns grow a taproot first, so depth is more important than width initially.
- Drainage Holes: Ensure your pot has plenty of drainage holes at the bottom. This prevents water from sitting and rotting the acorn or roots.
- Potting Mix: Use a well-draining potting mix. A blend of potting soil, perlite, and a little sand works well. Avoid heavy garden soil, which can compact too much.
Planting Technique
The way you place the acorn in the soil is important for successful germination. A simple method works best.
- Root Down: If you see a root, plant the acorn with the root pointing downwards. If you don’t see a root yet, plant it with the pointy end up or on its side.
- Depth: Plant the acorn about 1-2 inches deep in the soil. Do not bury it too shallow, as it might dry out.
- Watering: After planting, water the soil thoroughly until water runs out of the drainage holes.
Keep the pot in a warm location, but out of direct sunlight, as it waits to sprout.
Caring For Your Oak Seedling
Once your acorn sprouts, it is now a fragile seedling. This stage requires consistent care to help it grow strong and healthy. We will discuss watering, sunlight, and how to protect your young oak from pests.
Proper nurturing during this time is vital for its long-term survival and development. This is where you begin to see the rewards of your efforts.
Watering Needs
Young oak seedlings need consistent moisture, but they also need to avoid being waterlogged. Finding the right balance is key.
- Keep Soil Moist: The soil should be kept consistently moist, but not soggy. Check the soil moisture by sticking your finger about an inch deep. If it feels dry, it’s time to water.
- Water at the Base: Always water the soil directly at the base of the seedling, avoiding the leaves. This helps prevent fungal diseases.
- Drainage is Crucial: As mentioned before, ensure excess water can drain away freely. Soggy soil can lead to root rot, which is very harmful to young plants.
Sunlight Requirements
Oak seedlings need sunlight to grow, but direct, intense sun can be too harsh for very young plants.
- Bright, Indirect Light: Place your potted seedling in a location that receives bright, indirect sunlight. A spot near a sunny window is often ideal.
- Gradual Acclimation: If you plan to move your seedling outdoors, gradually acclimate it to direct sunlight over a week or two. Start with a few hours of morning sun and increase exposure slowly.
- Signs of Too Much Sun: If the leaves start to turn yellow or brown and look scorched, it might be getting too much direct sun.
Protection From Pests And Diseases
Young seedlings are vulnerable to various pests and diseases. Taking proactive measures can save your plant.
- Monitor Regularly: Inspect your seedling daily for any signs of pests like aphids or spider mites, or indicators of fungal issues like powdery mildew.
- Natural Pest Control: If you spot pests, you can often remove them by hand or use a gentle, natural insecticide like neem oil or a solution of soap and water.
- Good Air Circulation: Ensure good air circulation around your plant to help prevent fungal diseases. Avoid overcrowding it with other plants.
A healthy seedling is a happy seedling!
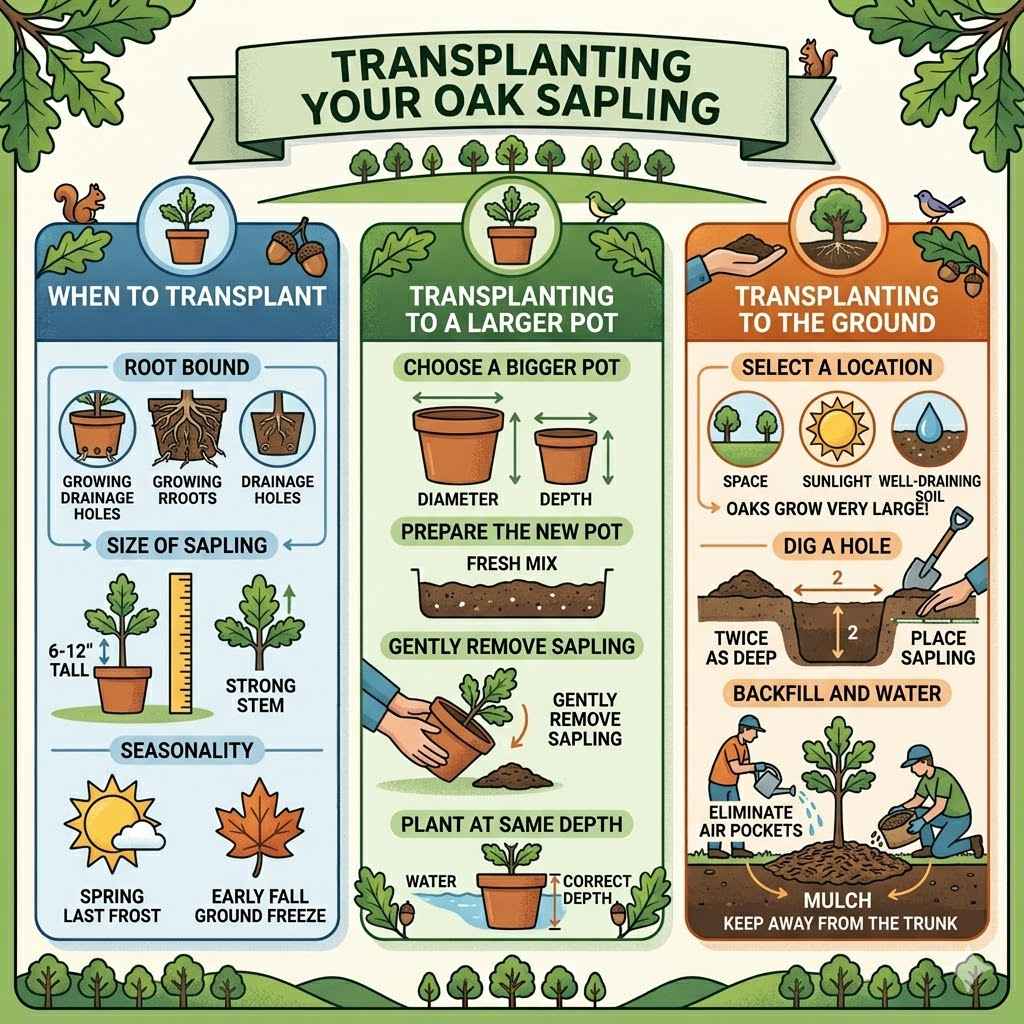
Transplanting Your Oak Sapling
Eventually, your small oak seedling will outgrow its pot. Moving it to a larger container or directly into the ground is a significant step. This section covers how to do this transplanting process smoothly so your oak continues to thrive.
When To Transplant
Timing is important for a successful transplant. You want to move your oak at the right stage of its growth.
- Root Bound: If roots are starting to grow out of the drainage holes or form a dense mat at the bottom of the pot, it’s time to transplant.
- Size of Sapling: A sapling that is roughly 6-12 inches tall and has a strong stem is usually ready.
- Seasonality: The best time to transplant is usually in the spring, after the last frost, or in early fall before the ground freezes. This gives the roots time to establish before extreme weather.
Transplanting To A Larger Pot
Moving to a bigger pot is a good intermediate step before planting in the ground.
- Choose a Bigger Pot: Select a pot that is at least a few inches larger in diameter and depth than the current one.
- Prepare the New Pot: Add a layer of fresh potting mix to the bottom of the new pot.
- Gently Remove Sapling: Carefully tilt the old pot and slide the sapling out, supporting the base of the stem. Try to keep the root ball intact.
- Plant at Same Depth: Place the sapling in the new pot so that the top of its root ball is at the same level as it was in the old pot. Fill in with soil and water well.
Transplanting To The Ground
Planting directly into the ground allows your oak to grow to its full potential.
- Select a Location: Choose a spot with plenty of space, sunlight, and well-draining soil. Remember oaks grow very large!
- Dig a Hole: Dig a hole that is twice as wide and as deep as the sapling’s root ball.
- Place Sapling: Gently place the sapling in the hole, ensuring the top of the root ball is level with the ground.
- Backfill and Water: Fill the hole with soil, gently firming it around the base. Water thoroughly to settle the soil and eliminate air pockets.
- Mulch: Add a layer of mulch around the base of the sapling, keeping it a few inches away from the trunk.
Frequently Asked Questions
Question: How long does it take for an acorn to sprout?
Answer: It can take anywhere from a few weeks to a few months for an acorn to sprout. This depends on the species, how well it was stratified, and the growing conditions. Some may sprout quickly, while others need more time to break dormancy.
Question: Can I plant an acorn directly in the ground without stratification?
Answer: Yes, you can try planting an acorn directly in the ground in the fall. Nature’s stratification process will occur over winter. However, stratification in a controlled environment often leads to a higher success rate and faster sprouting in the spring.
Question: What if my acorn doesn’t sprout after stratification?
Answer: Don’t worry if not all of your acorns sprout. Some may not have been viable from the start, or the conditions might not have been perfect. Try stratifying a new batch or try planting the non-sprouted acorns directly in the ground to see if they will sprout later.
Question: How often should I water an oak seedling?
Answer: Water your oak seedling whenever the top inch of soil feels dry. This could be every few days during warm, dry weather and less often when it’s cooler or more humid. Always check the soil moisture rather than watering on a strict schedule.
Question: Can I grow an oak tree indoors permanently?
Answer: While you can start an oak tree indoors, they are not typically suited for permanent indoor living. Oak trees are large, outdoor plants that need ample space and sunlight to grow into their full majestic size. Eventually, they need to be planted in the ground.
Summary
Growing an oak tree from an acorn is a rewarding process. By carefully selecting, preparing, and planting your acorn, and then providing consistent care for your seedling, you can cultivate a magnificent oak. This guide provides the essential steps, from initial collection to eventual transplanting, ensuring a successful start for your future tree.