How To Thin Wood Stain: Expert Tips for Perfect Consistency
To thin wood stain, simply add the appropriate thinner to achieve the desired consistency. When staining wood, it may be necessary to thin the stain in order to achieve the desired results.
Thinning the stain can help achieve a more uniform coverage and prevent the stain from drying too quickly. We will discuss the steps to thin wood stain effectively. Whether you are a DIY enthusiast or a professional woodworker, these tips will help you get the best results.
So, let’s dive in and learn how to thin wood stain like a pro!
Why Thin Wood Stain
Wood staining is a popular technique used to enhance the natural beauty of wood and protect it from external elements. However, applying wood stain directly from the can may not always produce the best results. Thining wood stain can significantly improve the outcome of your wood staining project. In this article, we will explore the reasons why thinning wood stain is important and how it can benefit your woodworking projects.
Enhances Penetration
Thinning wood stain allows it to penetrate deeper into the wood fibers, resulting in a more even and consistent finish. When wood stain is too thick, it tends to sit on the surface of the wood, preventing it from fully soaking into the pores. By thinning the stain, you create a smoother consistency that can easily seep into the wood, enhancing its natural grain and providing a more professional-looking result.
Even Color Application
Thinned wood stain ensures that the color is applied evenly across the entire surface of the wood. When the stain is too thick, it can lead to uneven color distribution, resulting in blotches or streaks. Thinning the stain helps to eliminate these problems by creating a more fluid and consistent application. This allows the stain to spread evenly, providing a seamless and uniform coloration that enhances the overall appearance of the wood.
In conclusion, thinning wood stain is an essential step in achieving optimal results for your wood staining projects. By enhancing penetration and promoting even color application, thinned wood stain provides a better finish and a more professional appearance. Whether you are staining furniture, cabinetry, or any other woodworking project, taking the time to thin your wood stain will ultimately lead to a more satisfying and visually appealing outcome.
Choosing The Right Thinner
Choosing the right thinner is crucial when it comes to thinning wood stain. With various options available, it is important to consider factors like compatibility, drying time, and desired finish to achieve optimal results.
Consider Wood Type
Wood type plays a crucial role in determining the right thinner for your wood stain. Different wood species have varying densities, grains, and absorption rates, which means that not all thinners will work effectively. When choosing a thinner, you need to consider the type of wood you are working with to ensure optimal results.
Type Of Wood Stain
The type of wood stain you are using is another important factor to consider when selecting a thinner. Wood stains come in different compositions, such as oil-based, water-based, or gel stains. Each type requires a specific thinner that is compatible with its formulation. Using the wrong thinner can impact the stain’s application and drying characteristics, ultimately affecting the final finish on your wood surface.
To choose the right thinner for your wood stain, you should follow these key considerations:
1. Wood Type: Determine the density and absorption rate of the wood you are working with, as this will affect the thinning process and the final outcome. Hardwoods like oak or mahogany may require a different thinner compared to softwoods like pine or cedar.
2. Type of Wood Stain: Understand the composition of your wood stain (oil-based, water-based, or gel) to identify the compatible thinner. Oil-based stains typically require mineral spirits or paint thinner, while water-based stains may call for water or denatured alcohol.
3. Manufacturer Recommendations: Refer to the manufacturer’s instructions and recommendations for thinning ratios and suitable thinners. Manufacturers often provide specific guidelines for achieving the best results with their stains, so it’s important to follow their advice.
4. Testing and Experimentation: Before applying the stain to your entire wood surface, it is advisable to conduct a test on a small, inconspicuous area. This allows you to assess how the thinner affects the stain’s color, consistency, and penetration. By experimenting with different thinning ratios and thinners, you can find the best combination for your specific project.
5. Safety Precautions: Some thinners may be flammable or emit strong fumes, so it’s important to take necessary safety precautions. Work in a well-ventilated area, use proper protective gear such as gloves and goggles, and follow all safety instructions provided by the thinner manufacturer.
Remember, choosing the right thinner is essential for achieving the desired results when thinning wood stain. By considering the wood type, type of wood stain, manufacturer recommendations, and conducting tests, you can ensure a successful and professional-looking finish on your wood projects.
Preparing The Stain
Before applying wood stain, it’s important to properly prepare it to achieve the desired consistency. This process involves reading the stain label to understand its properties and guidelines, as well as determining the appropriate mixing ratio. By following these steps, you’ll be able to thin wood stain effectively.
Reading The Stain Label
Reading the stain label is the first step in preparing the stain. This simple yet crucial task provides valuable information about the stain, such as its base, strength, and instructions specific to that product. By understanding the characteristics of the stain, you can make informed decisions about the thinning process.
Common information found on a stain label includes:
| Base | Oil-based, water-based, or gel-based stain |
| Strength | The intensity of color or the level of pigmentation |
| Application Method | Instructions on how to apply the stain |
| Drying Time | The estimated time it takes for the stain to dry |
| Cleanup | Recommended cleaning methods for brushes and tools |
Mixing Ratio Guidelines
Once you have familiarized yourself with the stain label, the next step is to determine the appropriate mixing ratio. The mixing ratio refers to the combination of stain and a thinning agent to achieve the desired consistency. While this ratio may vary depending on the stain and your application needs, some general guidelines can help you get started:
- Start with a small test batch to determine the desired thinness.
- Add the thinning agent gradually, following the label instructions, to control the thinning process effectively.
- Mix the stain and thinning agent thoroughly to ensure a consistent blend.
- Test the thinned stain on a small inconspicuous area to assess the desired results.
Remember, different stains may require different thinning ratios, so it’s essential to follow the specific instructions on the stain label to achieve the best outcome for your project.
Applying Thinned Stain
Learn how to effectively thin wood stain for optimal application in just a few simple steps. Achieve a flawless finish and enhance the natural beauty of your wood with this easy-to-follow guide.
Testing On Scrap Wood
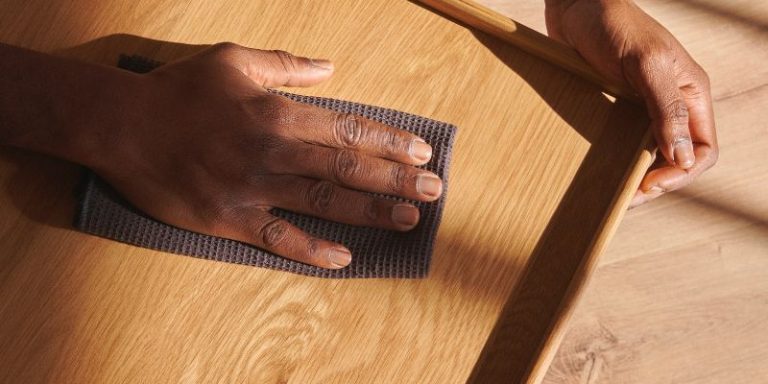
To ensure that the thinned wood stain will achieve the desired finish, it’s crucial to conduct a test on a scrap wood piece. This will allow you to get a preview of how the stain will appear on your project without any irreversible consequences. Start by sanding and preparing a small section of the scrap wood. Apply a thin coat of the thinned stain using a brush or sprayer, and let it dry completely. Evaluating the color and coverage will help you make any necessary adjustments before proceeding to the main project.
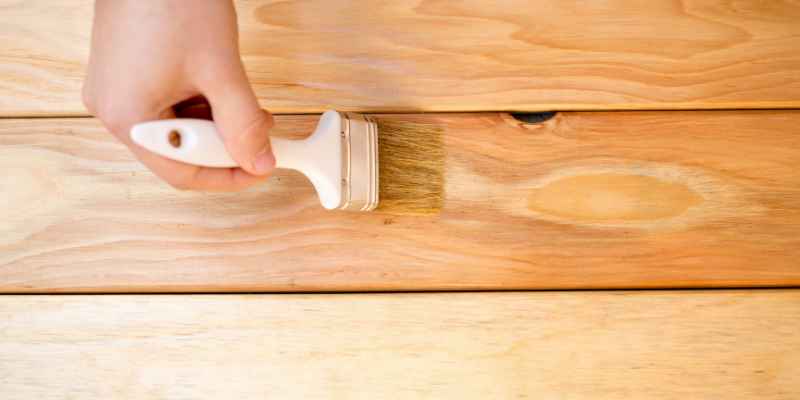
Using A Quality Brush Or Sprayer
When it comes to applying thinned wood stain, the right application tool can make all the difference. A high-quality brush or sprayer will ensure a smooth and even finish, enhancing the overall appearance of your project. Whether you choose a brush or sprayer depends on personal preference, the size of the project, and the type of wood being stained. A brush allows for more control, especially for intricate details, while a sprayer can be more efficient and provide a uniform coverage on larger surfaces.
Proper Technique
Regardless of the application method chosen, it’s important to follow a proper technique to achieve the best results. Dip the brush in the thinned stain and apply it in a consistent direction following the grain of the wood. Avoid oversaturating the wood, as this can lead to streaks and blotches. Instead, apply thin and even coats, allowing the stain to penetrate and enhance the natural beauty of the wood. If using a sprayer, maintain a consistent distance from the surface and spray in smooth, sweeping motions to ensure an even application.
Drying And Finishing
After applying the thinned wood stain, allow sufficient drying time before applying any additional coats or finishes. Refer to the manufacturer’s instructions on the recommended drying time, as different stains may have varying drying periods. Once the stain is fully dry, you can decide if another coat is needed to achieve the desired color and intensity. Remember to thoroughly clean your brushes or sprayers after each use to ensure their longevity and optimal performance in future projects.

Common Mistakes To Avoid
When it comes to thinning wood stain, it’s important to know the right techniques to achieve the desired results. However, many people make common mistakes that can lead to unsatisfactory outcomes. Avoiding these mistakes will ensure that your wood stain is properly thinned and applied for a beautiful finish. Let’s explore some of the most common mistakes to avoid.
Over-thinning The Stain
One of the biggest mistakes people make when thinning wood stain is over-thinning it. It can be tempting to add too much solvent to the stain, thinking that it will make it easier to work with or dry faster. However, this can result in a diluted stain that doesn’t penetrate the wood properly, leading to an uneven or washed-out appearance. Therefore, it’s crucial to follow the manufacturer’s instructions and only thin the stain as recommended.
Skipping Proper Mixing
Properly mixing wood stain is essential for achieving consistent results. Sadly, many people make the mistake of skipping this crucial step. When the components of the stain are not thoroughly mixed, it can result in uneven color distribution on the wood. To avoid this, make sure to take the time to stir the stain well before applying it. This will ensure that the colorants and binders are evenly dispersed, providing a uniform look on your wood surface.
By avoiding these common mistakes while thinning your wood stain, you can achieve a professional-looking finish and enhance the natural beauty of your wood projects.
Conclusion
Learning how to thin wood stain is essential for achieving the perfect finish on your woodworking projects. By following the steps outlined in this guide, you can ensure that your stain is evenly applied and enhances the natural beauty of the wood.
Whether you’re a beginner or experienced woodworker, mastering this technique will undoubtedly elevate the quality of your craftsmanship. So, don’t hesitate to experiment and refine your skills – the results will speak for themselves. Happy staining!