How to Unlock a Miter Saw: Head Pin, Slide, Bevel and Miter Locks
A miter saw head that will not rise is almost always held by the head lock pin, which DeWalt calls the lock down pin and Makita calls the stopper pin. The DeWalt, Makita, Milwaukee, Ryobi and Bosch manuals all start the release by pressing the handle down while you pull the pin. The manuals do not explain why a pin resists, but skipping that step is our best guess for a pin that seems jammed. This guide separates the five locks on a miter saw, gives release steps from the manuals, and ends with a symptom table.
Safety first: unplug the saw, or remove the battery on a cordless model, before you touch any lock. The head rises on its own the moment the pin lets go, so keep one hand on the handle. As our own precaution, keep your other hand well away from the blade. This page paraphrases the DeWalt DWS779, Makita LS1019L, Milwaukee 6955-20, Ryobi TSS100L and Bosch GCM12SD manuals. Your model may differ, so check your own manual before you rely on any step here.
Which Lock Is Holding Your Miter Saw?
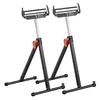 |
Best Roller Stand Pick VEVOR 2-Pack Folding Roller Stands, 250 lb Each, 27-43 in Adjustable Height ($45.82) The Ryobi manual says to support the far end of long stock with a roller stand or a surface level with the saw table. Once your head lock is released and the saw is set up, this pair does that job.
|
As an Amazon Associate we earn from qualifying purchases.
Many miter saws have four separate mechanical locks and one electrical one, and each needs a different fix. The names change from brand to brand, which is why a search for a "stopper pin" or "lock down pin" can point at the same part. The table below translates the names the five manuals use.
| Lock | Names in the manuals | What it holds | Symptom when engaged |
|---|---|---|---|
| Head lock pin | Lock down pin (DeWalt, Milwaukee), stopper pin (Makita), lock pin (Ryobi), head assembly lock pin (Bosch) | Holds the head down for carrying and storage | Head will not rise |
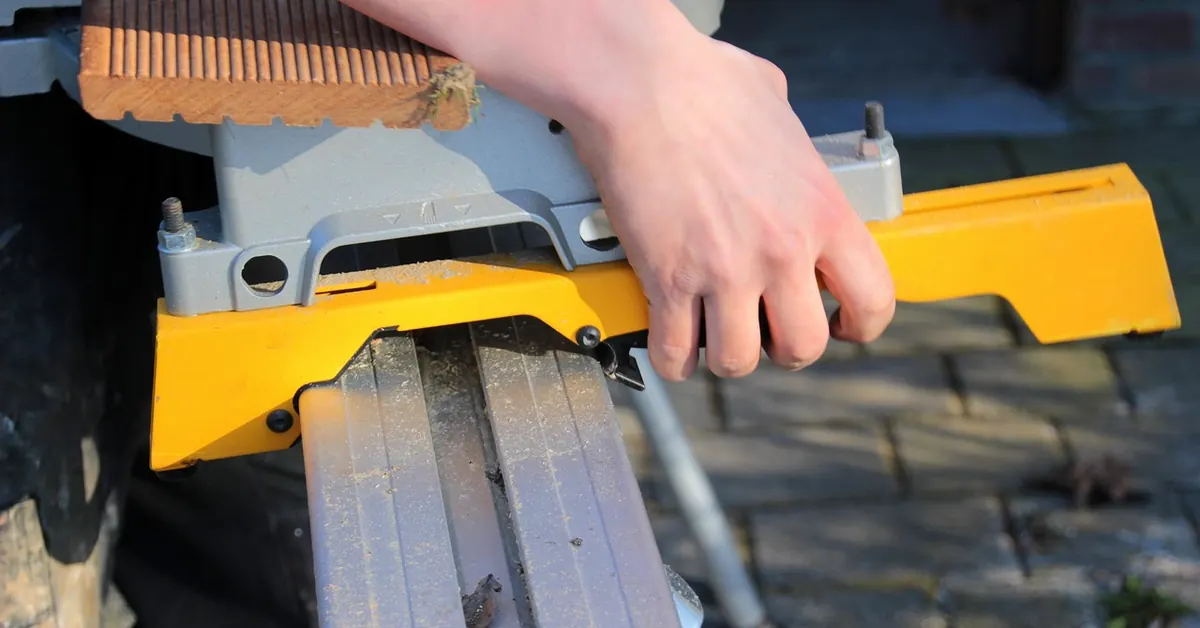
| Slide lock | Rail lock knob (DeWalt), slide rail lock (Milwaukee), slide lock knob (Ryobi), a second stopper pin on the slide pole (Makita), mechanism lock lever (Bosch) | Stops the head sliding along the rails | Head moves up and down but will not pull toward you |
| Bevel lock | Bevel lock knob (DeWalt), bevel adjustment lever (Milwaukee), bevel lock lever (Ryobi), knob (Makita), bevel lock lever (Bosch) | Holds the blade tilt | Head will not tilt left or right |
| Miter lock | Miter lock handle (DeWalt, Ryobi), miter angle lock knob (Milwaukee), grip (Makita), miter lock knob (Bosch) | Holds the table angle | Table will not rotate |
| Trigger lock-off | Lock-off lever (DeWalt), lock-off button (Makita), lock-off release buttons (Bosch), padlock hole in the trigger (all five) | Keeps the trigger from starting the saw | Plugged in but the saw will not start |
The head lock pin is meant to be engaged only while the saw is carried or stored. The DeWalt and Makita manuals both warn that it is never for cutting. Makita adds that using it for cutting operations may cause unexpected movement of the saw blade, kickback and serious personal injury.
Note that Makita is the odd one out: the LS1019L has two stopper pins, one that locks the handle down and one that locks the slide. They look alike, so confirm which one you are pulling.
How to Release the Head Lock Pin
This is the lock behind most "my miter saw is stuck" searches, and the manuals describe it with the same core move: press the handle down, then pull the pin. Here is the general sequence, followed by what each manual says.
- Unplug the saw or remove the battery.
- Stand at the front with one hand firmly on the handle.
- Press the handle down and keep pressing while you pull the pin. Every manual read here starts with this pressure.
- On saws where the manual says so (Makita, Ryobi), turn the pin 90 degrees, as those manuals direct.
- Ease off the pressure slowly, keep hold of the handle, and let the head rise under control.
| Saw (manual read) | What the manual says to do |
|---|---|
| DeWalt DWS779 | Press down lightly on the operating handle and pull the lock down pin. Gently release the downward pressure and hold the arm as it rises to full height. |
| Makita LS1019L | While lowering the handle slightly, pull the stopper pin and rotate it 90 degrees. The saw ships with the handle locked down by this pin. |
| Milwaukee 6955-20 | Press and hold down the saw head and, at the same time, pull out the lock down pin. The saw ships with the head locked down. |
| Ryobi TSS100L | Grasp the D handle and apply downward pressure while pulling the lock pin out and away from the saw housing. Rotate it 90 degrees, release it, and slowly raise the arm. |
| Bosch GCM12SD | Grasp the main handle and press down on the head assembly. While pressing the head down, pull out the head assembly lock pin. Release the pin but keep your grip on the main handle, and slowly let the spring-loaded head come up. |
Three of the five manuals (Makita, Milwaukee and Ryobi) say a new saw ships locked down, so a head that will not move on a just-unboxed saw is normal. The Ryobi manual adds a detail that is easy to miss: its saw is also secured with a tie-wrap, which has to be cut before the pin will come out. The same manual says to keep hand pressure on the D handle afterward, because the head can rise suddenly once the tie-wrap is gone.
Data point: all five manuals read for this page, DeWalt, Makita, Milwaukee, Ryobi and Bosch, starts the head release with downward pressure on the handle. See the Milwaukee 6955-20 operator manual the Makita LS1019L manual and the Bosch GCM12SD manual for the wording.
If the Pin Will Not Budge
First check that the saw is unplugged and that you are pressing the handle down while you pull, which is the step every manual here describes. Do not force the pin, pry it with a screwdriver or take anything apart. This is our precaution, not a manual instruction.
The five manuals do not describe a fix for a pin that stays stuck. That is a repair question for the maker, so stop, leave the saw unplugged, and contact the manufacturer’s service center. Again, that is our advice, not a manual instruction.
As our own precaution, skip the aerosol can unless your manual tells you to use one. The DeWalt manual warns against lubricants and cleaners, particularly sprays, near the plastic blade guard, because the polycarbonate can be attacked by certain chemicals. The DeWalt and Ryobi manuals both say the bearings are lubricated for life, while the Makita manual says to lubricate the sliding portions with machine oil after use to prevent rust. Follow your own manual.
Slide, Bevel and Miter Lock Release Steps by Brand
Once the head moves, the other locks decide whether the saw will slide, tilt or rotate. These are paraphrased from the manuals, and none of them involves the head lock pin. The Bosch GCM12SD steps follow the table.
| Lock | DeWalt DWS779 | Makita LS1019L | Milwaukee 6955-20 | Ryobi TSS100L |
|---|---|---|---|---|
| Slide | Rail lock knob must be loose for the saw to slide on its rails | Unlock the stopper pin on the slide pole so the carriage slides freely | Turn the slide rail lock counterclockwise to unlock, clockwise to lock | Turn the slide lock knob counterclockwise to loosen |
| Bevel | Turn the bevel lock knob counterclockwise, then pull the 0 degree override knob to move past 0 | Loosen the knob and raise the handle fully first. To tilt right, tilt left slightly, then right while pressing the releasing button | Lift the bevel adjustment lever halfway for the preset stops, all the way up to move freely, press down to lock | Pull out the lock pin and raise the arm, then pull the spring loaded bevel lock lever away from the housing |
| Miter | Lift the miter lock handle, push the miter latch button, set the angle, push the handle down to lock | Turn the grip counterclockwise and hold down the lock lever, with the handle raised fully | Loosen the miter angle lock knob, pull up the detent lever and rotate the table | Loosen the miter lock handle about half a turn to the left with the arm raised |
- Bosch GCM12SD slide: press the tab on the mechanism lock lever down until its wedge comes out from between the two lower housings, and the mechanism is free to slide.
- Bosch GCM12SD bevel: lift the bevel lock lever above table height, tilt the head, then press the lever down below table height to lock.
- Bosch GCM12SD miter: loosen the miter lock knob, pull up the miter detent lever, rotate the table, then tighten the knob before cutting.
One detail saves grief: Makita says not to tighten the bevel knob too hard, because over-tightening may cause the bevel locking mechanism to malfunction.
For squaring the blade and fence after you change angles, see our guide on how to adjust a miter saw.
Symptom Table: What to Check, in Order
Work from the top. Most "locked" saws are fixed by the first or second row.
| Symptom | Check first | What the manuals say |
|---|---|---|
| Head will not rise | Head lock pin | Press the handle down, then pull the pin. Cut the tie-wrap first on a new Ryobi. |
| Pin will not pull out | Downward pressure on the handle | All five manuals describe pressing the handle down while pulling the pin. If it still will not move, do not force it: stop and contact the maker (our precaution, not a manual step). |
| Head will not go all the way down | Depth stop | DeWalt: rotate the depth stop to the rear of the saw to bypass it. Milwaukee: loosen the lock nut counterclockwise and swivel the depth stop pawl away from the front. Makita: the stopper arm and adjusting screw set the lower limit of the blade, and the manual covers adjusting them with the saw unplugged. |
| Head goes up and down but will not slide | Slide lock | Loosen the rail lock knob, slide rail lock or slide lock knob counterclockwise. On the Makita LS1019L, unlock the stopper pin on the slide pole. On the Bosch GCM12SD, press the mechanism lock lever tab down. |
| Blade will not tilt | Bevel lock | Loosen the bevel lock knob or lift the bevel lever (Bosch: lift the bevel lock lever above table height). Makita and Ryobi say to raise the head fully first. DeWalt may also need the 0 degree override knob pulled. |
| Table will not rotate | Miter lock | Loosen the miter lock handle or knob. DeWalt, Milwaukee and Bosch also need the latch button or detent lever to leave a preset stop. |
| Saw is plugged in but will not start | Trigger lock-off | DeWalt: push the lock-off lever to the left, then squeeze the trigger. Makita: press in the lock-off button. If a padlock is through the trigger hole, remove it. |
Lock Everything Again Before You Carry or Store It
The DeWalt manual says to lock the rail lock knob, miter lock handle, bevel lock knob, lock down pin and fence adjustment knobs before transporting the saw. It also says to carry the saw by its lifting handle or the hand indentations in the base. The Milwaukee manual says to lock the head down and to lock the sliding mechanism before transporting or storing.
Carrying advice differs by brand. Milwaukee provides carrying handles on each side of the table and one on top of the head. Ryobi has a carrying handle on top of the saw arm and says to turn off and unplug the saw, lower the arm and lock it down first. Bosch says to lock the head down with the head assembly lock pin, engage the mechanism lock lever and grip both cast-in carry handles, and marks the main switch handle as a no-carry area. Makita says to carry the tool by holding both sides of the base.
The Makita manual gives a checklist worth copying for any brand: tool unplugged, carriage at 0 degree bevel and secured, carriage lowered and locked, carriage slid fully toward the fence and locked, turn base at the full right miter angle and secured.
Before Your First Cut After Unlocking
- Re-lock the angle locks you need. Ryobi tells you to make sure the miter table and the saw arm are locked in position before operating, by tightening the miter lock and the bevel lock.
- Check the trigger. Makita says to confirm the trigger actuates properly and returns to OFF before you plug in.
- Clean blade, clean guard. Makita warns that a dull or dirty blade can cause kickback.
- Support long boards. Ryobi says to support the far end of long lumber with a roller stand or a surface level with the saw table.
- Keep the guard on. Makita says never to defeat or remove the blade guard, and DeWalt says to keep the guard in place and in working order.
- Fix the saw down. DeWalt says to mount the saw firmly to a stable surface to prevent movement. If you need a stand, see our miter saw stand options.
Brand-Specific and Related Guides
- Own a Kobalt? Our Kobalt miter saw unlocking guide covers that brand on its own. If a Kobalt pin or knob is broken, the Kobalt miter saw parts list has model numbers and diagrams.
- New to the tool? What a miter saw is and how it cuts explains the parts you just unlocked.
- Not sure a miter saw is the right saw? Compare it in circular saw vs miter saw and corded vs cordless circular saws.
- Curious about shop saws that are not miter saws? Read what a Unisaw is.
Frequently Asked Questions
How do you unlock a miter saw head?
Unplug the saw, press the handle down, and pull the head lock pin while you keep pressing. The pin is called the lock down pin on DeWalt and Milwaukee, the stopper pin on Makita, the lock pin on Ryobi and the head assembly lock pin on Bosch. Makita and Ryobi also say to rotate it 90 degrees. Then let the head rise slowly while you keep hold of the handle.
Why will my miter saw head not go up?
The head lock pin is probably still engaged. Several new saws ship locked down, and the manuals release the pin while the handle is pressed down. If the head will not rise and the pin is out, check that you are not looking at a different lock, such as the slide lock.
Is the head lock pin the same as the bevel lock?
No. The head lock pin holds the head down for carrying and storage. The bevel lock holds the blade tilt, and the miter lock holds the table angle. Releasing the bevel or miter lock will not free a head that is pinned down.
Can you cut with the lock pin engaged?
No. The DeWalt and Makita manuals both say the lock pin is for carrying and storage only, never for cutting. Makita warns that using it for cutting may cause unexpected movement of the saw blade, kickback and serious personal injury.
Should you unplug a miter saw before unlocking it?
Yes. The DeWalt manual says to turn the tool off and disconnect it from power before moving it or making adjustments, and the Milwaukee manual says to disconnect the plug or remove the battery pack before adjustments. The head can spring up the moment the pin releases.
Bottom Line
If a miter saw will not move, work out which of the five locks is engaged before you pull on anything. For a head that is stuck down, press the handle down, pull the pin, and let the head rise under control. Then handle the slide, bevel and miter locks one at a time, and lock everything again before you carry the saw. Always confirm each step against the manual for your exact model.
Sponsored / affiliate links. As an Amazon Associate I earn from qualifying purchases. I may earn additional commission from eligible campaigns.