How to Safely Use a Miter Saw: Hand Distance, Gloves, Brake Time
To use a miter saw safely, clamp the workpiece against the fence and table, keep both hands outside a clear zone around the blade (4 to 6 inches, depending on whose manual you read), skip the gloves, and keep the saw head down until the blade stops, which can take up to 5 seconds. This guide pulls those rules from DeWalt, Makita and RIDGID manuals and school shop sheets, and shows where they disagree.
What to Wear on a Miter Saw (and What to Leave Off)
Best Miter Saw Safety Glasses Pick | |
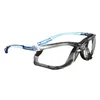 |
3M Safety Glasses, Virtua CCS, Anti-Fog Clear Lens, Blue Frame, $13.39 Wrap-around glasses with a removable foam gasket against sawdust, and a temple design that can hold corded earplugs (sold separately), so the eye and hearing protection the manuals below call for stay together.
|
As an Amazon Associate we earn from qualifying purchases. | |
The DeWalt DWS780 instruction manual lists three pieces of certified protective equipment: ANSI Z87.1 eye protection, ANSI S12.6 hearing protection, and NIOSH/OSHA/MSHA respiratory protection when the cut is dusty. It adds that everyday eyeglasses are not safety glasses.
The leave-off list is just as consistent. DeWalt’s manual says not to wear loose clothing, gloves, neckties, rings, bracelets or other jewelry that may get caught in moving parts, and to cover long hair. Makita’s miter saw manual carries the same line, and the RIDGID manual says to keep hair, clothing and gloves away from moving parts.
Dust deserves its own line. DeWalt’s manual warns that dust from sawing contains chemicals known to the State of California to cause harm, and names arsenic and chromium from chemically treated lumber as examples. It advises a well-ventilated area and a mask designed to filter microscopic particles.
- ANSI Z87.1 safety glasses or a face shield on every cut
- Hearing protection (see the noise table below)
- A respirator or dust mask for MDF, treated lumber or long sessions
- No gloves, loose sleeves, ties or jewelry; long hair tied back or capped
How Far Should Your Hands Be From a Miter Saw Blade?
At least 6 inches in DeWalt’s manual, at least 100 mm (about 4 inches) in RIDGID’s, and 4 inches in two school and university sheets we read. Makita’s miter saw rules skip the distance and say never use your hand to hold the workpiece at all.
| Source | Distance rule | What it says to do instead |
|---|---|---|
| DeWalt DWS780 manual | 6 in (152 mm) | Clamp every workpiece that would put your hand within 6 in of the blade |
| RIDGID R4251 manual | 100 mm (about 3.9 in) from either side | Use clamps; do not cut pieces too small to be securely clamped or held by hand |
| Makita LS1221 manual | No hand holding | Secure the workpiece against the base and fence with a vise; never use your hand |
| Fine Woodworking safety manual | 6 in | Keep hands and fingers clear of the blade by at least 6 in |
| West Virginia University EH&S sheet | 4 in | Do not cut stock too small to easily hold; clamp when possible |
| Blacksburg Middle School shop sheet | 4 in | Hold or clamp the material securely before any cut |
Our working rule: use the larger number, and treat a clamp as the default rather than the exception. If a cut would put a hand inside 6 inches, that is the signal to clamp, add a stop or reposition the stock. A strip of painter’s tape 6 inches either side of the blade line makes the zone visible mid-cut.
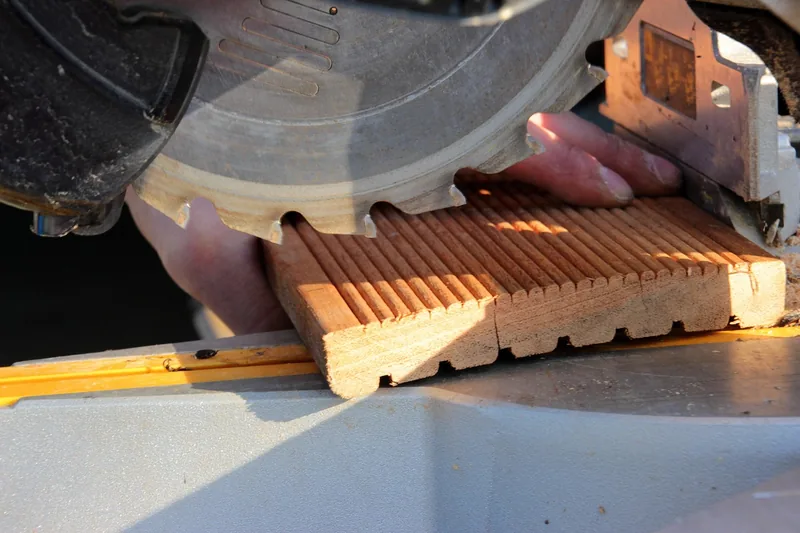
Hand position follows the same logic. One school shop sheet (Sullivan’s Shop Safety) says to use the left hand to help hold the material and the right hand to operate the saw, reversed for left-handers, and never to hold the board with a hand in line with the blade. DeWalt’s manual says never to cross arms in front of the blade. RIDGID’s manual adds: never cross a hand over the line of cut, and do not reach behind the fence within 100 mm of the blade while it spins.
What if the piece is too short to clamp?
Do not cut it that way. The RIDGID R4251 operator manual says not to use the saw on pieces too small to be securely clamped or held by hand, and the West Virginia University sheet says the same about stock too small to hold easily. The workaround is to cut the short piece from the end of a longer board, so the stock in your hand and under the clamp is long and the short piece is the offcut.
Why the Blade Keeps Spinning After You Let Go
An electric brake does not stop the blade the instant you release the trigger. DeWalt’s manual says the brake on the DWS780 stops the blade within 5 seconds of trigger release, that it is not adjustable, and that on occasion there may be a delay before it engages. On rare occasions it may not engage at all, and the blade then coasts to a stop.
Up to 5 seconds: the stated blade stop time after trigger release on the DeWalt DWS780. Source: DeWalt DWS780 instruction manual
Makita’s manual puts the same warning another way: avoid contact with any coasting blade, because it can still cause severe injury, and the brake is not a substitute for the blade guard. If the brake consistently fails to stop the blade quickly, Makita says to have the saw serviced.
The practical habit comes straight from RIDGID’s manual: after the cut, release the switch, hold the saw head down, and wait for the blade to stop before removing the cut-off piece. If you are comparing saws and want to know which models include a brake and what else changes between them, our compound sliding miter saw reviews cover it.
Sliding Miter Saws: Push the Cut, Don’t Pull It
On a sliding saw, start the cut at the back and push the blade through the wood, away from you. RIDGID’s manual says cutting on the pull stroke is likely to make the blade climb on top of the workpiece and violently throw the blade assembly toward the operator. Its sequence: pull the head out over the workpiece, start the motor, press down, then push through.
DeWalt’s manual describes the same out-down-back motion for stock larger than a 2×8 and adds a warning for the first move: do not let the blade contact the top of the workpiece while pulling out, because the saw may run toward you. It also says to let the saw come up to speed (about 1 second on the DWS780) before lowering the head slowly.
What Makes a Miter Saw Throw Wood
Miter saw manuals talk less about table-saw style kickback and more about workpieces being thrown, pinched or caught by the blade. Each cause below comes from a manual line we read, with the fix it points to.
| Cause | What the manual says | Fix |
|---|---|---|
| Freehand or loose workpiece | DeWalt: freehand operations could cause the workpiece to be thrown at high speed | Hold firmly against fence and table, or clamp |
| Bowed or gapped stock | RIDGID: clamp bowed stock with the outside bowed face toward the fence; no gap between workpiece, fence and table along the cut | Check for gaps before every cut |
| Debris on the table | RIDGID: small debris or loose pieces contacting the blade can be thrown at high speed | Clear the table of everything but the workpiece |
| Trapped offcut | RIDGID: a cut-off piece confined against the blade, for example by length stops, can wedge and be thrown violently | Keep the offcut free to fall away from the blade |
| Unsupported long or wide stock | RIDGID: tipping stock can lift the lower guard or be thrown; Makita: thin material sags, causing blade pinch | Support the full length at table height |
| Round stock | RIDGID: rods roll, the blade bites and pulls the work and hand in | Use a clamp or fixture made for round material |
| Dull or cracked blade | DeWalt: a dull or vibrating blade can cause serious injury; a cracked blade can come apart | Inspect before use and replace damaged blades |
A dull blade is the cause you control most easily, and our guide to changing a miter saw blade walks through the swap safely. One more disagreement worth knowing: RIDGID says to cut one workpiece at a time because stacked pieces cannot be adequately clamped, while DeWalt calls multiple-piece cuts not recommended but possible if every piece is held firmly. Cutting one at a time satisfies both.
Blades and materials the manuals rule out
DeWalt’s manual says to use only crosscut blades recommended for miter saws, and never to cut ferrous metals (anything with iron or steel content) or masonry, because carbide tips can fly off. For its 12-inch saw, the blade’s speed rating must be at least 4800 RPM; that figure is specific to that model, so check the saw’s own manual. RIDGID adds that abrasive cut-off wheels cannot be used.
Hearing: What OSHA’s Noise Table Means for a Miter Saw
OSHA 1910.95 sets a permissible noise exposure of 90 dBA over 8 hours, and every 5 dB increase halves the time allowed. An 8-hour average of 85 dBA is the action level that triggers a hearing conservation program. These are workplace rules, but a useful yardstick for a home shop.
| Daily exposure | Permissible level (dBA) |
|---|---|
| 8 hours | 90 |
| 4 hours | 95 |
| 2 hours | 100 |
| 1 hour | 105 |
| 30 minutes | 110 |
90 dBA for 8 hours, halved for every 5 dB more. Source: OSHA 1910.95, Table G-16
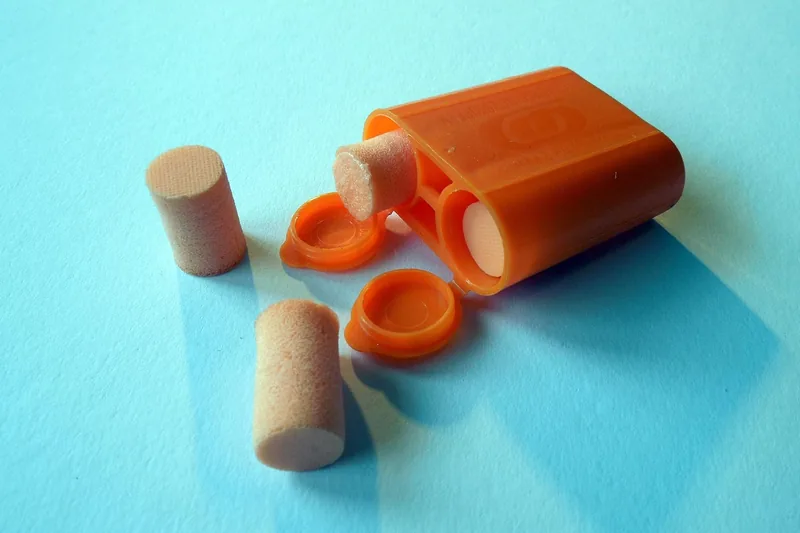
The DeWalt and Makita manuals we read give no decibel figure for their saws, only a warning that noise can contribute to hearing loss. Measure your own saw with a sound meter if you want a number, and see our miter saw decibel guide for typical readings. If your saw reads 100 dBA, the table allows 2 hours a day; at 110 dBA it allows 30 minutes.
Miter Saw Safety Checklist for Every Cut
Run this before every cut, not only the first of the day.
- Unplug for adjustments: Disconnect the saw before changing the blade, the angle or any setting, and never leave a running saw unattended.
- Inspect the blade and guard: Check the blade for cracks, missing teeth and pitch buildup, and confirm the lower guard moves freely and closes fully.
- Clear the table: Remove offcuts, tools and sawdust so nothing but the workpiece sits on the table.
- Set the angle and fence: Lock the miter and bevel angles, then adjust the fence so it supports the workpiece without touching the blade or guard.
- Make an unpowered dry run: With the saw off and nothing on the table, move the blade through a full simulated cut to check clearance.
- Secure the workpiece: Hold or clamp the stock tight to the fence and table with no gaps, and clamp anything that puts a hand inside 6 inches of the blade.
- Put on protection: Wear safety glasses, hearing protection and a dust mask, with no gloves or loose clothing.
- Let the blade reach full speed: Squeeze the trigger and wait for full speed before the blade touches the wood.
- Cut with a smooth, slow stroke: Lower the head slowly, and on a sliding saw push the cut through rather than pulling.
- Wait for the blade to stop: Release the trigger, keep the head down, and wait for the blade to stop before removing the offcut or raising the head.
Not sure which angles to set for a trim job or a polygon? Our miter saw angle chart has the settings, so the dry run is the only thing left to check.
Miter Saw Safety Test Questions, Answered
Several searches that reach this page are shop-class test questions. These are the answers the sources above support; your instructor’s key rules.
| Question | Answer | Basis |
|---|---|---|
| Minimum distance of hands from the blade? | 6 inches is the usual answer; some school sheets use 4 inches | DeWalt, Fine Woodworking (6 in); WVU, Blacksburg sheet (4 in) |
| What must be worn when operating a miter saw? | Safety glasses, hearing protection and a dust mask for dusty cuts; no loose clothing, jewelry or gloves | DeWalt DWS780 manual |
| Where should the left hand go on short pieces that cannot be clamped? | Nowhere near the blade: do not cut pieces that small; cut them from longer stock | RIDGID manual, WVU sheet |
| When making which cuts must you ensure the blade has adequate clearance? | Bevel and miter cuts: reset the fence and do an unpowered dry run | RIDGID and DeWalt manuals |
FAQ
Should you wear gloves when using a miter saw?
No. DeWalt’s manual lists gloves with loose clothing, neckties and jewelry that may get caught in moving parts, Makita’s does the same, and RIDGID says to keep gloves away from moving parts. Keep hands bare and use clamps instead.
How far should your hands be from a miter saw blade?
At least 6 inches in DeWalt’s manual and Fine Woodworking’s safety rules, and at least 100 mm (about 4 inches) in RIDGID’s. Two school and university sheets say 4 inches. Use the larger figure, and clamp the workpiece whenever a hand would get closer.
Can you cut small pieces on a miter saw?
Not safely if they are too small to clamp or hold. RIDGID’s manual says not to cut pieces too small to be securely clamped or held by hand.
How long does a miter saw blade take to stop?
DeWalt says the electric brake on its DWS780 stops the blade within 5 seconds of releasing the trigger, and that the brake may occasionally be slow or not engage at all. Keep the head down and wait for the blade to stop before touching the offcut.
Do you need a dust mask when using a miter saw?
Yes when the cut is dusty. DeWalt’s manual calls for NIOSH/OSHA approved respiratory protection suited to the dust and warns that treated lumber dust can contain arsenic and chromium. Add dust collection too.
Conclusion
Secure the workpiece, keep hands outside the blade zone, and be patient at both ends of the cut. Browse our full miter saw guides, including how to choose between a 10-inch and 12-inch saw.
Sponsored / affiliate links. As an Amazon Associate I earn from qualifying purchases. I may earn additional commission from eligible campaigns.