How to Use Miter Saw Protractor: Mastering Precision Cuts
To use a miter saw protractor, align the saw blade with the 0-degree mark, place the protractor against the saw’s base, and adjust the angle to the desired measurement. Using a miter saw protractor is a simple yet essential skill for anyone working with wood or making precise cuts.
This tool allows you to accurately measure and set angles for bevel and miter cuts, ensuring the proper fit and finish of your woodwork. Whether you are a novice DIY enthusiast or a professional woodworker, understanding how to use a miter saw protractor will help you achieve clean and precise cuts for your projects.
In this guide, we will walk you through the steps to effectively utilize a miter saw protractor, empowering you to tackle a wide variety of cutting tasks with confidence and accuracy.
Miter Saw Protractor Essentials
Understanding how to use a miter saw protractor is essential for woodworking enthusiasts and professionals alike. The precision and accuracy provided by the protractor can significantly impact the quality of the finished product.
Understanding The Basic Functions
The miter saw protractor is a crucial component of a miter saw, allowing the user to accurately measure and cut angles for various woodworking projects. It typically consists of a circular disc divided into degrees and minutes, providing precise measurements for angle cuts. By understanding how to read and use the protractor, woodworkers can achieve accurate and seamless angle cuts for their projects.
The Importance For Precise Woodworking
Precision is paramount in woodworking, and the miter saw protractor plays a crucial role in ensuring accuracy. Whether it’s creating tight-fitting joints, beveled edges, or complex angle cuts, precise measurements are essential for a professional and polished finish. By mastering the use of the miter saw protractor, woodworkers can elevate the quality of their craftsmanship and produce flawless results.
Choosing The Right Protractor
Material And Build Quality Considerations
When choosing a miter saw protractor, it’s crucial to consider the material and build quality. Ensure that the protractor is made from durable materials and boasts a sturdy construction to withstand frequent use. Look for protractors crafted from high-quality aluminum or heavy-duty plastic, as these materials offer durability and longevity. A durable protractor ensures reliable and accurate measurements, making it an essential tool for your woodworking projects.
Evaluating Features For Specific Projects
Each woodworking project may require specific features in a miter saw protractor. Whether you’re cutting complex angles or need precise measurements for intricate designs, evaluating the features is vital. Look for protractors with easy-to-read scales and clear markings, allowing for quick and accurate measurements. Additionally, consider protractors with built-in levels to ensure precise alignment. Choose a protractor with locking mechanisms to secure the angle settings for consistent cuts. Understanding the specific requirements of your project and selecting a protractor with the right features will ensure precise and efficient woodworking outcomes.
Setting Up Your Miter Saw Protractor
Setting up your miter saw protractor is crucial for accurate and precise cutting angles. Properly configuring the protractor ensures that your cuts are perfectly aligned, saving time and reducing the margin of error. In this section, we will go through the steps for accurate placement and securing the protractor for stability, enabling you to make the most of your miter saw’s potential.
Steps For Accurate Placement
When setting up your miter saw protractor, it’s essential to follow these steps for accurate placement:
- Calibrate the Protractor: Begin by calibrating the protractor to ensure its accuracy. Use a reliable 45-degree angle to check if the protractor aligns correctly with the miter saw’s default angles.
- Clean the Surface: Clear the miter saw table of any debris or sawdust to ensure a flat, stable surface for the protractor.
- Align the Markings: Align the notch or center mark on the protractor with the blade of the miter saw. This step is crucial for ensuring that the angle measurements are precisely executed.
Securing The Protractor For Stability
Securing the miter saw protractor is essential to maintain stability and prevent any accidental movement during the cutting process. Here’s how to ensure stability:
- Clamp it in Place: Use a reliable and sturdy clamp to secure the protractor firmly to the miter saw’s table. This prevents any unwanted movement that could affect the accuracy of your cuts.
- Check for Stability: Once the protractor is clamped, ensure that it is stable and doesn’t shift while making adjustments or cutting angles. This step is crucial to maintain precision throughout the cutting process.
- Double-Check the Alignment: Before making any cuts, double-check the alignment of the protractor to ensure that it hasn’t shifted during the setup process. This final verification step can save you from inaccurate cuts.
Calibration For Accurate Cuts
One of the key factors in achieving precise and accurate cuts with your miter saw is ensuring that it is properly calibrated. Calibration involves adjusting the miter saw protractor to ensure that it accurately measures angles, ultimately leading to precise cuts. This process not only enhances the quality of your woodworking projects but also contributes to safety by reducing the likelihood of errors.
The Process Of Calibrating Your Tool
Calibrating a miter saw protractor involves a few steps to ensure it provides accurate angle measurements. Follow these steps to calibrate your miter saw for precise cuts:
- Begin by ensuring that the miter saw is unplugged and the blade is in the lowered position to avoid any accidental start-ups.
- Use a reliable protractor to measure a known angle, such as 45 degrees, against the miter saw’s protractor scale.
- If the measurement on the miter saw protractor does not align with the known angle, adjustments will be needed.
- Refer to your miter saw’s user manual for specific instructions on making adjustments to the protractor. This may involve loosening screws and carefully repositioning the protractor to align it with the correct angle.
- After making adjustments, recheck the angle using the protractor to ensure it now accurately reflects the known angle.
- Repeat the process for different angles to ensure the miter saw protractor is accurately calibrated across various measurements.
Tips For Maintaining Calibration Over Time
Maintaining the calibration of your miter saw protractor is essential for consistent and accurate cuts. Consider the following tips to help preserve the calibration of your miter saw:
- Regularly check the accuracy of the protractor by comparing its measurements to known angles using a reliable angle measuring tool.
- Keep the miter saw clean and free from sawdust and debris that could affect the protractor’s movement and accuracy.
- Handle the miter saw with care and avoid impacting the protractor, as physical damage can lead to calibration issues.
- Store the miter saw in a stable and secure environment to prevent any jostling or movement that could disrupt the calibration over time.
- Refer to the user manual for your specific miter saw model for any additional maintenance recommendations regarding the protractor calibration.
Executing Precision Cuts With Your Protractor
How To Use Miter Saw Protractor: Guiding Through The Process
When it comes to woodworking, precision is key. Executing precision cuts with your miter saw protractor is essential to achieving accurate and seamless results. By mastering the use of the protractor, you can ensure that each cut is made with the utmost accuracy and attention to detail. Let’s dive into the process of using a miter saw protractor to execute precision cuts.
Adjusting The Saw Blade To Match The Protractor Angle
Before making any cuts, it’s crucial to adjust the saw blade to match the angle indicated on the miter saw protractor. To do this, follow these simple steps:
- Align the protractor: Place the miter saw protractor on the saw’s base and adjust it to the desired angle.
- Secure the angle: Once the protractor is aligned, secure the angle by tightening the bevel lock knob to lock the saw blade in place.
- Test the angle: Double-check the accuracy of the angle by making a test cut on a scrap piece of wood.
By adjusting the saw blade to match the protractor angle, you can ensure that each cut is executed with precision, resulting in clean and accurate woodworking projects.
Common Mistakes To Avoid
Misreading The Protractor
One of the most common mistakes when using a miter saw protractor is misreading the angle markings. This error can lead to inaccurate cuts and wasted materials. To avoid this, take your time to carefully read and understand how the protractor is labeled. Make use of a magnifying glass if necessary, to ensure accurate reading of the angles.
Not Accounting For Blade Thickness
Another crucial mistake is not accounting for the blade thickness when making miter cuts. Failing to factor in the thickness of the saw blade can result in imprecise cuts, especially when working with intricate joinery. Always make sure to consider the thickness of the blade when setting the miter and bevel angles to guarantee precise and clean cuts.
Advanced Techniques And Tips
Mastering advanced techniques for using a miter saw protractor opens up a world of opportunities for creating precise and complex angled cuts. With the right tips and tricks, you can extend the capabilities of your miter saw protractor to tackle a wide range of woodworking projects. Let’s explore some advanced techniques and tips that will help you make the most of your miter saw protractor.
Techniques For Complex Angles
When it comes to cutting complex angles, having a solid understanding of the miter saw protractor can make all the difference. By leveraging the following techniques, you can achieve precise cuts for intricate designs and complex woodworking projects:
- Compound Angles: For projects that require cuts with both miter and bevel angles, use the protractor to accurately set the miter and bevel angles for compound cuts. Take your time to measure and adjust the protractor to achieve the desired compound angle.
- Custom Angle Cuts: Utilize the protractor to make custom angle cuts by leveraging its adjustable features. With the ability to fine-tune the angle settings, you can create unique and precise cuts tailored to your specific woodworking needs.
- Multi-Sided Cuts: For multi-sided projects such as octagonal shapes, apply the protractor to set the angles for each cut, ensuring seamless and accurate joins for a professional finish.
How To Extend The Capabilities Of Your Miter Saw Protractor
Unlock the full potential of your miter saw protractor by exploring these tips to extend its capabilities:
- Calibration: Regularly calibrate your miter saw protractor to ensure accurate angle measurements. Calibration will help maintain precision and prevent inaccuracies in your cuts.
- Utilize Protractor Extensions: Consider investing in protractor extensions to expand the range of angles you can accurately measure and cut. Extensions can provide increased versatility for tackling advanced woodworking projects.
- Secure Fixtures for Stability: When working with complex angles, ensure your workpiece is securely fixed in place to prevent movement during cutting. Sturdy fixtures contribute to the accuracy of the cuts and overall safety.
Mastering Precision Cuts With Practice
Mastering precision cuts with practice is essential for anyone using a miter saw protractor. The ability to make accurate and consistent cuts is crucial for a wide range of woodworking projects. Whether you are a novice or an experienced woodworker, developing a reliable workflow can significantly improve the quality of your cuts. By mastering the techniques for repetitive and consistent cuts, you can elevate your woodworking game to the next level.
Developing A Reliable Workflow
Using a miter saw protractor efficiently involves developing a reliable workflow. This includes ensuring that your miter saw is set up correctly and that your work area is organized. Taking the time to make precise measurements and marking your cuts accurately is fundamental. Additionally, maintaining your tools and keeping them in good condition can contribute to a reliable workflow.
Techniques For Repetitive And Consistent Cuts
Mastering the art of making repetitive and consistent cuts requires practice and attention to detail. One important technique is to use a stop block to ensure that every piece you cut is the same length. This can be especially useful when working on projects that require multiple identical cuts. Additionally, paying attention to the orientation of the wood and using clamps to secure it can help maintain consistency in your cuts.
Frequently Asked Questions Of How To Use Miter Saw Protractor
What Is A Miter Saw Protractor Used For?
A miter saw protractor is used to measure and cut precise angled cuts in woodworking projects. It helps woodworkers accurately set and determine the angle for bevel and miter cuts, allowing for a professional finish.
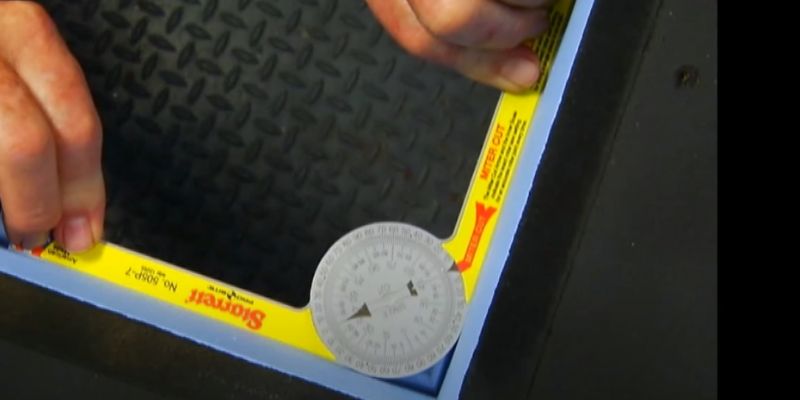
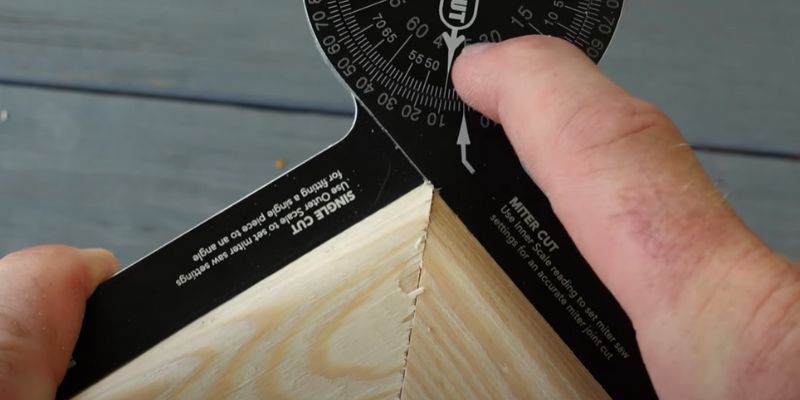
How To Read A Miter Saw Protractor Scale?
To read a miter saw protractor scale, align the desired angle with the pointer, ensuring the indicator is accurately positioned for an exact measurement. The scale will indicate the angle setting, allowing for precise and consistent cuts in woodworking tasks.
Can A Miter Saw Protractor Be Calibrated?
Yes, a miter saw protractor can be calibrated to ensure accuracy in angle measurements. Regular calibration helps maintain precision in cutting angles, contributing to the overall quality and professionalism of woodworking projects. Calibration ensures that the tool delivers precise and reliable results.
Conclusion
Incorporating a miter saw protractor in your woodworking projects can greatly enhance precision and accuracy. With the right techniques, you can maximize the full potential of this tool and achieve professional results. By familiarizing yourself with the protractor’s functions and following these steps, you can elevate your woodworking skills and improve the quality of your projects.