How to Waterproof Wood for a Bathroom Shower: Direct Water Exposure Needs a Real Sealant
To waterproof wood for a bathroom shower, apply a waterproof sealant to protect against moisture and water damage. Introducing wood into a bathroom shower can add warmth and natural beauty to the space.
However, it is crucial to waterproof the wood to ensure its durability and longevity. By applying a waterproof sealant, you can protect the wood from moisture and water damage caused by daily shower usage. This will help prevent warping, rotting, and mold growth, ensuring that your wood remains in excellent condition for years to come.
We will provide step-by-step instructions on how to effectively waterproof wood for a bathroom shower, allowing you to enjoy the aesthetic appeal of wood without worrying about potential issues.
Why Waterproofing Wood In A Bathroom Shower Is Important
Waterproofing wood in a bathroom shower is of utmost importance to prevent water damage and rot, as well as to ensure the longevity of the wood. The constant exposure to moisture in a bathroom can cause significant damage to untreated wood, leading to deterioration and even structural issues. By taking the necessary steps to waterproof the wood, you can protect your bathroom shower from potential damage, keeping it in excellent condition for years to come.
Preventing Water Damage And Rot
Water damage is a common problem in bathrooms, primarily due to the high levels of humidity and moisture present. Untreated wood is highly susceptible to absorbing water, leading to swelling, warping, and ultimately, rot. When wood becomes saturated, it loses its structural integrity and can become significantly weakened over time. This not only compromises the aesthetics of your bathroom but also poses serious safety risks. Waterproofing the wood effectively creates a barrier against moisture, preventing water damage and the subsequent rot that can occur.
Ensuring Longevity Of The Wood
The longevity of wood in a bathroom shower largely depends on its ability to withstand prolonged exposure to moisture. When wood is constantly exposed to water without proper waterproofing, it can deteriorate rapidly. This can lead to the need for frequent repairs or even complete replacement, incurring significant costs and inconvenience. By waterproofing the wood, you create a protective seal that enhances its durability, allowing it to withstand the harsh conditions of the bathroom environment. This not only extends the lifespan of the wood but also saves you money in the long run.
Choosing The Right Type Of Wood For Bathroom Showers
When it comes to designing a bathroom shower, one crucial factor to consider is the choice of wood. Selecting the right type of wood will not only enhance the aesthetics but also ensure its durability and resistance to water damage. In this article, we will explore the different options available for waterproofing wood in bathroom showers, focusing on two primary categories: wood species that are naturally resistant to water and treated wood options for improved water resistance.
Wood Species That Are Naturally Resistant To Water
If you want a wood that naturally repels water and stands up to the moisture-rich environment of a bathroom shower, there are several species to consider:
- Cedar: Known for its natural oils, cedar wood is highly resistant to rot, decay, and water damage. Its pleasant aroma and appealing grain pattern make it a popular choice for shower walls and benches.
- Teak: Renowned for its incredible durability, teak wood contains natural oils that repel water. This makes it an excellent choice for bathroom showers, as it can withstand constant exposure to moisture without warping or deteriorating.
- Ipe: With its dense and tightly grained structure, ipe wood is highly resistant to water, insects, and decay. This tropical hardwood is perfect for bathroom showers, offering exceptional longevity and a unique, rich color.
Treated Wood Options For Improved Water Resistance
If you have your heart set on a different wood species, you can opt for treated wood options that have undergone special processes to enhance their water resistance. These treatments penetrate the wood fibers, providing a protective barrier against moisture. Here are a few common treated wood options to consider:
- Pressure-Treated Wood: This type of wood is infused with preservatives under high pressure, making it highly resistant to water damage. Pressure-treated wood is a budget-friendly option that offers decent protection against rot and fungal decay.
- Modified Wood: Modified wood undergoes a treatment that alters its cellular structure, making it resistant to moisture. This wood species retains its natural appearance while delivering superior water resistance, ensuring your bathroom shower remains in excellent condition for years to come.
- Marine-Grade Plywood: As the name suggests, marine-grade plywood is specifically designed for water-based applications. Its waterproof adhesive makes it ideal for bathroom showers, providing excellent resistance to moisture and ensuring long-lasting durability.
By choosing the right type of wood for your bathroom shower, you can create a stunning and functional space that withstands the challenges of water exposure. Whether you opt for naturally resistant wood species like cedar, teak, or ipe, or explore treated wood options such as pressure-treated wood, modified wood, or marine-grade plywood, ensuring water resistance will make your bathroom shower a reliable and beautiful addition to your home.
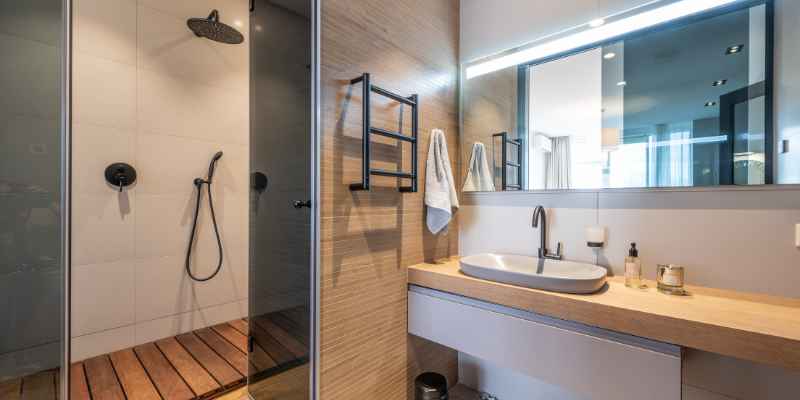 Waterproof Wood For Bathroom Shower” width=”800″ height=”400″ />
Preparing The Wood Surface For Waterproofing
Before waterproofing wood for a bathroom shower, it is crucial to properly prepare the wood surface. This involves cleaning, sanding, and ensuring the wood is free from any dirt, debris, or previous finishes. Taking these steps will help ensure a successful waterproofing process and protect the wood from moisture damage.
Cleaning And Sanding The Wood
Before waterproofing wood for a bathroom shower, the first step is to thoroughly clean and sand the surface of the wood. Cleaning the wood removes any dirt, grime, or debris that may prevent the waterproofing solution from properly adhering. Sanding the wood helps create a smooth and even surface for better waterproofing results.
To start, use a mild detergent or wood cleaner to gently scrub the wood surface. It’s important to avoid using harsh chemicals as they can damage the wood. After cleaning, rinse the wood with water and allow it to dry completely. This will ensure that the wood is free from any residue before proceeding to the next step.
Once the wood is dry, it’s time to sand the surface. Use a fine-grit sandpaper or a sanding block to smooth out any rough patches or imperfections. Sanding not only helps the waterproofing solution adhere better, but it also enhances the overall appearance of the wood.
- Ensure the wood surface is clean and free from any dirt or debris.
- Use a mild detergent or wood cleaner to gently scrub the wood.
- Rinse the wood with water and allow it to dry completely.
- Sand the wood using a fine-grit sandpaper or sanding block.
Filling Cracks And Gaps
After cleaning and sanding the wood, the next step in preparing the surface for waterproofing is to fill any cracks or gaps that may exist. Cracks and gaps can compromise the effectiveness of the waterproofing solution, so it’s important to address them beforehand.
Start by inspecting the wood for any visible cracks or gaps. These can be filled using a suitable wood filler or putty. Ensure that the filler or putty is specifically formulated for use in wet areas such as bathrooms. Apply the filler or putty according to the manufacturer’s instructions, smoothing it out with a putty knife or a similar tool.
Once the filler or putty has dried, sand the area lightly to achieve a smooth and level surface. This step helps to ensure that the filled cracks or gaps do not cause any unevenness in the waterproofing application.
- Inspect the wood surface for any visible cracks or gaps.
- Fill the cracks and gaps with a suitable wood filler or putty.
- Smooth out the filler or putty with a putty knife.
- Allow the filler or putty to dry before proceeding.
- Lightly sand the area to achieve a smooth surface.
Applying A Waterproofing Sealant Or Finish
To waterproof wood for a bathroom shower, applying a waterproofing sealant or finish is crucial. It helps protect the wood from water damage, maintaining its durability and preventing rot or mold growth. Ensure to follow the instructions properly for an effective and long-lasting result.
Choosing The Appropriate Waterproofing Product
When it comes to waterproofing wood for a bathroom shower, choosing the right products is crucial. It is essential to select a waterproofing sealant or finish that is specifically designed for wood and can withstand the high humidity and moisture levels typically found in a bathroom shower. Look for products that have a proven track record of effectiveness and durability in wet environments.
Applying Multiple Coats For Maximum Protection
To ensure maximum protection, it is recommended to apply multiple coats of the waterproofing product. Applying more than one coat not only enhances the effectiveness of the sealant or finish but also provides an additional layer of protection against moisture damage.
Before applying the second coat, it is important to allow the first coat to dry completely. This duration may vary depending on the product, so refer to the manufacturer’s instructions for the recommended drying time. Applying the coats uniformly and following the manufacturer’s instructions regarding drying time will yield the best results.
Remember to sand the surface lightly in between coats to ensure proper adhesion and smoothness. This will help create a seamless and effective barrier against water penetration.
When applying multiple coats, pay extra attention to the edges and corners of the wood, as these areas are more prone to moisture infiltration. Applying an extra coat to these vulnerable spots will further fortify your wood against water damage.
Additionally, always make sure to apply the waterproofing product in a well-ventilated area, using the appropriate safety equipment such as gloves and a respirator to protect yourself from potential harmful fumes.
By choosing the appropriate waterproofing product and applying multiple coats following the recommended instructions, you can ensure that your wood will be well-protected in the bathroom shower environment, prolonging its lifespan and maintaining its integrity.
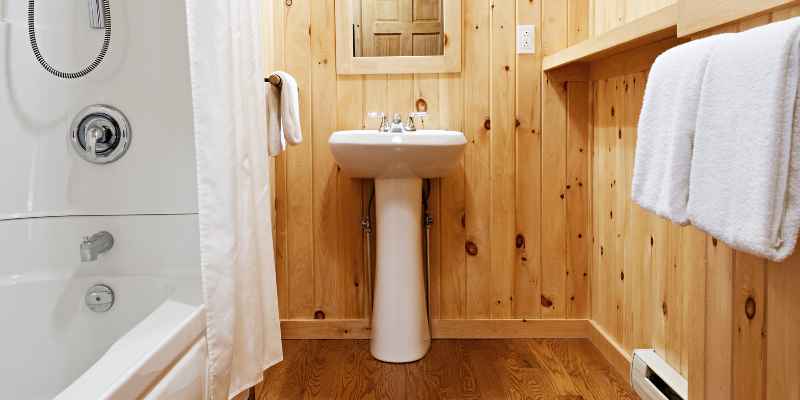 Waterproof Wood For Bathroom Shower” width=”800″ height=”400″ />
Maintaining And Reapplying Waterproofing Over Time
Maintain and reapply waterproofing on wood for a bathroom shower to protect it from moisture damage over time. This process helps to prolong the lifespan of the wood and maintain its structural integrity.
Regular Cleaning And Inspection
To maintain the waterproofing of the wood in your bathroom shower, regular cleaning and inspection are crucial. Cleaning the wood surface regularly helps to prevent the buildup of dirt, grime, and mold, which can compromise the waterproof seal. Use a mild soap or wood cleaner and a soft brush or sponge to gently clean the surface. Avoid using harsh chemicals or abrasive scrubbers, as they can damage the wood. After cleaning, thoroughly rinse the surface with water and dry it completely. Regular inspection allows you to identify any signs of wear or damage to the waterproofing and address them promptly.
When And How To Reapply Waterproofing
Over time, the waterproofing on the wood in your bathroom shower may begin to wear off or lose its effectiveness. When you notice that water is no longer bead up on the surface or that the wood absorbs moisture instead of repelling it, it is time to reapply the waterproofing. The frequency of reapplication depends on factors such as the type of wood, exposure to moisture, and usage. Typically, it is recommended to reapply the waterproofing every 6 to 12 months.
To reapply the waterproofing, you first need to clean the wood surface thoroughly. Follow the steps mentioned earlier for regular cleaning. Once the surface is clean and dry, apply a fresh coat of waterproofing product specifically designed for wood. You can use a brush or roller to evenly apply the waterproofing onto the wood surface, making sure to cover all areas. Allow the product to dry completely according to the manufacturer’s instructions before using the shower again.
Remember to follow the manufacturer’s recommendations and instructions carefully when selecting and applying the waterproofing product. Choosing a high-quality waterproofing product designed for bathroom use and maintaining a regular schedule of reapplication will help to ensure the long-lasting waterproofing of the wood in your bathroom shower.
Conclusion
To conclude, waterproofing wood in your bathroom shower is vital for long-lasting durability. By following the steps outlined in this blog post, you can ensure that your wood surfaces are protected from moisture damage. Remember to thoroughly clean and prepare the wood, apply a waterproofing product, and regularly maintain the treatment.
With these precautions, your bathroom shower will remain functional and visually pleasing for years to come.