Laminate Countertop Trimmer: How to Choose and Use One Right
A laminate countertop trimmer is really just a small, single-handed router built for one job: shaving the overhanging edge of a laminate countertop down flush with the substrate after the sheet has been glued on. It’s not the same tool as a full-size router bolted to a table, and buying the wrong one – or running the right one with the wrong bit or technique – is how most DIY laminate jobs end up with chipped edges, scorch marks, or a lip you can feel with your thumbnail. Below is what actually separates a good laminate trimmer from a bad choice, which bit style you need for the cut you’re making, and the technique that keeps the decorative layer from blowing out.
What a Laminate Trimmer Is (and Why It’s Not Just a Small Router)
Our Pick for Trimming Laminate Countertop Edges
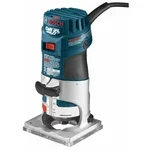 |
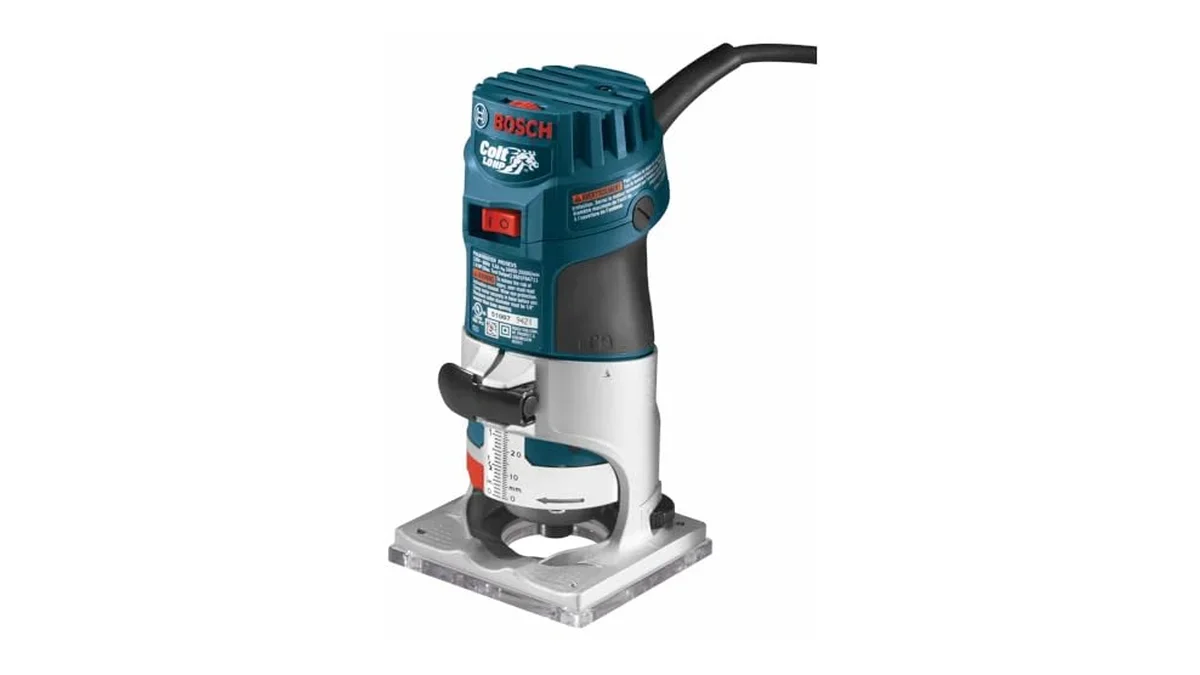
Bosch PR20EVS Colt 1.0 HP Variable-Speed Palm Router – $99.99 A dedicated palm-grip trim router with a clear base and 16,000-35,000 RPM range, which is exactly the size and control window laminate trimming calls for.
|
Full-size routers are built to sit in a router table or handle deep template work, and most of them are too tall and too heavy to control one-handed while you’re leaned over a countertop edge. A laminate trimmer (sometimes sold as a “palm router” or “1/4-sheet trimmer”) is deliberately small – usually under 3 lbs, sized to grip in one palm, with a low center of gravity and a clear plastic base so you can actually watch the bit meet the laminate edge as you move. That visibility matters more here than in almost any other routing task, because laminate trimming is a freehand, by-feel operation – you’re not running a fence or a template, you’re following the substrate edge in real time.
Motor size is the other real difference. Most dedicated trimmers run a 4.5-6 amp motor rated for roughly 30,000-35,000 RPM, which sounds aggressive but is actually tuned to keep a small-diameter carbide bit moving fast enough to shear laminate cleanly rather than tear it. A full-size 2+ HP router can absolutely trim laminate, but it’s harder to balance one-handed on a 1.5-inch-thick edge, and the extra bulk makes it easy to tip the base and gouge the substrate underneath.
Flush-Trim vs. Bevel-Trim Bits: Which One You Actually Need
This is the step most guides skip, and it’s the one that actually determines whether your edge looks factory-made or homemade. There are two bit families used with a laminate trimmer, and they are not interchangeable:
- Flush-trim bits cut straight up and down with a bearing (top or bottom-mounted) riding the substrate edge. Use these when the laminate needs to end perfectly flush with zero overhang – the standard cut for a self-edged countertop where the front strip and the top sheet meet at a clean corner.
- Bevel-trim bits are ground at an angle instead of straight down, so the cut leaves the laminate’s edge sitting a hair proud with a slight incline rather than a hard 90-degree corner. That small bevel gives you room to knock the edge down smooth with a fine file afterward without ever touching – and risking chipping – the decorative surface layer itself. Most trim-router bit sets marketed for laminate work include a bevel bit specifically for this reason.
If you only own one bit, a flush-trim bit with a bearing will get you through most countertop work. But if you’re doing a full self-edge buildup (laminate on the front edge plus laminate on top, common on kitchen and bathroom countertops), a bevel-trim bit is what keeps that top corner from chipping out under the router, since the bevel angle relieves pressure on the laminate’s brittle top layer right at the moment the bit exits the cut.
How to Trim Laminate Without Chipping or Burning the Edge
Most bad results trace back to one of two mistakes: feeding the router too slowly (which burns the laminate’s resin layer and leaves a scorched line) or fighting the bit’s rotation direction (which tears the edge instead of shearing it). Here’s the sequence that avoids both:
- Set the bearing depth first, unplugged. Loosen the bit, set the bearing to just barely contact the substrate edge below the laminate, and lock it down. Getting this wrong is the single most common cause of a router gouging into the particleboard or plywood underneath.
- Run the trimmer in one continuous pass, moving left to right along the edge (with the substrate on your left if you’re right-handed) so the bit’s rotation pulls itself into the cut instead of away from it – moving the opposite direction lets the bit grab and tear the laminate ahead of the bearing.
- Keep the base flat against the surface the entire pass. Lifting or rocking the trimmer mid-cut is what leaves the visible “step” or wavy line along an otherwise clean edge.
- Don’t pause mid-cut. Stopping partway and resuming almost always leaves a small burn mark or ridge at the restart point, because the bit sits in one spot and the friction heats the resin.
- Finish with a few strokes of a fine mill file held flat against the edge, filing downward only (never back up into the laminate) to knock off any bearing witness marks.
One detail worth knowing even if you never touch a router again after this project: the reason manufacturers spec such a high RPM range (often 16,000 up to 30,000-35,000) isn’t for speed of material removal – it’s to keep the cutting edge moving fast enough per revolution that it shears the brittle decorative layer cleanly instead of flexing and cracking it, which is exactly what happens when someone tries this cut with a low-RPM drill attachment instead of an actual trim router.
Features That Actually Matter When Choosing One
Specs sheets list a lot of numbers that don’t move the needle for this specific job. These are the ones that do:
- Variable speed, not single-speed. High-pressure laminate (HPL) and the thinner post-form laminate used on pre-fabricated countertops cut best at different speeds. A single fixed-RPM trimmer forces a compromise; variable speed lets you drop RPM for thinner, more brittle sheet stock.
- A genuinely clear base plate, not just a base with a cutout. Cloudy or scratched acrylic bases are common on cheaper trimmers and defeat the entire point of freehand visibility.
- 1/4″ collet compatibility with standard trim bits. Nearly every laminate flush-trim and bevel-trim bit on the market ships in a 1/4″ shank specifically because that’s the trim-router standard – check this before assuming a bit fits.
- Tool-free or single-wrench bit changes. You’ll be swapping between a flush bit and a bevel bit on the same job more often than you’d expect, and a spindle lock button saves real time over needing two wrenches.
- Weight under 3 lbs. Anything heavier gets tiring to hold steady one-handed against a vertical edge for more than a few minutes, which is exactly when technique starts slipping and edges start chipping.
Common Mistakes That Ruin an Otherwise Good Trim
Beyond direction-of-feed and burn marks covered above, three mistakes account for most ruined laminate edges:
- Using a router bit meant for wood instead of a carbide laminate-trim bit. Standard high-speed steel (HSS) bits dull almost immediately against the phenolic resin in laminate and start tearing instead of cutting within a single pass. Carbide-tipped bits hold an edge through an entire kitchen’s worth of countertop trimming.
- Skipping a test pass on scrap. Bearing depth that looks right by eye is often off by a hair, and that hair is the difference between flush and a visible step. A 30-second test cut on an offcut catches this before it’s permanent.
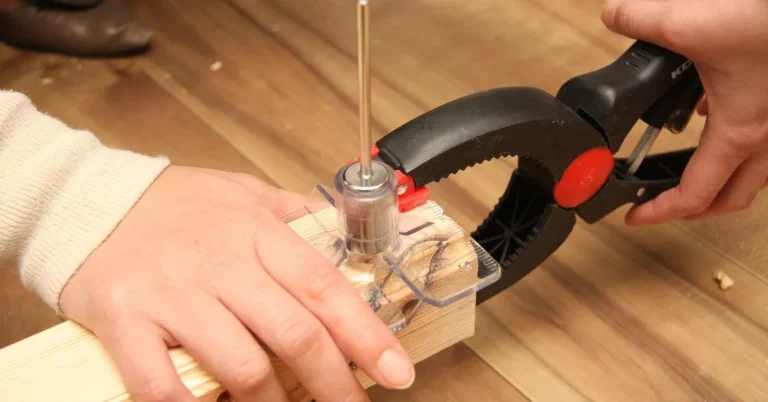
- Not securing the countertop before trimming. Any flex or movement in the substrate while the bit is engaged transfers straight into a wavy, inconsistent edge line – clamp or brace the piece so it can’t shift mid-pass.
These trimming mistakes are separate from cutting mistakes made earlier in the job – if you’re still sizing the laminate sheet itself before gluing it down, see our guide on choosing the right circular saw blade for laminate countertop to avoid chipping the sheet before it ever reaches the trimmer.
Frequently Asked Questions
Can a laminate countertop be trimmed to fit after it’s installed?
Yes. A laminate trimmer is designed for exactly this – trimming overhanging laminate flush with the substrate edge after the sheet is glued down, using either a flush-trim or bevel-trim bit depending on the joint you’re finishing.
How does a laminate countertop trimmer work?
A carbide bit spinning at high RPM (typically 16,000-35,000) shears the excess laminate as a bearing on the bit rides along the substrate edge, guiding the cut so the laminate ends up flush without needing a fence or guide rail.
What’s the difference between a flush-trim bit and a bevel-trim bit?
A flush-trim bit cuts straight down for a hard 90-degree edge. A bevel-trim bit cuts at a slight angle, leaving room to file the corner smooth by hand without risking a chip in the decorative laminate layer – the better choice for a full self-edge buildup.
Is a laminate trimmer easy to use for a first-time DIYer?
The tool itself is simple to operate, but the technique – feed direction, bearing depth, and a steady continuous pass – takes a practice cut or two on scrap material before running it on a visible edge. Rushing the first attempt on the actual countertop is the most common way beginners end up with a chipped corner.
Sponsored / affiliate links. As an Amazon Associate I earn from qualifying purchases. I may earn additional commission from eligible campaigns.