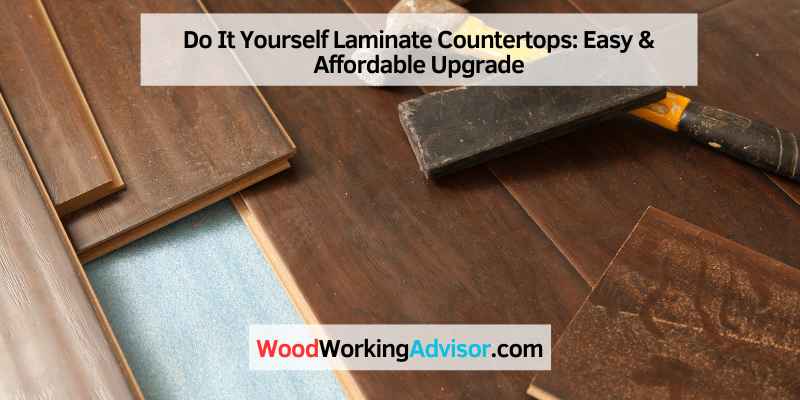
Do It Yourself Laminate Countertops: Easy & Affordable Upgrade
Yes, you can make your own DIY laminate countertops, which is an approachable and cost-effective project for homeowners who have basic tools. Installing a laminate countertop is easy compared to other types of countertop materials and can be done in a workshop or at the installation site.
If you are looking to renovate your kitchen and save some money in the process, then DIY laminate countertops are an excellent option to consider. Laminate is a popular choice for countertops due to its affordability and array of color options.
In addition, DIY laminate countertops are fairly easy to install and require only basic tools. With some simple steps such as cutting, applying glue, and routering edges, you can have a new laminate countertop installed in your kitchen in no time. We will guide you through the steps on how to build your own DIY laminate countertops with ease and simplicity.
Preparing The Countertop Surface
Before installing laminate countertops, it’s important to ensure that the surface of the countertop is properly prepared. This involves cleaning it thoroughly and sanding down any rough patches or bumps. By preparing the countertop surface carefully, you’ll ensure a smooth and long-lasting installation.
Removing Old Countertops
Before you start preparing the surface, you must remove the old countertop. The quickest and easiest way to do this is to cut through the old countertop and pry it away from the cabinets underneath. Make sure you wear safety glasses and gloves while doing this.
Cleaning And Sanding Surfaces
Once the old countertop is removed, clean the surface underneath thoroughly. Remove any old glue, adhesive or silicone with a scraper. Use a degreaser or a mixture of water and soap to clean the surface. After cleaning, sand the surface with fine-grit sandpaper to ensure a smooth surface for your new countertop.
Cutting The Laminate And Gluing It
Next, measure and cut the laminate to fit the dimensions of your countertop. Be sure to use a sharp blade or saw to achieve clean cuts. Once you have your laminate pieces cut, use a contact adhesive to glue the laminate onto the surface.
Finishing The Edges
To finish off your countertop, use a router to smooth out the edges of the laminate, or use edge banding to cover the edges of the countertop. Be sure to sand the edges thoroughly to remove any roughness or sharp corners.
Cleaning And Maintaining Your Laminate Countertop
Once your new laminate countertop is installed, it is important to keep it clean and well-maintained. Avoid using harsh chemicals and abrasive cleaners, as this can damage the surface of your countertop.
Instead, use a mild soap and warm water to clean up spills and stains. Regularly clean your laminate countertop with a damp cloth to prevent buildup of dirt, grease, and grime.
In conclusion, with a few simple steps, you can prepare your countertop surface for the installation of new laminate. By taking the time to properly remove the old countertop, clean and sand the surface, and install the new laminate, you can enjoy a fresh and updated countertop in no time.
Cutting Laminate Sheets
Cutting laminate sheets is an important step when creating do-it-yourself laminate countertops. Precise measurements and attention to detail are necessary to ensure a perfect fit. Proper tools, such as a circular saw with a fine-tooth blade, are crucial for a clean cut.
Cutting Laminate Sheets is a crucial step in creating a DIY Laminate Countertop. To achieve a perfect cut, you need to measure and mark the laminate sheets accurately; then, cut straight and angled lines with precision. In this section, we will guide you step-by-step on how to achieve these tasks and achieve a pro-level result.
Measuring And Marking Laminate Sheets
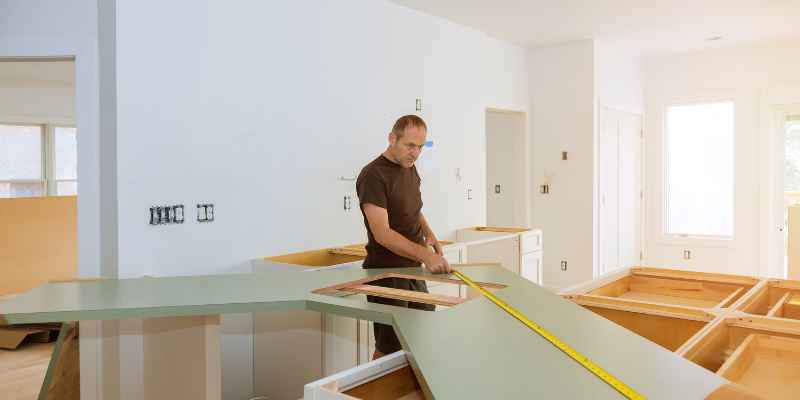
Before cutting the laminate sheets, you need to measure the countertop’s dimensions and add an extra inch to the measurements. Then, transfer the dimensions to the laminate sheets using a measuring tape and a pencil. After marking the measurements, use a straight edge or T-square to create straight lines that you will cut.
Cutting Straight Lines And Angles
To cut straight lines on laminate sheets, use a circular saw or jigsaw. If using a circular saw, use a fine-tooth blade and keep the laminate sheet’s color side facing down.
Make sure to maintain a steady hand and straight movement while cutting. Also, it’s crucial to proceed slowly and not apply too much pressure on the blade to avoid chipping and cracks on the laminates.
To cut angles on laminate sheets, you can use the jigsaw. First, mark the angle lines using a straight edge, then attach the jigsaw blade on the starting point of the angle and cut along the marked lines. Again, move the jigsaw slowly and steadily to avoid cracks and chipping.
In conclusion, cutting laminate sheets for a DIY Laminate Countertop requires precise measurements, straight lines, and steady movements. By following these steps and using the right tools, you can achieve a pro-level finish and save costs compared to hiring a professional.
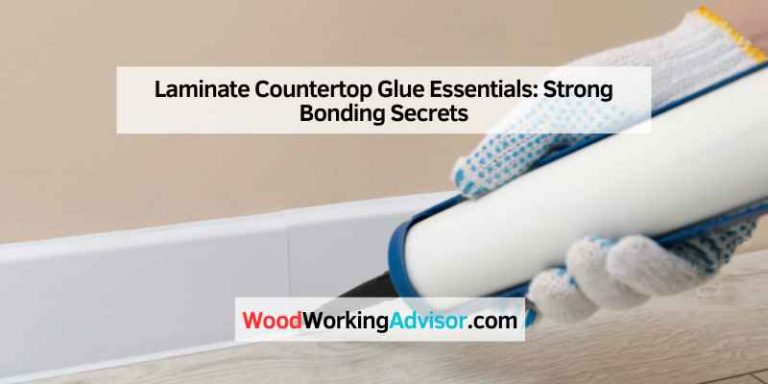
Gluing Laminate Sheets To The Countertop
To glue laminate sheets to a countertop for a do-it-yourself laminate countertop project, you will need contact cement adhesive, a paintbrush, and a roller. Apply an even layer of adhesive to both the surface of the countertop and the back of the laminate sheet, then press the sheet down onto the countertop and roll out any air bubbles.
Once you have cut the laminate sheets to size, gluing them onto the countertop is the next step. This is a critical step and requires attention to detail to ensure success. The following H3 headings break down the gluing process into manageable steps
Applying Contact Cement
The first step in the gluing process is to apply the contact cement to both the countertop and the laminate sheet. This can be done using a small foam roller or a brush. It is essential to apply an even layer of contact cement to both surfaces.
Aligning and Securing Laminate Sheets
Once the contact cement has been applied, carefully align the laminate sheet with the countertop. There is no room for error in this step, as once the two surfaces make contact, they will be difficult to reposition. Use dowel rods or other spacers to ensure that the laminate sheet remains in place as you lower it onto the countertop.
Smoothing out the Laminate
Using a roller, smooth out the laminate sheets to ensure that there are no air bubbles or creases. Pay particular attention to the edges and corners, making sure that they are well adhered to the countertop. If there are any air bubbles, use a sharp knife to puncture them, and then use the roller to press down the area again.
Overall, gluing laminate sheets to the countertop requires careful attention to detail and a steady hand. Following these steps will ensure that your DIY countertop project is a success and that the finished product looks professional and polished.
Trimming And Sanding Laminate Sheets
Trimming and sanding laminate sheets is an essential step in creating DIY laminate countertops. Careful cutting, followed by appropriate sanding, will leave a smooth edge for a professional finish.
Trimming Excess Laminate
After cutting the laminate sheet, there will be excess on the sides that needs to be trimmed. Use a router to trim the laminate close to the substrate, ensuring that the router bit is fully extended and moving from left to right. Be sure to wear safety goggles and gloves to prevent any accidents. Clean the edges of the laminate with acetone and a clean cloth to remove any adhesive or debris.
Sanding Laminate Edges And Surfaces
Sanding the edges and surfaces of the laminate is crucial for removing any sharp edges and creating a smooth finish. Use a sanding block or orbital sander with a medium grit sandpaper to sand the edges and surfaces. Move the sander in a circular motion to prevent any unevenness. Finish with a fine grit sandpaper to create a polished surface. Clean the countertop surface with a damp cloth to remove any dust or debris.
To summarize, trimming and sanding the laminate sheets are important steps to create a professional-looking DIY laminate countertop. With the use of a router and sanding tools, you can ensure a precise fit and smooth finish for your laminate countertop. Remember to wear protective gear and clean the surface before moving on to the next step.
Finishing Touches
Learn how to make DIY laminate countertops at home with precise cutting, gluing, and routering techniques. With the easy availability of laminate sheets and tools, the task becomes approachable even for first-timers. There are many resources available online that can guide you through the process of making your own laminate countertops.
u add the finishing touches to your DIY laminate countertops? There are a few essential steps you’ll need to follow to ensure your countertops look professional and polished. In this section, we’ll cover the key steps in applying edge banding to your countertops, as well as installing sink and faucet holes for a seamless finish.
Applying Edge Banding:
Edge banding is an essential step in finishing your laminate countertops. To do this, you’ll want to start by trimming your laminate to size, leaving a small overhang on all sides. Next, apply contact cement to the back of your edge banding, as well as to the edges of your countertop.
Once the glue has dried, carefully position the edge banding in place, trimming away any excess material with a razor knife. With a bit of sanding and polishing, you can achieve a seamless finish that looks like it was professionally done.
Installing Sink And Faucet Holes:
For a professional-looking finish, it’s important to ensure your sink and faucet holes are cut precisely. Use a cardboard template to mark out where your holes will go, double-checking your measurements before cutting. A jigsaw or hole saw is the best tool for cutting out your sink and faucet holes, but be sure to work carefully and take your time.
Once your holes are cut, use sandpaper or a file to smooth out any rough edges. With these finishing touches complete, your DIY laminate countertops will be ready to use and enjoy!
Maintaining Laminate Countertops
Maintaining laminate countertops involves cleaning it with mild soap and water, avoiding harsh cleaners, and preventing excessive moisture exposure. With proper care, do-it-yourself laminate countertops can last for years and be a cost-effective addition to any budget kitchen renovation.
Laminate countertops are a popular choice for homeowners due to their affordability, durability, and range of colors and patterns. Like any other surface in your home, laminate countertops require regular cleaning and maintenance to keep them looking their best. Whether you’ve installed a DIY laminate countertop or you’re looking to maintain an existing one, here are some tips to keep it in great condition.
Daily Cleaning and Maintenance
To keep your laminate countertops clean and free from damage, it’s essential to perform daily cleaning and maintenance. Here are a few simple tips:
– Wipe down your countertop with a damp, soft cloth or sponge after each use.
– Use a mild, non-abrasive cleaner to remove any spills or stains. Avoid using bleach or harsh chemicals that can damage the surface.
– Dry the countertop thoroughly after cleaning to prevent water damage or stains.
Repairing Chips and Scratches
Accidents happen, and it’s not uncommon for laminate countertops to get scratched or chipped over time. Fortunately, there are some easy DIY solutions to remedy these issues. Here’s how:
– For minor chips and scratches, use a laminate repair paste to fill in the damaged area. Follow the manufacturer’s instructions for best results.
– If the damage is more extensive, you can replace the damaged section of the countertop. Use a circular saw to cut out the damaged portion and replace it with a new sheet of laminate.
– To prevent scratching and damage, always use a cutting board when preparing food, and avoid placing hot pots and pans directly on the countertop.
With proper care and maintenance, your DIY laminate countertop can last for years to come. By following these tips, you can keep your countertops looking beautiful and functional for all your kitchen needs.
Frequently Asked Questions Of Do It Yourself Laminate Countertops
Can I Make My Own Laminate Countertop?
Yes, you can make your own laminate countertop by following the instructions and guidelines provided by DIY guides and videos available on various online platforms. Making a laminate countertop is a simple DIY project and can be done in a workshop or on the site installation.
The process involves cutting and gluing the laminate sheets and edges using basic tools and adhesive. It is an inexpensive and approachable project for homeowners compared to other countertop materials like granite or stone.
Is It Hard To Put Laminate On Countertops?
According to experts, installing laminate countertops is easier compared to granite or quartz. This is because of its lightweight, and typical homeowners already have the necessary tools to install it. DIY laminate countertops can be done in a workshop or at the installation site, making it a more approachable project.
What Is The Easiest Countertop To Install?
Laminate is the easiest countertop to install since it is lightweight, inexpensive, and comes in various colors and patterns. Unlike other countertops like granite or stone, installing laminate does not require special tools or professional help. DIY laminate countertops are approachable and can be done at home.
How Do You Seal Laminate Countertop Edges?
You can seal laminate countertop edges by using a router and a laminate trimmer. First, use a router to round the edge of the laminate countertop. Then, use a laminate trimmer to apply adhesive to the edge of the countertop.
Finally, apply a sealing material on the edge to create a protective barrier. It is important to follow the manufacturer’s instructions and safety precautions.
Conclusion
Creating a laminate countertop on your own is a manageable and budget-friendly option, whether you have experience or not. With the right tools and a little bit of patience, you can achieve a professional-looking countertop that fits your personal style and matches your existing kitchen.
Remember to take the time to properly measure and cut your laminate pieces, and use a strong adhesive during installation. With these tips and resources, you can confidently take on the challenge of a DIY laminate countertop project.