The Ultimate Guide to Ready Seal Exterior Wood Stain: My Journey to a Beautiful Deck
Hey there! If you’re anything like me, you love spending time outdoors, soaking up the sun on a beautifully stained deck or admiring a sturdy, colorful fence that just screams “home.” But let’s be real—keeping outdoor wood looking great is no small feat. The sun, rain, and constant wear can turn your masterpiece into a faded, weathered mess. That’s where Ready Seal Exterior Wood Stain comes in. I’ve spent years tinkering with woodworking projects, from decks to pergolas, and I’ve tried my fair share of stains. Ready Seal has become my go-to, and I’m excited to share everything I’ve learned about it with you. Whether you’re a DIY newbie or a seasoned woodworker, this guide will walk you through why Ready Seal is a game-changer, how to use it, and tips to make your project shine. Let’s dive in!
What Makes Ready Seal Exterior Wood Stain Special?
When I first heard about Ready Seal, I was skeptical. I’d used other stains that promised the world but left me sanding and reapplying within a year. Ready Seal is different. It’s a professional-grade, oil-based stain and sealer in one, designed to protect outdoor wood from the elements while keeping it looking gorgeous. What caught my attention was its “Goof-Proof” formula. No streaks, no lap marks, and no peeling? I had to see it for myself.
The magic lies in its penetrating oil-based formula. Unlike film-forming stains that sit on top of the wood and eventually crack, Ready Seal soaks deep into the grain. This protects the wood from water, mold, mildew, and UV rays without creating a surface layer that can flake off. I’ve used it on my cedar deck, and after two years, it still looks vibrant with zero peeling. It’s low-maintenance, which is a huge win for someone like me who loves woodworking but hates constant upkeep.
Another thing I love? It’s easy to apply. You don’t need to be a pro to get a professional finish. Whether you’re brushing, rolling, or spraying, the stain goes on smoothly. Plus, it comes in a range of colors—10 to be exact—so you can pick a shade that matches your vibe, from Natural Cedar to Dark Walnut. I went with Pecan for my fence, and it gives off this warm, rustic glow that my neighbors keep complimenting.
Why Choose Ready Seal for Your Outdoor Wood Projects?
Let me tell you about the moment I decided Ready Seal was the one. I was staining my new pergola, and I’d already botched a project the previous summer with a cheap stain that streaked like crazy. I was nervous, but Ready Seal made it so easy. Here’s why I think it’s a top pick for anyone in the USA looking to protect their outdoor wood:
- Durability: The oil-based formula penetrates deep, creating a tough barrier against moisture and UV damage. My deck has endured harsh Texas summers and still looks great.
- Ease of Application: No need to worry about perfect brush strokes. The “Goof-Proof” formula means no streaks or lap marks, even if you’re a beginner.
- Low Maintenance: Unlike other stains that peel and require sanding, Ready Seal just needs a light cleaning and reapplication every 2-3 years.
- Versatile Colors: With 10 shades, you can go natural or bold. I’ve seen friends use Light Oak for a modern look and Mission Brown for a classic feel.
- Eco-Friendly Options: While not fully VOC-free, Ready Seal is lower in volatile organic compounds than many oil-based stains, which is a plus for eco-conscious folks.
I’ve used it on decks, fences, and even outdoor furniture, and it performs like a champ every time. It’s pricier than some budget brands, but trust me, the results are worth every penny.
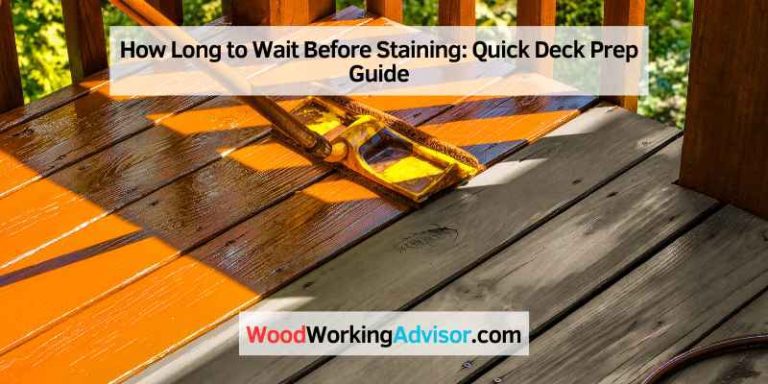
Preparing Your Wood for Ready Seal: My Step-by-Step Process
Before you pop open that can of Ready Seal, prep work is key. I learned this the hard way when I rushed a fence project and ended up with uneven color. Here’s how I prep my wood to ensure a flawless finish:
- Clean the Surface: Dirt, mildew, or old stain can mess up your results. I use a pressure washer set to low (around 1500 PSI) to clean my deck or fence. For stubborn spots, a deck cleaner works wonders. Make sure the wood is dry before moving on—Ready Seal needs a moisture content below 12%.
- Sand if Needed: If your wood is rough or has old, peeling stain, give it a light sanding with 80-120 grit sandpaper. I skip this for new wood, but it’s a must for weathered surfaces.
- Test for Readiness: Splash some water on the wood. If it soaks in, you’re good to go. If it beads up, wait a few days and test again. I once stained too early, and the finish wasn’t as vibrant.
- Protect Surrounding Areas: Ready Seal can bleed through, especially if you’re spraying. I cover nearby plants, concrete, or furniture with plastic sheeting or tarps. Trust me, your patio doesn’t need a cedar-colored makeover.
Taking time to prep makes all the difference. My pergola project turned out so well because I spent a day cleaning and sanding first. It’s not glamorous, but it’s worth it.
How to Apply Ready Seal Like a Pro
Applying Ready Seal is where the fun begins. I’ve tried brushing, rolling, and spraying, and each method has its perks. Here’s how I do it, based on what’s worked best for me:
- Brushing: This is my go-to for small projects like furniture. Use a natural-bristle brush for even coverage. I dip the brush lightly and work in small sections, letting the stain soak in naturally.
- Rolling: For large surfaces like decks, a roller is a time-saver. I use a 3/8-inch nap roller and apply thin, even coats. Don’t overload the roller—it can cause drips.
- Spraying: For fences, spraying is a game-changer. I use an airless sprayer with a 311 or 411 tip to avoid overspray. Keep the sprayer moving to prevent pooling, and have a brush handy to smooth out any drips.
No matter the method, apply two thin coats for the best results. I made the mistake of applying one thick coat once, and it took forever to dry. Thin coats dry faster (48-72 hours) and look more even. You can apply Ready Seal in any temperature, but make sure the wood is dry. I stained my deck in the Texas heat, and it turned out fine, but I avoided direct sunlight to prevent quick drying.
One tip: stir the stain well before and during application. The pigments can settle, and you don’t want uneven color. Also, don’t panic if the first coat looks splotchy—it evens out with the second coat.
Choosing the Right Ready Seal Color for Your Project
Picking a color can feel overwhelming, but Ready Seal’s 10 shades make it fun. I’ve experimented with a few, and each has its own personality. Here’s a quick rundown of some popular options and where they shine:
| Color | Vibe | Best For |
|---|---|---|
| Natural Cedar | Warm, reddish-brown | Decks, pergolas, rustic homes |
| Pecan | Rich, medium brown | Fences, furniture, classic look |
| Light Oak | Soft, natural tone | Modern homes, minimalist designs |
| Dark Walnut | Deep, bold brown | Statement pieces, large decks |
| Mission Brown | Traditional, warm brown | Historic homes, cozy patios |
I chose Natural Cedar for my deck because it highlights the wood’s grain while adding a warm glow. Pecan was perfect for my fence—it’s bold but not overpowering. If you’re unsure, grab a Ready Seal sample kit. I tested colors on a scrap piece of wood first, and it saved me from picking a shade that clashed with my house.
Pro tip: consider your home’s exterior and the wood type. Cedar and pine soak up stain differently, so test on a small area to see how the color pops. Also, think about maintenance. Lighter colors like Light Oak show less fading over time, while darker shades like Dark Walnut might need touch-ups sooner.
Maintenance and Longevity: Keeping Your Wood Looking Great
One of the reasons I’m hooked on Ready Seal is how low-maintenance it is. Most stains peel and crack, leaving you sanding for days. Ready Seal doesn’t form a film, so it fades gradually instead of flaking. My deck still looks vibrant after two years, but I know it’ll need a touch-up soon. Here’s how I keep my projects looking fresh:
- Cleaning: Every year, I give my deck a gentle pressure wash to remove dirt and mildew. A deck cleaner helps with tough spots. Don’t go too hard with the pressure washer—you don’t want to damage the wood.
- Reapplication: Ready Seal lasts about 2-3 years on decks and 3-5 years on fences, depending on weather and foot traffic. When it starts to fade, clean the surface, let it dry, and apply a single coat. No sanding needed!
- Spot Touch-Ups: If you notice uneven fading (like on high-traffic areas), you can spot-treat with a brush. I did this on my deck stairs, and you can’t even tell where I touched up.
I live in a sunny, humid climate, so I check my deck every spring. If the water test shows absorption, I know it’s time to reapply. It’s so easy compared to other stains I’ve used, which required stripping and sanding.
Comparing Ready Seal to Other Popular Stains
I’ve tried a lot of stains over the years—Thompson’s WaterSeal, Behr, Olympic, you name it. Here’s how Ready Seal stacks up based on my experience:
- Thompson’s WaterSeal: Cheap and widely available, but it’s basically wax and doesn’t last. My old deck looked gray within a year.
- Behr Premium: Decent coverage, but it’s film-forming and peels over time. I spent hours sanding it off my old fence.
- Olympic Maximum: Good UV protection, but it’s thicker and trickier to apply without streaks. Ready Seal’s “Goof-Proof” formula is way easier.
- DEFY Extreme: A solid competitor, but it’s pricier and not as forgiving for beginners. Ready Seal’s ease of use wins for me.
Ready Seal isn’t perfect—it’s expensive, and the 48-72 hour dry time can test your patience. But the durability and low maintenance make it my top choice. If you’re on a tight budget, Thompson’s might tempt you, but you’ll regret it when you’re restaining in a year.
Tips and Tricks for the Best Results with Ready Seal
After staining multiple projects, I’ve picked up some tricks that make Ready Seal even better:
- Test on Scrap Wood: Always test your color and application method on a spare piece. I learned this after my first fence looked darker than expected.
- Use Quality Tools: A good sprayer or natural-bristle brush makes a huge difference. Cheap brushes leave bristles stuck in the stain.
- Work in Small Sections: Don’t try to stain your whole deck at once. I work in 4×4-foot sections to keep the application even.
- Check the Weather: Avoid staining in direct sunlight or high humidity. I stained my pergola on a cloudy day, and the finish was flawless.
- Clean Up Properly: Oil-based stains like Ready Seal require mineral spirits for cleanup. I keep a can handy for brushes and spills.
These little tweaks have saved me time and frustration. My pergola still gets compliments, and I credit my prep and application process.
Common Mistakes to Avoid
I’ve made plenty of mistakes with Ready Seal, so let me save you some trouble:
- Skipping Prep: Dirty or wet wood will ruin your finish. I once stained a damp fence, and the color was patchy.
- Applying Too Much: Thick coats take forever to dry and can look uneven. Two thin coats are better than one heavy one.
- Not Stirring Enough: The pigments settle, so stir every 15 minutes. I skipped this once, and my deck had streaks.
- Ignoring Bleed-Through: If you’re spraying, mask off areas you don’t want stained. My neighbor’s driveway got a few cedar-colored splatters before I learned this.
Learn from my blunders, and your project will look like it was done by a pro.
Why Ready Seal Is Worth the Investment
Ready Seal isn’t the cheapest stain out there, but it’s worth every dollar. A 5-gallon pail costs around $150-$200, depending on where you shop (Lowe’s, Amazon, or Ace Hardware carry it). Compare that to budget stains like Thompson’s, which might save you $50 upfront but need reapplying every year. With Ready Seal, you’re investing in a product that lasts 2-5 years and saves you hours of maintenance. My deck and fence projects have held up through rain, sun, and even a surprise hailstorm, and I’m still thrilled with the results.
If you’re in the USA, you can find Ready Seal at major retailers or order online. I grabbed mine from Lowe’s, and they even had a sale. Check for sample kits if you’re unsure about colors—they’re a lifesaver.
Conclusion: Transform Your Outdoor Wood with Ready Seal
As I sit on my deck, sipping coffee and admiring the warm Natural Cedar finish, I can’t help but smile. Ready Seal Exterior Wood Stain has transformed my woodworking projects from stressful chores into labors of love. Its ease of use, durability, and gorgeous colors make it a must-have for anyone looking to protect their deck, fence, or outdoor furniture. Whether you’re a DIY beginner or a seasoned pro, Ready Seal takes the guesswork out of staining and delivers results that last. I’ve shared my journey, tips, and mistakes to help you get the most out of this amazing product. So grab a can, pick your color, and get ready to make your outdoor wood shine. Trust me—your neighbors will be jealous!
Frequently Asked Questions About Ready Seal Exterior Wood Stain
Can I use Ready Seal on pressure-treated wood?
Yes, you can! I’ve used it on pressure-treated pine for my deck posts. Just make sure the wood is dry (test with the water splash method) and has a moisture content below 12%. Wait about 30 days for new pressure-treated wood to cure before staining.
How long does Ready Seal take to dry?
It takes 48-72 hours to fully cure, depending on weather and humidity. I stained my fence in humid weather, and it took closer to 72 hours. Thin coats dry faster, so don’t slather it on.
Do I need to sand before applying Ready Seal?
Not always. For new or smooth wood, you can skip sanding. For weathered or previously stained wood, I lightly sand with 80-120 grit to remove old finish or rough spots. It makes the color pop.
Can I apply Ready Seal over an existing stain?
If the old stain is oil-based and not peeling, you can apply Ready Seal over it after cleaning. I did this on an old fence, and it worked fine. If the old stain is peeling or water-based, sand it off first.
How often do I need to reapply Ready Seal?
On decks, it lasts about 2-3 years; on fences, 3-5 years. I check my deck yearly with the water test. If water soaks in, it’s time for a quick coat. No sanding needed—just clean and reapply.
Is Ready Seal safe for pets and kids?
Once it’s fully cured (48-72 hours), it’s safe. I let my dog roam on my deck after a week, and he’s fine. During application, keep pets and kids away due to the oil-based fumes, and use mineral spirits for cleanup.
What’s the best way to clean up after using Ready Seal?
Use mineral spirits to clean brushes, rollers, or sprayers. I soak my brushes in a can of mineral spirits, then wash with soap and water. For skin, soap and water work fine if you act fast.