What Brush to Use for Wood Stain: Natural vs. Synthetic Guide
The brush you grab determines whether your stain goes on smooth or streaky. Use a natural bristle brush for oil-based stains and a synthetic (nylon/polyester) bristle brush for water-based stains — the wrong pairing is the single most common cause of blotchy, uneven stain jobs.
You sanded the wood down to a perfectly smooth surface, opened the can, and loaded up whatever brush was closest — and now there are streaks running the length of the board. That’s not bad luck. Stain behaves completely differently depending on what’s carrying it onto the wood, and a brush built for the wrong type of stain will fight you the entire way. The fix isn’t a different stain or more sanding; it’s matching the applicator to the stain’s base. Here’s exactly how to get that right, plus when a brush isn’t even the best tool for the job.
Why the Wrong Brush Wrecks a Stain Finish
A brush isn’t just a delivery method — it controls how evenly the stain lands on the wood and how much of it you waste along the way. Grab the wrong one and you’ll usually run into one of these four problems:
- Streaks and lap marks: bristles that can’t release the stain evenly leave visible lines wherever one stroke overlaps the last.
- Blotchy color: uneven pickup means some areas of the board end up darker than others, even on the same board.
- Wasted stain: a brush that soaks up too much stain drips and pools; one that holds too little forces constant re-dipping.
- Shed bristles: cheap brushes, or the wrong bristle type reacting badly with a solvent, leave loose hairs stuck in the wet finish.
All four of these trace back to one root cause: bristle material fighting the stain’s base. Get that one pairing right and most of these problems disappear on their own.
Best Natural-Bristle Pick for Oil-Based Stain
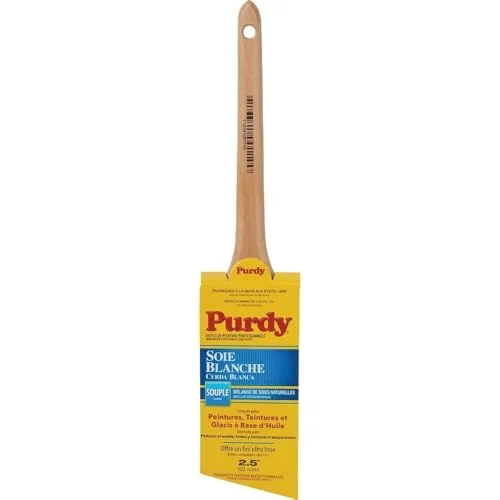 |
Purdy White Bristle 2-1/2 in. Brush – $15.48 The exact natural-bristle size this guide recommends for oil-based stain on furniture, trim, and cabinets.
|
Oil-Based vs. Water-Based Stain: Check the Can First
Before picking a brush, confirm what’s actually in the can. The label will say “oil-based” or “water-based” directly, and the cleanup instructions confirm it — mineral spirits or paint thinner means oil-based, soap and water means water-based.
| Feature | Oil-Based Stain | Water-Based Stain |
|---|---|---|
| Solvent (base) | Petroleum distillates (mineral spirits) | Water |
| Dry time | 6–24 hours between coats | 1–3 hours between coats |
| Odor | Strong solvent smell | Low odor |
| Cleanup | Mineral spirits or paint thinner | Soap and water |
| Correct brush | Natural bristle | Synthetic bristle |
Oil and water don’t mix — and that rule extends straight to your brush. A natural bristle brush is built to hold and release an oil-based product; a synthetic brush is built to stay stiff and functional when it’s loaded with water.
Natural Bristle vs. Synthetic Bristle Brushes
Once you know your stain type, the bristle material is the decision that actually matters. Here’s what’s different about each one and why it behaves the way it does.
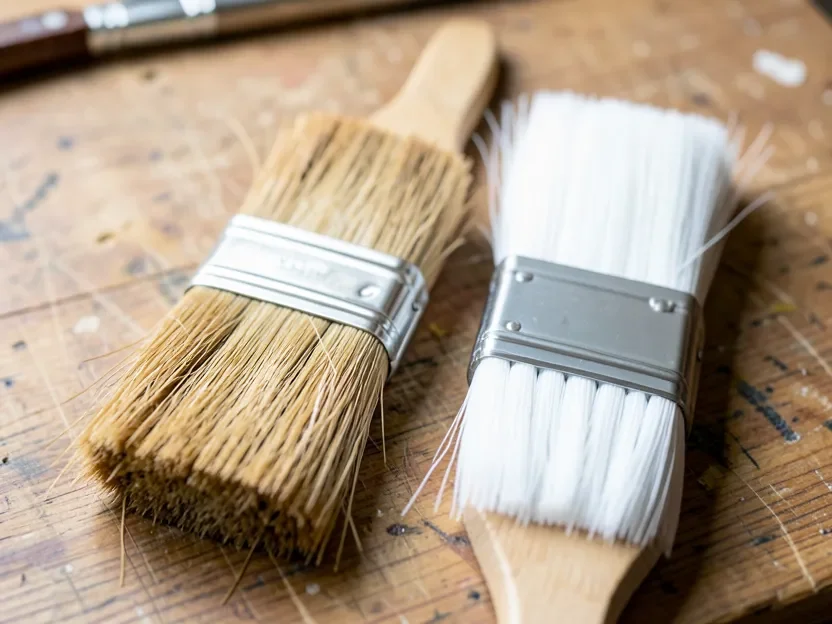
Natural Bristle Brushes: Built for Oil-Based Stains
Natural bristle brushes are made from hog or badger hair. Under magnification, each bristle tip splits into fine “flags,” which is exactly what gives the brush more surface area to hold oil-based stain — that’s why a natural brush needs fewer trips back to the can on a large panel than a synthetic one does. Dip it into an oil-based stain and it releases the product smoothly and consistently, which is where that hand-rubbed look comes from.
Never use a natural bristle brush with a water-based stain. Natural hair absorbs water the same way your own hair does — it goes limp, clumps together, and loses the shape needed to lay down an even coat.
A quick prep step most people skip: work a brand-new natural bristle brush in mineral spirits for a minute and blot it dry before its first real use. This “seasons” the bristles and knocks loose any factory hairs that would otherwise shed straight into your wet stain.
- Pros: holds more oil-based product per dip, releases it smoothly, lasts for years if cleaned properly.
- Cons: costs more, needs mineral spirits to clean, ruined by water-based products.
Synthetic Bristle Brushes: Built for Water-Based Stains
Synthetic brushes use nylon or polyester filaments instead of animal hair. Those filaments don’t absorb water, so the brush keeps its shape and stiffness through an entire water-based stain job, giving you a crisp, even coat instead of a limp, clumped one.
A quality synthetic brush can also be used with oil-based stain in a pinch — it just won’t flow quite as smoothly as a natural brush does, since it lacks those flagged tips. That trade-off is why a lot of woodworkers keep one good synthetic brush as their all-purpose option.
- Pros: works with water-based products, cleans up with soap and water, holds its shape, usually cheaper.
- Cons: can leave faint brush marks in thicker oil-based stains if you’re not careful.
For most furniture, trim, and cabinet work, a 2 to 2.5-inch flat sash brush is the standard size in either bristle type — wide enough to cover a panel in fewer strokes, narrow enough to still control near an edge or corner.
| Brush type | Best for | Why it works | Avoid with |
|---|---|---|---|
| Natural bristle (hog hair) | Oil-based stains & finishes | Flagged tips hold and release oil-based product evenly. | Water-based stains — bristles go limp. |
| Synthetic bristle (nylon/polyester) | Water-based stains & finishes | Filaments don’t absorb water, so the brush stays firm. | Not ideal with oil, though usable in a pinch. |
Foam Pads, Rags, and Staining Pads: When to Skip the Brush
A brush isn’t always the right tool. Depending on the project — and the stain — one of these three applicators can actually outperform a brush.
Foam Brushes
The cheap black foam brushes sold at every hardware store are disposable, which makes them useful for small touch-ups, testing a color on scrap wood, or a one-and-done project where cleanup isn’t worth the hassle. They work best with water-based stains — the solvents in oil-based products can break the foam down mid-project. Go easy on the pressure, too much can trap air bubbles in the finish or tear the foam on a sharp edge.
Rags and Lint-Free Cloths
Wiping stain on with a folded, lint-free rag (an old cotton t-shirt works fine) gives you more direct control over how much color the wood actually absorbs than any brush does. Fold it into a small pad, dip lightly, and wipe with the grain. This method works with either oil- or water-based stain, and it’s the fastest way to a deep, even color without brush marks. The Utah State University Extension notes that controlling how much stain gets wiped off is the real key to a uniform color — exactly what the rag method is built for.
Staining Pads
A staining pad — a handle attached to a flat, absorbent pad — is built for large flat surfaces like decks, floors, and tabletops. It holds far more stain than a brush and covers a lot of square footage quickly and evenly, which is why it’s the go-to for big jobs where a brush would mean constant re-dipping.
The one exception worth knowing: gel stain is thick enough that it doesn’t flow evenly off any bristle brush, natural or synthetic — the brush tends to drag it rather than release it. A folded rag or a foam pad consistently lays down a smoother, more even coat of gel stain than a brush does, regardless of bristle type. If you’re using gel stain, reach for a rag before you reach for a brush.
How to Match the Applicator to Your Project
Once you know your stain type, use the project itself to pick the specific tool:
| Project type | Recommended applicator(s) | Pro tip |
|---|---|---|
| Large flat surfaces (decks, floors, tabletops) | Staining pad, or a large natural/synthetic brush | Use the pad for the field and a brush to cut in the edges first. |
| Furniture with legs and spindles (chairs, tables) | Lint-free rag, small/medium brush | A rag wraps around rounded parts far better than a flat brush does. |
| Detailed or carved items (trim, picture frames) | Small artist’s brush, foam brush | Smaller tools give you the control to avoid pooling in tight corners. |
| General woodworking projects (bookshelves, cabinets) | 2–2.5 inch natural/synthetic brush, plus a rag | Keep a rag on hand the whole time to wipe off excess as you go. |
How to Load, Apply, and Avoid Brush Marks
Having the right brush only gets you halfway there — technique handles the rest.
- Test on scrap first. Try your exact stain and brush combo on an offcut of the same wood, or a hidden spot like the underside of a table, before touching the actual project.
- Don’t overload the brush. Dip only about a third of the bristle length into the can, then tap the excess off against the inside of the can — not the rim, which just pushes stain back down and wastes it.
- Always follow the grain. Long, even strokes in the direction of the grain help the stain absorb uniformly instead of pooling across it.
- Wipe off the excess. Stain colors the wood by soaking in, not by sitting on top of it. Apply to a section, wait the time listed on the can, then wipe off everything that hasn’t absorbed with a clean, lint-free rag — skipping this step is what causes a sticky, uneven film.
- Inspect a new brush before dipping it. Fan the bristles and tug gently, or tap the brush against your hand, to knock loose any factory hairs before they end up stuck in your wet finish.
Cleaning and Storing Your Stain Brush
A well-cleaned brush can last for years of projects, which makes cleanup worth the extra five minutes.
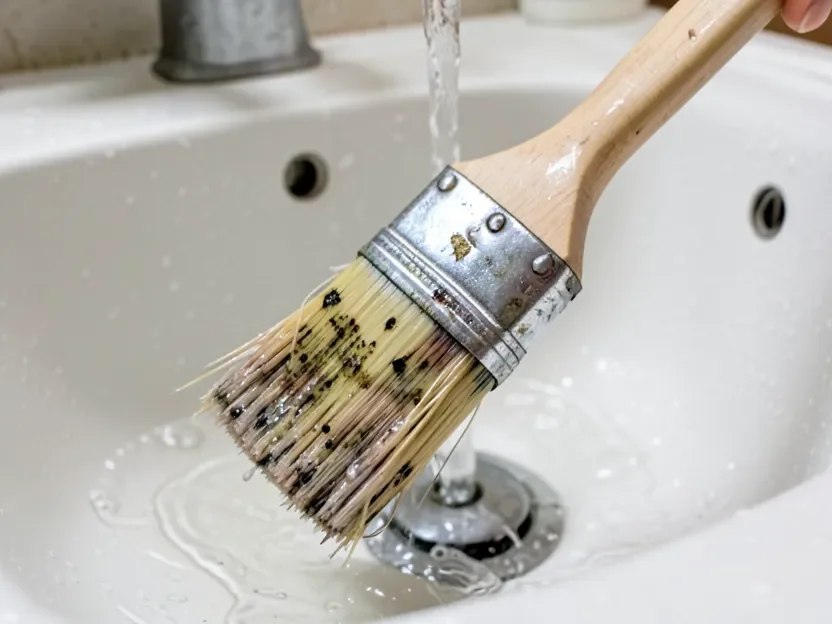
Cleaning Oil-Based Stain from a Brush
- Squeeze out as much excess stain as possible onto newspaper.
- Swish the brush in a jar of mineral spirits or paint thinner, working the bristles against the side of the jar.
- Repeat with fresh solvent until no more color comes out.
- Wash with warm, soapy water, rinse thoroughly, and shake out the excess.
- Reshape the bristles by hand and hang the brush to dry.
Work in a ventilated area and wear gloves. Oil-soaked rags can spontaneously combust as they dry, so dispose of both the used solvent and any rags according to your local household hazardous waste guidelines rather than tossing them straight in the trash — see the EPA’s household hazardous waste guidance for how to do it safely.
Cleaning Water-Based Stain from a Brush
- Squeeze out any excess stain.
- Rinse under warm running water.
- Work a little soap or detergent into the bristles with your fingers.
- Rinse until the water runs clear.
- Shake out the excess water, reshape the bristles, and hang to dry.
Storing a Brush So It Lasts
Never rest a brush on its bristles — that bends them permanently out of shape. Hang it from a hook or nail instead. If it came with a cardboard sleeve, keep it: once the brush is completely dry, sliding the sleeve back on keeps the bristles shaped correctly until the next project.
Frequently Asked Questions
Can I use a regular paint brush for stain?
Yes, as long as it’s the right bristle type for your stain’s base. Use a natural bristle paint brush for oil-based stain and a synthetic (nylon/polyester) paint brush for water-based stain — the same rule that applies to a dedicated stain brush applies to any paint brush.
What happens if I use a natural bristle brush with water-based stain?
The bristles absorb water from the stain, go soft and limp, and clump together. You lose all control over the stroke, and the result is a streaky, uneven finish.
Are expensive brushes really worth it for staining?
Usually, yes. A better brush holds more bristles that are shaped and set more precisely, holds more stain per dip, releases it more evenly, and sheds far less. You don’t need the top-of-the-line option, but avoiding the cheapest brushes on the shelf is worth the extra few dollars.
How many times can I reuse a staining brush?
A quality brush that’s cleaned thoroughly after every use can handle dozens of projects and last for years — see our full guide to cleaning stain out of a brush for the method.
Can I use a foam brush with oil-based stain?
You can for a small or quick job, but it’s not ideal — the solvents in oil-based stain can break down the foam over a longer project. Foam brushes work best with water-based stain or a fast touch-up.
What’s the best way to avoid brush marks in stain?
Start with the correct brush for your stain type, apply a thin coat with the grain, and then wipe off the excess with a clean rag after it sits for the time listed on the can. That last step matters most — stain gets its color from what soaks in, not what’s left sitting on the surface.
My brush is shedding bristles into the finish. What do I do?
Pull the loose bristle out immediately while the stain is still wet, using tweezers or the tip of a utility knife. To prevent it from happening again, comb through any new brush with your fingers and tug gently to remove loose factory hairs before you start.
The Bottom Line
Matching your brush to your stain isn’t a small detail — it’s one of the most effective, lowest-cost things you can do for a clean, professional-looking finish. Natural bristle for oil-based stain, synthetic bristle for water-based, and a rag or pad for gel stain or large flat surfaces. Get that one decision right, and streaky, blotchy stain jobs stop being a mystery.
Sponsored / affiliate links. As an Amazon Associate I earn from qualifying purchases. I may earn additional commission from eligible campaigns.