How to Line a Wooden Box With Satin (Without Glue Bleed-Through)
To line a wooden box with satin, wrap the fabric around thin card panels and glue the panels in, instead of brushing glue onto satin against bare wood. Satin shows every wet glue spot and wrinkle, so a panel lining hides the seams and lets you correct mistakes. This guide covers measuring, panel sizes, glue choice, satin versus velvet or felt, and fixes for bubbles and stains.
Materials You Need to Line a Wooden Box With Satin
 |
Best Fabric Glue Pick for Satin Lining Aleene’s Fabric Fusion Glue, 4 oz A water-based, low-odor fabric adhesive that dries clear, so it suits wrapping satin around card panels without a stiff or yellow glue line.
|
As an Amazon Associate we earn from qualifying purchases.
You do not need much, and most of it is already in a craft drawer. Buy a little more fabric than you think you need, because satin frays and a slipped cut cannot be undone.
- Satin fabric: about a quarter yard covers a small jewelry box or keepsake box. Polyester satin is cheaper and easier to cut than silk satin.
- Thin card: mat board, chipboard or 1/8 in foam core for the panels. Cereal-box card is too flimsy and will buckle.
- Fabric glue: a water-based fabric adhesive, plus a small foam brush or old credit card to spread it thin.
- Cutting tools: sharp fabric scissors, a metal ruler, a craft knife and a self-healing mat or scrap board.
- Measuring tools: a tape measure and a pencil, plus a square to check that panel corners are true.
- Fine sandpaper (180 to 220 grit): to knock off splinters and rough spots inside the box before any fabric goes in.
Satin comes in several weaves, and the choice matters for a lining. The table below compares the three you will find in most fabric shops.
| Satin type | Feel | Glue behavior | Best for |
|---|---|---|---|
| Silk satin | Softest, most luxurious | Marks easily; test glue on a scrap first | Heirloom or keepsake boxes |
| Polyester satin | Smooth, slightly stiffer | Hides glue better than silk, but can melt under hot glue | Most beginner projects and gift boxes |
| Charmeuse | Lightweight, drapes loosely | Thinnest of the three, so it shows the most glue | Boxes with padded panels |
Match the color to the wood. A cream or champagne satin looks calm in walnut or cherry, while deep burgundy or navy makes pale pine or maple look richer. If you are still building the box itself, our plans for a simple wooden box give you an interior that is easy to line because the walls are flat and square.
Panel Lining vs Gluing Satin Directly to the Wood
This is the decision that separates a clean lining from a messy one. Most quick tutorials glue fabric straight onto the wood. That works for felt, but satin is thin, shiny and slippery, so it shows every drop of glue and every ridge underneath.
| Method | Corners and seams | Glue bleed-through risk | Can you fix a mistake? | Best for |
|---|---|---|---|---|
| Card panels wrapped in satin | Sharp and even | Low, glue only touches the card | Yes, pull the panel and re-wrap | Satin, silk, velvet |
| Satin glued directly to wood | Often puckered at corners | High on thin satin | Rarely, fabric stretches when lifted | Felt and thick cotton |
| Adhesive-backed felt | Good if trimmed with a knife | None, no wet glue | Sometimes, before it bonds fully | Drawers and quick projects |
The panel method costs about ten extra minutes and removes most of the risk. It also gives the lining a little padding, which is why jewelry makers use it. Wrapping velvet around card has the same advantage, because velvet wrinkles badly if wet glue soaks into it.
How to Measure and Cut the Panels
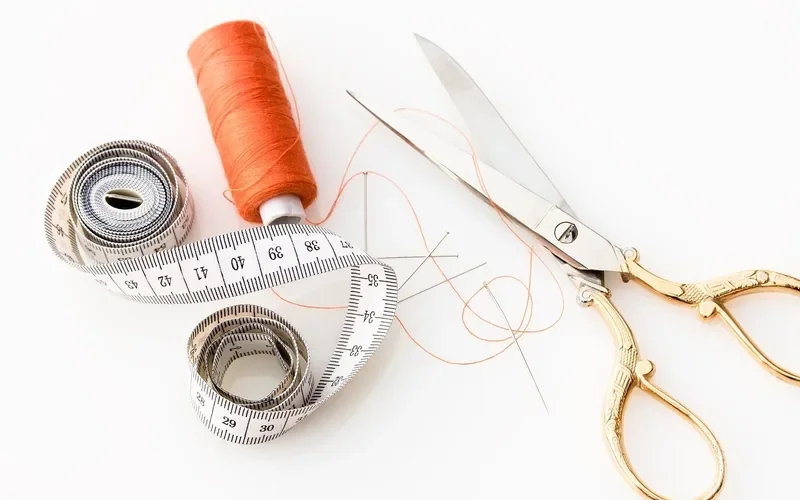
Measure the inside of the box, not the outside, at three points: length, width and depth. Wood boxes are rarely perfectly square, so measure each wall separately and write the numbers on the card as you cut.
Each layer of card plus satin takes up room. A reasonable starting allowance is about 1/8 in of total thickness per wall for thin card, and a bit more for foam core. Cut a test panel and check it against the box before cutting the rest. The worked example below uses a box with an interior of 8 in long, 5 in wide and 2 1/2 in deep. It is simple arithmetic to show the method, not measurements from a specific test.
| Panel | Rule | Cut size for the example box |
|---|---|---|
| Two long sides | Interior length minus 1/8 in, interior depth minus 1/8 in | 7 7/8 in x 2 3/8 in |
| Two short sides | Interior width minus 2 wall layers (1/4 in) minus 1/8 in clearance | 4 5/8 in x 2 3/8 in |
| Bottom (installed last) | Interior length and width, each minus 2 wall layers and 1/8 in clearance | 7 5/8 in x 4 5/8 in |
| Satin for each panel | Panel size plus about 1 in in each direction | Long sides 8 7/8 in x 3 3/8 in |
If the box has a hinged lid, measure the gap when the lid is closed. A lining that adds two layers of card and satin can stop a tight-fitting lid from closing flat, which is a common surprise. Wood finish thickness matters too, so it is worth reading how stains, oils and sealers cure before you commit to a lining.
Which Glue Works Best on Satin?
Use a glue that spreads thin, dries clear and does not soak through. Here is how the common options compare on satin specifically.
| Adhesive | Pros | Cons on satin |
|---|---|---|
| Water-based fabric glue | Dries clear, cleans up with water while wet, flexible | Slow, roughly 2 to 4 hours to dry; too much darkens the fabric |
| Hot glue | Grabs instantly | Lumps show through satin, and polyester satin can glaze or melt at high heat |
| Spray adhesive | Even coat on card panels | Overspray, strong fumes, and it can bleed through thin fabric |
| Double-sided tape or adhesive sheets | No wet glue, no stains | Less forgiving once pressed down |
| General craft glue | Cheap | Can stiffen and yellow, weaker bond to fabric over time |
Fabric glue is the safest all-round choice. According to the maker of Aleene’s Fabric Fusion, it dries in about two to four hours and is not recommended for felt. If you plan to use felt instead of satin, read our guide on whether you can glue felt and which adhesives hold it.
A quick test saves a ruined lining. Put a dab of glue on a scrap of the same satin, let it dry, and look at the front in daylight. If a dark ring shows, thin the coat or switch to double-sided tape on that fabric.
Step-by-Step: How to Line the Box With Satin
Follow these steps in order. The whole job takes about an hour of hands-on time plus drying, for a small box.
- Finish and cure the wood first: sand the inside lightly, wipe away dust and apply any finish. Let it cure fully before the fabric goes in, because wet or tacky finish can transfer smells and stains to the satin.
- Test-fit the card: cut the panels to the sizes worked out above and dry-fit them without fabric. Trim in 1/32 in steps until each one slides in without forcing.
- Cut the satin: lay each card on the wrong side of the fabric and cut about 1 in larger on every edge. Press the satin flat first if it is creased.
- Wrap each panel: put a thin coat of fabric glue on the back edge of the card only. Fold the satin over the edge, pull it snug and press it down. Leave the front face of the card unglued so nothing bleeds through.
- Fold the corners: fold each corner in like a gift wrap and trim any bulk. Bulky corners are what make panels sit crooked.
- Glue in the sides: spread a thin, even coat of glue on the box wall, not the satin. Press the long sides in first, then the short sides.
- Drop in the bottom: glue the bottom panel last so it covers the bottom edges of the side panels and hides any seam.
- Weight and dry: lay a book on the bottom panel and leave the box for at least four hours, or overnight, before closing the lid.
Watching the technique helps if you have never wrapped fabric around card. This short video shows a similar lining method from start to finish.
Satin, Velvet, Felt or Cotton: Which Lining Is Right?
A common claim is that satin absorbs moisture and protects valuables. It does not. Polyester satin is a synthetic and sheds water, and even silk only absorbs a little. Satin lines a box for looks and a soft, smooth surface. If you need scratch protection for jewelry, padded panels matter more than the fabric name.
| Lining | Look and feel | Glue behavior | Best for |
|---|---|---|---|
| Satin | Glossy, smooth, formal | Shows glue and wrinkles easily | Keepsake and gift boxes |
| Velvet | Deep, soft, hides fingerprints | Wrinkles if wet with glue, so use card panels | Jewelry and watch boxes |
| Felt | Matte, dense, forgiving | Soaks up glue, so spread lightly; some fabric glues exclude felt | Tool boxes, drawers, hobby boxes |
| Cotton | Plain, breathable | Easy to work, little bleed on medium weights | Sewing and craft boxes |
Keep silver away from fresh finishes. Solvent and oil fumes from a recently finished box, and acidic woods such as oak, can tarnish silver stored inside a lining. Let the finish cure and consider a sealed pouch for silver pieces. For more box ideas once the lining is done, browse our ideas for decorating wooden boxes.
Fixing Common Satin Lining Problems
| Problem | Likely cause | Fix |
|---|---|---|
| Dark, stiff glue patches on the satin | Too much glue or glue applied to the fabric face | Re-wrap the panel with new satin and glue only the back edge of the card |
| Wrinkles across the panel | Satin pulled unevenly or not pressed before wrapping | Lift a wet corner, re-smooth from the center outward, and weight it |
| Frayed edges showing at the corners | Satin cut too short, or raw edge left exposed | Fold the raw edge under the card, or add a thin ribbon trim |
| Gap between panel and wall | Panel cut too small or the card is warped | Cut a new panel 1/16 in larger, or add a strip of double-sided tape behind it |
| Lid will not close flat | Lining thickness exceeds the clearance | Swap thick foam core for thin mat board, or line only the bottom |
Care is simple. Dust the lining with a soft dry brush, blot spills without rubbing, and keep the box out of direct sun, which fades satin quickly. Most tutorials say to avoid water on satin, and spot-cleaning with a barely damp cloth is only worth trying on a hidden corner first.
Frequently Asked Questions
What glue is best for lining a wooden box with satin?
A water-based fabric glue is the safest choice because it spreads thin and dries clear. Apply it to the card panel edges and the box wall rather than the fabric face. Hot glue can melt polyester satin and lump up, and general craft glue can stiffen over time.
How do you line a box with satin without glue showing through?
Wrap the satin around card panels and glue only the back edge of the card, then glue the finished panel into the box. The wet glue never touches the front of the fabric. Test the glue on a scrap of the same satin first.
How much satin do I need to line a wooden box?
For a small jewelry or keepsake box, about a quarter yard is usually enough. Cut each piece about 1 inch larger than its panel on every side. Add extra for mistakes, because satin frays and cannot be re-cut once it is short.
Should you finish the wood before lining a box?
Yes. Sand the inside, apply any stain or sealer and let it cure fully before the lining goes in. A tacky or off-gassing finish can stain the satin and carry odors, and it is much harder to finish around fabric than bare wood.
Can I use velvet or felt instead of satin?
Yes. Velvet gives a deeper, jewelry-store look but wrinkles if soaked with glue, so use card panels. Felt is more forgiving and can be glued directly or bought adhesive-backed, but it soaks up glue, so spread it lightly.
Conclusion
A satin lining looks best when the fabric never touches wet glue. Cut card panels to fit, wrap them in satin, and glue the panels into a fully cured box, sides first and bottom last. Test your glue and your fit on scraps, and the result looks like a boutique piece rather than a craft project.
Sponsored / affiliate links. As an Amazon Associate I earn from qualifying purchases. I may earn additional commission from eligible campaigns.