Screws for Attaching Cabinets Together
For attaching cabinets face-to-face, use 2 1/2 inch cabinet screws (confirmat or particleboard screws) driven through pre-drilled clearance holes with a washer-head to spread the load — standard drywall screws strip out of particleboard and MDF cabinet sides because their thread pitch is too fine for engineered wood.
The failure point is almost always the pilot hole: too small and the screw splits solid-wood face frames, too large and it won’t grip particleboard or MDF sides at all — matching the screw and pilot-hole size to your specific cabinet material is what actually determines whether the joint holds.
Below, we cover which screw type to use for face-frame vs. frameless cabinets, correct pilot-hole sizing by material, and when to use cam locks or dowels instead of screws entirely.
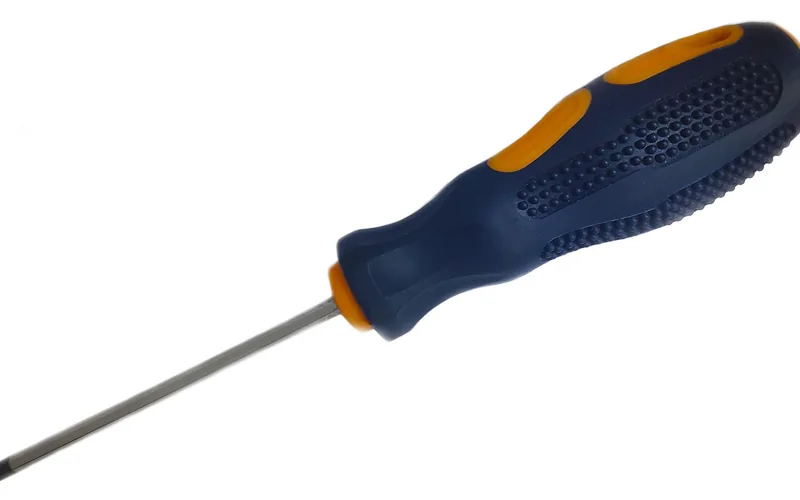
Types Of Screws For Cabinet Installation
Best Confirmat Screw Pick
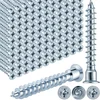
7mm x 50mm Confirmat Cabinet Screws, Flat Head, Zinc Plated
The standard size for joining particleboard or MDF cabinet carcasses — matches most flat-pack and frameless cabinet hardware.
- Best for: frameless (Euro-style) particleboard or MDF cabinet assembly
- Why we picked it: 7x50mm is the standard confirmat size most stepped drill bits and cabinet hardware are built around
- Main drawback: requires a dedicated stepped pilot bit, not a standard twist drill
Compare more cabinet fastening supplies
 Option 1 Power Pro #8 x 1-1/4″ Interior Wood Screws (242-Pack)
|
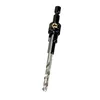 Option 2 7x50mm Confirmat Two-Piece Stepped Drill Bit
|
As an Amazon Associate we earn from qualifying purchases.
Cabinet installation requires the use of different types of screws to ensure a stable and secure connection. Understanding the various types of screws available can help in choosing the right one for the job. Here are the key types of screws commonly used for attaching cabinets together:
Wood Screws
Wood screws are versatile screws with coarse threads designed to provide a strong hold in wood materials. They are suitable for attaching cabinets made of solid wood or plywood.
Cabinet Screws
Cabinet screws are specifically designed for cabinet installation, featuring a flat head that sits flush with the surface. These screws are often used for securing cabinet hinges and handles.
Confirmat Screws
Confirmat screws are widely used in cabinet construction as they provide excellent holding power. These screws have large, coarse threads that offer strong resistance against pulling forces, making them ideal for assembling cabinets quickly and securely.
What Size Screw For Attaching Cabinets Together?
For face-frame cabinets (the style with a solid wood frame across the front), use #8 flat-head wood screws — typically 1-1/4″ to 1-1/2″ long — driven through one stile into the adjoining stile, penetrating at least 1″ into the second piece. For frameless (Euro-style) cabinets built from particleboard or MDF, the standard is a 7mm x 50mm confirmat screw driven into a stepped pilot hole; confirmat screws hold well in particleboard because their wide, unthreaded shank resists the material crumbling around a standard wood screw. Spacing both types roughly every 6-8 inches along the joint gives a stable connection without over-drilling the panel.
Cabinet Leg Leveler Screws
Leveler screws are a different fastener entirely from the joining screws above — they thread into a leg base or leveling foot mounted under the cabinet, not into the adjoining cabinet box. Most kitchen cabinet leveling legs use a coarse-thread screw sized to the leg manufacturer’s mounting plate (commonly 1/4″-20 or a proprietary thread), adjusted after installation to correct for an uneven floor rather than tightened for holding power like a joining screw.
Choosing The Right Screw For Your Cabinets
When it comes to assembling cabinets, selecting the appropriate screws is crucial for ensuring the structural integrity and longevity of the cabinetry. Choosing the Right Screw for Your Cabinets involves considering various factors such as the cabinet material, weight, and load capacity.
Considering Cabinet Material
The type of material used in your cabinets will dictate the type of screw needed for assembly. Wood cabinets may require different screws compared to metal cabinets due to variations in material density and strength.
Weight And Load Capacity
It is essential to take into account the weight of the cabinets and the items they will hold. Using screws with the appropriate load capacity ensures that the cabinets remain secure and stable, preventing any accidents or damage.
Preparation And Tools For Installing Cabinet Screws
When it comes to installing cabinet screws, proper preparation and the right tools are essential for ensuring a secure and long-lasting connection between cabinets. Measuring and marking accurately, as well as having the essential tools at hand, are crucial steps in the installation process.
Measuring And Marking
Before installing cabinet screws, it’s important to measure and mark the locations where the screws will be placed. Use a tape measure to determine the precise positions for the screws, ensuring they are evenly spaced for optimal support.
Essential Tools For Installation
Having the right tools for installing cabinet screws is fundamental to the process. The following tools are essential:
- Tape measure
- Pencil for marking
- Drill with appropriate drill bits (a two-piece stepped bit is required for confirmat screws specifically)
- Screwdriver or power screwdriver
- Level for ensuring the cabinets are installed straight
Step-by-step Guide To Installing Cabinet Screws
When it comes to the stability and durability of your cabinets, using the right screws is essential. In this step-by-step guide, we will walk you through the process of installing cabinet screws to securely attach your cabinets together. By following these simple steps, you can ensure that your cabinets will withstand the test of time.
Pilot Holes
To begin, it is important to create pilot holes before inserting the screws. Pilot holes help prevent the wood from splitting when you drive in the screws. Make sure to align the cabinets properly before drilling the pilot holes. Here’s how to do it:
- Measure and mark the location where you want to attach the cabinets together.
- Select an appropriate drill bit that is slightly narrower than the diameter of the screw you will be using — for a #8 wood screw, a 1/8″ pilot works for straight holes.
- Drill the pilot holes at the marked locations, ensuring that they are deep enough to accommodate the length of the screws.
- Repeat this process for all the areas where you will be attaching the cabinets together.
Countersinking
In addition to pilot holes, countersinking is another crucial step in properly installing cabinet screws. Countersinking helps to create a flush surface, where the screw heads sit below the wood’s surface, giving your cabinets a polished and professional appearance. Follow these simple steps to countersink your screws:
| Steps to Countersinking |
|---|
| Use a countersink drill bit that matches the diameter of the screw head. |
| Place the countersink drill bit into the pilot hole. |
| Drill gently until the head of the screw sits flush with the surface of the wood. |
| Repeat this process for all pilot holes. |
Securing Cabinets Together
Now that you have created pilot holes and countersunk the screws, you can start securing the cabinets together. It is recommended to have a helper to assist you in positioning the cabinets properly during this process. Follow these steps to securely attach your cabinets:
- Align the cabinets in the desired position, ensuring that they are level and flush.
- Insert screws into the pilot holes and drive them in using a screwdriver or drill with the appropriate drill bit.
- Tighten the screws until the cabinets are securely held together, but be careful not to overtighten as it may damage the wood.
- Double-check the alignment and positioning of the cabinets before you finish installing all the screws.
Troubleshooting And Tips For A Seamless Installation
Attaching cabinets together is a crucial step in any installation process, ensuring stability and durability for your cabinets. However, sometimes you may encounter issues that can disrupt the seamless installation process. Here are some troubleshooting tips and practical advice to help you overcome common obstacles and achieve a flawless attachment of your cabinets.
Dealing With Misaligned Holes
When aligning cabinets together, it’s essential that the pre-drilled holes line up perfectly. However, misaligned holes can occur, making it challenging to connect the cabinets securely. Here are a few tips to address this issue:
- Double-check measurements: Before drilling any holes, ensure accurate measurements and markings, following your cabinet installation plans meticulously.
- Use a pilot hole: If you encounter a misaligned hole, use a small drill bit to create a pilot hole slightly off-center. This method allows you to readjust the alignment and create a new hole that matches the adjacent one.
- Fill and redrill: In the case of major misalignments, you can fill the original hole with wood filler. Once dried, redrill the hole to the accurate position, ensuring a snug fit for the screw.
Ensuring Even And Tight Alignment
To achieve a seamless installation, it’s vital that your cabinets align evenly and securely. Here are a few tips to ensure even and tight alignment:
- Clamps: Use clamps to hold the cabinets in place while attaching them together. This ensures even alignment and prevents any shifting during the installation process.
- Countersink screws: To achieve a flush and seamless finish, consider using countersink screws. These screws have a tapered head that sits below the surface, providing a smooth and polished look.
- Check alignment with a level: After attaching each cabinet, use a level to ensure they are perfectly aligned both vertically and horizontally. Any inconsistencies can be adjusted before proceeding with the next cabinet.
- Tighten screws gradually: When securing the cabinets, tighten the screws gradually, applying equal pressure. This technique prevents any distortion or misalignment during the installation process.
By following these troubleshooting tips and implementing the suggested methods, you can overcome common challenges when attaching cabinets together. With attention to detail and a systematic approach, you’ll achieve a seamless installation that not only enhances the functionality of your cabinets but also adds aesthetic appeal to your space.

Frequently Asked Questions Of Screws For Attaching Cabinets Together
How Do You Attach Cabinets Together?
To attach cabinets together, use screws specifically designed for cabinet construction. Align the cabinets, drill pilot holes, and then secure them with screws. Make sure to use the right size and type of screws for the job to ensure a strong and secure attachment.
What Kind Of Screws Are Used For Cabinet Installation?
For cabinet installation, it is best to use wood screws or cabinet screws. These screws have a coarse thread and a sharp point, which makes them ideal for fastening cabinets to wood studs or frames. Make sure to choose the appropriate length and gauge of screws based on the thickness of the cabinet material.
How Many Screws Should I Use To Attach Cabinets Together?
The number of screws needed to attach cabinets together depends on the size and weight of the cabinets. As a general rule, use at least two screws for each joint or connection point. However, for larger or heavier cabinets, it is advisable to use additional screws to provide extra stability and support.
What Size Screws Do I Need For Kitchen Cabinets?
For face-frame cabinets, use #8 wood screws, 1-1/4″ to 1-1/2″ long. For frameless particleboard or MDF cabinets, use a 7mm x 50mm confirmat screw with a matching stepped pilot bit. Using the wrong type for the material — a standard wood screw in particleboard, for example — is a common cause of stripped or loosening joints.
Conclusion
When selecting screws for attaching cabinets, choose the right size and type for a secure installation. This ensures stability and longevity for your cabinets. Remember to consider strength, material, and compatibility when making your choice. Using the correct screws will guarantee a professional and durable cabinet installation for your space.
Sponsored / affiliate links. As an Amazon Associate I earn from qualifying purchases. I may earn additional commission from eligible campaigns.