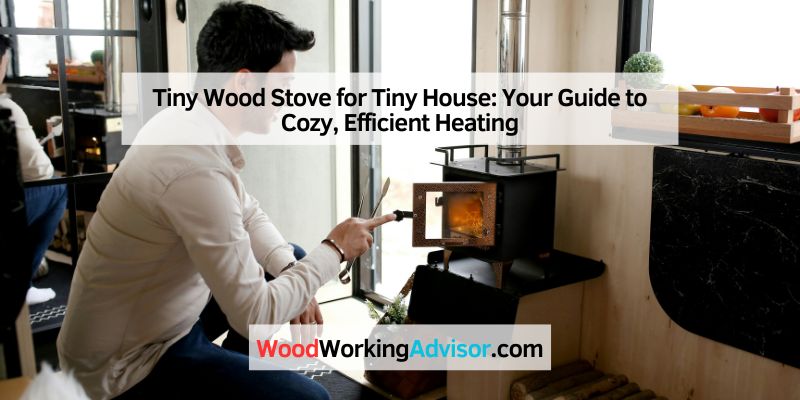
Tiny Wood Stove for Tiny House: Your Guide to Cozy, Efficient Heating
Hey there! If you’re diving into the world of tiny house living, you’ve probably dreamed of curling up in a cozy, warm space while the wind howls outside. I’ve been there, too, sitting in my own 300-square-foot tiny home, sipping coffee and basking in the glow of my tiny wood stove. There’s something magical about the crackle of a fire in a small space—it’s not just heat; it’s a feeling of home. When I first started researching tiny wood stoves for my own build, I was overwhelmed by the options and technical details. But after years of trial, error, and cozy evenings, I’ve learned what works and what doesn’t.
In this guide, I’m sharing everything I’ve discovered about choosing, installing, and maintaining a tiny wood stove for your tiny house. Let’s make your space warm, safe, and inviting!
Why Choose a Tiny Wood Stove for Your Tiny House?
When I moved into my tiny house, I knew I wanted a heating solution that was efficient, affordable, and charming. Tiny wood stoves checked all those boxes. They’re designed specifically for small spaces, delivering just the right amount of heat without overwhelming your home. Unlike electric heaters, they don’t rely on a power grid, which is a game-changer if you’re off-grid or want to cut energy bills. Plus, the ambiance of a flickering fire is hard to beat—my guests always comment on how it makes my tiny house feel like a real home.
These stoves are compact, often measuring just 12 to 20 inches wide, yet they pack a punch with heat outputs ranging from 5,000 to 40,000 BTUs. That’s perfect for tiny homes under 400 square feet. They’re also eco-friendly when you choose EPA-certified models, which burn cleaner and produce less smoke. For me, the decision came down to cost and independence. A cord of seasoned hardwood costs about $200-$300 in my area, far cheaper than running electric heat all winter. And with my solar setup, I didn’t want to drain my battery bank on heating.
But it’s not just about practicality. There’s a romance to a wood stove. On snowy mornings, I light a fire, and within minutes, my entire space feels like a warm hug. It’s a ritual that connects me to simpler times, and I know I’m not alone in loving that feeling.
Picking the Perfect Tiny Wood Stove
Choosing the right stove can feel daunting, but I’ve learned it’s all about matching your needs to the stove’s specs. When I was shopping, I focused on size, heat output, and features like cooktops or aesthetics. Here’s what you need to consider.
First, think about your tiny house’s square footage. My 300-square-foot home needed a stove with about 10,000-20,000 BTUs to stay comfortable in chilly New England winters. Oversizing can make your space too hot, while an undersized stove leaves you shivering. A BTU calculator tailored for small spaces helped me nail this down. Insulation matters, too—if your home has good insulation and minimal windows, you can lean toward a lower BTU output.
Next, check the stove’s dimensions. My favorite, the Dwarf 3kW from Tiny Wood Stove, is just 16 inches wide and fits snugly in a corner. If your space is super tight, like a 100-square-foot van conversion, look at models like the Cubic Mini Grizzly, which is only 11 inches wide. Clearance is another big deal. Most stoves need 8-18 inches of space from combustible materials like walls or furniture. Some, like the Kimberly stove, need just 6 inches, which saved me precious floor space.
Features are where things get fun. I opted for a stove with a cooktop so I could simmer soups or heat my kettle. Some models, like the Dwarf 5kW Cookstove Combo, even have a small oven for baking bread—perfect for off-grid living. Aesthetics matter, too. I chose a sleek, matte black stove to match my modern interior, but you can find vintage-inspired designs or colorful enamel finishes.
Here’s a quick comparison of popular tiny wood stoves I researched:
| Model | BTU Output | Dimensions (W x D x H) | Flue Size | Features | Price (Approx.) |
|---|---|---|---|---|---|
| Dwarf 3kW (Tiny Wood Stove) | 10,000-15,000 | 16” x 12” x 18.5” | 3” | Heat shield, compact design | $1,200 |
| Cubic Mini Grizzly | 6,000-14,000 | 11” x 12” x 10.5” | 3” | Secondary combustion, lightweight | $800 |
| Kimberly Gasifier | Up to 40,000 | 10” x 10” x 24” | 3” | EPA-certified, 8-hour burn | $4,000 |
| Jotul 602 | Up to 28,000 | 12” x 19” x 22” | 6” | Classic design, high efficiency | $1,500 |
Each has its strengths, but I went with the Dwarf 3kW for its balance of size, cost, and efficiency. Your choice depends on your budget, space, and whether you want extras like a cooktop or water boiler.
Installation: Getting It Right the First Time
Installing my wood stove was the most nerve-wracking part of my tiny house build. Cutting a hole in my roof felt like performing surgery on my home! But with careful planning, it was manageable. Here’s how I did it and what you need to know.
Safety is non-negotiable. Local building codes and the National Fire Protection Association (NFPA) set strict rules for clearances, hearth materials, and venting. I checked my town’s regulations and found I needed a non-combustible hearth pad (I used slate tiles) extending at least 18 inches around the stove. If your tiny house is on wheels, ensure the stove is bolted securely to the floor or chassis to prevent tipping during transit.
The flue system is the heart of your setup. I used a double-wall chimney pipe for safer, tighter clearances. A telescoping pipe was a lifesaver for my mobile tiny house—it extends when parked and retracts for travel. Chimney height matters, too. The “3-2-10 Rule” says the chimney should be 3 feet above the roof and 2 feet higher than anything within 10 feet. This ensures good draft and prevents smoke from re-entering your home.
Ventilation is another must. My tiny house is airtight, so I installed a direct air intake to feed the stove fresh air from outside. Without it, the stove can pull air from inside, creating negative pressure and sucking in smoke. I also added a carbon monoxide detector and smoke alarm for peace of mind.
If you’re not handy, hire a professional. My installation cost about $1,500, including the stove, flue kit, and labor. DIY can save money, but don’t skimp on quality parts. A poorly installed stove is a fire hazard. I learned this the hard way when I forgot to seal a flue joint, and smoke leaked into my living space. Lesson learned: double-check every connection.
Safety Tips to Keep Your Tiny House Secure
I’ll be honest—having an open flame in a tiny space scared me at first. But with the right precautions, my wood stove has been safe and reliable. Here are the safety tips I swear by.
Always burn seasoned, dry wood. Wet or green wood creates creosote, a tar-like buildup in your chimney that can catch fire. I store my wood in a covered shed and let it season for at least six months. Oak, maple, or hickory burn hot and clean, giving me the most heat with minimal smoke.
Clean your stove and chimney regularly. I empty the ash pan daily and have my chimney swept annually to remove creosote. A wire brush and glass cleaner keep the stove’s window sparkling, so I can enjoy the fire’s glow. Never leave the stove unattended while it’s burning, and don’t overload it—small, steady fires are safer than roaring ones.
Install a fire extinguisher within arm’s reach. Mine is mounted near my front door, and I check it monthly. A spark arrester on the chimney cap prevents embers from escaping, especially important if you’re parked near trees or dry grass.
Finally, test your smoke and carbon monoxide detectors monthly. I learned the importance of this when a friend’s detector caught a flue leak before it became dangerous. These small habits make a big difference in keeping your tiny house safe.
Maintaining Your Tiny Wood Stove
Maintaining my stove is like caring for a beloved pet—it needs regular attention to perform its best. Here’s how I keep mine in top shape.
Daily, I remove ashes from the pan with a metal scoop and dispose of them in a steel bucket. I let ashes cool for 24 hours before spreading them in my garden as fertilizer. Weekly, I wipe down the stove with a damp cloth and mild soap to remove soot and dust. The glass door gets a quick scrub with a specialized cleaner to keep it clear.
Every few months, I check the door and window gaskets for wear. These seals keep the stove airtight, ensuring efficient burning. Replacing them is easy and costs about $20. I also inspect the flue for cracks or rust and tighten any loose connections.
Once a year, I hire a chimney sweep to clean out creosote and check the flue system. It costs about $100 but prevents chimney fires and keeps the stove burning efficiently. If you notice the fire burning sluggishly or smoke leaking, it’s time for maintenance. My first winter, I ignored a slow draft and ended up with a smoky cabin—cleaning the flue fixed it instantly.
The Lifestyle of a Tiny Wood Stove
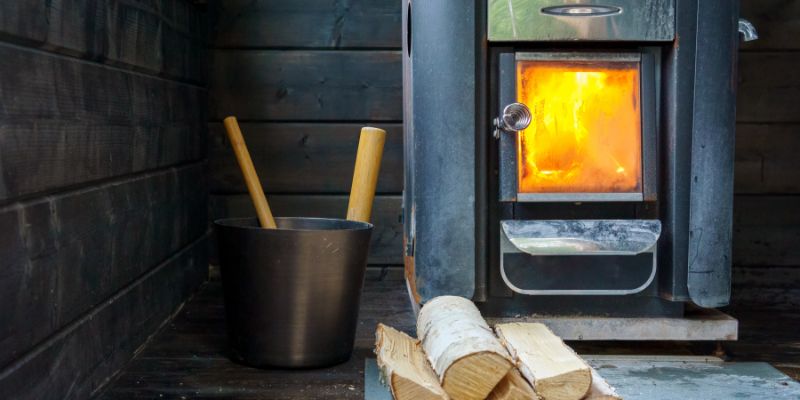
Living with a wood stove is more than just heating—it’s a lifestyle. I start my mornings by splitting kindling and stacking logs, which feels like a grounding ritual. The process of building a fire, from crumpled newspaper to a steady blaze, is oddly satisfying. It’s taught me patience and respect for the elements.
The stove also shapes how I use my space. I built a cozy nook near the stove with a small bench and cushions, perfect for reading or sipping tea. The heat radiates evenly, so my entire home feels warm, even in the corners. On cold nights, I dry my mittens or warm my coffee on the cooktop, adding a practical touch to the charm.
But it’s not all rosy. Chopping and storing wood takes time and space. I built a vertical wood rack under my stairs to save floor space, but it’s still a chore to haul logs in winter. And yes, the stove can make your space smoky if you don’t manage the fire properly. I learned to open the damper fully when starting a fire to avoid puff-back smoke.
Despite the work, the stove has become the heart of my tiny home. It’s where I gather with friends, share stories, and feel connected to my space. It’s a reminder that living small doesn’t mean sacrificing comfort—it means embracing what matters most.
Cost Considerations and Savings
When I budgeted for my wood stove, I was surprised by both the upfront costs and long-term savings. The stove itself cost $1,200, and the flue kit, hearth pad, and installation added another $800. If you’re on a tight budget, look for used stoves or DIY installation, but ensure they meet safety standards.
Ongoing costs are minimal. A cord of wood lasts me most of the winter, costing about $250. Compared to electric heat, which could run $50-$100 a month in my area, the stove paid for itself in two years. Plus, I qualify for a 30% IRS Residential Energy Tax Credit since my stove is EPA-certified, saving me $600 on my taxes.
The real savings come from off-grid living. With my solar panels and wood stove, I’m not tied to utility bills. That financial freedom lets me travel more and stress less about monthly expenses. If you’re in a rural area with access to free or cheap wood, the savings are even greater.
Design Ideas to Integrate Your Stove
A tiny wood stove isn’t just functional—it’s a design centerpiece. In my home, I made the stove a focal point by surrounding it with a stone hearth and a reclaimed wood mantle. It adds rustic charm without taking up much space. Here are some ideas to make your stove blend seamlessly with your tiny house.
Consider a wall-mounted stove to save floor space. Models like the Cottage Mini Soapstone Gas Stove can be hung on a bracket, giving you room for storage underneath. I’ve seen tiny homes with built-in benches or fold-down tables near the stove, creating a multi-purpose cozy corner.
For wood storage, get creative. I built a narrow shelf along the wall to stack logs vertically, which doubles as decor. Some folks use under-seat compartments or outdoor sheds to keep wood dry and out of sight. If your stove has a cooktop, add a small kettle or cast-iron pot to enhance the aesthetic.
Choose a stove that matches your style. My matte black Dwarf stove fits my minimalist vibe, but a colorful enamel stove could pop in a bohemian interior. Add a heat shield with tiles or stainless steel to protect walls while adding visual interest.
Environmental Impact and Sustainability
As someone who cares about the planet, I worried about the environmental impact of burning wood. But modern tiny wood stoves are surprisingly eco-friendly. EPA-certified models, like my Dwarf 3kW, burn cleaner, producing as little as 3 grams of emissions per hour. That’s a fraction of older stoves.
Using sustainable wood sources is key. I buy from local suppliers who harvest responsibly, and I avoid burning treated or wet wood, which releases harmful fumes. If you have access to fallen trees or reclaimed wood, you can further reduce your footprint.
The stove also supports my off-grid lifestyle, reducing my reliance on fossil fuel-based electricity. Paired with solar panels, it’s a low-impact way to stay warm. I feel good knowing my cozy fires aren’t harming the environment as much as traditional heating might.
Conclusion
Living with a tiny wood stove in my tiny house has been one of the best decisions I’ve made. It’s more than just a heat source—it’s the heart of my home, bringing warmth, charm, and a sense of independence. From choosing the right model to mastering the art of fire-building, I’ve learned that a wood stove is a commitment to a simpler, more intentional way of living. It’s not always easy—there’s wood to chop, ashes to clean, and safety to prioritize—but the rewards are worth it.
Every time I light a fire and feel the glow fill my space, I’m reminded why I chose this lifestyle. Whether you’re off-grid in a forest or parked in a suburban backyard, a tiny wood stove can transform your tiny house into a cozy haven. So, grab a cup of cocoa, start researching, and get ready to embrace the warmth of your own little fire.
FAQs
What size wood stove do I need for my tiny house?
It depends on your square footage and insulation. For a 200-400 square foot tiny house, a stove with 5,000-20,000 BTUs is usually enough. Use a BTU calculator to match your climate and insulation level. My 300-square-foot home stays toasty with a 15,000-BTU stove.
Are tiny wood stoves safe for mobile tiny homes?
Yes, if installed correctly. Bolt the stove to the floor or chassis, use a detachable chimney for travel, and ensure proper clearances. I secure my stove and remove the chimney extension when moving my tiny house on wheels.
How much does it cost to install a tiny wood stove?
Expect to spend $1,500-$3,000, including the stove, flue kit, hearth, and professional installation. DIY can cut costs to $800-$1,500, but safety is critical. My setup cost $2,000, including labor, and paid for itself in energy savings.
Can I cook on a tiny wood stove?
Many models, like the Dwarf 5kW Cookstove Combo, have cooktops or ovens. I use my stove’s cooktop for boiling water and simmering soups. It’s a great way to save space and add functionality.
How often should I clean my wood stove and chimney?
Empty the ash pan daily and clean the stove weekly with a damp cloth. Have your chimney swept annually to remove creosote. I learned the hard way that skipping this can lead to smoke issues!
Are tiny wood stoves environmentally friendly?
EPA-certified stoves burn cleaner, producing minimal emissions. Use seasoned hardwoods and source wood sustainably to reduce your impact. My stove’s low emissions and my off-grid setup make it a green choice for me.