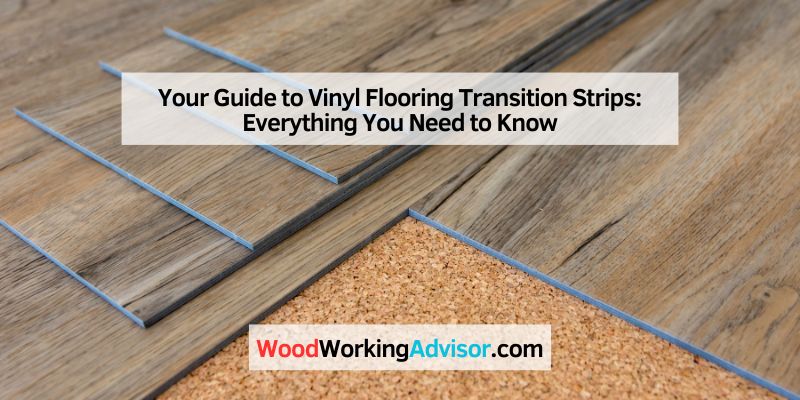
Your Guide to Vinyl Flooring Transition Strips: Everything You Need to Know
Hey there! If you’re installing vinyl flooring or upgrading your home’s floors, you’ve probably come across transition strips. These little pieces are game-changers for a polished, professional look. I’ve spent years working on flooring projects, from my own home to helping friends, and I’m excited to share what I’ve learned about vinyl flooring transition strips. Let’s dive into why they matter, how to choose them, and how to install them like a pro.
What Are Vinyl Flooring Transition Strips?
When I first started working with vinyl plank flooring, I noticed gaps and uneven edges where different floors met. That’s where transition strips come in. These strips bridge the gap between two types of flooring or different heights. Think of them as the glue that ties your rooms together visually.
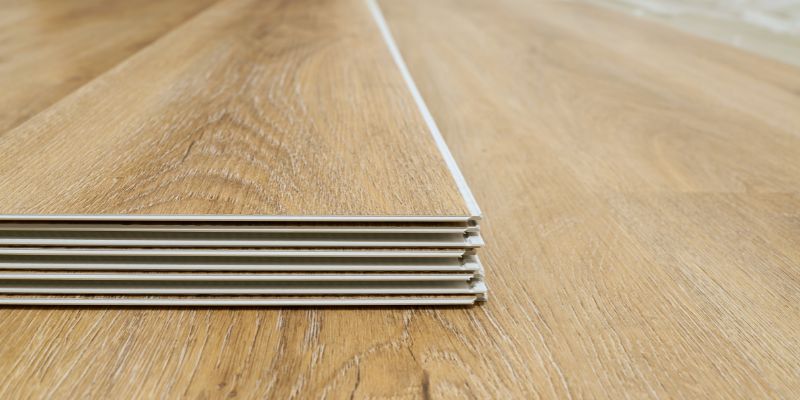
Transition strips are narrow pieces, usually made of vinyl, wood, or metal, that cover the edges where vinyl flooring meets hardwood flooring, laminate flooring, or even carpet. They protect the edges, prevent tripping, and make your floors look seamless. I remember installing my first strip between my kitchen’s vinyl plank flooring and the living room’s hardwood flooring. It was like adding the final piece to a puzzle!
There are different types of transition strips, like T-molding, reducer strips, and threshold strips. Each serves a unique purpose, which I’ll explain later. For now, know that they’re essential for flooring installation to ensure safety and style.
Why Do You Need Transition Strips for Vinyl Flooring?
Let me tell you about the time I skipped a transition strip in my hallway. The edge of my vinyl flooring started to lift, and it became a tripping hazard. That’s when I realized these strips aren’t just for looks—they’re practical too.
Here’s why you need them:
- Safety First: Uneven floors can cause trips. Transition strips smooth out height differences.
- Protecting Edges: Exposed flooring edges can chip or peel. Strips keep them safe.
- Aesthetic Appeal: They create a clean, professional look between rooms.
- Versatility: They work with vinyl plank flooring, hardwood flooring, or even tile.
I’ve seen flooring transitions make a huge difference in homes. Without them, your floors might look unfinished, like a cake without frosting.
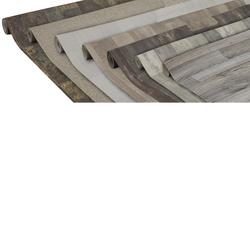
Types of Vinyl Flooring Transition Strips
When I started exploring flooring accessories, I was surprised by how many types of transition strips exist. Each one has a specific job. Here’s a breakdown of the most common ones I’ve used:
| Type | Purpose | Best For |
|---|---|---|
| T-Molding | Joins two floors of similar height | Vinyl flooring to hardwood flooring or laminate flooring |
| Reducer Strips | Connects floors of different heights | Vinyl plank flooring to tile or lower surfaces |
| Threshold Strips | Covers edges at doorways or room entrances | Transitions to carpet or exterior doors |
| Baseboard Strips | Finishes edges along walls | Where vinyl flooring meets walls |
| End Caps | Covers exposed ends of flooring | Edges near fireplaces or sliding doors |
- T-Molding: I used this in my living room where vinyl plank flooring met laminate flooring. It’s shaped like a “T” and sits snugly between two floors.
- Reducer Strips: These are great for slight height differences, like when I transitioned from vinyl flooring to a tiled bathroom.
- Threshold Strips: Perfect for doorways. I installed one at my front door, and it’s held up beautifully.
- Baseboard Strips: These go along walls to hide gaps. They’re like the cherry on top for a clean finish.
- End Caps: I used one near my fireplace to cap off the vinyl flooring edge.
Choosing the right strip depends on your flooring types and room layout. I’ll share more tips on picking the perfect one later.
How to Choose the Right Transition Strip
Picking the right transition strip can feel overwhelming, but it’s easier than you think. When I renovated my kitchen, I spent hours debating materials and colors. Here’s what I learned:
- Match the Material: If you’re using vinyl plank flooring, a vinyl strip blends best. For hardwood flooring, a wood strip looks natural.
- Consider Color: I always try to match the strip’s color to the darker flooring. It creates a smoother transition. For example, my oak hardwood flooring paired well with a slightly darker oak T-molding.
- Measure the Gap: Measure the height difference between floors. A reducer strip works for gaps up to ¼ inch, while T-molding is better for same-height floors.
- Think About Durability: Metal strips last longer in high-traffic areas, like hallways. I used an aluminum threshold strip in my entryway, and it’s still flawless.
Pro tip: Bring a flooring sample to the store. It helps you visualize how the strip will look in your space.
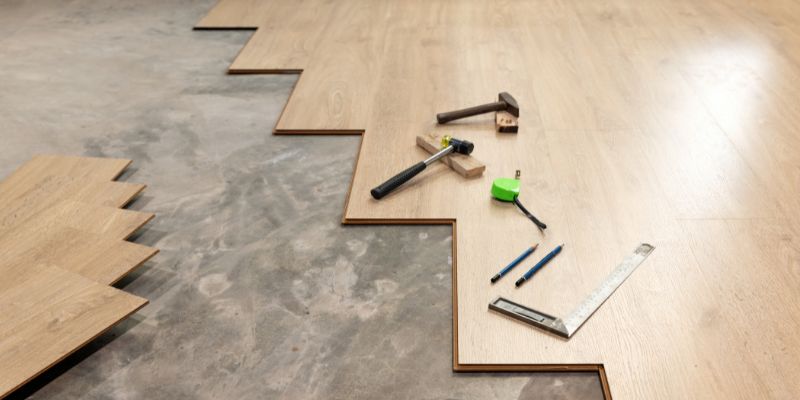
How to Install Vinyl Flooring Transition Strips
Installing transition strips is easier than it sounds, and I’ve done it enough times to share some tricks. Here’s a step-by-step guide based on my experience:
- Measure and Cut: Measure the gap where the strip will go. I use a tape measure and mark the strip with a pencil. Then, cut it with a miter saw for precision.
- Prepare the Area: Clean the floor thoroughly. Dust or debris can mess up the adhesive. I learned this the hard way when my first strip wouldn’t stick.
- Choose the Installation Method: Some strips use adhesive, others need screws or a track system. I prefer adhesive for vinyl plank flooring because it’s quick.
- Attach the Strip: For adhesive strips, peel off the backing and press firmly. For tracks, secure the track first, then snap the strip in place.
- Check Alignment: Make sure the strip sits flush. I use a level to double-check.
- Seal the Edges: Apply caulk around the strip for a polished look. This also keeps water out in wet areas like bathrooms.
I once installed a T-molding in my dining room in under 20 minutes. It’s that simple once you get the hang of it!
Common Mistakes to Avoid
I’ve made my fair share of mistakes with flooring installation. Here are some pitfalls to watch out for:
- Skipping Measurements: Always measure twice. A strip that’s too short looks sloppy.
- Ignoring Traffic Patterns: High-traffic areas need durable strips, like metal or heavy-duty vinyl.
- Poor Adhesive Choice: Use the right adhesive for your strip material. I once used the wrong glue, and the strip peeled up in a week.
- Not Matching Colors: A mismatched strip stands out like a sore thumb. Take time to find the right shade.
Learning from these mistakes has saved me time and money. Trust me, a little planning goes a long way.
Where to Buy Vinyl Flooring Transition Strips
Finding the right transition strips is easier than ever. I usually check these places:
- Home Improvement Stores: Home Depot and Lowe’s have a wide selection of T-molding, reducer strips, and more.
- Online Retailers: Amazon and Wayfair offer tons of options, often with customer reviews. I found a great threshold strip on Amazon for my bedroom.
- Flooring Specialty Stores: These stores carry high-quality flooring accessories and can match your vinyl flooring perfectly.
- Local Hardware Stores: Smaller shops sometimes have unique styles or custom-cut options.
I always compare prices and read reviews before buying. It helps me avoid low-quality strips that warp over time.
Maintenance Tips for Transition Strips
Once your transition strips are installed, keeping them in top shape is easy. Here’s what I do:
- Clean Regularly: Sweep or vacuum to remove dirt. I use a damp cloth for sticky spots.
- Avoid Harsh Chemicals: Strong cleaners can damage vinyl or wood strips. Stick to mild soap and water.
- Check for Wear: High-traffic areas might need touch-ups. I inspect my strips every few months.
- Reapply Adhesive if Needed: If a strip loosens, add a bit of adhesive to secure it.
I’ve had some threshold strips in my home for years, and they still look brand new with these simple steps.
Vinyl Flooring Transition Strips vs. Other Flooring Accessories
You might wonder how transition strips compare to other flooring accessories like baseboards or quarter-round molding. Here’s what I’ve noticed:
- Transition Strips: Focus on joining two floors or covering gaps. They’re functional and decorative.
- Baseboards: These line the walls, hiding gaps where vinyl flooring meets the wall. I use them for a finished look.
- Quarter-Round: Similar to baseboards but smaller, these are great for tight spaces.
In my home, I use a mix of baseboards and transition strips for a cohesive look. It’s all about finding the right balance.
Conclusion
After years of working with vinyl flooring, I can’t stress enough how much transition strips improve a space. They’re not just functional—they make your floors look professional and polished. Whether you’re connecting vinyl plank flooring to hardwood flooring or smoothing out a doorway with a threshold strip, these little pieces make a big impact. By choosing the right type, measuring carefully, and installing them properly, you’ll have floors that are safe, durable, and beautiful. So, grab your tools, pick the perfect T-molding or reducer strip, and give your home the upgrade it deserves!
FAQs About Vinyl Flooring Transition Strips
What Are Vinyl Flooring Transition Strips Made Of?
They can be made of vinyl, wood, metal, or composite materials. Vinyl is common for vinyl plank flooring because it blends well. Wood works great for hardwood flooring, while metal is durable for high-traffic areas.
Do I Need Transition Strips for Every Room?
Not always. You need them where different flooring types meet or where there’s a height difference. For example, I used a T-molding between my kitchen and living room but skipped it in a single-floor bedroom.
Can I Install Transition Strips Myself?
Yes! It’s a simple DIY project. With basic tools like a saw and adhesive, you can install transition strips in under an hour. Just measure carefully and follow the steps I shared earlier.
How Do I Match Transition Strips to My Flooring?
Take a sample of your vinyl flooring to the store. Match the color and material as closely as possible. I always choose a strip that blends with the darker floor for a seamless look.
Are Transition Strips Expensive?
They’re very affordable. Most transition strips cost $10–$50, depending on material and length. I’ve found great deals online and at local hardware stores.
Can Transition Strips Be Used with Carpet?
Absolutely. Threshold strips or carpet-to-vinyl strips work perfectly. I used one to transition from my vinyl flooring to a carpeted bedroom, and it looks great.
How Long Do Transition Strips Last?
With proper care, they can last years. My aluminum threshold strip has been in place for five years and still looks new. Regular cleaning and checking for wear keep them in top shape.