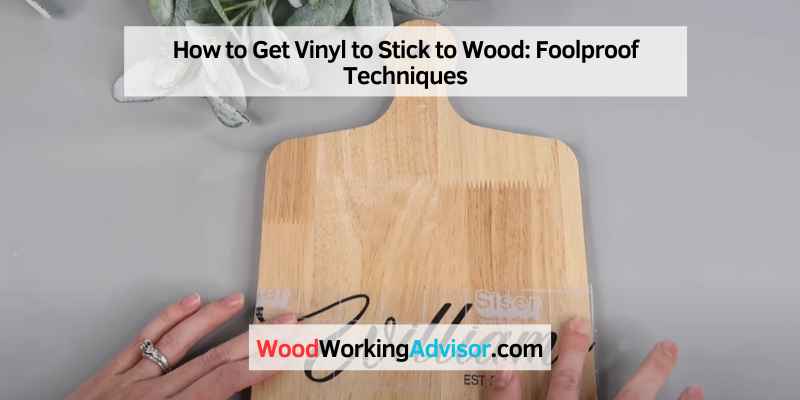
How to Get Vinyl to Stick to Wood: Foolproof Techniques
To get vinyl to stick to wood, follow these steps: clean the wood surface, apply heat with a heat gun or hairdryer, place the vinyl on the wood, and use a squeegee to press and smooth it down. Vinyl can stick to wood by properly preparing the surface and using heat and pressure to ensure a secure bond.
Unfinished, porous wood grips vinyl adhesive well on its own, but sealed or painted wood surfaces need light sanding first — vinyl adhesive bonds to the sealant layer instead of the wood underneath, and a smooth sealed surface gives it far less to grip, which is the main reason vinyl signs peel off finished wood within weeks.
Below, we cover surface prep for both raw and finished wood, the heat-and-pressure application technique, and how to seal the vinyl afterward for outdoor durability.
Preparing The Wood Surface
Getting vinyl to stick to wood requires proper preparation of the wood surface. By taking the necessary steps to clean and sand the wood, you can create a smooth and adhesive-friendly surface that will ensure a strong bond between the vinyl and the wood. In this blog post, we will guide you through the process of preparing the wood surface for maximum adhesion.
Cleaning The Wood
- Remove any dirt, dust, or debris from the wood surface using a soft cloth or brush. Be thorough in your cleaning to ensure the vinyl has a clean surface to adhere to.
- If the wood is stained or has any existing finish, use a mild cleaning solution such as soapy water to remove any grease or grime.
- Rinse the wood surface with clean water to remove any residue from the cleaning solution.
- Dry the wood surface completely before moving on to the next step.
Sanding The Wood
Note: Sanding is only necessary if the wood surface is rough or has imperfections.
- Start by using a coarse-grit sandpaper (around 60-80 grit) to remove any roughness or unevenness on the wood surface.
- Sand the wood in the direction of the grain using even strokes, applying firm but gentle pressure.
- After thoroughly sanding the wood with the coarse-grit sandpaper, switch to a finer-grit sandpaper (around 120-150 grit) to achieve a smoother surface.
- Continue sanding until the wood surface feels smooth to the touch and any visible imperfections have been eliminated.
- Remove any sanding dust or residue from the wood surface using a soft cloth or brush.
Once you have cleaned and sanded the wood surface, it is now ready for vinyl application. Properly preparing the wood surface will ensure the vinyl adheres securely, providing long-lasting durability and a professional finish. In the next section, we will discuss the next steps to take in order to successfully apply the vinyl to the wood surface.

Choosing The Right Vinyl
When it comes to getting vinyl to stick to wood successfully, one of the most crucial steps is choosing the right vinyl. This ensures that the adhesive sticks properly and the vinyl stays in place for years to come. In this section, we’ll discuss two important factors to consider when evaluating the vinyl quality and selecting the proper vinyl type.
Evaluating The Vinyl Quality
Before selecting a vinyl for your wood project, it’s essential to evaluate the quality of the vinyl. Here are a few aspects to consider:
- Durability: Choose a vinyl that is durable and can withstand the conditions it will be exposed to. Look for vinyl with high resistance to moisture, UV rays, and temperature changes, especially if the wood item will be placed outdoors or in areas with high humidity.
- Thickness: Opt for a vinyl that is thick enough to resist tearing and provide longevity. Thicker vinyl is generally more durable and less likely to show signs of wear and tear over time.
- Adhesive Strength: Make sure the vinyl has a strong adhesive backing that will adhere well to wood surfaces. Check reviews or consult with experts to find out if the adhesive is reliable and long-lasting.
- Color Fastness: It’s important to choose vinyl that will maintain its color over time. Look for vinyl that is fade-resistant and won’t discolor or dull when exposed to sunlight or other elements.
- Easy Application: Consider whether the vinyl is easy to handle and apply without any specialized tools or complicated instructions. A vinyl that is user-friendly makes the process much smoother and avoids unnecessary frustration.
Selecting The Proper Vinyl Type
Not all vinyl is created equal, and selecting the proper vinyl type for your wood project is vital. There are different types of vinyl available, each with its own characteristics and uses. Here are some popular options:
| Vinyl Type | Description |
|---|---|
| Permanent Adhesive Vinyl | This vinyl has a stronger adhesive that creates a permanent bond with the wood surface. It is ideal for long-term applications and can withstand outdoor conditions better. |
| Removable Adhesive Vinyl | As the name suggests, this type of vinyl can be easily removed from the wood without leaving any residue or damage. It’s suitable for temporary decorations or if you plan to change the design in the future. |
| Heat Transfer Vinyl | This vinyl requires the use of heat and pressure to adhere to the wood surface. It is commonly used for fabric applications, but it can also work well on wood if applied correctly. Heat transfer vinyl offers a wide range of colors and finishes. |
By selecting the appropriate vinyl type, you ensure that it meets the specific requirements of your wood project and enhances its overall appearance.
TOP PICK FOR VINYL ON WOOD
 ARTEZA self-adhesive vinyl sheets for wood projects
ARTEZA Self-Adhesive Vinyl Sheets
Waterproof adhesive vinyl that’s easy to weed and cut for signs, labels, and decor on wood.
- Best for: signs, wall art, and lettering projects on wood
- Why we picked it: waterproof finish holds up on indoor and outdoor wood pieces
- Main drawback: needs a clean, well-prepped surface to bond well
 TECKWRAP squeegee for vinyl decal application TECKWRAP squeegee for vinyl decal applicationVinyl Application Squeegee Presses out air bubbles without scratching the vinyl Check on Amazon |
 Clear transfer tape for applying vinyl letters and decals Clear transfer tape for applying vinyl letters and decalsClear Transfer Tape Lifts and places cut vinyl letters as one unit for even spacing Check on Amazon |
As an Amazon Associate, we earn from qualifying purchases.
Applying The Vinyl
Vinyl application on wood can be a tricky process, but with the right techniques, you can ensure a strong bond. Follow these steps to get vinyl to stick to wood effectively.
Measuring And Cutting The Vinyl
To ensure a smooth and seamless application of vinyl on wood, it is crucial to start with proper measurements and cutting. Here are the steps you need to follow:
- Clean the wood surface thoroughly to remove any dust or dirt that may prevent the vinyl from sticking properly.
- Measure the dimensions of the wood surface using a measuring tape. Make sure to account for any curves or edges if present.
- Transfer the measurements onto the vinyl sheet using a pen or a marker. Be precise and accurate to achieve the desired results.
- Carefully cut the vinyl along the marked lines using sharp scissors or a craft knife. Take your time to achieve clean edges and smooth cuts.
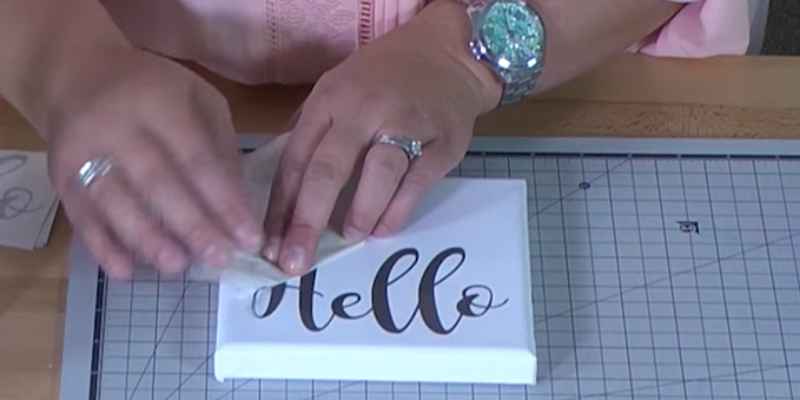
Using Transfer Tape
Transfer tape is an essential tool in the vinyl application process. It helps to move the vinyl from its backing paper onto the wood surface without any distortion. Follow these steps:
- Peel off the backing paper from the vinyl carefully, ensuring that the vinyl remains intact and does not fold or stick to itself.
- Place a piece of transfer tape over the vinyl, aligning it with one edge.
- Smooth down the transfer tape using a scraper or a credit card, starting from the center and moving outwards. This step removes any air bubbles and ensures a secure bond between the vinyl and the transfer tape.
- Gently lift the transfer tape, along with the vinyl, ensuring that the vinyl adheres to it without any issues.
Applying The Vinyl To The Wood
Now that you have prepared the vinyl and transfer tape, it’s time to apply them to the wood surface. Follow these steps for a successful application:
- Position the transfer tape with the vinyl over the wood surface, aligning it according to your desired placement.
- Press the transfer tape firmly onto the wood, starting from the center and moving towards the edges. Ensure there are no air bubbles or wrinkles.
- Use a scraper or a credit card to smooth out the vinyl onto the wood. Apply gentle pressure to ensure it adheres evenly.
- Peel off the transfer tape slowly and carefully, leaving the vinyl on the wood. Check for any areas where the vinyl may not have adhered properly, and press it down if needed.
Removing Air Bubbles
Air bubbles can be a frustrating obstacle when you’re trying to get vinyl to stick to wood. Not only do they detract from the overall appearance of the project, but they can also weaken the adhesive bond and cause the vinyl to peel off over time. Luckily, there are a few techniques you can use to remove air bubbles and ensure a smooth and long-lasting result.
Using A Squeegee
One effective method for removing air bubbles is by using a squeegee. This tool helps to evenly distribute the vinyl and push out any trapped air. Follow these steps:
- Carefully position the vinyl on the wood surface, leaving a small margin around the edges.
- Starting from the center and working outward, firmly press the vinyl onto the wood using the squeegee.
- Moving in smooth, overlapping strokes, apply even pressure to eliminate any air bubbles.
- Work your way from one end of the vinyl to the other, ensuring it adheres securely to the wood.
Poking With A Pin
If you still notice stubborn air bubbles after using a squeegee, another technique you can try is poking them with a pin. Here’s how:
- Identify the location of the air bubble.
- Take a pin and carefully pierce the vinyl in the center of the bubble.
- Gently press down on the surface to release the trapped air through the pinhole.
- Using your fingers or the squeegee, smooth out the area to ensure a tight bond between the vinyl and wood.
Remember, it’s crucial to take your time and work carefully to avoid damaging the vinyl or the wood surface. By using a squeegee and poking with a pin when necessary, you can remove air bubbles and achieve a flawless result when sticking vinyl to wood.
Sealing And Protecting The Vinyl
To ensure that vinyl sticks to wood effectively, it is crucial to seal and protect the vinyl surface. This can be achieved by applying a sealant or primer specifically designed for vinyl and wood surfaces, creating a strong bond that will last.
Properly sealing and protecting the vinyl will help prevent peeling or lifting, ensuring a durable and long-lasting finish.
Applying A Clear Protective Coating
Applying a clear protective coating is an essential step in ensuring the longevity and durability of your vinyl on wood. This coating acts as a shield, guarding the vinyl from potential damage caused by everyday wear and tear, spills, and changing weather conditions.
Before applying the protective coating, make sure the vinyl is completely clean and free from any dust, dirt, or debris. This will ensure a smooth and even application. You can wipe the surface with a mild soap and water solution or use a gentle vinyl cleaner specifically designed for this purpose.
Once the surface is clean and dry, it’s time to apply the clear protective coating. There are several options available, including polyurethane, varnish, or lacquer. These coatings are transparent and will not alter the appearance of the vinyl.
| Materials needed: | Instructions: |
|---|---|
| Polyurethane, varnish, or lacquer | 1. Ensure the vinyl is clean and dry |
| Clean cloth or brush | 2. Apply the clear protective coating in thin, even layers |
| Sandpaper (optional) | 3. Allow each layer to dry completely before applying the next |
Follow the manufacturer’s instructions for the specific type of coating you are using. If desired, you can lightly sand the surface between coats to ensure a smooth finish. However, be sure to wipe away any dust particles before applying the next layer.
Overall, applying a clear protective coating is a crucial step in sealing and preserving the vinyl on wood. Not only does it enhance the appearance of the vinyl, but it also protects it from scratches, stains, and fading, ensuring that your vinyl project remains vibrant and beautiful for years to come.
Maintaining The Vinyl
Maintaining the vinyl is key to ensuring its longevity and longevity. Here are some tips to keep your vinyl on wood looking its best:
- Regularly clean the vinyl surface with a mild soap and water solution or a vinyl cleaner formulated for wood surfaces. Avoid using harsh chemicals or abrasive cleaners that may damage or discolor the vinyl.
- Immediately wipe away any spills to prevent staining or damage to the vinyl. Use a soft cloth or paper towel to blot the area gently.
- Avoid placing hot objects directly on the vinyl surface as it can cause the vinyl to warp or melt. Always use coasters or trivets to protect the vinyl from heat.
- When moving furniture or objects across the vinyl surface, use protective pads or felt pads to prevent scratching.
- Regularly inspect the vinyl for any signs of wear or damage. If you notice any peeling or lifting edges, promptly repair them to prevent further damage.
- Lastly, avoid excessive exposure to direct sunlight, as it can fade the colors of the vinyl over time. Consider using window treatments or UV-protective coatings to minimize sun damage.
By following these maintenance tips, you can keep your vinyl on wood looking fresh, vibrant, and protected.
Frequently Asked Questions For How To Get Vinyl To Stick To Wood
Why Is My Vinyl Not Sticking To Wood?
Vinyl may not stick to wood for several reasons. Firstly, ensure that the wood surface is clean and free of dirt or debris. Secondly, make sure the wood is smooth and has no rough or uneven areas. Additionally, using a primer specifically designed for vinyl adhesion can improve the stickiness.
Lastly, applying the vinyl at the recommended temperature and ensuring proper pressure during application can also help it stick better to the wood.
How Do You Get Vinyl To Stay On Wood?
To get vinyl to stay on wood, follow these steps:
1. Clean and dry the wood surface thoroughly.
2. Apply a primer specifically designed for vinyl adhesion.
3. Use a strong vinyl adhesive or epoxy.
4. Press the vinyl firmly onto the wood and smooth out any air bubbles.
5. Allow the adhesive to fully dry before using or handling the vinyl.
What Can I Use To Stick Vinyl To Wood?
You can use adhesive sprays or double-sided tape to stick vinyl to wood. Make sure to clean the wood surface thoroughly before applying the adhesive. Press down firmly on the vinyl to ensure a strong bond.
Does Heat Help Vinyl Stick To Wood?
Yes, heat helps vinyl adhere to wood by softening the adhesive backing for a stronger bond.
How Do You Install Vinyl Letters Onto Wood?
Position the letter sheet with low-tack painter’s tape to set placement, then use transfer tape to lift each letter as one unit so spacing stays even. Press from the center of each letter outward with a squeegee, then slowly peel back the transfer tape at a low angle, checking that every letter released cleanly before removing it fully. Individual letters are easy to reposition if one lifts crooked — just don’t press the full sheet down before checking alignment.
Conclusion
To summarize, getting vinyl to stick to wood requires careful preparation and application. By following the step-by-step guide outlined in this post, you can achieve long-lasting adhesion and create stunning vinyl projects on various wooden surfaces. Remember to clean and sand the wood, use a high-quality adhesive, apply heat for better adherence, and ensure proper curing time.
With these techniques, you can enjoy beautiful vinyl designs that enhance your woodwork. Happy crafting!