What Are Jointers Used For? 4 Jobs, Settings and Safety
A jointer is used to make one face of a board flat and one edge straight and square to it. Everything else a jointer does, from cutting bevels to rabbets, is a variation on those two jobs. This guide covers the four things jointers are actually used for, the settings behind each one, how a jointer differs from a planer, and the safety limits that come from manufacturer manuals.
What Jointers Are Used For: The Short Answer
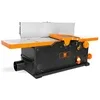 |
Best Benchtop Jointer Pick WEN JT630H 10-Amp 6-Inch Spiral Benchtop Jointer: $273.83 A compact way to do every job in this guide: face flattening, edge jointing and bevels, in a shop without room for a floor-standing machine.
|
As an Amazon Associate we earn from qualifying purchases.
A jointer has two flat tables with a cutterhead between them. The board rides on the outfeed table after it is cut, so the flat surface you create becomes the reference for the rest of the board. That is why a jointer can remove cup, bow and twist, and why the other tools in the milling chain depend on it. If you want the mechanics in detail, see our guide on how a jointer works. This page focuses on the jobs.
If you are still deciding whether to buy one, read do I need a jointer first. Confused by the name? Our joiner vs jointer page sorts out the mix-up.
The Four Main Jobs of a Jointer
| Job | What the jointer does | Key setting |
|---|---|---|
| Face jointing | Flattens one wide face of a board | Concave (cupped) side down, light cuts; Powermatic gives 1/8 inch as the maximum depth of cut |
| Edge jointing | Makes an edge straight and square to the flat face | Fence at 90 degrees; light cuts, 1/8 inch maximum (Powermatic) |
| Beveling | Cuts an angled edge | Fence tilted to the angle from a bevel gauge; Powermatic advises tilting it in toward the operator |
| Rabbeting | Cuts a step along an edge for a joint | Straight-knife cutterhead only on the Powermatic; 1/2 inch maximum rabbet depth |
Sources: the Powermatic 6-inch jointer operating manual and the Wikipedia jointer entry, both linked at the end.
1. Flattening a Face
Face jointing produces the first flat surface on a rough or warped board. Powermatic puts the purpose plainly: planing on a jointer is to produce one flat surface, and the other side can then be milled to final thickness on a thickness planer. For a cupped board its manual says to place the concave side down and take light cuts until the surface is flat.
2. Squaring an Edge
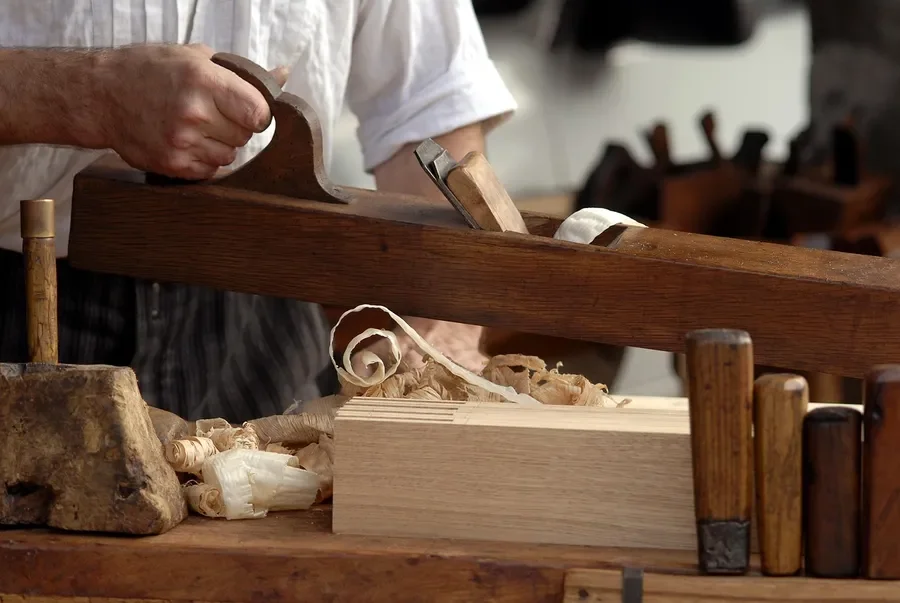
With one face flat, hold it against the fence and joint an edge. That edge is now straight and 90 degrees to the reference face. Edge jointing is what lets you glue boards edge to edge into a panel with tight seams. Two boards jointed the same way will meet cleanly, which is why jointers are so closely tied to glue-ups. Our guide to squaring rough lumber walks through the full face, edge, thickness sequence.
3. Cutting Bevels
Beveling is edge jointing with the fence tilted. The Powermatic manual describes it in exactly those terms and adds that the fence can be tilted in or out, though tilting it in toward the operator is recommended for safety. Set the fence from a bevel gauge, inspect the stock for soundness and grain direction, and start with a cut of about 1/16 inch.
4. Cutting Rabbets
A rabbet is a step cut along an edge to receive another board. This is a job many articles list for every jointer, but it is not universal. Powermatic states rabbeting can be done with the straight-knife cutterhead only and is not applicable to its helical cutterhead model. If you plan to rabbet, check your own manual before you buy a helical or spiral machine. Our helical vs spiral cutter head page covers the trade-offs of each head type.
Jointer vs Planer: The Myth That a Jointer Makes Boards Uniform
A common misconception, and one an earlier version of this article repeated, is that a jointer smooths boards to even thickness. It does not. Wikipedia is direct on this: a jointer cannot be used to create a board of even thickness along its length, and after jointing one face a thickness planer is used. The jointer makes the flat reference; the planer makes the second face parallel to it.
| Jointer | Thickness planer | |
|---|---|---|
| Main job | Flat face and straight, square edge | Uniform thickness, second face parallel to the first |
| Reference used | Its own outfeed table, set level with the cut | The bed; works best with a flat face down |
| Fixes cup and bow | Yes, on the face it cuts | Not on its own; needs a flat reference face |
| Order in milling | First | Second |
Skipping the jointer is possible with other methods, and we cover them in how to mill wood without a jointer and how to joint wood without a jointer. If you are comparing planers, see handheld vs benchtop planer.
What a Jointer Cannot Do
- Make thickness even. That is the planer’s job, as above.
- Handle boards wider than the cutterhead. Wikipedia lists home workshop models at 4 to 8 inches wide and industrial machines at 12 to 16 inches. The WEN featured above is a 6-inch machine, so a 10-inch board needs another method.
- Safely process short or thin pieces. See the limits below.
- Handle round stock. Wikipedia says round wood should never be jointed.
Jointer Safety Limits From Real Manuals
Jointers are among the more dangerous shop machines, and the published limits below come from a manufacturer manual and a woodworking safety guide. Numbers differ between sources, so treat the strictest one as your rule and read your own machine’s manual.
| Topic | Powermatic 6-inch manual | Fine Woodworking safety guide |
|---|---|---|
| Minimum stock length | Surfacing and beveling: over 12 inches; jointing: not shorter than 8 inches | Never joint stock under 12 inches long |
| Minimum thickness | Jointing: not under 1/4 inch; surfacing: not under 3/8 inch without a work-holding fixture | Edge: 1/4 inch; face: 3/8 inch |
| Push blocks | Use a hold-down or push block for stock under 12 inches long, 3 inches wide or 3 inches thick | Use paddles, push blocks and push sticks |
| Hand distance from cutterhead | Never closer than 3 inches | Keep hands 6 inches away |
| Depth of cut | Not over 1/8 inch for edging and surfacing | Under 1/16 inch for clear wood; under 1/32 inch for knotty stock |
⚠ Use the strictest number. The two sources disagree on hand distance (3 vs 6 inches) and depth of cut, so plan on 12 inches minimum length, 6 inches of hand clearance and light cuts. Sources: Powermatic manual, Fine Woodworking
Rules that appear in the sources
- Keep the cutterhead guard in place. Wikipedia calls a functional guard mandatory; Fine Woodworking says always have it on.
- Watch grain direction. Powermatic warns that to avoid kickback the grain must run in the same direction you are cutting, and to use a lesser depth of cut and slow feed on swirl grain or burls.
- Never put pressure on stock directly over the cutterhead. The Powermatic manual says this can tip the stock into the cutterhead along with the operator’s fingers.
- Move your hands one at a time. The manual says to move them in an alternating motion and never pass them directly over the knives.
- Let the cutterhead reach full speed before feeding, and stay focused on the machine.
Dust is a real problem too, since a jointer throws a lot of chips. See our home shop dust collector guide and our plans for shop-made push blocks, which can be adapted for jointer work.
Using a Jointer: Basic Order of Operations
- Inspect the board for loose knots, nails and grain direction.
- Joint the concave face first, with light passes until it is flat.
- Joint one edge with the flat face against the fence.
- Plane the second face parallel on a thickness planer (see what S4S lumber means for the finished result).
- Rip the second edge on a table saw, and you have four-square stock.
Frequently Asked Questions
What is the main use of a jointer?
A jointer flattens one face of a board and makes one edge straight and square to it. Those two flat references are what the rest of the milling process, and tight edge-glued panels, depend on.
Can a jointer make a board the same thickness?
No. A jointer cannot create a board of even thickness along its length. After jointing one face, you run the board through a thickness planer to make the second face parallel to it.
Can a jointer cut bevels and rabbets?
Yes for bevels: tilt the fence and joint the edge as usual. Rabbets depend on the machine. Powermatic says rabbeting is possible with its straight-knife cutterhead only, not its helical head, so check your manual.
How short can a board be for a jointer?
Sources differ: Powermatic lists 8 inches as the minimum for jointing and more than 12 inches for surfacing or beveling, while Fine Woodworking says never joint under 12 inches. Use 12 inches as the safe rule and push blocks for anything close to it.
Conclusion
Jointers exist to give you a flat face and a square edge, and they do those jobs better than any other machine. Pair one with a thickness planer, respect the 12 inch minimum length, use push blocks and keep the guard on. Sources used on this page: the Powermatic manual, Fine Woodworking’s safety guide and the Wikipedia jointer entry.
Sponsored / affiliate links. As an Amazon Associate I earn from qualifying purchases. I may earn additional commission from eligible campaigns.