
What Direction to Lay Wood Flooring: Expert Tips for a Flawless Installation
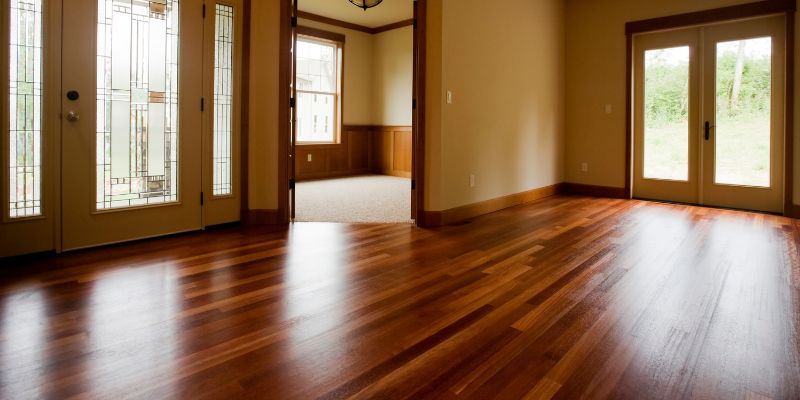
Lay wood flooring in the direction of the longest wall in the room for an aesthetically pleasing and visually elongating effect. When installing wood flooring, it’s important to consider the direction of the boards to create a cohesive and visually appealing look for your space.
By laying the boards parallel to the longest wall, you can enhance the sense of length in the room and create a more harmonious flow. This direction also allows the natural variation and patterns in the wood to be showcased in the best possible way.
Follow these guidelines to ensure a seamless and visually striking wood floor installation.
Considerations For Wood Flooring Installation
When it comes to installing wood flooring, one of the key decisions you’ll need to make is the direction in which to lay the planks. The direction of the floorboards can have a significant impact on the overall aesthetics and functionality of your space. In this article, we will explore some important considerations to keep in mind when deciding which direction to lay your wood flooring.
Choosing The Right Direction
The direction in which you lay your wood flooring can greatly affect the perception of the room’s size and shape. Here are some factors to consider when choosing the right direction:
- Room Shape: Take a close look at the shape of the room. If it’s a long, narrow space, laying the floorboards parallel to the longest wall can create an illusion of width. Conversely, in wider rooms, laying the planks perpendicular to the longest wall can add a sense of depth.
- Natural Light: Consider the direction of natural light in the room. Laying the floorboards perpendicular to the light source can enhance the natural lighting effect and make the space appear brighter.
- Traffic Flow: Assess how foot traffic moves through the room. Laying the wood flooring parallel to the main flow of traffic can create a sense of continuity and visually unify the space.
Factors To Keep In Mind
In addition to considering the layout and aesthetics, here are some additional factors to keep in mind when installing wood flooring:
- Existing Flooring: If you’re replacing old flooring, it’s often best to install the new wood planks in the same direction as the existing floor. This helps maintain a smooth transition between rooms and prevents the need for additional subfloor preparation.
- Structural Considerations: Ensure the wood flooring runs perpendicular to the floor joists for maximum structural strength.
- Doorways: Pay attention to doorways, as the direction of the wood flooring may need to change to accommodate different rooms. Aim for a seamless transition but be prepared to adjust the direction when necessary.
By carefully considering these factors, you can make an informed decision about the direction to lay your wood flooring. Remember, your goal is to create a visually appealing and functional space that complements the overall design of your home.
Installing Wood Flooring Parallel To The Longest Wall
When it comes to installing wood flooring, one of the most popular and visually appealing choices is to lay it parallel to the longest wall in the room. This method not only creates a sense of continuity but also enhances the overall aesthetics of the space. In this blog post, we will explore the benefits of parallel installation and provide you with a step-by-step guide to help you achieve professional-looking results.
Benefits Of Parallel Installation
Laying wood flooring parallel to the longest wall offers several advantages that make it a preferred choice among homeowners. Let’s take a look at some of these benefits:
- Optical illusion of a larger space: By running the planks parallel to the longest wall, you can create an optical illusion that makes the room appear larger than it actually is. This is particularly useful in smaller rooms or narrow hallways.
- Seamless flow: Parallel installation creates a seamless flow throughout the space, making it feel more open and cohesive. This is especially beneficial in open-concept layouts where multiple rooms are connected.
- Enhanced visual appeal: When the wood flooring is installed parallel to the longest wall, it draws the eye along the length of the room, emphasizing its proportions and adding a touch of elegance.
- Easier furniture placement: With the planks running parallel to the longest wall, it becomes easier to arrange furniture along the edges. There are no awkward cuts or transitions to deal with, creating a more harmonious layout.
Step-by-step Guide
Now that you understand the benefits of installing wood flooring parallel to the longest wall, let’s dive into the step-by-step process. Follow these instructions to achieve a successful installation:
- Prepare the subfloor: Ensure that the subfloor is clean, level, and free from any debris. Repair any sags, cracks, or uneven areas before proceeding.
- Acclimate the wood flooring: Allow the wood planks to acclimate to the room’s temperature and humidity for a few days. This will prevent any potential expansion or contraction issues later on.
- Start from a straight reference line: Measure the center of the longest wall and mark a straight reference line. This will serve as your starting point for laying the first row of flooring.
- Install the first row: Lay the first row of planks along the reference line, ensuring a tight fit between each piece. Use spacers to maintain a consistent expansion gap along the walls.
- Continue with subsequent rows: Install the subsequent rows following the manufacturer’s instructions. Stagger the end joints for a more natural and visually appealing look.
- Trim and finish: Once all the planks are installed, trim and finish the edges as required. Install the baseboards or molding to cover the expansion gap and complete the installation.
Following these steps will help you achieve a beautiful and professional-looking wood flooring installation that enhances the overall aesthetics of your space. Whether it’s a small room or a large open area, laying the planks parallel to the longest wall is a timeless choice that will never go out of style.
Installing Wood Flooring Perpendicular To The Joists
Installing wood flooring perpendicular to the joists is an important consideration. This technique provides stability and strength to the floor, ensuring a long-lasting and visually appealing result.
Installing wood flooring perpendicular to the joists is an important aspect of the installation process that can greatly impact the overall performance and durability of your floor. By following this method, you can ensure that the floorboards are properly supported and will have less risk of squeaking or warping over time. In this section, we will explore the benefits of perpendicular installation and provide you with a step-by-step guide to help you achieve the best results for your wood flooring project.
Benefits Of Perpendicular Installation
There are several benefits to installing wood flooring perpendicular to the joists. Firstly, it helps to distribute the weight of the floorboards more evenly, reducing the risk of sagging or unevenness in the long run. This is especially important if you have heavy furniture or appliances in your home. Additionally, perpendicular installation can minimize the chances of squeaky floors, creating a more peaceful and enjoyable living environment. By following this method, you can also maximize the stability of your wood flooring, ensuring that it remains in top condition for many years to come.
Step-by-step Guide
To install wood flooring perpendicular to the joists, follow these simple steps:
1. Prepare the subfloor: Ensure that the subfloor is clean, dry, and level. Remove any existing flooring and repair any damaged areas to create a smooth surface for the new wood flooring.
2. Find the direction of the joists: Use a stud finder or look for nails or other indicators to determine the direction of the joists in your subfloor. This will help you determine the direction in which you will lay the wood planks.
3. Plan your layout: Starting from a corner of the room, plan the layout of your wood flooring by measuring the width of the planks and the width of the room. This will help you determine whether you need to cut any planks to fit the space.
4. Acclimate the wood: Before installation, let the wood flooring acclimate to the room for at least 48 hours. This allows the planks to adjust to the temperature and humidity of the space, reducing the risk of expansion or contraction after installation.
5. Lay the vapor barrier: Install a vapor barrier or underlayment to protect the wood flooring from moisture and create a smooth surface for installation. Follow the manufacturer’s instructions for proper installation.
6. Start at the longest wall: Begin laying the wood flooring along the longest wall of the room, starting with a full plank. Use a tapping block and rubber mallet to connect the planks together tightly.
7. Continue the installation: Work your way across the room, staggering the end joints of the planks for a more natural look. Use a circular saw or jigsaw to cut planks to fit around doorways or other obstacles as needed.
8. Ensure a tight fit: As you install each plank, make sure it fits snugly against the previous row. This will help maintain a consistent and stable installation.
9. Trim the final row: Measure and cut the final row of planks to fit against the wall. Leave an expansion gap between the last row of wood flooring and the wall to allow for natural movement.
10. Connect the wood flooring to the baseboards: Install baseboards or quarter round molding to cover the expansion gap and provide a finished look to your wood flooring installation.
By following these steps and installing your wood flooring perpendicular to the joists, you can achieve a beautiful, stable, and long-lasting floor in your home. Enjoy the natural beauty and warmth that wood flooring brings to any space, knowing that you’ve completed the installation with care and attention to detail.
Conclusion
Choosing the right direction to lay wood flooring can greatly impact the overall appearance and functionality of your space. From enhancing the visual flow to accommodating natural light and traffic patterns, understanding these considerations is crucial. By aligning the planks with the longest wall or following the lines of the house, you can create a visually pleasing and seamless look.
Don’t forget to take into account the existing architectural features and personal preferences. With these factors in mind, you can confidently make the best decision for your wood flooring installation.