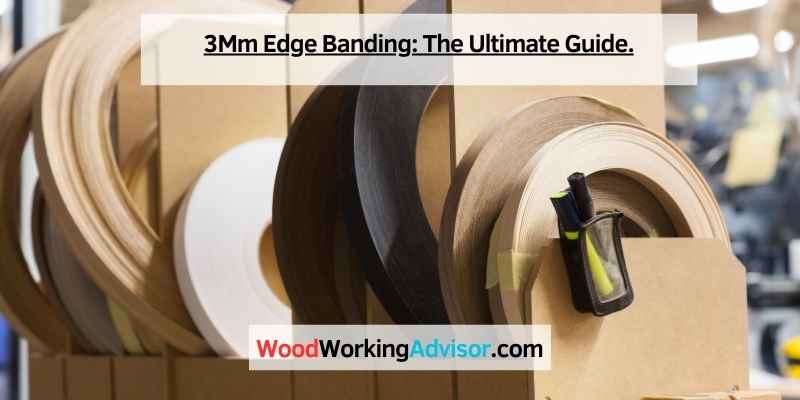
What Is 3mm Edge Banding Used For?
3mm edge banding is a thin material used to seal the exposed and visible edges of materials such as plywood, particleboard, and MDF. Edge banding can be made of various materials and comes in different widths.
Edge banding is an essential part of the woodworking and furniture industry as it enhances the durability, aesthetic appeal, and overall quality of the finished product. This thin strip of material is used to cover the exposed edges of wood-based boards such as plywood, particleboard, and MDF, which would otherwise be left bare and vulnerable to damage.
Edge banding adds extra protection against moisture, impact, and wear and tear, making the finished product more durable and long-lasting. There are different types of edge bandings such as PVC, veneer, ABS, and melamine that come in varying widths and thicknesses, including the popular 3mm edge banding.
Types Of Edge Banding
Edge banding is a popular material used to seal the exposed edges of wood and composite materials. The banding provides a clean finish while also protecting the material from damage. There are many different types of edge banding, but the most popular are PVC, veneer, ABS, and melamine. Each type of banding has its unique properties and advantages, and it’s important to choose the right one for your project.
Pvc Edge Banding
PVC edge banding is made from a plastic material, and it’s affordable, durable, and easy to work with. It’s available in many different colors and textures, making it a versatile choice for many applications. PVC edge banding is resistant to moisture, chemicals, and temperature changes, making it an excellent choice for both indoor and outdoor use. It can be applied using heat-activated adhesive or contact cement.
Veneer Edge Banding
Veneer edge banding is made from actual wood veneer, giving it a natural, authentic look. It’s available in many different species of wood, and it can be stained or finished to match the material it’s being applied to. Because it’s made from real wood, it can be sanded, stained, and finished just like the rest of the material. Veneer edge banding is typically applied using contact cement.
Abs Edge Banding
ABS edge banding is made from a thermoplastic material that’s similar to PVC. It’s a durable and flexible material that’s resistant to impact and chemicals. ABS edge banding is available in many different colors and textures, and it’s easy to work with. It can be applied using heat-activated adhesive or contact cement.
Melamine Edge Banding
Melamine edge banding is made from resin-impregnated paper, and it’s available in many different colors and patterns. It’s a durable and moisture-resistant material that’s suitable for use in kitchens, bathrooms, and other high-moisture areas. Melamine edge banding is typically applied using contact cement.
| Type of Edge Banding | Advantages | Disadvantages |
|---|---|---|
| PVC | Affordable, durable, versatile | Can yellow over time |
| Veneer | Natural, authentic look, can be finished like wood | Can be costly, not as durable as other types |
| ABS | Durable and flexible, impact and chemical-resistant | Not as heat-resistant as other types |
| Melamine | Moisture-resistant, available in many colors and patterns | Can chip or crack if exposed to impact |
- PVC, veneer, ABS, and melamine are the most popular types of edge banding.
- PVC edge banding is affordable, durable, and easy to work with, while veneer edge banding has a natural, authentic look.
- ABS edge banding is durable and flexible, while melamine edge banding is moisture-resistant.
- Each type of edge banding has its unique properties and advantages, and it’s important to choose the right one for your project.
Choosing The Right Edge Banding
Choosing the right edge banding is crucial to creating a polished and professional looking project. Edge banding is a thin material used to seal the edge of a surface, usually in woodwork or cabinetry. With an abundance of options for thickness, width, color, style, and installation method, it’s important to consider many factors to ensure that you select the right edge banding for your project.
Factors To Consider
Before purchasing edge banding, there are several factors to consider to ensure that you make the best choice:
- Thickness and Width
- Color and Style Options
- Installation Method
Thickness And Width
Edge banding thickness options can range from 0.5mm to 3mm, and widths can vary from 5/8 inch to 1-5/8 inch. It’s essential to choose the right thickness and width that will match the thickness of the board or project.
For instance, thicker edge banding is more durable than thinner ones, and it caters to high traffic areas, while the thinner ones are suitable for lower traffic areas. Additionally, the width of edge banding should also be considered. Make sure to choose the right width that will provide adequate coverage on the surface’s edge.
Color And Style Options
Edge banding comes in different colors and styles. It is essential to blend color and style with the project elements for the final outcome. A close match or contrast between the edge banding and the board or surface can make a significant difference. For example, choosing a complementary color for the edge banding draws attention to the project’s character, while a contrasting color adds depth and highlights the design.
Installation Method
Edge banding can be installed in different ways, including: pre-glued, hot melt, and iron-on. The installation method will depend on the board or surface type and the tools available. Pre-glued edge banding is an excellent option for projects that prefer a quick installation process since no extra adhesive is required.
On the other hand, hot melt installation provides a strong bond, especially in high traffic areas. It’s important to consider the installation method to ensure the best results for the application.
Overall, selecting the right edge banding requires careful consideration of several factors. By choosing the right thickness, width, color, style, and installation method, you can make sure that your project has the perfect finishing touch.
Best Practices For Installing Edge Banding
Edge banding is a thin material that is used to seal the exposed edges of wood-based materials. The process of installing edge banding can be a tricky one, but by following these best practices, the process can be simplified and more efficient.
Preparing The Surface
Before installing edge banding, it’s crucial to prepare the surface properly. The surface must be clean, smooth, and free of any dust or debris. Any rough edges must be sanded or smoothed out to ensure that the edge banding adheres well. It’s also important to select the correct edge banding material to ensure that it matches the surface material.
Cutting The Edge Banding
Cutting the edge banding to size is the next step after preparing the surface. It’s important to measure the length of the surface correctly to avoid any gaps or overlaps once the edge banding is installed. Use a sharp blade or scissors to make a clean cut. Additionally, a table saw can be used to cut the edge banding to a specific shape or length.
Applying Adhesive
Proper adhesive is important when installing edge banding. There are several types of adhesives available, including hot melt, contact, and pressure-sensitive adhesives. Ensure that the adhesive is compatible with both the edge banding and the surface material. Follow the adhesive manufacturer’s recommendations for application, and apply the adhesive evenly to the surface and the edge banding.
Applying Edge Banding
Once the adhesive has been applied, it’s time to apply the edge banding. Start at one end of the surface and align the edge banding with the edge of the surface. Apply pressure along the length of the edge banding to ensure that it adheres evenly.
It’s essential to maintain consistent pressure and speed during the application process to ensure that the edge banding is applied neatly and accurately. After installing the edge banding, trim any excess material, and make sure that the edges are smooth and uniform.
Conclusion
By following these best practices, installing edge banding can be a smooth and efficient process. Proper surface preparation, accurate measurement and cutting, proper adhesive selection and application, and careful installation techniques will ensure that the edge banding adheres well and looks neat and professional.

Tools And Materials Required For Edge Banding
Some materials and tools required for 3mm edge banding include a cutting machine, edge banding glue, edging tape, a heat gun, a trimming knife, and sandpaper for finishing. These items are essential for ensuring a smooth and professional-looking finish to your woodworking projects.
If you’re in the process of designing furniture or cabinets, you would need to pay attention to even the smallest details. This includes edge banding that will protect the exposed edges of the panels and give it a clean finish. The edge banding process demands certain essential tools and materials that you’ll need to complete it. Below are the main tools that you’ll need:
Edge Banding Tape
The first thing you would need is an edge banding tape that matches the color of the panel. These tapes usually come in rolls of different widths and lengths. They can be made of PVC, ABS, melamine, or veneer. PVC is the most common one found in the market.
Adhesive Applicators
After the edge banding tape is cut according to the required dimensions, you’ll need an adhesive to stick it to the panel. An adhesive applicator would come in handy to apply the glue accurately and evenly. You can choose from a manual, semi-automatic, or fully automatic applicator.
Joint Trimmers
A joint trimmer is used to remove the excess edge banding tape from the panel. It will give the edge a clean finish and make sure it doesn’t peel off from the panel. It can be a manual tool or a machine operated one, depending on the volume of work.
Hot Air Guns
The hot air gun is used to activate the adhesive on the edge banding tape so that it sticks firmly to the panel. It heats up the glue and melts it, making it tacky and ready to bond with the panel.
Sanding Tools
By using a sanding tool like a block sander or an orbital sander, you can smooth out the edges of the panel and the edge banding tape. This is a crucial step that will give the final product a clean, seamless appearance.
All of these tools and materials can be found at hardware stores or online marketplaces like Amazon, Woodworker’s Hardware, and Outwater. Having these tools handy will help you complete the edge banding process with ease and precision.
Where To Buy Edge Banding
Looking to buy 3mm edge banding? You can find a variety of options on Amazon, Woodworker’s Hardware, eBay, and Outwater. Other options include Etsy and AliExpress. com. Keep thickness and width in mind when selecting the best edge banding for your project.
Amazon
Amazon is one of the most trusted online shopping websites in the world, and it offers a wide range of 3mm edge banding at competitive prices. You can choose from ABS, PVC, melamine, and many other types of edge banding materials. Amazon has many sellers with different return policies, so be sure to check the product details before purchasing.
Ebay
eBay is another great option to buy 3mm edge banding, and it has many sellers with competitive pricing. You can find different edge banding materials like PVC, veneer, ABS, and melamine on eBay. However, you must check the seller’s rating and return policy before purchasing.
Woodworker’s Hardware
Woodworker’s Hardware offers a vast selection of 3mm edge banding materials, including PVC, veneer, and polyester. They have an easy-to-use website with many cross-referencing manufacturers and an excellent return policy.
Outwater
Outwater is a great place to buy 3mm edge banding. They have a vast selection of materials, including PVC, veneer, ABS, and melamine, with many colors and finishes. They also offer free samples before buying to help you choose the perfect match for your project.
Westlund Distributing Cabinetry Supplies
If you’re looking for quality 3mm edge banding, you can check Westlund Distributing Cabinetry Supplies. They provide PVC, veneer, melamine, and ABS edge banding with quality adhesive. They have a 30-day no-hassle return policy and offer free shipping on orders over $250.
Aliexpress
If you prefer international purchasing, AliExpress has many sellers with competitive prices for 3mm edge banding. However, be sure to check the shipping costs and estimated arrival before purchasing.
Etsy
Etsy is a great place for handcrafted items, and you can find 3mm edge banding here as well. Sellers on Etsy provide different materials like PVC, veneer, and ABS edge banding in unique designs and finishes.
Frequently Asked Questions For 3mm Edge Banding
What Is The Difference Between 3mm And 1mm Edge Banding?
3mm and 1mm edge banding differ in thickness. 3mm is thicker and offers greater durability, while 1mm is thinner and more flexible. The choice depends on the specific use and the desired aesthetic.
How Thick Can Edge Banding Be?
Edge banding can vary in thickness depending on the material used, ranging from 0. 5mm to 3mm. PVC and ABS edge banding typically ranges from 0. 5mm to 3mm, while veneer and melamine edge banding is usually 0. 6mm to 2mm thick.
The thickness of edge banding is determined by the material and the application it’s being used for.
What Are The Widths Of Edge Banding?
The widths of edge banding can vary depending on the material used. PVC, veneer, ABS and melamine are popular types. The thickness of edge banding can range from 1mm to 3mm.
What Are The Three Types Of Edge Banding?
The three types of edge banding include PVC, veneer, ABS, and melamine.
Conclusion
3mm edge banding is an ideal material for sealing and edging cabinet doors, drawers, and shelves. It comes in a variety of materials such as PVC, veneer, ABS, and melamine. With proper installation, it can enhance the aesthetic value of your cabinetry.
Whether you are a professional woodworker or a DIY enthusiast, you can find this product in different sizes, colors, and adhesive types from various online stores and distributors. Make sure to choose the right thickness and width that suits your project requirements.