How Do You Get Dents Out Of Finished Wood?
You have got your hands on the new sets of furniture. During or after the installation, you see some dents on the furniture. What do you do now? How do you get dents out of finished wood? Becoming upset after seeing this kind of thing is normal.
I am not going to discuss it. I will discuss what you should do in this particular situation. Regardless of the cause or type, you will be able to get out of the situation if you follow my instructions. I will talk about all these in this article. So, without wasting any more seconds, let’s get to the article.
Ways To Get Dents Out Of Finished Wood: Methods For Specific Situations
In general, there are two types of dents. Small and Large. For these two types, you have to follow two main methods:
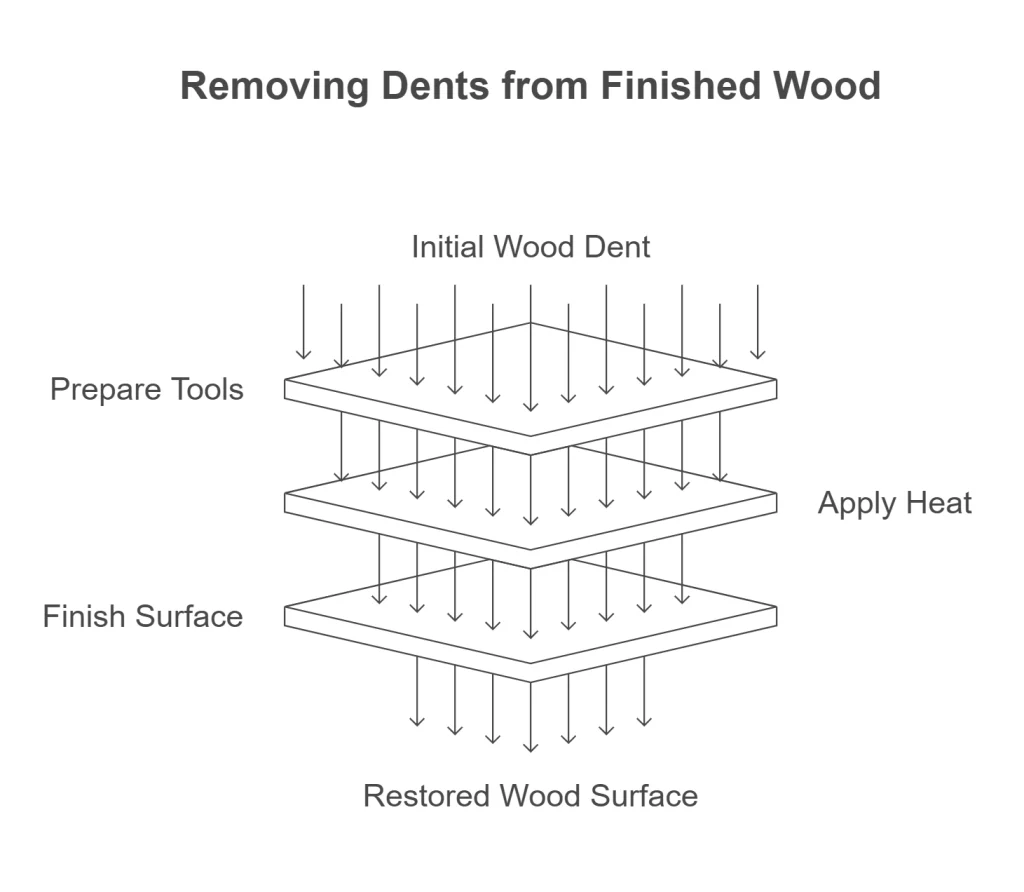
- Method To Follow For Small Dents: The Steam Method
If you find small dents in your finished wood, follow the stream method:
Step 1: Gather All The Required Things
You will just need the following items:
i. Water
ii. A steam iron
iii. A rag or towel
iv. Sandpaper
Step 2: Place A Towel Or A Rag On The Surface Of The Dent
It is a precautionary step to protect the furniture. Small or temporary dents are fixable. But if you somehow manage to deal permanent damage to your furniture, there is no coming back. For this reason, you have to place a towel or an ironing board on the surface over the dent’s position.
Step 3: Turn The Iron To ‘Steam’ Setting
Now, take the steam iron and turn it to the ‘Steam’ setting. If you have a steam control, set it to medium-high. If you don’t have any steam control, keep it at the highest setting but don’t go for dry heat.
You can use dry heat for large dents but not on delicate surfaces, such as finished wood. There is a high risk of permanently damaging your furniture.
Step 4: Prepare The Iron
Place the hot iron face down on a thick cloth or towel and leave it there for about 30 seconds so that it gets hot enough to produce sufficient steam to remove the dent from your furniture.
Don’t place the iron directly onto the dent because it could damage your furniture permanently. And I am sure you definitely wouldn’t want that!
Step 5: Place The Hot Iron Over The Dent
Once the 30 seconds are up, press the iron directly onto the dent using firm pressure by rotating it around in a circle while continuously steaming it for about 10-15 seconds.
Or, press the iron until you feel that there is no more steam coming out of the fabric and also keep checking if there is any improvement on your furniture’s dent.
Step 6: Remove The Iron
The moment you are convinced that you don’t need any more heat, take the iron off of your furniture. Placing the iron over your furniture for an indefinite period is also a bad thing. That is why you need to take the iron off as soon as you are pleased with the steam.
Step 7: Do The Finishing
Now is the time to finish things off. Try to get sandpaper that is lower than 120 grit. If you don’t know what sandpaper you should get, just ask the shopkeeper. He will tell you which one is best for your furniture.
Gently sand the furniture. Don’t press the sandpaper too hard on your furniture. It may cause further issues. Continue doing so until you are happy with the finish.
- Method To Follow For Large Dents: The Wood-Putty Method
I have discussed the most effective way to remove small dents from your furniture. Now is the time to discuss the method to follow for large dents:
Step 1: Prepare The Work Area
First, remove the finish from the spot where the dent has appeared. Do this with a sharp chisel, or you can use a utility knife too. If you use a utility knife, you need to be very careful not to cut into the wood itself. Because, If you do that, what is the point of repairing the finished wood in the first place?
Step 2: Fill The Large Dent With A Mix
The next step is to fill the dent with a wood-putty that is color-matched to your furniture. Once you have done this, leave it for 24 hours so that the putty can dry properly. Don’t try to hurry. You have to at least give this much time to your dent to heal. Otherwise, the fill won’t be strong.
Step 3: Do The Sanding
Now, sand down the putty until it is flush with the rest of the finish, and make sure that there are no dips or bumps. Yes, you have to press the sandpaper. But don’t over-press. In that case, you won’t be able to measure properly how much you have flushed or how much you still need to.
Step 4: Apply Varnish
The last step is to apply a new coat of varnish over the spot where you have applied wood-putty. Applying a new coat of varnish will make it look like you have brand new furniture that has just come out of the showroom. Give some time to the varnish to do its thing. After that, you are ready to use your furniture again!
Alternative To Follow To Get Rid Of Dents: Application Of Ice Cube
I have discussed two specific methods for two different kinds of dents. What if you don’t have the item(s) to do the fixes? What should you do in that particular situation? Don’t worry. I have also gathered an alternative.
Apply ice cubes to the cloth if you don’t have an iron. The cold temperature causes the fibers of the wood to compress, which helps pop out dents. Place a few drops of water on the dent if it’s very small, such as a dent made by a hammer or screwdriver.
The moisture swells and expands compressed fibers in the wood to help pop out dents in finished wood furniture and trim. After a few hours of the application of the ice cube, the ice will melt to water, and the wood will expand.
You’ll need to let it sit for about eight hours before you can remove the moisture. Try blotting the area with a dry rag if there is any excess water, but don’t rub too hard, or you could make matters worse.
Once the water has dried, take a hairdryer and blast some heat on the dent for about 20 seconds or so. It should make the wood expand, thus filling in the dent.
And you should already know the finishing procedure of sanding and flushing. Get a proper finish to make your furniture look brand new again.
Types Of Dents On Finished Wood:
When it comes to dents in the finished wood, there are two types: shallow dents, and deep dents. A shallow dent is a minor depression that can be repaired with either a steam iron or a hairdryer.
A deep dent is when the wood fibers have been compressed past the point of no return. These are called “compression dents,” and they generally cannot be fixed without applying stains and refinishing the area.
Deep dents in wood floors typically occur when heavy furniture or big appliances like refrigerators are moved from one place to another. Sometimes, heavy foot traffic can also cause this type of damage.
The most common type of dent, on the other hand, occurs when a heavy object falls on the floor or when someone accidentally drops something on it.
Either way, you can repair most minor dents yourself with just a few simple tools and some elbow grease. So, you don’t need to worry just because of the dents. I am assuring you about this.
Causes Of Dents On Finished Wood: Know-How
The causes of dents on finished wood are many. For example, the most common cause is the accidental dropping of a heavy object, such as a toolbox or a piece of furniture, or anything else that falls on the floor.
In addition to this reason, there are several other causes of dents in the wood. The following paragraphs will discuss these reasons and how to repair them.
- Fall Of Heavy Objects:
Heavy objects that fall on the floor can cause a dent in the wood. This may occur when you are moving around or while carrying a heavy object. To avoid these types of dents, you should use caution when carrying heavy objects such as tools and furniture.
Also, make sure that you move around carefully so that you will not accidentally drop a heavy object onto your newly installed hardwood floors.
- Someone Walking Over With Metal Stud Shoes:
Another reason for dents in hardwood is if someone has walked over them with shoes or sandals that have metal studs in them. These studs can easily dent your new hardwood flooring if they come into contact with it.
To avoid this situation, you should wear shoes without metal studs when working on your newly installed hardwood floors.
- Heat From Another Object:
A dent can also happen due to the heat from another object, such as an iron or hot beverage. The heat will soften the finish and allow it to indent under pressure. In this case, you will find a ring or circles around where the heat source was placed.
- Water:
You may be surprised to hear this. But trust me, water can also create dents in finished wood surfaces if allowed to sit for an extended period. Water will not damage most finished wood surfaces unless leftover time because it evaporates quickly.
This is one reason why you should always wipe up spills immediately. This will prevent water from settling into your furniture’s finish and causing damage over time.
- Insects:
Carpenter bees are the most common insect that causes dents on finished wood, but they don’t sting or feed on wood. They bore through the wood to lay eggs, which is how they cause dents in the surface of your furniture or floorboards.
The best way to get rid of them is to first locate their nests, fill the holes with a mixture of steel wool and wood glue or a borate spray solution. After applying the borate spray, wipe it off with a clean rag, so it doesn’t stain the surface of your flooring or furniture.
6 Tips To Prevent Dents On Finished Wood:
It’s not surprising that you’re worried about dents. Dents are a common annoyance that owners of real wood furniture face. You should be worried before instead of searching for “how to get dents out of finished wood.”
I can’t guarantee the prevention of dings and dents, but I have a few tips that may help you protect your new furniture by minimizing the risk of damage. I have heard from many customers that they got success using these tricks to prevent or reduce the appearance of dings and dents in their finished wooden furniture.
Tip-1: Keep fabric-covered items off your furniture as much as possible. Some fabrics, such as denim, can leave impressions in and will darken the finish in some instances.
Tip-2: Use coasters when placing drinks and hot plates on your table or other surfaces.
Tip-3: Place placemats under dishes to prevent scratches and stains during mealtime.
Tip-4: Use table pads under tablecloths to protect your table during meals and when serving hot foods (including casserole dishes).
Tip-5: Use felt pads on the bottoms of items like picture frames, vases, lamps, and other decorative items, so they don’t rub against the surface of your new furniture.
Tip-6: Use a soft cloth to remove dust from your furniture regularly. Do not use a feather duster or anything else that could scratch the surface.
Related Questions About How Do You Get Dents Out of Finished Wood
How Do You Get Dents Out Of Varnished Wood?
Most people who want to remove dents from varnished wood do so because they want to repair some damaged furniture.
The best method for removing dents from varnished wood depends on whether or not you have access to a vacuum cleaner. If you have one, it’s easy enough to just use hot water and a regular iron on the affected area. It works best if you start with a dry iron and gradually increase the temperature until the dent comes out cleanly.
However, if you don’t have access to a vacuum cleaner, two other methods work well: steam bending, and ironing through plastic wrap. Both of these techniques involve applying heat directly to the dent itself, but they’re much harder on your furniture than simply using hot water.
How Do You Fix A Dent In A Prefinished Hardwood Floor?
You can fix a dent in a prefinished hardwood floor by using a hot glue gun, a putty knife, and some wood filler. The first step is to warm the dent with the hot glue gun, making sure not to go over it for too long because that could cause damage. Then use a putty knife to gently push the area back into place.
Once the dent is fixed, apply wood filler to make sure the repair is even with the rest of the flooring and then sand it down.
How Do You Repair Dents In Wood Furniture?
When you have a dent in a piece of wood furniture, it can be frustrating because the damage stands out. If you neglect a dent in your wood furniture, it will continue to get worse over time and be more expensive to fix down the road. Luckily, there are several techniques that you can use to repair dents in your wooden furniture.
You can use a wood dent puller, a plunger, a steam iron, moisture, or even dry ice to remove dents in the wood. The methods are:
Wood Dent Puller: This is a tool that you can use to remove dents in the wood. It is not as effective as other tools, but it can still be used to get rid of small dents.
Steam Iron and Moisture: This method uses the steam from an iron to remove the dent in your wooden furniture. It is easy to do, and the materials needed are readily available at home.
Dry Ice: Dry ice is another substance that can be used to get rid of dents in wood furniture. All you need is some dry ice (which you can purchase at any grocery store) and a towel or rag to wrap it in. Once you have wrapped the dry ice in a towel, place it on top of the dent for around 30 seconds or until it disappears.
How Do You Fix A Dent In The Particle Board?
There are several methods of fixing a dent in the particleboard. The technique will mostly depend on the size of the dent. Most dents can be fixed by using a combination of glue, putty, clamps, and filler.
If the particle board is exposed to high humidity or moisture, use water-resistant products as they will stand up better against the humidity.
Conclusion
As you see, you are at the end of your journey with me in this blog. At this point, you should know the answer to the question- “how do you get dents out of finished wood?”
I did not only discuss the method or solution to this problem but also tried to give a touch on other topics related to this problem. If you have any more queries or if I missed anything, make sure to leave them in the comment box!