Ash Wood Color: Essential, Stunning Guide
Ash wood color is a natural wonder, often appearing light, creamy white to pale brown, sometimes with subtle grey or even pinkish tones. Its distinct grain pattern adds beautiful depth, making it a versatile choice for furniture, flooring, and DIY projects. Understanding its characteristics will help you create stunning projects.
Hey there, fellow woodworkers! Ever look at a piece of furniture and think, “Wow, that wood is gorgeous!”? Often, you’re seeing the natural beauty of ash. It’s a popular wood for good reason. Its color can range from a very light, almost white hue to a warmer, medium brown. But sometimes, figuring out exactly what “ash wood color” means can feel a bit blurry, especially when you’re just starting out. You want your projects to look amazing, right? Don’t worry, I’m here to help demystify ash wood color. We’ll explore all its shades, how to identify them, and how to make them shine in your next creation. Let’s dive in and uncover the stunning world of ash!
Understanding Ash Wood Color: A Beginner’s Guide
Ash wood is a fantastic choice for many woodworking projects, from stylish furniture to durable flooring. Its appeal lies not just in its strength but also in its distinctive and varied color palette. As a beginner, grasping the nuances of ash wood color is key to selecting the right material and achieving the look you desire. Ash trees (Fraxinus species) are found all over the world, and their wood can exhibit a surprising range of tones and grain patterns.
The Spectrum of Ash Wood Shades
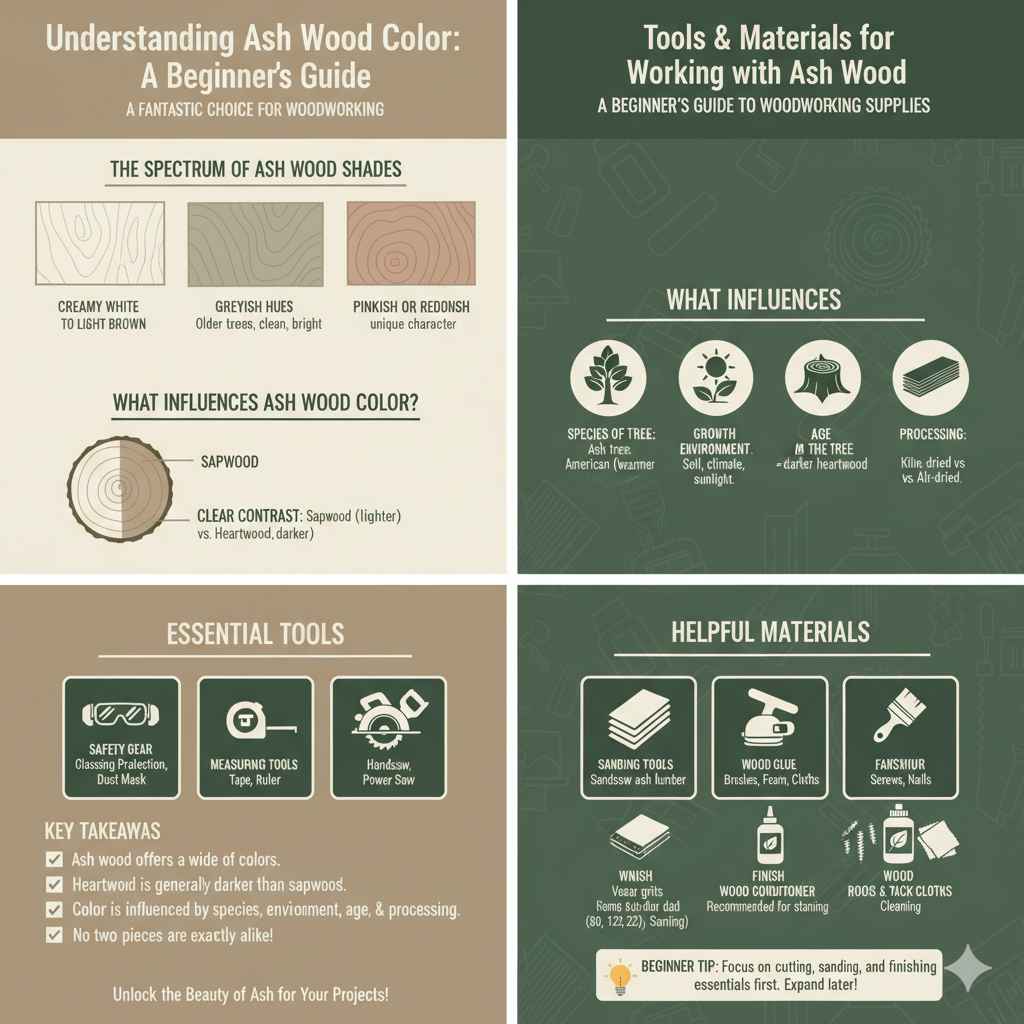
When we talk about ash wood color, we’re not looking at just one shade. It’s a spectrum that can really surprise you. Generally, ash is known for its light color, but there’s more to it than meets the eye. Let’s break down the typical colors you’ll encounter:
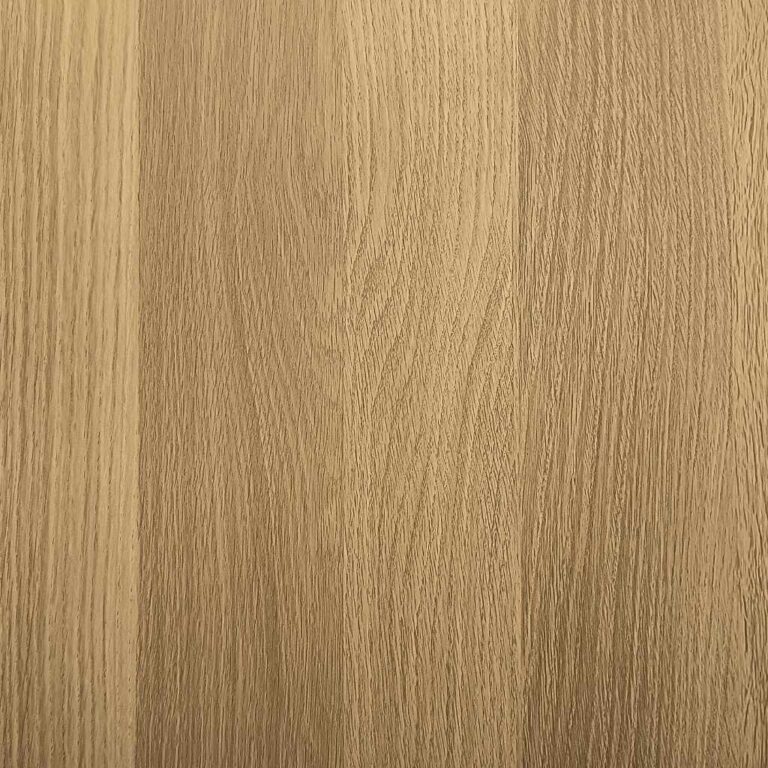
- Creamy White to Light Brown: This is the most common appearance for ash. The heartwood (inner part of the tree) is often a bit darker than the sapwood (outer part). You’ll see a clean, bright look that’s easy to work with and stain.
- Greyish Hues: Sometimes, ash can have a more pronounced grey tone. This is especially true for older trees or specific species. These greyish shades can add a rustic or contemporary feel to your projects.
- Pinkish or Reddish Undertones: Less common, but you might find ash with subtle pink or reddish hints, particularly in the heartwood. These warmer tones can give a project a unique character.
- Distinguishing Heartwood and Sapwood: Ash wood typically shows a clear difference between its heartwood and sapwood. The sapwood is almost always lighter, often a creamy white, while the heartwood ranges from light brown to darker shades. This contrast can be a beautiful feature in its natural state or when finished.
What Influences Ash Wood Color?
Several factors can play a role in the final color of ash wood you use in your project. Understanding these can help you select lumber that best suits your vision:
- Species of Ash Tree: There are many types of ash trees! For example, American ash (like White Ash, Fraxinus americana) is known for its light, creamy color and prominent grain. European ash (Fraxinus excelsior) can have similar tones but might lean a bit warmer.
- Growth Environment: Where the tree grew – soil conditions, climate, and sunlight exposure – can subtly affect the wood’s color.
- Age of the Tree: Older trees generally have a larger proportion of heartwood, which tends to be darker than the sapwood of younger trees.
- How the Wood Was Processed: The way lumber is dried (kiln-dried versus air-dried) and cut can also influence its appearance.
Knowing these variations helps you appreciate that no two pieces of ash wood are exactly alike, which is part of its charm!
Common Types of Ash Wood and Their Colors
While we often refer to it simply as “ash,” different species offer slightly different characteristics. Here’s a look at some common types you might encounter:
| Ash Species | Typical Color Description | Grain Pattern | Common Uses |
|---|---|---|---|
| White Ash (Fraxinus americana) | Creamy white to light brown. Sapwood is very pale. Heartwood is light to medium brown. | Straight, coarse, and prominent grain, often with wavy or straight patterns. | Furniture, flooring, baseball bats, tool handles, cabinetry. |
| Green Ash (Fraxinus pennsylvanica) | Similar to White Ash, often light brown with lighter sapwood. Can sometimes have a slightly greyish tone. | Usually straight-grained, but can be less uniform than White Ash. | Utility furniture, pallets, crates, often used where cost is a factor. |
| European Ash (Fraxinus excelsior) | Light brown, sometimes with a yellowish or greyish cast. Can be quite pale. | Often has a noticeable, wavy, or interlocking grain pattern. | Furniture, cabinetry, flooring, turning, sports equipment. |
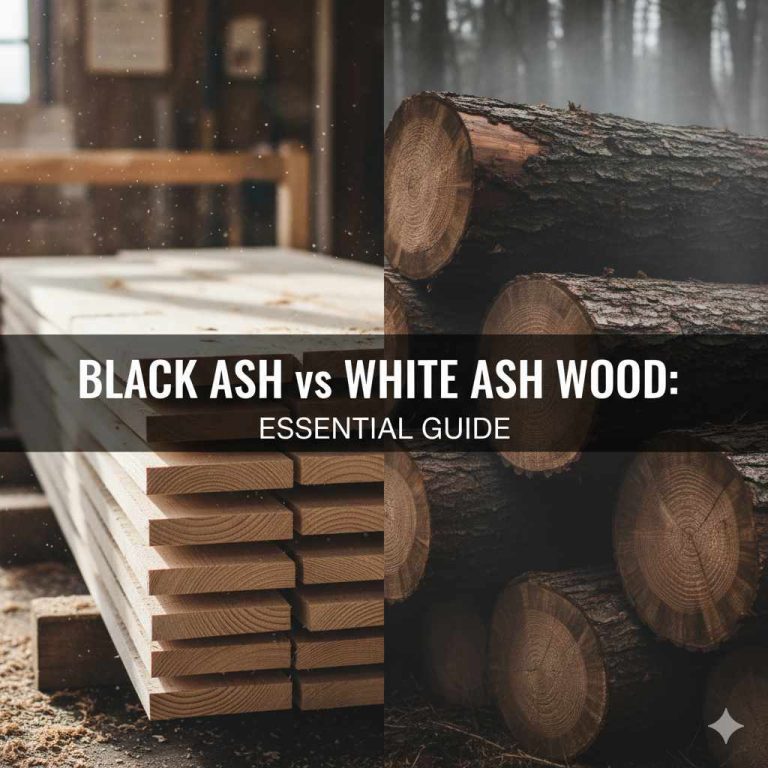
| Black Ash (Fraxinus nigra) | Darker brown than other ashes, often greyish-brown. Can have a more subdued appearance. | Typically straight-grained and somewhat coarse. | Cabinetry, baskets, veneer. Traditionally used by Native Americans for crafts. |
For most DIY projects, especially furniture and cabinetry, White Ash and European Ash are very popular due to their attractive color and workable nature. If you’re looking for something with a bit more character, Black Ash might be an interesting choice, though its color is less vibrant.
Working with Ash Wood Color: Tips for Beginners
Once you’ve chosen your ash, how do you get the most out of its color? Whether you want to enhance its natural beauty or transform it with a finish, there are a few simple tips to keep in mind.
Embracing the Natural Beauty
Ash has a beautiful grain and color that can look stunning with minimal finishing. Often, all it needs is a clear protective coat to bring out its best.
- Clear Coats: A simple oil finish (like Danish oil or Tung oil) or a clear water-based or oil-based polyurethane will enhance the natural color and grain of ash without altering it significantly. These finishes add a subtle sheen and protect the wood.
- Sanding is Key: Proper sanding is crucial for any finish. Start with a coarser grit (like 80 or 100) to smooth out saw marks and progressively move to finer grits (up to 220 or even 320) for a silky-smooth surface. This results in a more even finish application and better color absorption if you decide to stain.
- Dealing with Grain Differences: The distinct grain of ash can sometimes mean different absorption rates for finishes. If you’re applying a clear coat, you might notice some areas look slightly “wetter” or darker than others – this is normal and part of the natural variation!
Staining Ash Wood
Ash is an excellent candidate for staining. Its porous nature accepts stain well, allowing for a wide range of color possibilities. However, there are a couple of things to be aware of:
- Consider a Pre-Stain Wood Conditioner: Because ash can have variations in its grain density, some areas might absorb stain more readily than others, leading to a blotchy appearance. Applying a pre-stain wood conditioner before staining helps to even out the absorption, ensuring a more uniform color. You can find these at most hardware stores.
- Test Your Stain: Always, always test your stain color on a scrap piece of the same ash wood you’re using for your project. This is the best way to see how the stain will look on your specific piece of wood and to ensure you achieve the desired shade.
- Stain Colors: Ash can take on a variety of stain colors beautifully. Darker stains can create a dramatic, modern look, while lighter or natural stains can enhance its inherent creamy tones.
For more on finishing techniques, check out resources like Woodworking Network, which often has helpful articles and guides for wood finishing.
Painting Ash Wood
While many prefer to showcase ash’s natural beauty, it can also be painted. Its smooth surface is a good base for paint, but again, preparation is key.
- Primer: Use a good quality primer. This will help your paint adhere better and provide a uniform base color, covering any variations in the natural ash tone.
- Sanding Between Coats: Lightly sanding with a fine-grit sandpaper (220 grit or higher) between paint coats will help create a smooth, professional finish.
- Consider Wood Filler: If your ash has deep grain or imperfections you don’t want showing through paint, you can use wood filler to create a perfectly smooth surface before priming and painting.
Troubleshooting Common Ash Wood Color Issues
Even with the best intentions, sometimes things don’t go exactly as planned. Here’s how to tackle a few common issues beginners might face regarding ash wood color:
1. Blotchy Stain Appearance
Problem: You’ve stained your ash project, and it looks splotchy and uneven. Some areas are much darker than others.
Solution: This is usually due to uneven stain absorption.
- If the finish is still wet, try using a clean rag with a bit of mineral spirits to gently wipe and blend the darker splotches. Work in the direction of the grain.
- In the future, always use a pre-stain wood conditioner on ash before staining.
- You can also try applying a gel stain, which sits more on the surface and is less prone to blotching.
2. Ash Looks Too Yellow/Dull
Problem: The natural color of your ash wood seems dull or has an undesirable yellow tone that clashes with your design.
Solution:
- Consider a light whitewash or glaze: A thin coat of white paint or glaze can be wiped on and then wiped off, leaving a subtle color tone in the grain and softening any yellowness.
- Try a slightly tinted finish: A very light-tinted polyurethane or oil finish can sometimes impart a warmer or cooler tone to the wood, adjusting its overall hue.
- Stain it: If you dislike the natural color, a stain is your best bet to completely transform the tone.
3. Inconsistent Color Between Boards
Problem: You’ve bought several boards of ash, and their natural colors vary quite a bit – some are much lighter than others.
Solution: This is very common with natural wood!
- Sort and Arrange: Before you start cutting, lay out all your boards. Arrange them so the colors flow nicely from one to the next in your final project. You might place lighter boards next to each other and darker boards together, or you might intentionally create a gradient.
- Accept Variation: Sometimes, a little variation is part of the beauty of real wood. Embrace it as a unique characteristic of your project.
- Embrace a Uniform Finish: If the variation is too much to handle naturally, a uniform stain color applied evenly over all boards will hide these inconsistencies beautifully.
Remember, woodworking is a journey, and dealing with natural materials means embracing their unique qualities. Resources from organizations like the Wood Science and Technology Program at NC State University can provide deeper insights into wood properties and how they affect finishing.
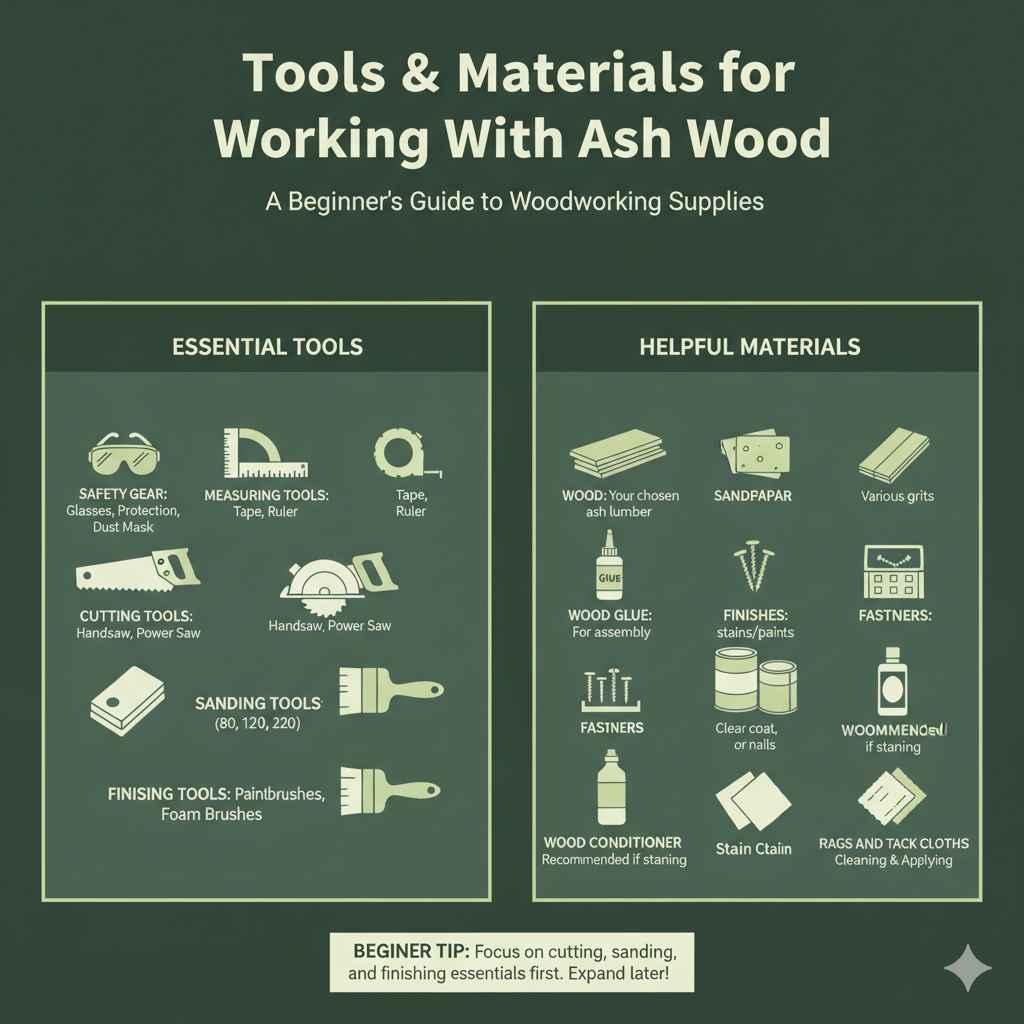
Tools and Materials for Working with Ash Wood Color
To get the best results when working with ash wood color, having the right tools and materials makes a big difference. Here’s a basic rundown:
Essential Tools:
- Safety Gear: Always start with safety glasses, hearing protection, and a dust mask.
- Measuring Tools: Tape measure, ruler, and a combination square.
- Cutting Tools: A handsaw or power saw (like a circular saw or miter saw) for accurate cuts.
- Sanding Tools: Sandpaper in various grits (80, 120, 220), a sanding block, or an orbital sander.
- Finishing Tools: Good quality paintbrushes, foam brushes, or clean, lint-free cloths for applying finishes and stains.
Helpful Materials:
- Wood: Your chosen ash lumber.
- Sandpaper: Various grits from coarse to fine.
- Wood Glue: For assembling pieces.
- Fasteners: Screws or nails if needed for your project.
- Finishes: Clear coat (polyurethane, varnish, lacquer) or stains/paints of your choice.
- Wood Conditioner: Highly recommended if you plan to stain ash.
- Rags and Tack Cloths: For cleaning and applying finishes.
Don’t feel overwhelmed by the list. For your first few projects, focus on the essentials for cutting, sanding, and finishing. You can always expand your collection of tools and materials as you gain more experience.
Frequently Asked Questions About Ash Wood Color
Let’s clear up some common questions beginners have about ash wood color.
Q1: Is ash wood naturally light in color?
A: Yes, ash wood is typically known for its light color, ranging from creamy white to pale brown. The sapwood is usually lighter than the heartwood, which can sometimes have subtle grey, pink, or warmer brown tones.
Q2: Can ash wood be stained to look like other woods?
A: Absolutely! Ash takes stain very well, allowing you to achieve a wide range of colors. You can stain it to mimic darker woods like walnut or cherry, or to achieve a specific modern look with grey or even colored stains.
Q3: Does ash wood have a strong grain pattern?
A: Yes, ash generally has a prominent and distinct grain pattern. It’s often straight but can also be wavy or irregular, giving it a lot of natural character. This strong grain is one of its appealing features.
Q4: Is ash hardwood or softwood?
A: Ash is considered a hardwood. It comes from deciduous trees (trees that lose their leaves annually), which are generally classified as hardwoods. Ash is known for its strength and durability.
Q5: How do I prevent blotchiness when staining ash?
A: The best way to prevent blotchiness is to use a pre-stain wood conditioner before applying your stain. This helps the wood absorb the stain more evenly. Always test your stain on a scrap piece first.
Q6: Is ash wood expensive?
A: Ash wood is generally in the mid-range for lumber prices. It’s typically more affordable than premium hardwoods like cherry or walnut but more expensive than softwoods like pine. Prices can vary significantly by region and the specific grade and type of ash.
Q7: Can I use ash for outdoor projects?
A: While ash is a strong wood, it’s not naturally as resistant to decay and insects as some other woods like cedar or redwood. For outdoor use, it requires a very robust, waterproof finish and regular maintenance to protect it from the elements.
Conclusion
You’ve now got a solid understanding of ash wood color, from its natural variations to how to work with it to achieve stunning results. Remember that ash offers a versatile palette, perfectly suited for beginners looking to create beautiful and durable projects. Whether you choose to highlight its natural creamy tones with a clear finish, transform it with a rich stain, or give it a fresh look with paint, ash wood is an excellent choice. The key is preparation: proper sanding, using a pre-stain conditioner when staining, and always testing your finishes on scrap pieces. Don’t be afraid to experiment and embrace the unique character that ash wood brings to your creations. With a little practice and these handy tips, you’ll be crafting with confidence, turning simple ash boards into truly remarkable pieces. Happy woodworking!