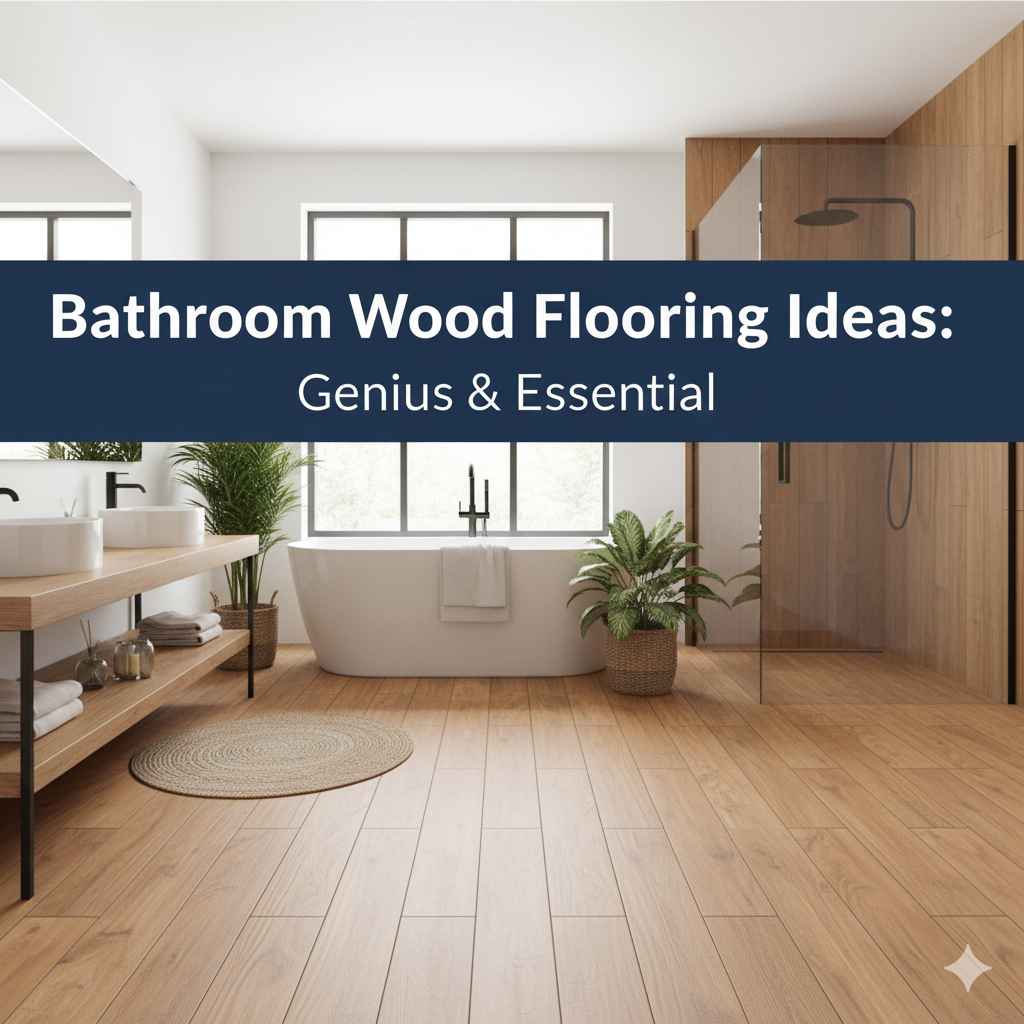
Bathroom Wood Flooring Ideas: Genius & Essential
Dreaming of bathroom wood flooring? Yes, it’s possible and gorgeous! Choose water-resistant wood species like teak or bamboo, or opt for clever engineered wood. Proper sealing and ventilation are key. Explore these genius ideas to bring warmth and style to your bathroom safely.
This seems like a huge decision, doesn’t it? You want that warm, inviting look of wood in your bathroom, but you’ve heard stories. Whispers of warped planks, swollen edges, and water damage. It’s enough to make anyone stick to tile. But what if I told you that with the right ideas and a few smart choices, bathroom wood flooring can be both beautiful and wonderfully durable? You can absolutely achieve that designer look without the constant worry. We’re going to walk through simple, genius ways to make it happen, so let’s dive in!
Bathroom Wood Flooring Ideas: Genius & Essential
Wood flooring in a bathroom might sound like a contradiction, but the trend is definitely catching on for good reason. The natural beauty, warmth, and timeless elegance of wood can transform a bathroom from a purely functional space into a luxurious sanctuary. However, the bathroom’s unique environment – with its moisture, humidity, and potential for spills – means traditional hardwood isn’t always the best fit. But don’t let that deter you! We’ve gathered some genius bathroom wood flooring ideas that blend aesthetics with practicality, ensuring you get the look you love without the common pitfalls.
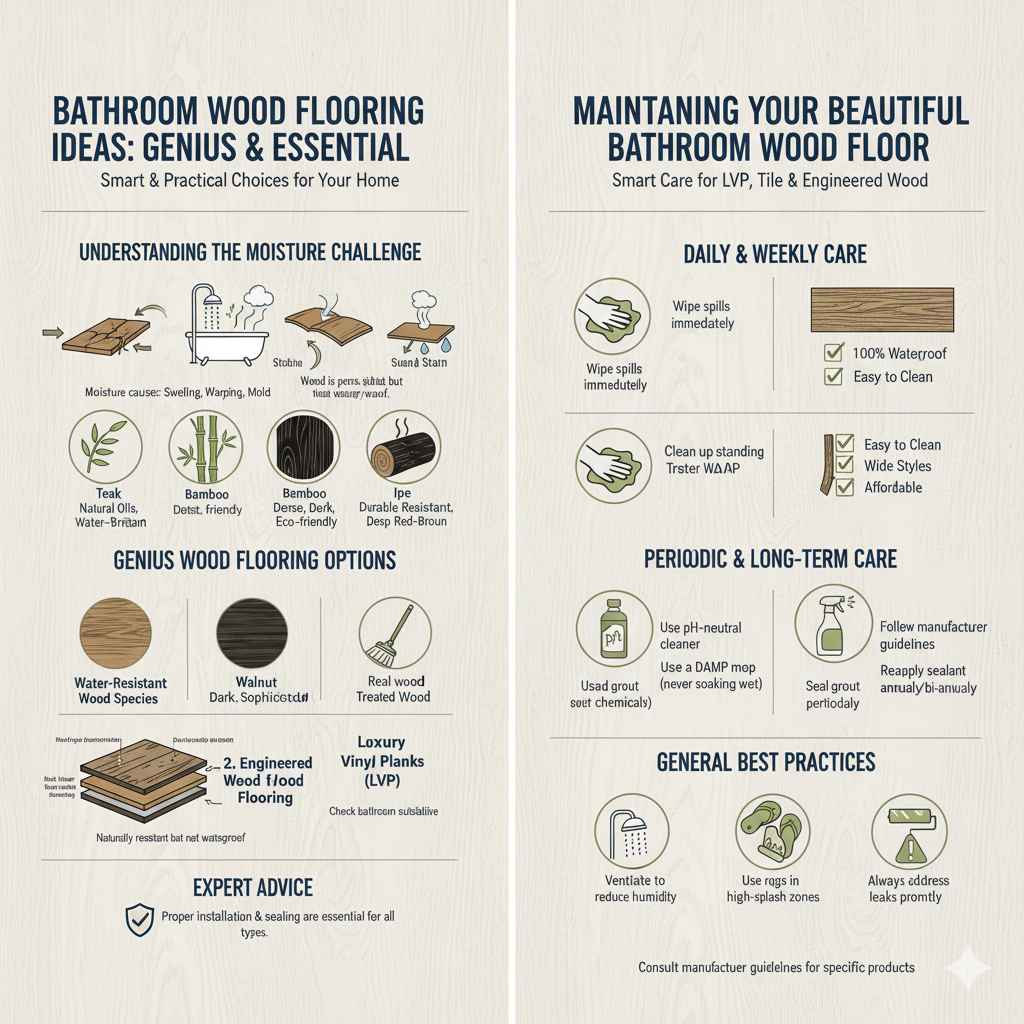
Understanding Your Bathroom’s Moisture Challenge
Before we jump into the pretty ideas, let’s chat about why bathrooms are tricky for wood floors. Bathrooms deal with a lot more moisture than other rooms. Think about steamy showers, splashed water from sinks and tubs, and even condensation. All this moisture can cause untreated wood to expand, warp, swell, and even rot over time. This is why choosing the right type of wood and proper installation techniques are ‘essential’ for success.
Genius Wood Flooring Options for Bathrooms
Not all wood is created equal when it comes to resisting moisture. Here are the top contenders and why they’re smart choices for your bathroom.
1. Water-Resistant Wood Species
Some natural woods have a higher oil content or natural density that makes them more resistant to moisture. These are your heavy hitters for a true wood look.
Teak: This exotic hardwood is legendary for its natural oils and high density, making it exceptionally resistant to water and decay. It’s often used in boat building for this very reason! Its rich, golden-brown color adds a touch of luxury.
Bamboo: While technically a grass, bamboo flooring is incredibly dense and surprisingly stable in humid conditions. It’s also an eco-friendly choice! Look for strand-woven bamboo for maximum durability.
Walnut: Known for its beautiful dark color and elegant grain, walnut is denser than many common hardwoods like oak, offering decent moisture resistance. It’s a more traditional option that can bring a sophisticated feel.
Ipe (Brazilian Walnut): Another extremely dense hardwood, Ipe is naturally resistant to rot, insects, and moisture. It’s very durable and has a beautiful, deep reddish-brown color.
2. Engineered Wood Flooring: The Savvy Choice
Engineered wood flooring is a fantastic compromise, offering the look of real wood with enhanced stability. It’s constructed from multiple layers of wood veneer or composite materials, with a top layer of real hardwood.
How it works: The cross-ply construction of engineered wood makes it much less susceptible to expanding and contracting with changes in humidity and temperature compared to solid hardwood.
Bathroom suitability: Many engineered wood floors are designed with moisture resistance in mind. You can find options with a high-quality veneer and robust core layers that hold up well in bathrooms. Always check the manufacturer’s specifications for bathroom suitability.
Installation: Engineered wood can often be glued down, which provides a good seal against subfloor moisture.
3. Luxury Vinyl Planks (LVP) with a Wood Look
While not technically wood, LVP that mimics wood grain and texture is an incredibly popular and practical alternative. It’s 100% waterproof and very durable.
Pros: Completely waterproof, easy to clean, wide range of styles, generally more affordable than real wood.
Cons: Doesn’t offer the same natural feel or resale value boost as real wood.
When to consider: If maximum water protection and ease of maintenance are your top priorities, LVP is a genius solution.
Essential Considerations for Bathroom Wood Floors
Once you’ve chosen your material, there are crucial steps and considerations to ensure your flooring lasts and looks great.
1. Sealing is Non-Negotiable
No matter what type of wood you choose, a high-quality sealant is your first and best defense against moisture.
Polyurethane finishes: These create a protective barrier on the surface of the wood. Look for water-based polyurethane finishes, which are typically more durable and less prone to yellowing over time.
Multiple coats: Applying at least three coats of a durable sealant is recommended. This provides a thicker, more reliable protective layer.
Regular maintenance: Even sealed floors need care. Wiping up spills quickly and using appropriate cleaning products will extend the life of your finish.
For more on protective finishes, the WoodWeb knowledge base offers detailed information on various finishing techniques.
2. Ventilation is Your Best Friend
Good airflow helps to dissipate moisture and prevent it from accumulating.
Exhaust fan: Ensure your bathroom has a properly functioning exhaust fan. Run it during and for at least 20-30 minutes after showers or baths to remove humid air.
Subfloor ventilation: If you have a crawl space beneath your bathroom, ensure it’s adequately ventilated to prevent moisture buildup.
3. Installation Matters – A Lot!
The way your floor is installed significantly impacts its durability in a bathroom.
Glue-down installation: For engineered wood or solid wood in bathrooms, a full-spread glue-down installation is often recommended. The adhesive creates a seal between the planks and the subfloor, preventing moisture from seeping underneath. This is generally superior to a floating floor in a high-moisture area.
Acclimation: Always allow wood flooring to acclimate to the room’s conditions for at least 48-72 hours before installation. This allows the wood to adjust to the temperature and humidity in your home.
Expansion gaps: Proper expansion gaps around the perimeter of the room are crucial for solid and engineered wood. These gaps are usually covered by baseboards and allow the wood to expand and contract naturally without buckling.
For guidance on general flooring installation, the DIY Network provides helpful resources for homeowners.
4. Avoid Direct Water Exposure
Even with the best wood and sealing, it’s wise to minimize direct water contact.
Use bath mats: Place absorbent mats outside the shower or tub to catch drips.
Promptly clean spills: Don’t let water sit on the floor for extended periods. Wipe it up immediately.
Shower curtains/doors: Ensure shower curtains or doors are working correctly to keep water contained within the tub or shower area.
Bathroom Wood Flooring Design Ideas
Now for the fun part! How can you create stunning looks with wood flooring in your bathroom?
1. Light & Airy: Blonde Woods and Whites
Look: A light-colored wood, like white oak, ash, or a light bamboo, can make your bathroom feel larger and more serene.
Pairing: Combine with white or light-colored walls, brass or brushed nickel fixtures, and minimalist decor. This creates a spa-like atmosphere.
Genius tip: Consider a matte or satin finish on lighter woods to avoid showing water spots as easily.
| Wood Type | Color Family | Vibe | Moisture Resistance |
|---|---|---|---|
| White Oak | Light/Medium | Serene, airy | Moderate |
| Ash | Light | Bright, clean | Moderate |
| Bamboo (Strand-Woven) | Natural/Tan | Modern, eco | Good |
| Engineered Oak | Varies | Versatile | Good (depends on core) |
2. Rich & Dramatic: Dark Woods and Contrasts
Look: Deep, rich wood tones like walnut, ipe, or dark-stained oak can add warmth and sophistication.
Pairing: Contrast dark floors with crisp white subway tile in the shower, metallic accents (like matte black or oil-rubbed bronze), and pops of jewel tones in towels or accents.
Genius tip: Ensure your vanity and other wood accents in the room complement, rather than clash with, the floor color.
3. Natural Texture: Wire-Brushed or Hand-Scraped
Look: Woods with a textured finish, like wire-brushed or hand-scraped, add depth and visual interest. The texture can also help camouflage minor imperfections or water marks.
Pairing: Works well with rustic, farmhouse, or bohemian styles. It adds character and warmth, making the bathroom feel cozier.
Genius tip: This texture is great for hiding minor scratches that might occur over time.
4. The Eco-Conscious Choice: Bamboo and Cork
Look: Bamboo offers a clean, modern aesthetic, often with a distinctive grain pattern. Cork, while softer, is also a sustainable option known for its comfort and water resistance (when sealed).
Pairing: Bamboo fits well in contemporary or minimalist designs. Cork can offer a unique, earthy feel.
Genius tip: For cork, look for engineered, multi-layer cork flooring specifically designed for high-traffic and potentially damp areas. The Cork Forest Conservation Foundation highlights its sustainability.
5. Engineered Wood: The Versatile Canvas
Look: Thanks to its construction, engineered wood comes in an enormous variety of species, stains, and finishes, from pale grays to deep mahoganies.
Pairing: Whatever your bathroom’s style – modern, traditional, coastal, or eclectic – there’s likely an engineered wood option to match.
Genius tip: Look for engineered wood with a thicker wear layer (the top layer of real wood) for greater longevity. Brands often specify if a product is suitable for kitchens and bathrooms.
DIY vs. Professional Installation
This brings us to a critical decision: can you tackle this as a DIY project, or is it better left to the pros?
DIY Installation Considerations:
Skill Level: Installing wood flooring requires precision, patience, and some basic carpentry skills. Reading, understanding, and following manufacturer instructions are paramount.
Tools: You’ll need specialized tools like a miter saw for precise cuts, a flooring nailer if using solid wood (though glue-down is often better for bathrooms), a tapping block, and possibly a jigsaw for cuts around obstacles.
Time: DIY projects often take longer than anticipated, especially for beginners. Allow ample time and be prepared for potential challenges.
Cost Savings: The primary benefit is cost savings on labor.
Professional Installation Benefits:
Expertise: Professionals have the experience to handle challenging subfloors, ensure proper acclimation, and execute a flawless glue-down installation.
Speed: They can typically complete the job much faster than a DIYer.
Warranty: Professional installation often comes with a warranty, protecting your investment.
Peace of Mind: Knowing the job is done correctly can be invaluable, especially in a moisture-prone area like a bathroom.
For DIYers considering the route, resources like Family Handyman offer guides on subfloor preparation, which is key for any flooring project.
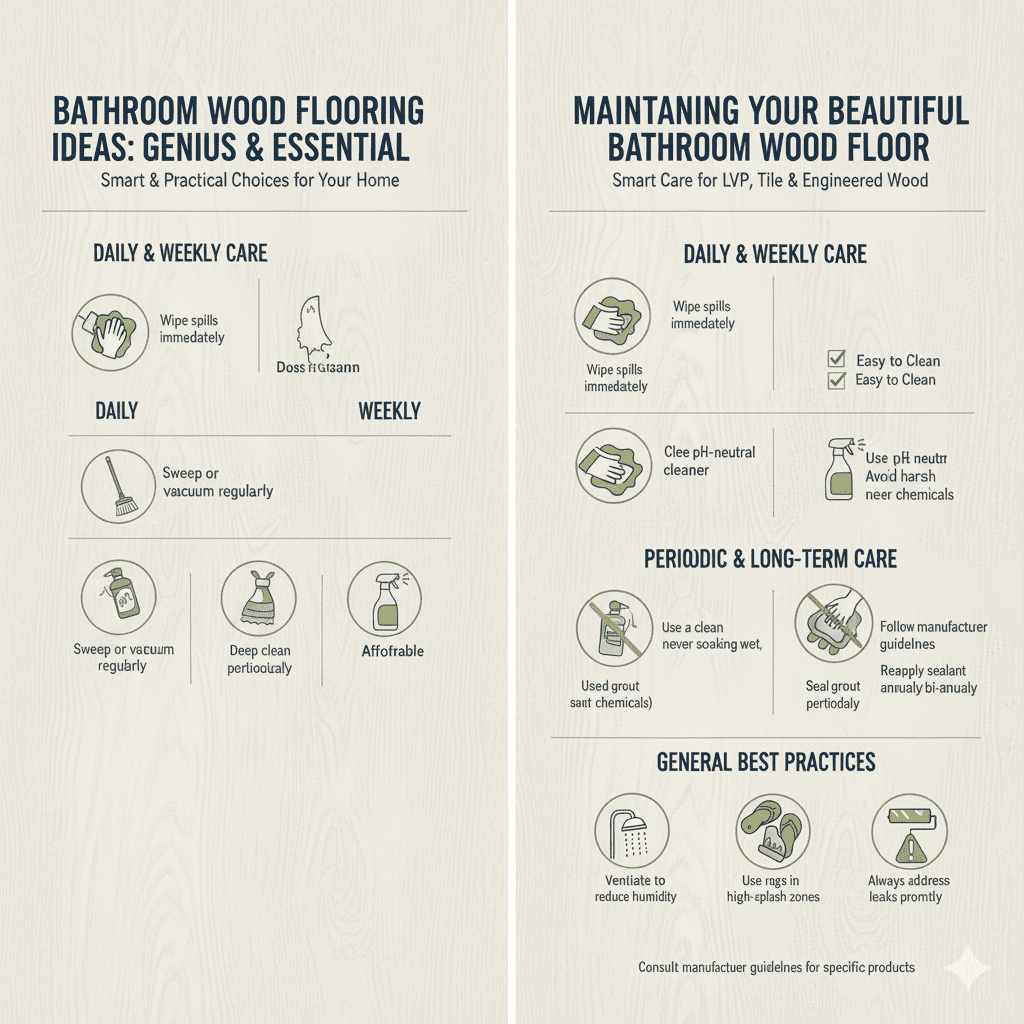
Maintaining Your Beautiful Bathroom Wood Floor
Part of the genius of bathroom wood flooring is that it can be maintained beautifully. Here’s how:
Daily: Wipe up any splashes or standing water immediately with a soft, absorbent cloth.
Weekly: Dust or dry mop the floor. If it needs more cleaning, use a hardwood floor cleaner specifically recommended by your flooring manufacturer. Avoid using excessive water or steam mops, as these can damage the wood and finish.
Periodic (as needed): Deep cleaning might be necessary every few months. Again, use manufacturer-recommended cleaners and a damp (not wet) mop.
Resealing: Depending on traffic and wear, you may need to reapply a protective sealant every few years to maintain its water resistance.
Frequently Asked Questions About Bathroom Wood Flooring
Q1: Can I really have real wood floors in my bathroom?
A1: Yes, you can! The key is choosing the right type of wood (like teak or bamboo) or opting for engineered wood with good moisture resistance, and ensuring it’s properly sealed and installed. Always follow manufacturer guidelines for bathroom use.
Q2: What is the most water-resistant type of wood for a bathroom?
A2: Teak and Ipe are naturally very water-resistant due to their high oil content and density. Strand-woven bamboo is also a strong, water-resistant option. Engineered wood designed for bathrooms can also perform very well.
Q3: Will moisture ruin my wood bathroom floor?
A3: Unprotected or unsuitable wood can be ruined by moisture. However, with proper sealing, water-resistant wood species, good ventilation, and prompt cleanup of spills, wood floors can thrive even in a bathroom.
Q4: How do I clean wood floors in a bathroom?
A4: Always use a wood floor cleaner recommended by the manufacturer. Damp mop the floor – never use a soaking wet mop or a steam cleaner, as excess water can damage the wood. Wipe up spills immediately.
Q5: Is engineered wood better than solid hardwood for bathrooms?
A5: For most bathrooms, yes. Engineered wood is more stable and less prone to warping due to humidity and temperature changes because of its layered construction. It’s a very smart choice for these environments.
Q6: What’s the difference between a floating floor and a glue-down floor for bathrooms?
A6: A floating floor is installed by locking planks together and allowing them to rest on the subfloor. A glue-down floor is adhered directly to the subfloor. For bathrooms, glue-down is generally preferred as it creates a better seal against moisture seeping into the subfloor.
Q7: Should I still use bath mats if I have wood floors?
A7: Absolutely! Bath mats are essential for catching water drips from the shower or tub and preventing immediate contact with the wood floor, even if it’s well-sealed.
Conclusion
Bringing wood flooring into your bathroom is a fantastic way to elevate your home’s design and create a warm, inviting space. By understanding the unique challenges of a bathroom environment and making informed choices about materials, finishes, and installation, you can enjoy the beauty of wood with confidence. Whether you opt for naturally resistant hardwoods like teak, the stable construction of engineered wood, or even a high-quality vinyl plank that mimics wood, the key is proper sealing, excellent ventilation, and diligent care. These genius and essential strategies will help you achieve a stunning bathroom floor that is both durable and a joy to behold for years to come. So go ahead, embrace the warmth and elegance of wood – your bathroom, and your home, will thank you for it!