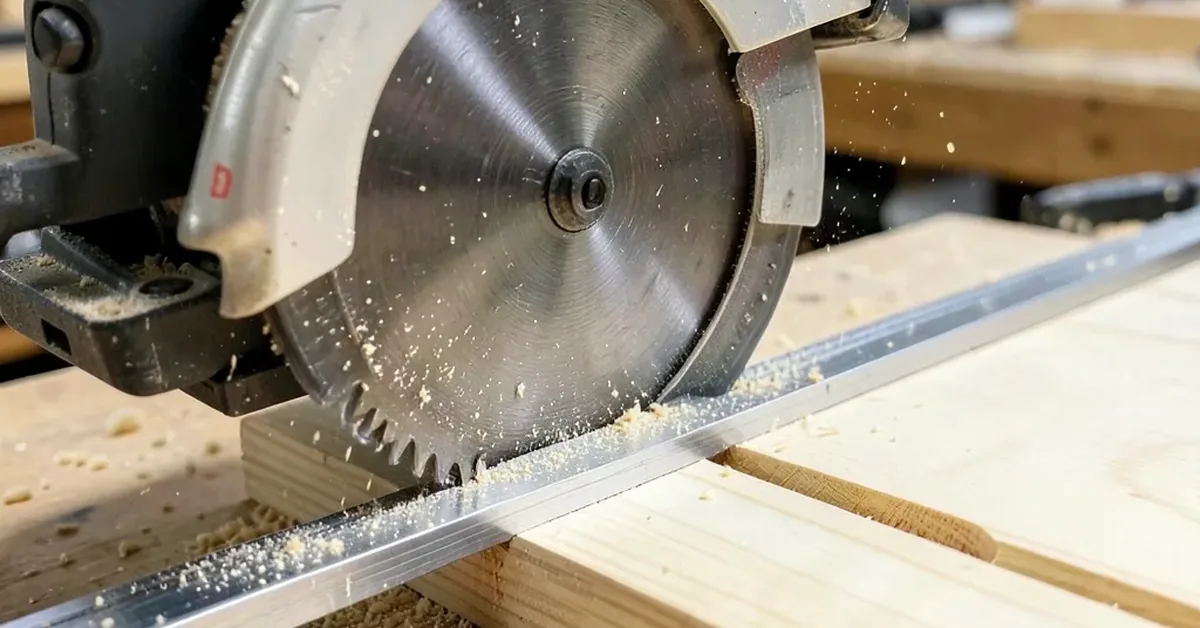
How to Dado With a Circular Saw (No Dado Blade Needed)
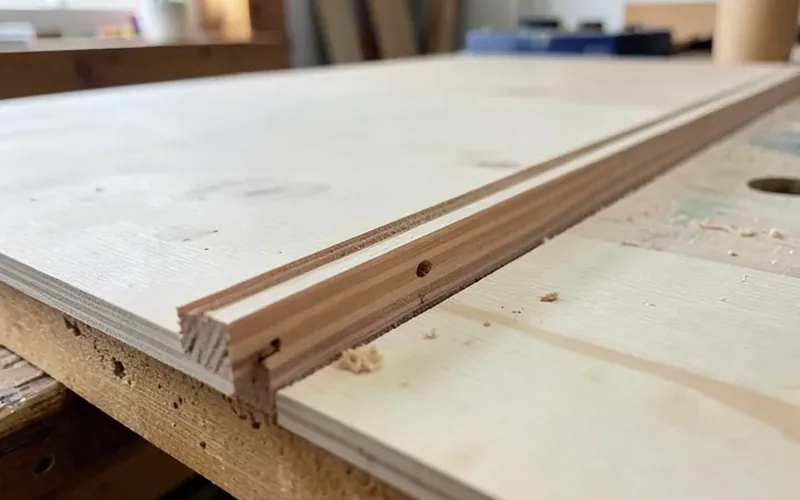
A dado is a wide, flat-bottomed groove cut across the grain that a shelf or panel fits into — and with a handheld circular saw, you cut one by making repeated overlapping passes at a fixed depth, not by mounting a stacked dado blade set (those are built for table saws, not circular saws, and most circular saw arbors and guards can’t safely accept one). Get the depth wrong and the joint either falls apart under load or splits the panel. This guide covers marking the width, setting blade depth with the one-third rule, making clean multi-pass cuts, and clearing the waste.
Quick Answer
To cut a dado with a circular saw: mark both edges of the groove, clamp a straightedge guide to define one edge, set blade depth to about one-third of the material’s thickness, cut along both marked lines, then make repeated passes between them to clear the waste. This uses your saw’s regular blade — it does not require (or safely accept) a stacked dado blade set, which is a table-saw accessory.
Tools You Actually Need
Best Circular Saw Guide Pick
 |
Kreg Straight Edge Guide XL, 98 Inch – $79.00 A dedicated circular-saw straightedge is what actually makes multi-pass dado cuts repeatable — it’s the tool referenced throughout this guide’s setup and cutting steps, not a dado blade stack.
|
As an Amazon Associate we earn from qualifying purchases.
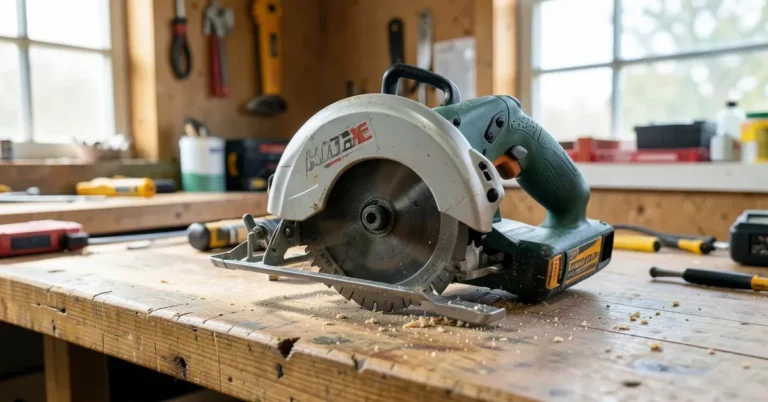
Unlike a table saw setup, cutting a dado with a circular saw uses the saw’s standard blade — no dado blade stack is involved or needed. Here’s what the job actually requires:
- A circular saw with a sharp, fine-tooth blade: A clean crosscut blade (24+ teeth) reduces tearout at the edges of the groove.
- A straightedge or track guide: Clamped to the workpiece, this keeps each pass parallel and gives you a crisp edge on at least one side of the dado.
- Clamps: To secure both the workpiece and the guide — a guide that shifts mid-cut ruins the joint.
- A sharp chisel: For cleaning up the groove’s bottom and corners after the saw passes.
- A combination square or marking gauge: To lay out the exact width of the dado before you cut.
Setting Up: Width, Depth, and the One-Third Rule
Mark the dado’s width using the actual board that will sit in it — not a tape-measure guess — since plywood is rarely exactly its nominal thickness. Place the shelf or panel where the joint will go and scribe both edges directly onto the workpiece.
For depth, the standard rule of thumb in cabinetmaking is to cut no deeper than about one-third of the material’s thickness, and never more than half. For 3/4-inch plywood, that’s roughly 1/4 inch deep — enough to seat the joint mechanically without removing so much material that the panel loses strength.
Step-by-Step: Cutting the Dado
- Mark both edges: Scribe the dado’s two boundary lines using the actual mating board, as described above.
- Set blade depth: Unplug the saw, then set the depth to about one-third of the material’s thickness — check it against a scrap offcut before cutting the real workpiece.
- Clamp the guide to the first line: Position your straightedge so the saw’s blade lines up exactly on one marked edge, accounting for the offset between the blade and the edge of the saw’s base plate.
- Cut the first boundary pass: Guide the saw along the straightedge for a clean, straight edge on one side of the dado.
- Reposition and cut the second boundary pass: Move the guide to the opposite marked line and repeat.
- Clear the waste between the two cuts: Make several more passes between the boundary cuts, moving the guide slightly each time, until all the waste is removed down to the set depth.
- Clean up with a chisel: Flatten the groove’s bottom and square up the corners, since the round blade leaves a slightly rounded channel bottom.
- Test-fit before glue-up: Slide the mating board in dry first — it should seat with light hand pressure or a few taps, not require force.
📊 The standard cabinetmaking rule of thumb is a dado depth of about one-third the stock’s thickness, never exceeding half — cutting deeper weakens the panel’s remaining structural material. For 3/4-inch plywood, that puts the target depth around 1/4 inch. Source: widely documented cabinetmaking practice, e.g. discussions in Fine Woodworking.
Safety Measures To Consider
Making multiple overlapping passes with a circular saw means more time with the blade exposed than a single straight cut, so safety habits matter more here, not less.
Wearing Proper Safety Gear
- Safety glasses or goggles: Protect your eyes from flying wood particles or debris.
- Ear protection: Reduce the risk of hearing damage from the loud noise produced by the circular saw.
- Dust mask or respirator: Multiple passes generate more dust than a single cut.
- Gloves suited for the task: Snug-fitting, not loose — loose gloves near a spinning blade are their own hazard.
Securing the Workpiece and Guide
- Clamp the workpiece: Secure it firmly using clamps to keep it from shifting mid-pass.
- Clamp the guide separately: A guide that isn’t independently secured can creep during repeated passes.
- Support large panels: Use a sawhorse or auxiliary support so the offcut side doesn’t sag and pinch the blade.
- Keep the cord clear: On corded saws, route the cord away from your cutting path before you start.
Troubleshooting Dado Cut Issues
Preventing Tearout
- Use a sharp blade: A dull blade tears wood fibers instead of slicing them.
- Score the cutline first: A shallow scoring pass along each marked line with the saw (or a utility knife) reduces splintering on the good face.
- Use a sacrificial backer: Support the underside of the cut to reduce exit tearout.
- Cut with the good face up: Most circular saw blades cut cleaner on the face they enter, so plan orientation accordingly for the visible side.
Uneven Groove Depth
An uneven groove bottom usually means the base plate wasn’t kept flat against the workpiece during a pass, or the depth setting shifted between passes. Recheck the depth stop before each pass on wider dados, and keep steady, even downward pressure on the shoe rather than letting it rock.
Frequently Asked Questions
Do I need a dado blade for a circular saw?
No. Stacked dado blade sets are designed for table saws (and radial arm saws), not handheld circular saws — most circular saw arbors, washers, and blade guards aren’t built to accept a wide stack safely. The standard circular-saw technique uses the saw’s regular blade and multiple overlapping passes instead.
What safety precautions matter most for dado cuts with a circular saw?
Eye and ear protection, a secured workpiece, an independently clamped guide, and a sharp blade. Because dado cuts require several passes rather than one, take a moment between passes to confirm the workpiece and guide haven’t shifted.
How deep should a dado cut be?
About one-third of the material’s thickness, and never more than half. For standard 3/4-inch plywood, that’s roughly 1/4 inch — deep enough to seat the joint without cutting away so much material that the panel weakens.
Conclusion
Cutting a dado with a circular saw comes down to accurate marking, a depth setting that respects the one-third rule, and a straightedge guide to keep repeated passes consistent — no dado blade stack required or recommended. Practice the sequence on scrap plywood before committing to a real project, and always dry-fit the joint before glue-up.
Sponsored / affiliate links. As an Amazon Associate I earn from qualifying purchases. I may earn additional commission from eligible campaigns.