How Many Coats of Stain: Achieve a Flawless Finish Every Time
You need to apply at least two coats of stain for best results. This ensures even color and durability.
But how many coats are truly necessary? Staining wood enhances its beauty and protects it. Knowing the right number of coats is crucial. Too few coats might not give the desired finish. Too many can waste time and resources. In this guide, we’ll explore how many coats of stain you need for different projects.
You’ll learn the factors that affect this number and get tips for a perfect finish. Whether you’re a DIY enthusiast or a professional, this information will help you achieve the best results for your woodwork. Let’s dive in and find out how to get that perfect stained finish.
Choosing The Right Stain
There are several types of stains. Water-based stains dry quickly and have low odor. Oil-based stains penetrate deeply and last longer. Gel stains are thick and do not drip. Each type has its own pros and cons. Pick the one that suits your project best.
The type of wood affects stain choice. Softwoods like pine absorb more stain. Hardwoods like oak need less. Climate also matters. Humid areas may need a different type of stain. Consider the look you want. A darker stain shows less wood grain. A lighter stain highlights it.
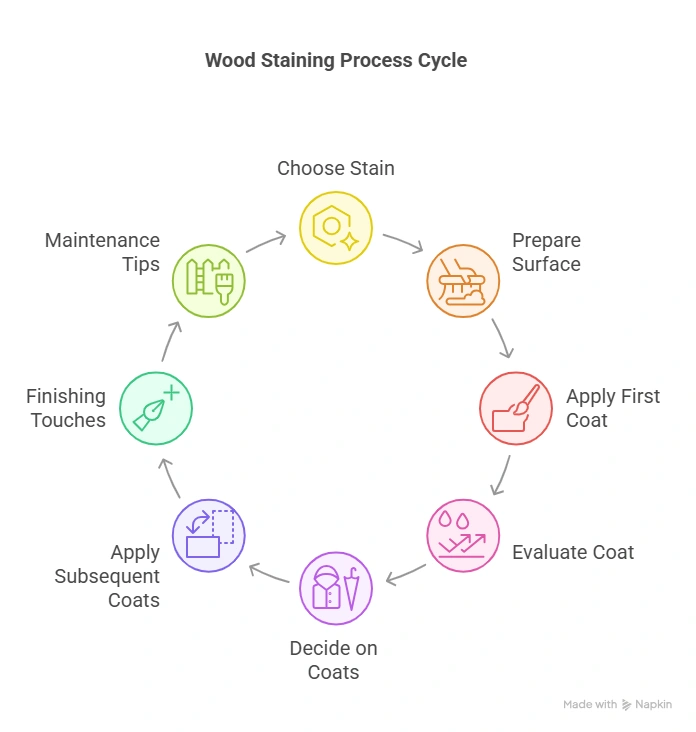
Preparing The Surface
First, remove dirt and dust from the wood. Use a soft brush or a cloth. Make sure the wood is dry. Wet wood can ruin the stain. Clean corners and edges carefully. Dirt hides in small spaces. Check for any spots you missed. Clean them again if needed.
Sanding makes the wood smooth. Start with a coarse grit sandpaper. This removes rough spots. Next, use a finer grit sandpaper. It makes the wood even smoother. Sand in the direction of the grain. This prevents scratches. Check the wood often. Feel for smoothness. Sand more if needed. Always wear a mask. Sanding creates dust.
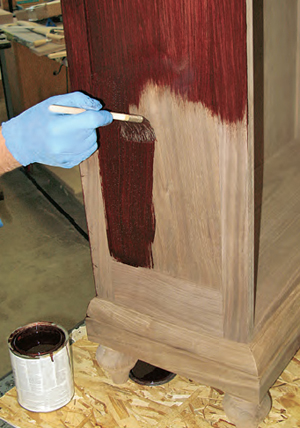
Applying The First Coat
Gather all the required tools first. You will need a brush or a rag. You also need sandpaper and a clean cloth. Get a stir stick to mix the stain well. Lastly, wear gloves to protect your hands.
Start by sanding the wood with sandpaper. This helps the stain stick better. Wipe off any dust with a clean cloth. Stir the stain well using the stir stick. Dip the brush or rag into the stain. Apply the stain evenly on the wood. Let it dry completely before applying the next coat.

Credit: www.woodworkersjournal.com
Evaluating The First Coat
Wait for the stain to dry. It can take several hours. Drying time varies. Temperature and humidity affect drying. High humidity slows drying. Cool temperatures slow drying too.
Check the surface closely. Look for any uneven spots. The coat should look even. If some areas look darker, it’s not uniform. Uniformity is key for a good finish. Reapply stain if needed. Make sure to fix any blotchy areas.
Deciding On Additional Coats
To get a deeper color, use more coats of stain. Each coat makes the wood darker. Apply each coat evenly for best results. Always let each coat dry completely before adding another. This helps you see the true color. Test on a small area first.
Different woods absorb stain in different ways. Soft woods like pine soak up more stain. Hard woods like oak absorb less. This affects how many coats you need. Test on a small piece of the same wood first. This shows how the wood will look. Adjust the number of coats based on this test.
Credit: www.woodworkersjournal.com
Applying Subsequent Coats
Wait for the first coat to dry. This can take a few hours. Lightly sand the surface after drying. This helps the next coat stick better. Apply the second coat evenly. Follow the grain of the wood. Use a clean brush or cloth.
Check the drying time on the stain can. Each brand is different. Some stains need only two coats. Others may need more. Always read the instructions carefully.
Don’t rush the drying process. It may ruin the finish. Avoid using a dirty brush. This can cause streaks. Do not apply too much stain at once. It may not dry properly. Thin coats work best.
Do not skip sanding between coats. This helps each coat look smooth. Avoid staining in direct sunlight. It can dry the stain too quickly. Always test the stain on a small area first. This ensures the color is right.
Finishing Touches
Sealing the stain is important. It protects the wood. Use a clear sealer. Apply with a brush. Let it dry fully. This keeps the stain in place. Prevents damage from water. Makes the wood look good.
Polishing the wood adds shine. Use a soft cloth. Rub gently in circles. This makes the wood smooth. Removes any rough spots. Enhances the wood’s beauty. Do this after sealing. It gives a perfect finish.
Maintenance Tips
Protecting the finish is key. Use furniture covers. Covers help guard against sun and rain. Keep them dry. Water can damage the wood. Dry the surface quickly. This prevents mold and mildew. Avoid placing hot items on the wood. Heat can ruin the finish. Use coasters for drinks. They stop water rings from forming.
Reapply the stain when it fades. Faded stain offers less protection. Clean the wood first. Dirt can block the new stain. Apply thin coats. Thick coats take longer to dry. Follow the manufacturer’s instructions. Each stain type is different. Regular reapplication keeps the wood looking good. It also extends its life.

Credit: hempshields.com
Frequently Asked Questions
Is 3 Coats Of Stain Too Much?
Three coats of stain are usually not too much. Ensure even application and drying time for best results.
How Many Coats Of Stain Does Wood Need?
Most wood needs 1-2 coats of stain for optimal results. Always follow the manufacturer’s instructions for the best outcome.
How Long Should Stains Sit Before Wiping?
Stains should sit for 10-15 minutes before wiping. This allows the cleaner to penetrate and loosen the stain.
Should You Do Multiple Layers Of Stain?
Yes, applying multiple layers of stain can enhance color depth and durability. Ensure each layer dries fully before adding the next.
Conclusion
Choosing the right number of stain coats is crucial. It affects the final look. One coat may give a light finish. Two coats provide a deeper color. Three coats can make it darker. Test on a small area first. This helps you see the result.
Quality materials ensure better finishes. Follow manufacturer instructions for best outcomes. Proper application methods are key. Enjoy your beautifully stained project.