How to Change the Blade on a Dewalt Miter Saw: Effortlessly Upgrade Your Cutting Precision
To change the blade on a Dewalt miter saw, start by unplugging the saw and removing the blade guard. Then, use a hex wrench to loosen and remove the blade screw, and replace the old blade with a new one, ensuring the teeth face downwards.
Changing the blade on a Dewalt miter saw is a simple process that can be done by following a few steps. With the right tools and precautions, anyone can replace the blade on their miter saw to ensure precise and clean cuts.
In this guide, we will take you through the step-by-step process of changing the blade on a Dewalt miter saw, so you can continue your woodworking projects with ease and confidence. By following these instructions, you will be able to make the blade-changing process a quick and hassle-free task. Let’s get started!
Effortless Blade Replacement On Dewalt Miter Saw
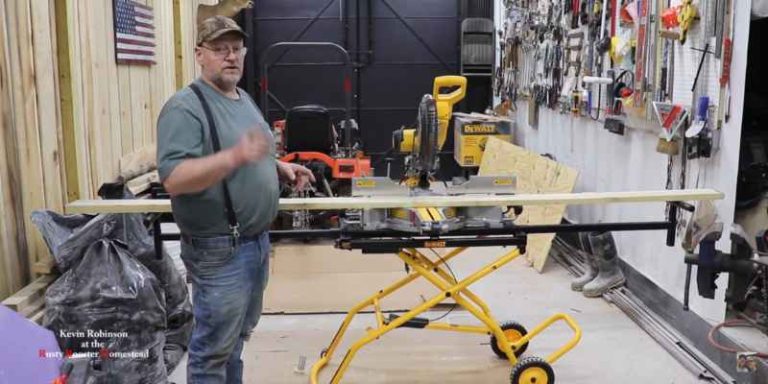
Changing the blade on your Dewalt miter saw is a crucial maintenance task that ensures the tool continues to provide accurate and precise cuts. Effortless blade replacement not only saves time but also guarantees a seamless woodworking experience. Whether you’re a DIY enthusiast or a professional woodworker, knowing the ins and outs of blade replacement can significantly enhance your work efficiency and the quality of your cuts.
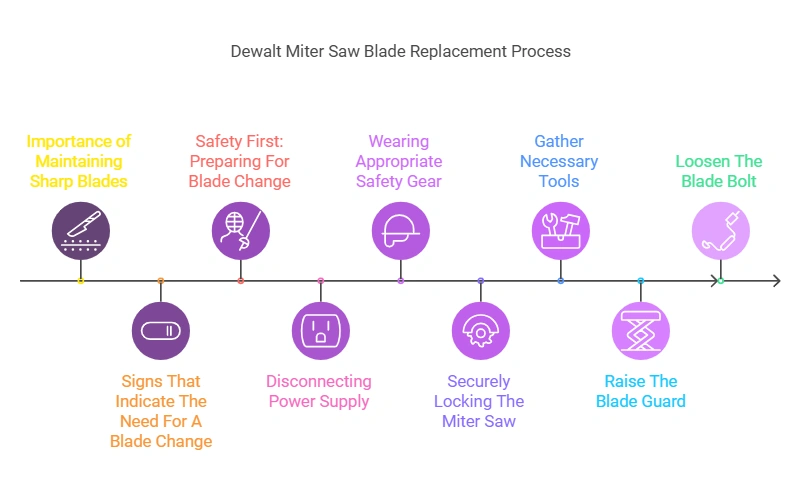
Importance Of Maintaining Sharp Blades
Maintaining sharp blades on your Dewalt miter saw is vital to ensure the efficiency and precision of your cutting tasks. Sharp blades make clean and accurate cuts without splintering or tearing the wood, resulting in better-finished products. Blunt or dull blades not only compromise the quality of the workpiece but also put unnecessary strain on the motor, reducing the tool’s lifespan.
Signs That Indicate The Need For A Blade Change
It’s essential to recognize the signs that indicate the need for a blade change. Some common indicators include a decrease in cutting performance, burning or scorch marks on the wood, or an increase in cutting time. If you notice any of these signs during your cutting tasks, it’s a clear indication that the blade needs to be replaced to maintain the quality and efficiency of your miter saw.
Safety First: Preparing For Blade Change
When changing the blade on a Dewalt miter saw, prioritizing safety is paramount. By taking the necessary precautions, you can ensure a smooth and secure blade replacement process. This includes familiarizing yourself with proper safety measures before initiating the blade change.
Disconnecting Power Supply
Before starting the blade change, it is crucial to disconnect the power supply to your Dewalt miter saw. This can be done by unplugging the saw from the electrical outlet to prevent any accidental start-ups or electrical hazards during the blade replacement process.
Wearing Appropriate Safety Gear
Prior to changing the blade, ensure that you are wearing appropriate safety gear such as protective gloves and safety glasses to shield yourself from potential debris or injury. These safety essentials create a protective barrier, minimizing the risk of harm during the blade replacement.
Securely Locking The Miter Saw
Securely locking the miter saw is essential to maintain stability during the blade change. Be sure to engage the saw’s blade lock mechanism to prevent any movement of the blade. This step helps in safely securing the saw, reducing the risk of accidents while replacing the blade.
How To Change The Blade: Step-by-step Guide
Changing the blade on a Dewalt miter saw is a simple yet essential maintenance task that ensures smooth and precise cutting performance. This step-by-step guide will walk you through the process, enabling you to handle this task effortlessly. Follow these instructions to maintain the efficiency and safety of your miter saw.
Gather Necessary Tools
Before starting the blade replacement process, gather the required tools:
- Wrench
- Phillips screwdriver
- Replacement blade
Raise The Blade Guard
Start by pulling up the blade guard to access the blade and its surrounding components.
Loosen The Blade Bolt
Using a wrench, turn the blade bolt in the direction opposite to the blade rotation to loosen it. Ensure the blade bolt is completely free before proceeding.
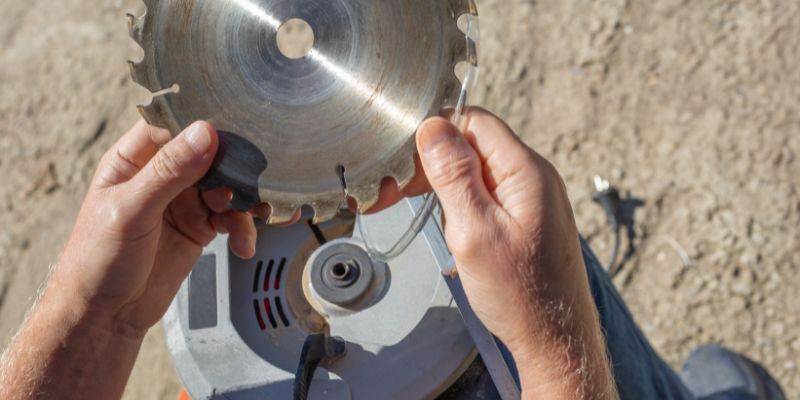
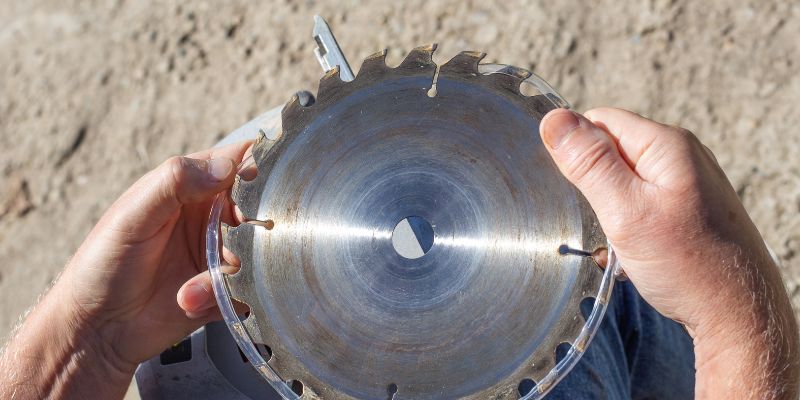
Remove The Old Blade Carefully
Gently pull the old blade out of the saw, taking care not to let it drop or hit any other parts of the saw. Keep the blade bolt and washer in a secure place while handling the old blade to prevent misplacement.
Clean The Blade Housing Area
Thoroughly clean the blade housing area using a brush or compressed air to remove any debris or sawdust. Ensure the area is free from any obstruction that could affect the installation of the new blade.
Upgrading Your Cutting Precision
Choosing The Right Blade For The Job
When it comes to upgrading the cutting precision of your Dewalt miter saw, selecting the right blade is crucial. Different blades are designed for specific materials and cutting applications. As a general rule, finer tooth blades are suitable for precise cuts on softer materials like wood, while coarser blades are better for tougher materials like metal or plastic. Most importantly, ensure the blade you choose is compatible with your specific miter saw model.
Aligning The New Blade Properly
Proper alignment of the new blade is essential for optimizing your cutting precision. Make sure the arbor and blade holes match for a secure fit. Follow the manufacturer’s guidelines for installing the blade to ensure it is aligned correctly. Improper alignment can result in inaccurate cuts and potential safety hazards, so it’s crucial to take your time and ensure precise alignment.
Ensuring Blade Tension And Clearance
Once the new blade is installed, it’s critical to ensure proper tension and clearance. Adjust the tension according to the manufacturer’s specifications to prevent blade slippage or excessive wear. Clearances should also be checked to avoid any interference between the blade and the cutting material. Maintaining the correct tension and clearance is key to maximizing cutting precision and safety.
Verify And Test: Post-replacement Checks
After replacing the blade on your Dewalt Miter Saw, it’s crucial to verify and test for optimal performance. Ensure the blade is securely fastened, and conduct a trial run to confirm smooth functionality and precise cutting results. This post-replacement check is essential for safety and efficiency.
After changing the blade on your Dewalt miter saw, it’s crucial to perform post-replacement checks to ensure the blade is properly aligned and calibrated for accurate cuts. By verifying and testing the alignment and performance, you can guarantee safe and precise cutting operations.
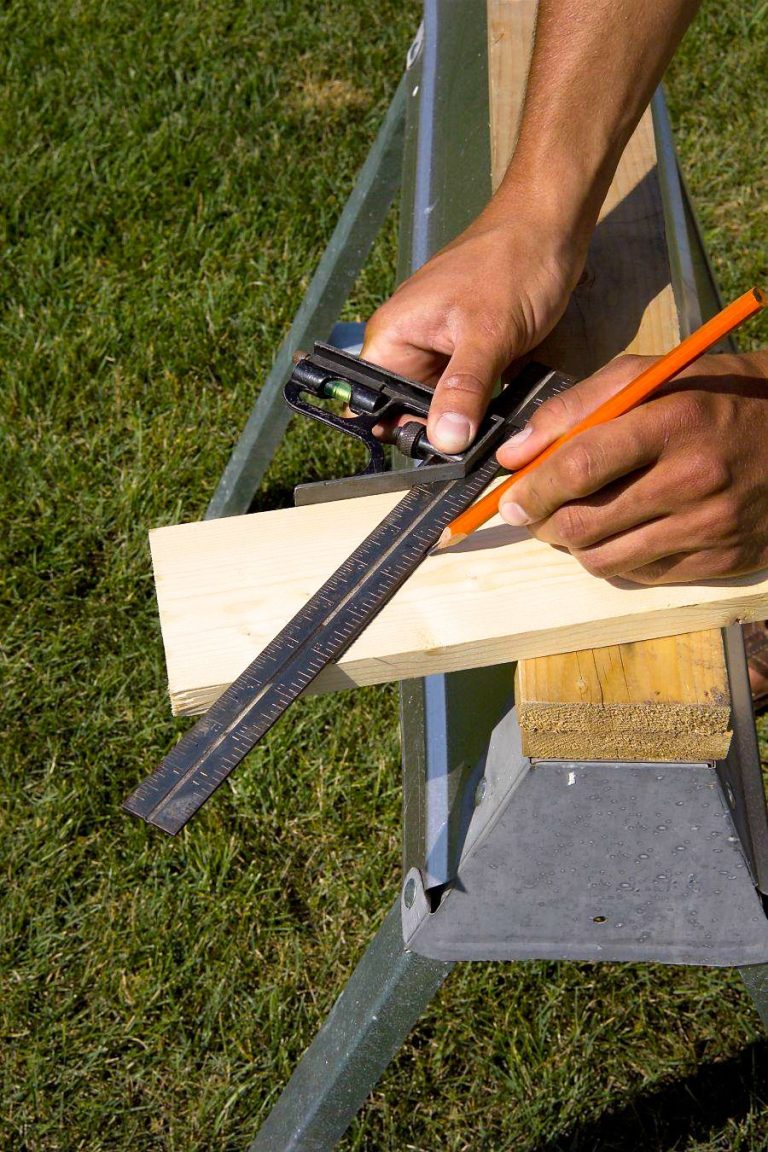
Checking Blade Alignment With The Fence
To ensure the new blade is aligned with the fence, start by adjusting the miter saw’s bevel and angle settings to 0 degrees. Use a combination square to check the alignment of the blade with the fence. Place the square against the fence and the blade, ensuring it makes contact with both. If there is any gap or misalignment, make necessary adjustments to align the blade parallel to the fence. This step is crucial for achieving accurate and square cuts.
Performing Test Cuts On Scrap Material
After verifying the blade alignment, it’s essential to perform test cuts on scrap material to assess the accuracy and smoothness of the cuts. Use a piece of scrap wood and make a couple of test cuts at different angles and lengths. Inspect the cut edges and ensure they are clean and precise. If there are any issues, such as tear-out or uneven cuts, recalibrate the miter saw for optimal performance.
Tips For Calibrating For Accurate Cuts
When calibrating the miter saw for accurate cuts, remember to use a reliable square to ensure the blade and fence are perfectly perpendicular. Additionally, always use sharp and high-quality blades to optimize cutting performance. Regularly inspect and maintain the saw’s components to prevent any potential issues that may affect the accuracy of your cuts.
Maintaining Your Dewalt Miter Saw Blade
To change the blade on your Dewalt miter saw, start by unplugging the saw and unlocking the arbor. Remove the guard and the bolt holding the blade, and replace the old blade with a new one. Use the wrench to tighten the bolt and reattach the guard, then plug the saw back in and you’re good to go!
Cleaning The Blade After Usage
After using your Dewalt miter saw, it’s essential to clean the blade to maintain its performance and longevity. Use a damp cloth to wipe away any sawdust, resin, or other debris that may have accumulated during use. For stubborn residue, a solution of warm water and mild detergent can be used. Ensure the blade is completely dry before storage to prevent corrosion.
Routine Inspection For Wear And Damage
Regularly inspecting your Dewalt miter saw blade is crucial for ensuring its continued functionality. Examine the blade for any signs of wear, such as dullness or warping, as these can affect the quality of the cuts. Additionally, check for any chips or cracks, which can compromise safety. If you notice any of these issues, promptly replace the blade to maintain optimal cutting performance.
Storage Recommendations For Blades
Proper storage is essential for preserving the quality of your Dewalt miter saw blades. When not in use, store the blades in a dry environment to prevent rust formation. Consider using blade protectors or sheaths to safeguard against damage and ensure safe handling. Additionally, storing the blades away from direct sunlight and extreme temperatures will help maintain their integrity over time.
Frequently Asked Questions On How To Change The Blade On A Dewalt Miter Saw
How Often Should I Change The Blade On A Dewalt Miter Saw?
You should change the blade when it becomes dull or starts to produce rough cuts. It’s also wise to change the blade if you notice excessive wear or damage.
What Tools Do I Need To Change The Blade On A Dewalt Miter Saw?
You will need an Allen wrench, a screwdriver, and possibly a clamp to secure the blade or guard. Always consult the saw’s manual for specific tool requirements.
Can I Use Any Brand Of Blade With My Dewalt Miter Saw?
It’s recommended to use Dewalt-approved blades for optimal performance and safety. Using non-approved blades may void the warranty or cause operational issues. Always check the saw’s manual for guidance on compatible blades.
How Do I Ensure The New Blade Is Properly Aligned In The Saw?
To ensure proper alignment, follow the manufacturer’s instructions for blade installation. Use a square to check the alignment before tightening the blade securely. Improper alignment can lead to inaccurate cuts and safety hazards.
Conclusion
Changing the blade on a Dewalt miter saw is a straightforward process that can be completed with a few simple steps. By following the manufacturer’s instructions and taking proper safety precautions, you can ensure a smooth and efficient blade replacement.
With this knowledge, you’ll be able to maintain your saw’s performance and safety for years to come.