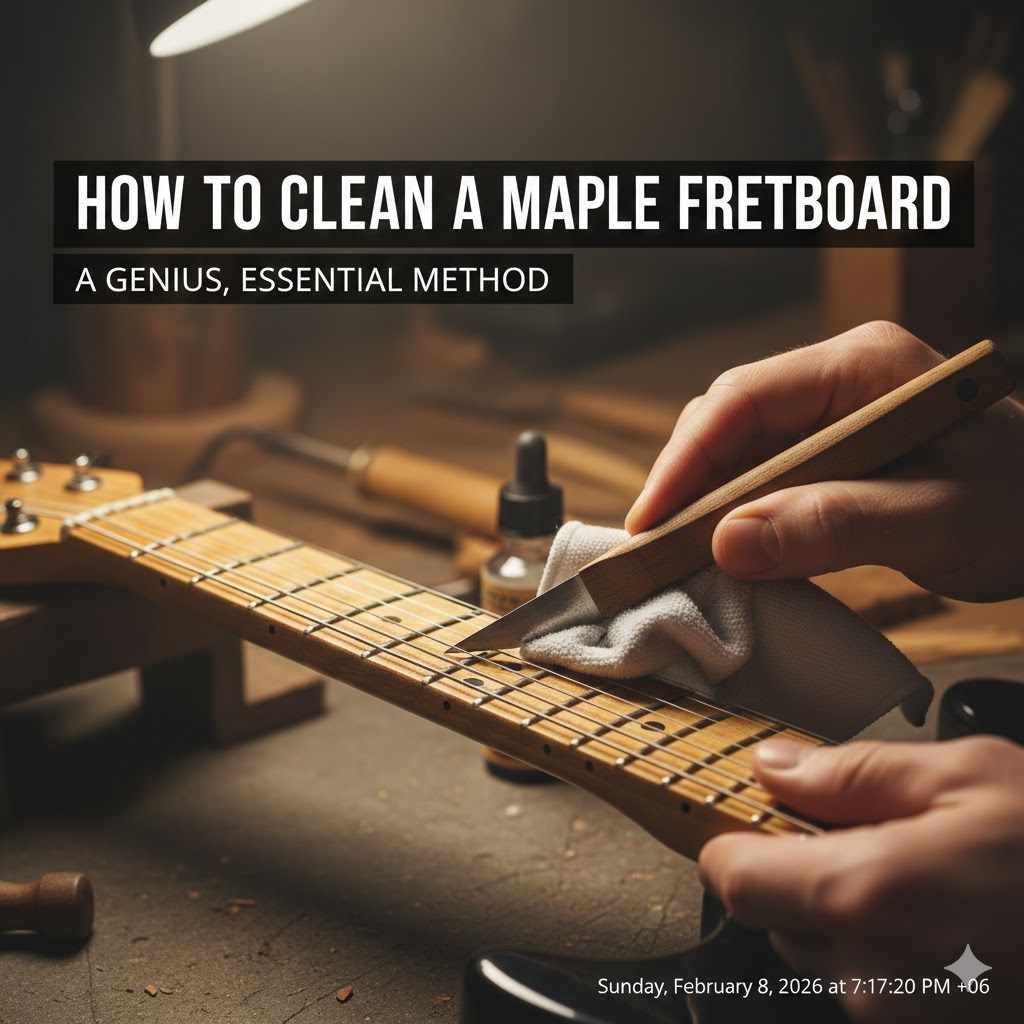
How To Clean A Maple Fretboard: A Genius, Essential Method
To clean a finished maple fretboard, use a few drops of Naphtha or a dedicated guitar polish on a clean microfiber cloth, gently wiping away grime. For an unfinished maple fretboard, lightly scrub with 0000-grade steel wool to lift dirt. Always wipe the fretboard completely dry afterward and avoid using oils, which can discolor the wood.
Hello there! It’s Md Meraj, your guide in the workshop. Today, we’re stepping away from the big saws and drills to tackle a smaller, but just as important, project: cleaning your guitar’s maple fretboard. A dirty fretboard doesn’t just look bad; it can feel sticky and even affect your playing. It’s a common problem that frustrates many musicians, but I promise you, the fix is simple and incredibly satisfying.
Many folks are nervous about cleaning maple, and for good reason! It’s a light-colored wood, and you want to keep it looking fresh and bright. Don’t you worry. I’m going to show you a genius, foolproof method that works every time. We’ll walk through the right tools, the gentle steps, and what to avoid so your guitar looks and feels brand new. Let’s get that fretboard shining!
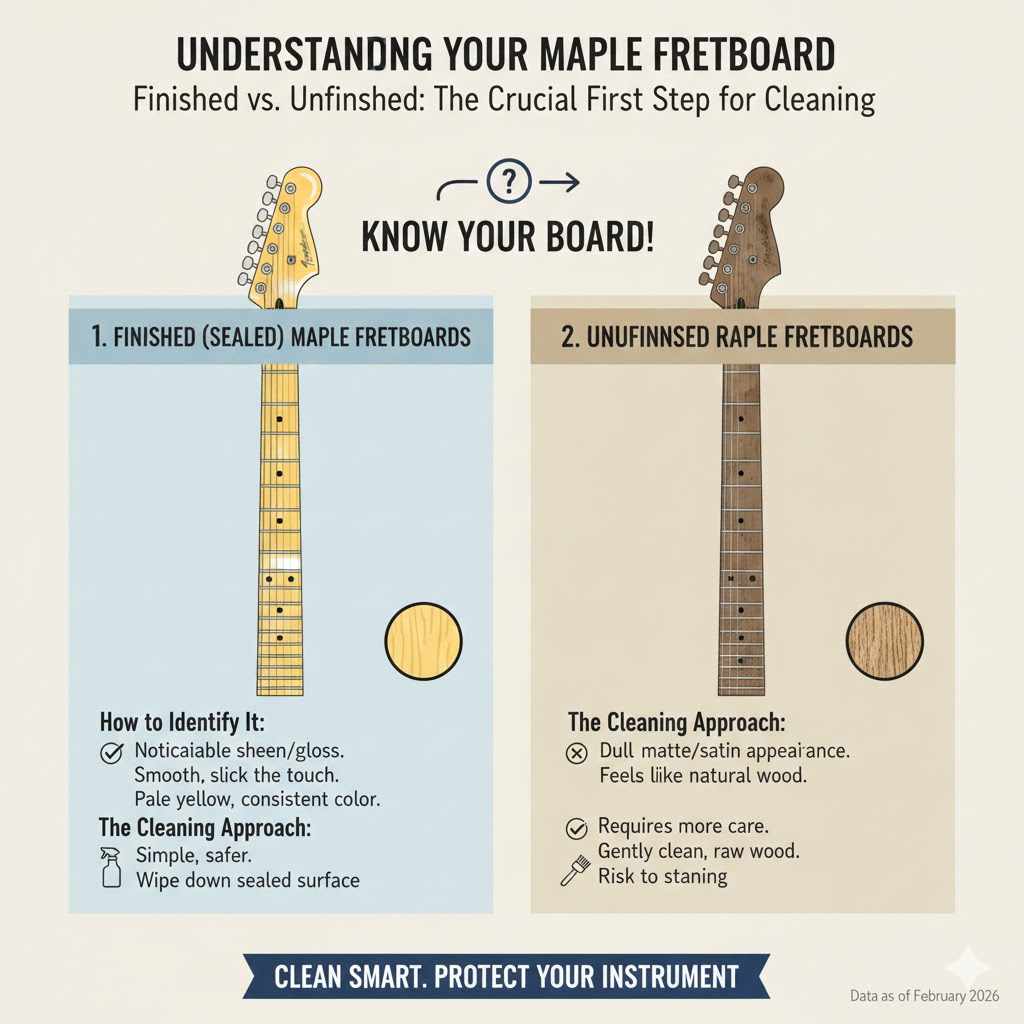
Understanding Your Maple Fretboard: The First Crucial Step
Before we grab a single cloth, we need to know what kind of maple fretboard you have. This is the most important part, because the type of fretboard determines the entire cleaning process. Maple fretboards come in two main varieties: finished and unfinished.
1. Finished (Sealed) Maple Fretboards
Most modern maple fretboards are finished. This means they have a protective layer of lacquer or polyurethane sealing the wood, much like the finish on your guitar’s body or the top of a wooden dining table. This seal is fantastic because it protects the pale maple wood from absorbing dirt, sweat, and oils from your fingers.
- How to Identify It: A finished maple fretboard will have a noticeable sheen or gloss. It feels smooth and slick to the touch. The color is often a bright, pale yellow or white, and it looks consistent from top to bottom.
- The Cleaning Approach: Since you’re cleaning the finish and not the raw wood, the process is much simpler and safer. You essentially just need to wipe down a hard, sealed surface.
2. Unfinished (Raw or Oil-Finished) Maple Fretboards
Unfinished maple fretboards are less common but are found on some vintage or custom-built guitars. These fretboards have no hard, glossy seal. The wood is left either completely raw or is treated with a light penetrating oil. Because the wood is exposed, it’s much more susceptible to staining and absorbing grime.
- How to Identify It: An unfinished fretboard will have a dull, matte, or satin appearance. It feels more like natural wood. You may see the wood grain more clearly, and it might have darker, dirty spots where your fingers press most often.
- The Cleaning Approach: This type requires more care. You’ll be cleaning the wood itself, which means we need to be very gentle to lift the dirt out of the wood grain without causing damage or discoloration.
If you’re unsure, a good rule of thumb is to assume your modern guitar from a major brand has a finished fretboard. But take a close look at the gloss and feel—your guitar will tell you what it is!
Gather Your Supplies: The Right Tools for the Job
Having the right tools makes any job easier, and this is no exception. The good news is you don’t need anything fancy or expensive. We’ll separate the lists for finished and unfinished fretboards to keep things simple.
For Finished Maple Fretboards:
- Two Microfiber Cloths: One for cleaning, one for polishing. Make sure they are clean and soft.
- Guitar Polish or Cleaner: Any high-quality polish from brands like Dunlop, D’Addario, or Fender will work perfectly.
- Alternative Cleaner (Naphtha): A small amount of Naphtha (like Ronsonol or Zippo lighter fluid) is a secret weapon for luthiers. It’s a fantastic degreaser that evaporates quickly without harming the finish. Use it in a well-ventilated area.
- A Soft Brush: An old, soft-bristled toothbrush or a small painter’s brush is perfect for getting grime from around the frets.
For Unfinished Maple Fretboards:
- Microfiber Cloth: You’ll need one for wiping away debris.
- #0000 Super-Fine Steel Wool: This is the key ingredient. Make sure it is grade #0000 (four zeros), as anything coarser will scratch the wood.
- Alternative Scrubber (Magic Eraser): A small piece of a Magic Eraser (melamine foam) can also work wonders. Use it very lightly.
- Painter’s Tape: This is essential for protecting your pickups from tiny steel wool particles, which are magnetic.
- Clean, Dry Work Area: A towel or mat to lay your guitar on.
Notice what’s missing? Water! We want to avoid using significant amounts of water on any fretboard, as it can seep into the wood and cause swelling or other issues. Now, let’s get to cleaning.
How To Clean A Finished Maple Fretboard: Step-by-Step
This is the most common scenario, and thankfully, it’s a breeze. Your goal here is to clean the glossy finish without scratching it.
Step 1: Prepare Your Guitar
Lay your guitar on a flat, stable surface with a towel underneath to protect it. To get full access to the fretboard, you’ll need to loosen the strings. You don’t have to remove them completely! Just slacken them enough so you can pull them to the sides of the neck, out of your way.
Step 2: The Initial Dry Wipe
Take your first clean microfiber cloth and give the entire fretboard a thorough wipe-down. This will remove any loose dust and surface debris. You’d be surprised how much comes off with just this simple step!
Step 3: Apply Your Cleaner
Now, let’s tackle the stuck-on grime. If you’re using a guitar polish, spray a small amount onto your cloth—not directly onto the fretboard. If you’re using Naphtha, apply a few drops to the cloth. Using the cloth ensures you don’t use too much liquid.
Step 4: Gentle Wiping Motion
With your dampened cloth, wipe the fretboard down, one section at a time. Use a gentle, circular motion to lift the dirt. You should see the grime transfer from the fretboard to your cloth. For stubborn spots, you might need to apply a little more pressure, but always be gentle.
Step 5: Detail Cleaning Around the Frets
Grime loves to build up right alongside the metal frets. This is where your soft brush comes in. With the fretboard still slightly damp from the cleaner, gently scrub along the edge of each fret. This will dislodge that stubborn gunk. Follow up with your cloth to wipe it away.
Step 6: The Final Buff
Once you’re satisfied that all the dirt is gone, take your second, completely dry microfiber cloth. Buff the entire fretboard to remove any leftover cleaner and restore its beautiful shine. Make sure it’s completely dry before you tune your strings back up.
And that’s it! Your finished maple fretboard should look as bright and clean as the day you got it. Now let’s look at the more delicate process for unfinished boards.
How To Clean An Unfinished Maple Fretboard: Step-by-Step
Cleaning an unfinished board requires a bit more finesse because you’re cleaning the raw wood pores. Our goal is to lift the dirt out of the grain without using liquids that could stain it.
Step 1: Prepare Your Guitar and Work Area
Just like before, lay your guitar down on a soft surface. This time, it’s best to remove the strings completely to give you total, unobstructed access. This is also the perfect time to give your strings a change!
Step 2: Protect Your Pickups!
This is a non-negotiable step. If you’re using steel wool, you MUST cover your pickups with painter’s tape. Steel wool sheds tiny metal particles that are magnetic. If they get on your pickups, they can be nearly impossible to remove and can cause issues with your guitar’s electronics. Cover them completely.
Step 3: The Gentle Scrub with Steel Wool
Take a small pad of your #0000 steel wool. The key here is to use very light pressure and to always scrub with the grain of the wood (up and down the neck, not side-to-side). Work on one fret at a time, gently rubbing the dirty areas. The steel wool will act like a very fine abrasive, lifting the grime from the wood pores without removing wood. You’ll see the dark spots start to lighten.
If you’re using a Magic Eraser, use it dry and with the same light, with-the-grain motion. It works in a similar way.
Step 4: Wipe Away the Debris
After scrubbing, you’ll have dust and steel wool residue on the fretboard. Use your clean, dry microfiber cloth to thoroughly wipe everything away. You can also use a vacuum with a brush attachment to make sure you get all the steel wool particles.
Step 5: Final Inspection and Touch-Up
Examine the fretboard. Are there any spots you missed? If so, repeat the gentle scrubbing process on those areas. Once you’re happy, give it one final, thorough wipe-down. Remove the painter’s tape from your pickups carefully.
Finished vs. Unfinished Maple Cleaning: A Quick Comparison
To make it even clearer, here’s a simple table that breaks down the key differences in cleaning these two types of fretboards.
| Task | Finished (Sealed) Maple | Unfinished (Raw) Maple |
|---|---|---|
| Primary Cleaning Tool | Microfiber cloth with guitar polish or Naphtha | #0000 Super-fine steel wool or a Magic Eraser |
| Use of Liquids | Yes, a small amount of dedicated cleaner applied to a cloth | No, this is a dry cleaning method to avoid staining |
| Main Goal | To clean the protective top coat (the finish) | To lift embedded grime directly from the wood pores |
| Protecting Pickups | Not necessary | Absolutely essential (use painter’s tape) |
| Conditioning/Oiling | Never. The finish seals the wood. | Generally not recommended for maple. Avoid oils. |
Common Mistakes to Avoid (Please Read!)
Part of a job well done is knowing what not to do. Here are a few common mistakes that can damage your beautiful maple fretboard. Avoiding these will ensure your guitar stays in perfect shape.
- Never Use Lemon Oil: While lemon oil and other conditioning oils are great for dark woods like rosewood or ebony, they should never be used on maple. On an unfinished maple fretboard, the oil will soak in and leave dark, blotchy stains. On a finished fretboard, it will just sit on top and create a greasy, sticky mess.
- Don’t Use Water: As mentioned before, avoid using water. According to the Forest Products Laboratory, wood readily absorbs moisture, which can cause it to swell, warp, or even crack the finish over time. A damp cloth might be okay in a pinch on a finished board, but a proper cleaner is always safer.
- Avoid Harsh Household Cleaners: Window cleaner, furniture polish (like Pledge), and all-purpose kitchen sprays contain chemicals that can damage a guitar’s delicate finish. Stick to products made specifically for guitars.
- Don’t Be Too Aggressive: Whether you’re wiping a finished board or scrubbing an unfinished one, gentle pressure is all you need. Scrubbing too hard can create scratches or wear through the finish.
- Forgetting to Protect Pickups: I’ll say it again for unfinished boards: always, always cover your pickups when using steel wool. This is one of the easiest and most costly mistakes to make.
How Often Should You Clean Your Fretboard?
This is a great question! You don’t need to do a deep clean every week. Proper maintenance is about finding a good balance. Here is a simple schedule you can follow.
| Type of Cleaning | Frequency | What to Do |
|---|---|---|
| Quick Wipe-Down | After every time you play | Use a clean, dry cloth to wipe down your strings and fretboard. This removes sweat and oils before they build up. |
| Standard Clean | Every 1-2 months or every string change | Perform the cleaning steps for your finished fretboard using guitar polish. This keeps grime from building up. |
| Deep Clean | Every 6-12 months, or when it looks visibly dirty | This is the full process described above, including using a brush around the frets or steel wool for unfinished boards. |
Listen to your guitar. If the fretboard feels sticky or looks grimy, it’s time for a clean, regardless of when you last did it. Regular, light maintenance will make the deep cleans much quicker and easier.

Frequently Asked Questions (FAQ)
1. Can I really use lighter fluid (Naphtha) on my expensive guitar?
Yes, absolutely! It sounds strange, but Naphtha is a pure petroleum distillate that has been used by guitar makers and repair experts for decades. Its main benefit is that it cuts through grease and grime effectively but evaporates extremely quickly, so it doesn’t soak into the wood or damage modern finishes. However, always use it in a well-ventilated area and keep it away from open flames. Fender’s own care guides recommend products with Naphtha for deep cleaning.
2. How can I be 100% sure if my fretboard is finished or unfinished?
The easiest way is the “water drop test,” but you must be extremely careful. In an inconspicuous area (like the very last fret), place a tiny, single drop of water. On a finished board, the water will bead up on the surface and stay there. On an unfinished board, it will start to soak into the wood within a few seconds. Wipe the water away immediately, regardless of the result. If in doubt, treat it as a finished board, as that method is safer for both types.
3. My unfinished fretboard has really dark, stubborn spots. What can I do?
For deep-set stains on unfinished maple, the #0000 steel wool method is your best bet. Be patient and use light, consistent pressure. It may take some time, but it should gradually lift the stain. If a stain is truly set in, it may have permanently discolored the wood. Some players see this as character—a sign of a well-loved instrument! Aggressive sanding is not recommended as it can change the fretboard’s radius.
4. I scratched my finished maple fretboard by accident. How can I fix it?
Minor surface scratches in a glossy finish can sometimes be buffed out using a very fine automotive swirl remover or polishing compound. Apply a tiny amount to a soft cloth and rub the scratch gently in a circular motion. This is an advanced technique, so if you are not confident, it’s best to consult a professional guitar technician or luthier.
5. Is there anything I can apply to my unfinished maple fretboard to protect it?
This is a topic of much debate. Some luthiers apply a very thin coat of a non-darkening, non-greasy protectant like a hard wax or a specialized fretboard sealant. However, the safest bet for a beginner is to leave it bare. Unfinished maple is intended to be a raw playing surface, and adding oils or waxes can change its feel and appearance. Keeping it clean and dry is the best form of protection.
6. Can I use steel wool on a finished maple fretboard?
No, you should not use steel wool on a finished fretboard. The glossy finish is a thin layer of plastic-like lacquer or poly, and steel wool will act like sandpaper, creating fine scratches and dulling the finish. Stick to soft cloths and liquid cleaners for finished boards.
Conclusion: A Fretboard You Can Be Proud Of
And there you have it—a clean, smooth, and happy maple fretboard. See? I told you it was simple! By correctly identifying your fretboard type and using the right gentle tools, you’ve not only made your guitar look better but also improved its feel and playability. Taking care of our tools, whether they are in the woodshop or the music room, is a deeply rewarding part of any craft.
Remember the golden rules: know your finish, avoid harsh oils and chemicals, and always be gentle. A little bit of care every now and then goes a long way in preserving the beauty and life of your instrument. Now, go tune up those fresh strings and enjoy the feel of a perfectly clean fretboard under your fingertips. Happy playing!