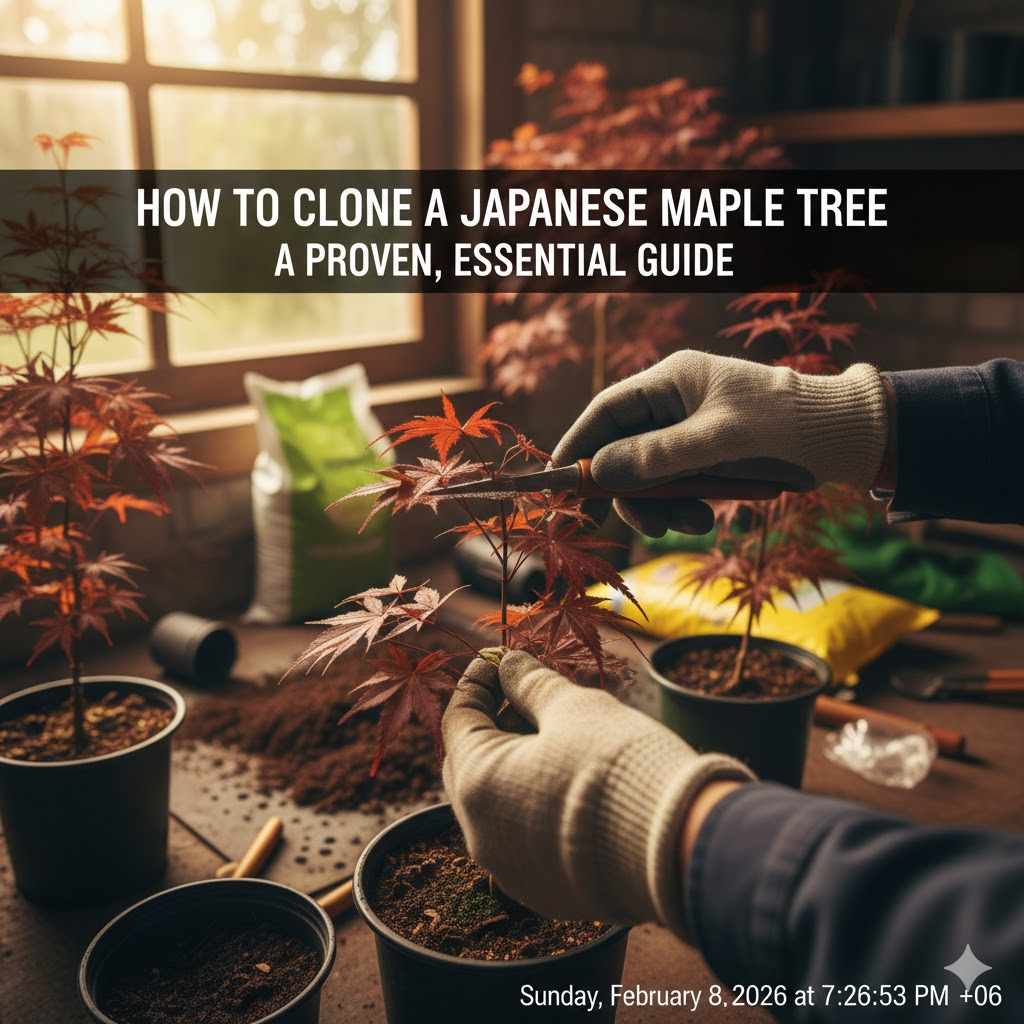
How To Clone A Japanese Maple Tree: A Proven, Essential Guide
To clone a Japanese maple tree, take a 4-6 inch softwood cutting from new growth in late spring. Remove the lower leaves, dip the cut end in rooting hormone, and plant it in a pot with well-draining soil. Cover with a plastic bag to maintain humidity and place it in bright, indirect light until roots form.
Hello there! It’s Md Meraj, and today we’re stepping out of the workshop and into the garden for a project that feels just as rewarding as crafting a piece of furniture. If you’ve ever looked at a beautiful Japanese maple and wished you could have another one just like it, you’re in luck. Cloning, or propagation, sounds complex, but it’s really a simple process anyone can master. It’s a fantastic way to multiply your favorite tree without spending a dime. In this guide, I’ll walk you through every simple step to create a new Japanese maple tree from a cutting. Let’s get our hands dirty and create something that will grow for years to come.
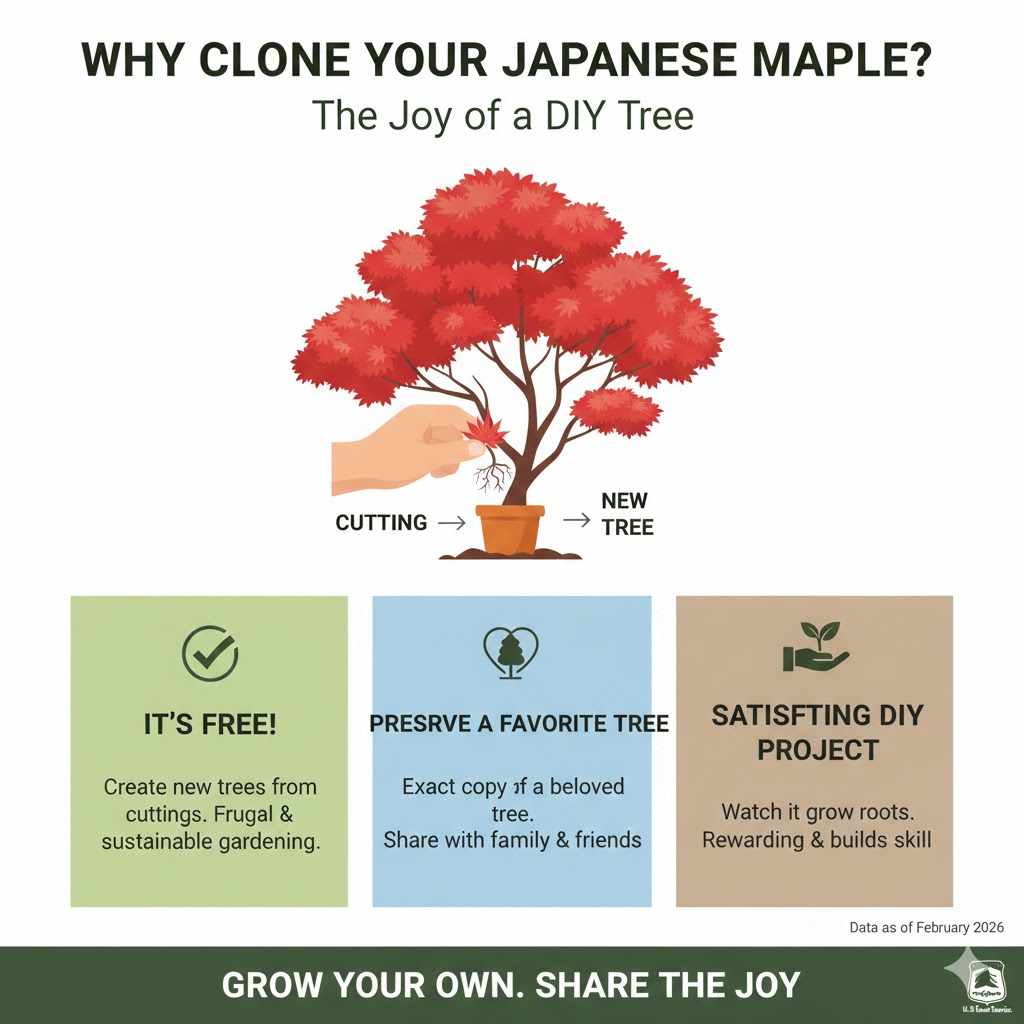
Why Clone Your Japanese Maple? The Joy of a DIY Tree
Before we dive into the “how,” let’s talk about the “why.” You might have a special Japanese maple in your yard—maybe it was a gift, or perhaps it has the most stunning red leaves you’ve ever seen. Cloning allows you to create an exact genetic copy of that beloved tree. It’s a wonderful, hands-on project that connects you to your garden in a new way.
Here are a few great reasons to try it:
- It’s Free! A new Japanese maple from a nursery can be quite expensive. Cloning lets you create new trees using just a small cutting from your existing one. It’s the ultimate in frugal and sustainable gardening.
- Preserve a Favorite Tree: If you have an older tree or one with sentimental value, cloning ensures its legacy continues. You can have a living copy to plant elsewhere or share with family and friends.
- Perfect for Gifting: A tree you grew yourself makes a thoughtful and personal gift. It’s a present that literally keeps on growing, reminding the recipient of you for years.
- A Satisfying DIY Project: Just like finishing a woodworking project, watching a small cutting grow roots and develop into a new tree is incredibly rewarding. It builds your confidence and teaches you a valuable skill.
This process is all about patience and simple techniques. It doesn’t require expensive equipment or expert knowledge. With a little care, you can successfully create a new tree that carries all the beautiful traits of its parent.
Understanding the Basics: Cuttings vs. Grafting
When people talk about creating new Japanese maples, you might hear two terms: cuttings and grafting. It’s helpful to know the difference, but don’t worry, we’re focusing on the easy method today!
Taking cuttings is what we’ll be doing. This is true cloning. You take a piece of the parent tree (a stem or branch), encourage it to grow its own roots, and it becomes a new, independent plant that is genetically identical to the original.
Grafting is a more advanced technique often used in commercial nurseries. It involves taking a cutting from a desirable Japanese maple (called the scion) and attaching it to the root system of a different, hardier maple tree (called the rootstock). It requires precision and skill to ensure the two parts fuse and grow together.
For beginners, cuttings are the way to go. It’s straightforward, requires fewer specialized tools, and gives you that wonderful feeling of growing a tree from scratch. Here’s a quick comparison to make it even clearer:
| Feature | Cloning with Cuttings | Grafting |
|---|---|---|
| Skill Level | Beginner-friendly and easy to learn. | Advanced, requires practice and precision. |
| Process | Cut a stem and encourage it to grow its own roots. | Join a cutting (scion) to another tree’s roots (rootstock). |
| Result | A tree genetically identical to the parent on its own roots. | A tree with the top of one variety and the roots of another. |
| Tools Needed | Basic gardening tools: pruners, pot, soil, rooting hormone. | Specialized tools like a grafting knife and wrapping tape. |
As you can see, working with cuttings is the perfect starting point for any DIY enthusiast. It’s all about giving a piece of a plant the right conditions to start a new life.
When is the Best Time to Take Cuttings?
Timing is one of the most important parts of this project. If you take your cutting at the right time of year, you give it the best possible chance to grow roots. For Japanese maples, the ideal time is during a period of active growth.
The best time to take cuttings is in late spring or early summer, usually between late May and early July. This is when the tree has produced new, fresh growth. This type of cutting is called a “softwood” cutting.
What is a softwood cutting? It’s a piece of a stem from the current season’s growth. Here’s how you can identify it:
- It’s Flexible: Softwood is still young, so it will be bendy and flexible.
- It Has a Greenish Color: The stem won’t be tough and woody yet; it will still look fresh and green.
- It Snaps When Bent: This is the key test. If you bend the stem sharply, it should snap cleanly. If it just crushes or bends without breaking, it’s too young (immature). If it’s tough and hard to bend, it’s too old (hardwood).
Taking cuttings during this softwood stage is ideal because the plant’s cells are dividing rapidly and are primed to form new roots. Think of it as catching the plant at its peak energy level for the year. Trying to take cuttings in the fall or winter is much harder for a beginner, as the wood is dormant and less willing to root.
Gathering Your Tools and Materials
Like any good project, success starts with having the right tools and materials ready to go. You don’t need anything fancy, and you probably have most of these items already. Keeping things clean is a top priority to prevent diseases from harming your delicate cuttings.
Here’s your simple checklist:
- A Healthy Japanese Maple Tree: Choose a strong, disease-free tree to take your cuttings from.
- Sharp, Clean Pruning Shears or a Knife: A clean cut is crucial. Wipe the blades with rubbing alcohol before you start to sterilize them and prevent the spread of bacteria.
- Small Pots or a Seedling Tray: 4-inch pots are perfect for individual cuttings. Make sure they have drainage holes at the bottom.
- Rooting Hormone Powder or Gel: This is the secret ingredient that gives your cuttings a big boost. It contains hormones that signal the stem to start producing roots. You can find it at any garden center.
- The Right Potting Mix: Do not use regular garden soil. It’s too heavy and can lead to rot. A 50/50 mix of perlite and peat moss (or coco coir) is perfect. This mix provides excellent drainage and aeration, which roots need to thrive.
- Clear Plastic Bags: Large enough to fit over your pots. These will act as mini-greenhouses to trap humidity.
- Small Sticks or Stakes: Wooden skewers or small twigs work perfectly. You’ll use these to prop up the plastic bag so it doesn’t touch the leaves.
- A Watering Can or Spray Bottle: For gently watering your cuttings.
Having everything laid out and ready before you start makes the whole process smooth and enjoyable. It’s just like setting up your workshop before starting a new woodworking build!
Step-by-Step Guide to Cloning Your Japanese Maple
Alright, with your tools ready and the time of year just right, let’s get to the fun part. Follow these steps carefully, and you’ll be on your way to creating a beautiful new tree. I’ve broken it down into simple, manageable actions.
Step 1: Prepare Your Potting Mix and Pots
First, get your pots ready. If you’re reusing old pots, give them a good scrub with soap and water to make sure they’re clean. A clean home is a healthy home for your cuttings.
Next, mix your soil. In a small bucket or container, combine equal parts perlite and peat moss. Add a little water and mix it with your hands until it’s evenly moist but not soaking wet. It should feel like a damp sponge. Fill your pots with this mixture, pressing down gently to remove any large air pockets. Set them aside so they’re ready and waiting.
Step 2: Select the Right Branch on Your Tree
Walk over to your Japanese maple and take a look. You’re searching for the perfect branches for cuttings. Remember, you want softwood—the new growth from this year.
- Look for stems that are about the thickness of a pencil.
- Avoid stems that have flowers or buds on them. You want the cutting’s energy to go into making roots, not blooms.
- Choose a branch on the side of the tree that gets good morning sun. These are often the healthiest.
- Perform the “snap test” mentioned earlier to confirm you have true softwood.
Step 3: Take Your Cuttings Correctly
Once you’ve identified a few good stems, it’s time to make the cut. It’s best to do this in the early morning when the tree is full of moisture and not stressed by the sun’s heat.
- Using your sterilized pruning shears or knife, cut a 4 to 6-inch section from the tip of the branch.
- Make your cut at a 45-degree angle, right below a leaf node (the little bump on the stem where a leaf grows from). Cutting here increases the surface area for root growth.
- Take a few more cuttings than you think you’ll need. Not every cutting will succeed, so taking 5 or 6 gives you a much better chance of getting a couple of strong new trees.
- Place your cuttings into a plastic bag with a damp paper towel immediately to keep them from drying out while you prepare them.
Step 4: Prepare the Cuttings for Rooting
Now, head back to your workspace to prepare each cutting for planting. This is a delicate but simple process.
- Take one cutting out of the bag. Using your fingers or shears, carefully remove the leaves from the bottom half of the stem. Leave two or three sets of leaves at the top. This prevents moisture loss and helps the cutting focus on root growth.
- If the top leaves are very large, you can cut them in half horizontally. This also reduces water loss through evaporation.
- Pour a small amount of rooting hormone powder or gel onto a paper plate or into a small dish. Do not dip the cutting directly into the main container to avoid contamination.
- Moisten the bottom inch of the cutting with water, then dip it into the rooting hormone. Gently tap off any excess powder. You want a light, even coating.
As Purdue University’s Extension points out, maintaining sterile conditions is vital for preventing fungal diseases, which cuttings are very susceptible to. Clean tools and fresh rooting hormone for each batch are key.
Step 5: Plant Your Cuttings
Your cuttings are now ready for their new homes. Take one of the pots you prepared earlier.
- Using a pencil or your finger, poke a hole in the center of the potting mix. Make it deep enough for about half the length of your cutting. Making a hole first prevents the rooting hormone from being rubbed off.
- Gently place the cutting into the hole.
- Lightly press the soil around the stem to ensure it’s secure and making good contact with the mix.
- Gently water the cutting to help settle the soil.
You can plant multiple cuttings in a larger pot, just be sure to space them a few inches apart so their leaves don’t overlap.
Step 6: Create a Mini-Greenhouse
The final step is to create a humid environment, which is the most critical factor for success. Cuttings don’t have roots yet, so they absorb moisture through their leaves. High humidity prevents them from drying out.
- Place two or three small sticks or stakes into the soil around the edge of the pot. These will act as a frame to hold the plastic bag up.
- Drape a clear plastic bag over the top of the pot, ensuring it doesn’t touch the leaves of the cutting. The stakes will prevent this.
- Secure the bag around the rim of the pot with a rubber band or string. This creates a tiny, self-contained greenhouse that traps moisture.
And that’s it! Your cutting is now prepared for its journey to becoming a new tree.
Caring for Your New Cuttings
Your job isn’t done just yet. For the next several weeks, your cuttings will need a bit of attention to ensure they have the perfect conditions for rooting. Think of it as a quiet, watchful period.
Finding the Perfect Spot
Where you place your potted cuttings is very important. They need a location that gets plenty of bright, indirect light. A spot near a north-facing window or on a porch that’s shaded from the harsh afternoon sun is ideal. Direct sunlight will be too intense and can scorch the leaves and overheat the mini-greenhouse, killing your cutting.
Watering and Moisture
Your goal is to keep the soil consistently moist, but never soggy. Overwatering is a common mistake and will cause the stem to rot before it can form roots.
- Check the soil every few days by touching it. If the top feels dry, it’s time to water.
- To water, briefly remove the plastic bag and gently water the soil. Try not to get the leaves wet. A spray bottle can be great for this.
- Open the bag for about 10-15 minutes every couple of days. This allows for fresh air circulation and helps prevent mold from forming.
Patience is Key: How Long Does Rooting Take?
This is where patience becomes your best tool. Japanese maples are not the fastest plants to root from cuttings. It can take anywhere from 4 weeks to 3 months for roots to develop. During this time, you might not see much happening on top, but hopefully, there’s a lot of activity happening below the soil.
You can check for roots using the “gentle tug test.” After about 4 or 5 weeks, give the stem a very light, gentle pull. If you feel resistance, it means roots have formed and are holding the cutting in place. If it pulls out easily, it’s not ready yet. Just place it back in the hole, firm the soil, and give it more time.
Common Problems and Easy Solutions
Even with the best care, you might run into a few small issues. Don’t be discouraged! It happens to everyone, and most problems have a simple fix. Here’s a quick troubleshooting guide.
| Problem | Likely Cause | Simple Solution |
|---|---|---|
| Leaves are yellowing and dropping. | This is often normal. The cutting is shedding old leaves to conserve energy for making roots. | Remove the fallen leaves from the pot but don’t panic. As long as the stem is green and firm, it’s still viable. |
| The whole cutting is wilting. | Usually a sign of low humidity or not enough water. | Make sure your plastic bag is sealed properly. Mist the inside of the bag with water to increase humidity and check if the soil is moist. |
| Fuzzy, gray mold is growing on the soil or stem. | Too much moisture and not enough air circulation. | Remove the bag for a few hours each day to let things air out. You can also carefully wipe away visible mold with a cotton swab. Reduce watering slightly. |
| The stem turns black or brown and mushy. | This is called rot, usually from overwatering. | Unfortunately, a rotten cutting usually cannot be saved. This is why it’s wise to start with several cuttings. Throw this one out and focus on the others. |
Remember, this is a numbers game. Even experienced gardeners don’t have a 100% success rate. If one or two of your cuttings fail, that’s okay! It’s all part of the learning process.
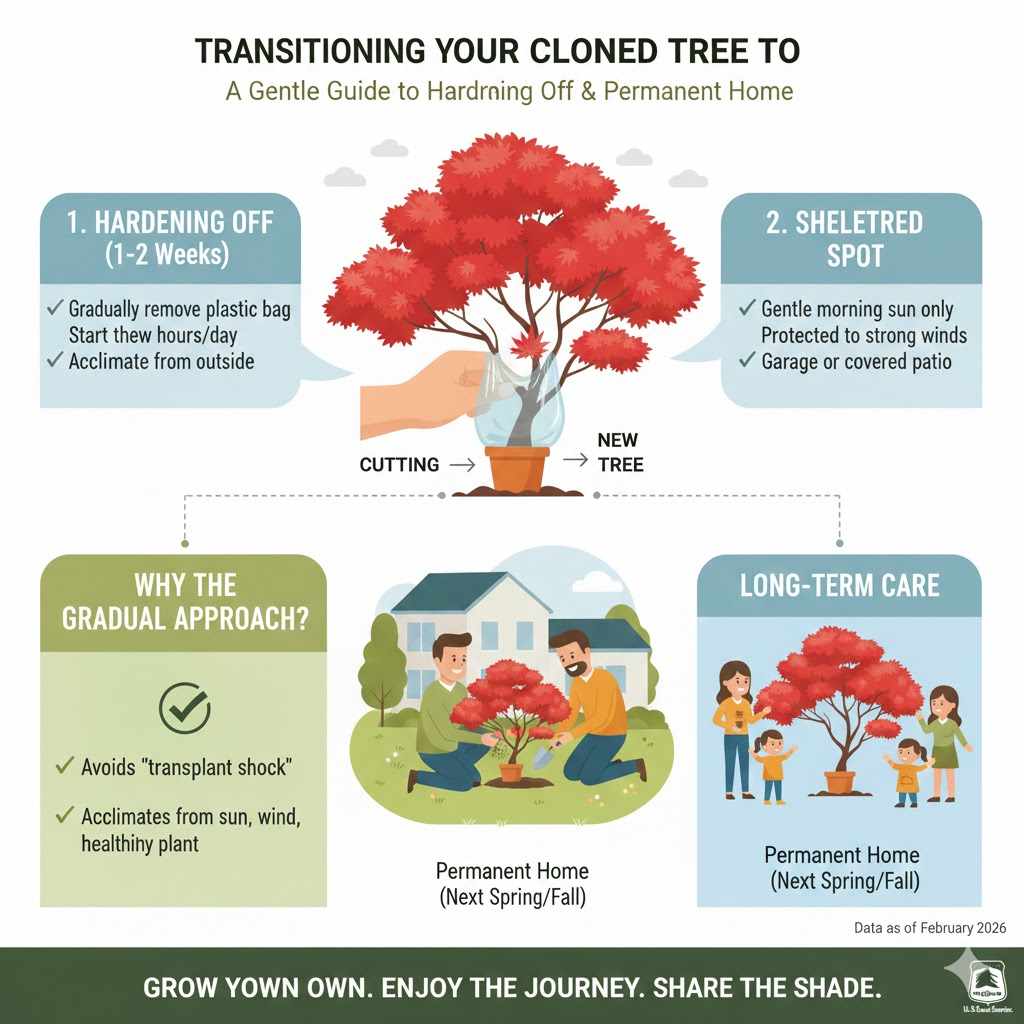
Transitioning Your Cloned Tree to a Permanent Home
Once your cutting has a healthy set of roots (you’ll feel good resistance on the tug test, or you may even see roots peeking out of the drainage holes), it’s time to start treating it like a real plant. This transition needs to be gradual to avoid shocking your new tree.
This process is called “hardening off.” The goal is to slowly acclimate your tree to the less humid, more variable conditions of the outside world. This can take about one to two weeks.
- Start by removing the plastic bag for a few hours each day. Gradually increase the amount of time the bag is off over the course of a week.
- Move the pot to a sheltered outdoor spot that receives only gentle morning sun and is protected from strong winds.
- After another week, your new tree should be accustomed to being outside full-time.
Your cloned Japanese maple can live in its pot for its first year. It’s best to let it develop a strong root system before planting it in the ground. Keep it watered and move it to a slightly larger pot if it becomes root-bound. The following spring or fall is the perfect time to choose a permanent location in your garden and plant your homegrown tree.
Frequently Asked Questions (FAQ)
1. What is the easiest Japanese maple to clone?
Generally, the non-dissected, upright varieties with green or red leaves (like ‘Bloodgood’ or the basic Acer palmatum species) tend to have a higher success rate with cuttings than the more delicate weeping or laceleaf varieties. However, this method can work for any type, so it’s always worth a try!
2. Can I use honey instead of rooting hormone?
You may have heard of using honey as a natural rooting aid. While honey has some mild antifungal properties, it does not contain the hormones needed to stimulate root growth. For a woody cutting like a Japanese maple, a commercial rooting hormone from a garden center will give you a significantly higher chance of success.
3. Why did my cutting turn brown and shrivel up?
This usually means the cutting dried out before it had a chance to grow roots. This could be due to low humidity (the plastic bag wasn’t on properly), too much direct sun, or not watering enough. Make sure to keep the environment moist and the light indirect.
4. Can I root Japanese maple cuttings in water?
While some houseplants root easily in water, it’s not recommended for woody cuttings like Japanese maples. Roots grown in water are different from roots grown in soil and often have a hard time transitioning to a pot. The potting mix method described in this guide provides the right balance of moisture and air for strong, healthy root development.
5. How big will my cloned tree get?
Since your new tree is an exact clone, it will have the same genetic potential as its parent. It will eventually grow to the same mature size and have the same shape, leaf color, and characteristics. You can check the specific variety of your parent tree to find its typical height and spread.
6. When can I plant my newly rooted maple outside?
It’s best to be patient. After your cutting has rooted, let it grow in its pot for at least a full growing season, or even a full year. This allows it to develop a robust root system that can handle the stress of being transplanted into the garden. The best times to plant it outside are in the spring or fall.
A Rewarding Project for Any DIYer
There you have it—a complete guide to cloning your very own Japanese maple tree. It may seem like a lot of steps, but each one is simple and straightforward. This project is more about care and patience than it is about having a green thumb. It’s about giving nature a helping hand and watching something amazing happen.
Just like with woodworking, you’re taking raw material and, with a bit of technique and patience, creating something beautiful and lasting. Don’t be afraid to experiment. Take a few extra cuttings, try a slightly different location, and learn from the process. The feeling of planting a tree in your yard that you grew yourself from just a tiny twig is an incredible reward. I hope you give it a try and enjoy the simple, quiet satisfaction of making something grow.