What Does It Mean to Countersink a Screw? (82° vs 90°)
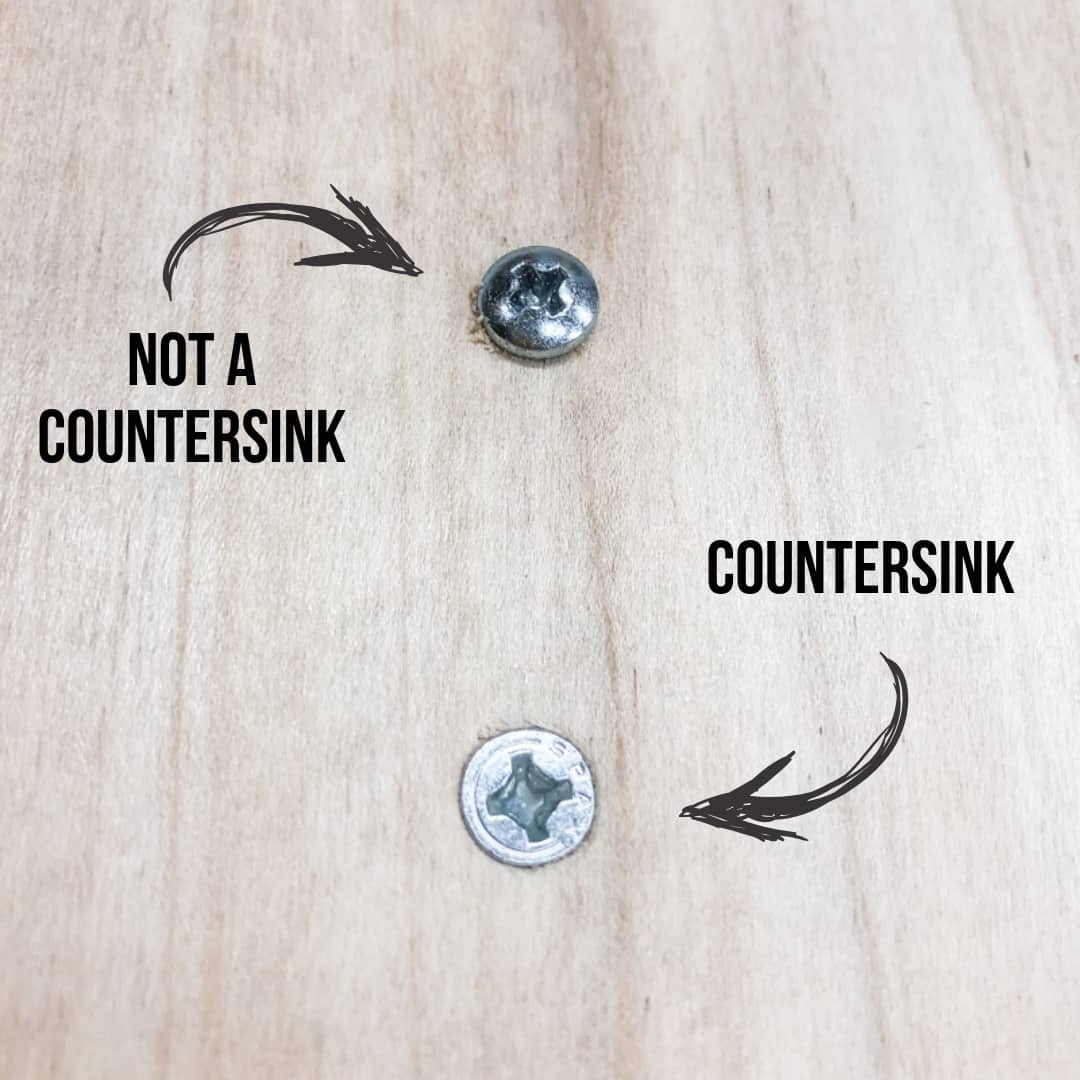
Countersinking a screw means cutting a cone-shaped recess above the pilot hole so the screw head sits flush with or below the surface — unlike a counterbore, which is flat-bottomed. Using the wrong angle (82° vs. 90°) or drilling too deep splits softwood and leaves a weak, proud screw head. This guide covers the standard angle chart, how countersinking differs from counterboring, and the tools that avoid the most common mistakes.
Introduction To Countersinking
Countersinking a screw means cutting a cone-shaped recess in the surface so the screw head sits flush with, or below, the surface instead of sticking up. It is done with a countersink bit — a separate step from drilling the pilot hole — and is standard practice in woodworking, metalworking, and construction for a smooth, professional-looking finish that also helps prevent the wood from splitting.

Tools Needed
A countersink tool creates a conical hole for screws to sit flush with a surface. Essential tools include a drill, countersink bit, and screwdriver.
Drills
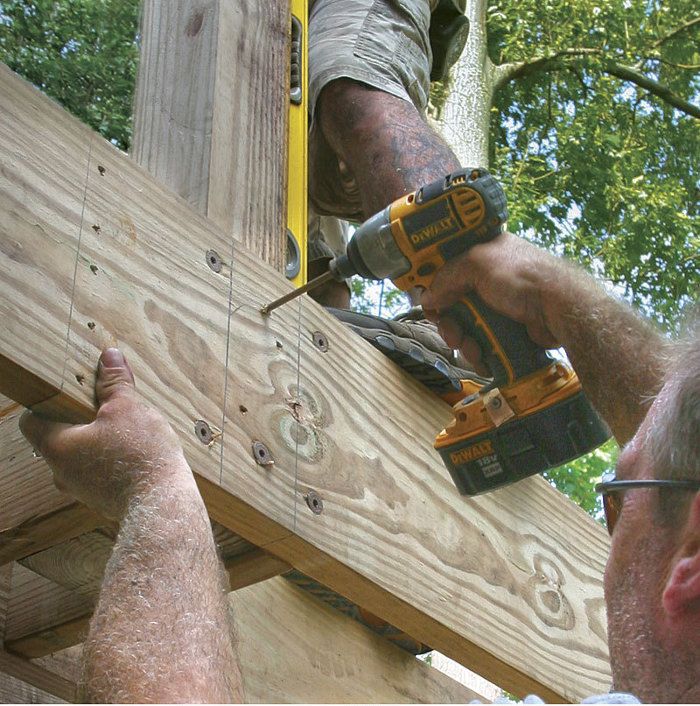
A drill is a must-have tool for countersinking screws. Cordless drills are light, portable, and easy to control. Always match the drill bit to the material — a dull or wrong-size bit is the most common cause of a ragged hole. Wear safety glasses to protect your eyes.
Countersink Bits
Countersink bits create the recess for the screw head so it sits flush with the surface. Choose the size that matches your screw head diameter. Some bits have an adjustable depth stop, which helps control exactly how deep the recess goes. Keep bits clean and sharp — dirty or dull bits tear the wood instead of cutting it.
Best Countersink Bit Set Pick
EZARC 12-Piece Adjustable Countersink Drill Bit Set
Covers screw sizes #4 through #12 with a magnetic extension bit holder and storage case.
- Best for: handling multiple wood screw sizes without buying separate bits
- Why we picked it: adjustable depth stops make it easy to match the 82° angle chart in this guide
- Main drawback: the storage case is plastic and can crack if dropped
Compare more countersinking options
 Option 1 FTG USA 5-Piece Countersink Set
|
 Option 2 Stainless Flat-Head Wood Screws (120 pc)
|
 Option 3 3-in-1 Countersink/Counterbore Set (82°)
|
As an Amazon Associate we earn from qualifying purchases.
What Angle Should You Use to Countersink a Screw?
A countersink angle is the cone angle cut into the recess so it matches the underside of the screw head. Using the wrong angle leaves a gap around the head or lets it sit too high — the two must match for the screw to seat flush.
| Angle | Standard | Best For |
|---|---|---|
| 82° | US / Imperial (Unified Thread Standard) | Most wood screws sold in North America |
| 90° | Metric / ISO | UK and metric flat-head screws |
| 100° | Aerospace / structural | Rivets and structural fasteners in thin material |
📊 Most commercial wood screws sold in North America use an 82° countersink angle; UK and metric hardware typically use 90°. — Source: Rivcut Countersink Size & Angle Chart (rivcut.com)
Types Of Countersinks
Fluted countersinks have several grooves that help clear material as they cut. They come in sizes matched to specific screw gauges and work well in both wood and metal, leaving a clean recess that seats the screw flush.
Cross-hole countersinks have a hole through the side that clears debris as you drill, which helps the bit last longer and stay cooler. They are common for both metalwork and wood, and give a smooth, consistent finish.

Countersink vs. Counterbore: What’s the Difference?
A countersink cuts a tapered, cone-shaped recess for a flat- or oval-head screw. A counterbore cuts a flat-bottomed, cylindrical hole — usually for a bolt head, socket-head cap screw, or to hide a screw entirely under a wood plug.
| Feature | Countersink | Counterbore |
|---|---|---|
| Hole shape | Conical / tapered | Flat-bottomed cylinder |
| Used for | Flat-head or oval-head screws | Bolts, socket-head cap screws |
| Typical finish | Screw head sits flush with the surface | Often covered with a wood plug |
| Best for | Furniture, cabinets, trim work | Structural bolts, hidden hardware |
Step-by-step Process
- Mark the screw location: Mark the exact spot with a pencil so the pilot hole and countersink stay centered.
- Drill the pilot hole: Use a bit sized to the screw’s shank — undersized bits split softwood, oversized bits won’t hold threads.
- Cut the countersink recess: Switch to a countersink bit matched to the screw head’s angle (82° or 90°) and drill just deep enough for the head to sit flush.
- Test-fit before driving: Drop the screw into the hole without driving it — the head should sit level with, or just below, the surface.
- Drive the screw flush: Drive the screw home on low drill torque so the head seats without stripping the wood fibers.
Common Mistakes
Countersinking a screw involves creating a conical hole so the screw head sits flush with the surface. Avoiding mistakes like drilling too deep or using the wrong bit size is essential for a proper fit.
Incorrect Depth
Using the wrong depth is a common mistake. Too deep, and the screw sits below the surface, weakening the joint. Too shallow, and the head stays proud — a safety and appearance problem. Measure the depth first, and use a depth gauge or a bit with an adjustable stop if you have one.
Wrong Bit Size
Choosing the wrong bit size can ruin the work. Too large, and the screw won’t hold. Too small, and the wood splits as the head forces its way in. Always match the bit size to the screw — check the packaging for the recommended size.

Applications Of Countersinking
Countersinking is a core technique in woodworking — furniture, cabinets, and shelving all use it to keep screw heads flush and prevent the wood from splitting as pieces are joined. Metalworking projects countersink screws and bolts for the same reason: a flush fastener resists snagging and wears more evenly over time.
Benefits Of Countersinking
Countersinking gives a smoother, more professional finish since screw heads sit flush instead of sticking out, and the recess is easy to fill with wood filler, putty, or a plug before painting or staining. It also reduces stress on the wood fibers around the hole, which helps prevent splitting and keeps the joint strong over time.
Troubleshooting Tips
Countersinking a screw involves creating a conical hole so the screw head sits flush with or below the surface. Properly countersinking improves both aesthetics and safety.
Fixing Misaligned Screws
Misaligned screws can cause problems down the line. Remove the screw, then realign or re-drill the hole if needed before inserting it again. If it still isn’t straight, step up to a larger screw so it fills the hole properly, and use a countersink bit again so the head still sits flush.
Dealing With Splintering
Splintering happens when the wood breaks apart around the hole. Use a sharp bit and drill slowly and steadily. Painter’s tape over the drill area helps hold the wood fibers together, and starting with a small pilot bit before stepping up to the countersink bit also reduces the risk.
“In our shop, we default to an 82° countersink bit for standard wood screws and only switch to 90° when we’re working with metric hardware — mixing the two is the single most common reason a screw head ends up sitting proud instead of flush.”
Frequently Asked Questions
What Does It Mean to Countersink a Screw?
Countersinking a screw means cutting a cone-shaped recess above the pilot hole so the screw head sits flush with, or slightly below, the surface instead of sticking up.
What Angle Should You Use to Countersink a Wood Screw?
Use an 82° countersink for most wood screws sold in North America. Metric and UK flat-head screws typically need a 90° angle instead, so check the screw head’s angle before drilling.
What Is the Difference Between a Countersink and a Counterbore?
A countersink cuts a tapered, cone-shaped recess for a flat-head screw. A counterbore cuts a flat-bottomed, cylindrical hole, usually for a bolt head or to hide a screw under a wood plug.
Why Is Countersinking Important?
Countersinking gives a flush, professional finish, prevents the screw head from snagging clothing or skin, and reduces the risk of splitting softwood by spreading out driving stress.
What Happens If You Drill a Countersink Hole Too Deep?
A too-deep countersink hole seats the screw head below the surface, which weakens its grip and leaves a visible gap. Fill it with wood filler or a plug, or move to a slightly larger screw so the head seats properly.
Conclusion
Countersinking a screw creates a flush finish, prevents snagging, and helps stop wood from splitting. The two things that matter most are matching the countersink angle (82° or 90°) to your screw head and controlling the depth — get those right and the technique is easy to apply on any project.