
How to Cut a Groove in Wood: Master the Art with These Expert Techniques
To cut a groove in wood, use a router or a table saw with a dado blade and securely clamp the wood to a work surface. Cutting a groove in wood can be a useful technique for various woodworking projects.
Whether you want to create decorative details, join pieces together, or simply add functional elements, knowing how to cut a groove is essential. While there are different methods available, one of the most popular options is using a router or a table saw with a dado blade.
By following these steps and taking necessary precautions, you can achieve clean and precise grooves in your woodwork. This guide will walk you through the process, giving you the confidence to tackle your woodworking projects with ease. So, let’s get started and learn how to cut a groove in wood effectively.
Selecting The Right Tools
When it comes to cutting a groove in wood, selecting the right tools is crucial in achieving a clean and precise result. By using the appropriate saw and chisel, you can ensure that your grooves are smooth and accurately cut, making your woodworking projects stand out.
Choosing The Proper Saw
One of the first steps in cutting a groove is to choose the proper saw. The type of saw you select will depend on the depth and width of the groove you want to create. Here are a few saws to consider:
| Saw Type | Usage |
|---|---|
| Crosscut Saw | Ideal for cutting grooves across the grain of the wood. |
| Rip-Cut Saw | Best for cutting grooves along the grain of the wood. |
| Japanese Pull Saw | Great for precise and delicate grooves. |
By choosing the right saw for your specific project, you can ensure that your grooves will be cut effortlessly and accurately.
Selecting The Right Chisel
Once you have selected the appropriate saw, the next step is to choose the right chisel. A chisel is necessary to clean out and shape the groove. Here are a few factors to consider when selecting a chisel:
- Width: Choose a chisel width that matches the desired width of your groove.
- Material: Look for a chisel made from high-quality steel to ensure durability.
- Sharpness: A sharp chisel is essential for clean and precise cuts, so make sure to sharpen it before starting.
By selecting the right chisel, you can effectively refine and shape your groove, achieving a professional and polished look for your woodworking projects.
Preparing The Wood Surface
Before you start cutting a groove in wood, it is important to prepare the wood surface properly. This will help ensure a clean and precise cut, and will also prevent any damage to the wood. Preparing the wood surface involves two main steps: marking the groove location and securing the wood. Let’s explore these steps in detail:
Marking The Groove Location
In order to cut a groove in wood accurately, you need to mark the exact location where the groove will be cut. This will act as a guide and help you maintain consistency throughout the process. Follow these steps to mark the groove location:
- Measure and mark the starting and ending points of the groove on the wood surface using a pencil or a marking knife. Make sure your marks are clear and easily visible.
- If you need to cut multiple grooves, use a straightedge or a ruler to draw parallel lines between the starting and ending points. This will ensure that all the grooves are evenly spaced and aligned.
Securing The Wood
Securing the wood in place is crucial to prevent any movement or wobbling during the cutting process. This will result in a more accurate and controlled cut. Here are some methods to secure the wood:
- Use clamps to hold the wood firmly in place on a workbench or sawhorse. This will ensure stability and allow you to exert consistent pressure while cutting.
- If clamps are not available, you can use double-sided tape or grip pads on the underside of the wood to prevent it from sliding during the cutting process.
- For larger pieces of wood, consider using a vice to secure it in place. This will provide a strong grip and enhance stability.
- Before cutting, make sure the wood is positioned in a way that allows you easy access to the marked groove location.
Once you have prepared the wood surface by marking the groove location and securing the wood, you are ready to move on to the next step: cutting the groove. Stay tuned for our next blog post where we will guide you through the process of cutting a groove in wood.
Cutting The Groove
When it comes to woodworking, cutting a groove in wood is a fundamental skill. Whether you are making a decorative joint or creating a channel for a panel, knowing how to cut a precise groove is essential. The process involves using various tools such as a saw and chisel to achieve clean and accurate results. In this guide, we will explore the techniques for cutting a groove in wood, focusing on using a saw for the initial cut and a chisel for precision.
Using A Saw For The Initial Cut
To start cutting a groove in wood, the initial step is to use a saw to make the primary incision. A table saw or a handheld circular saw is often used for this purpose. Position the wood securely on the work surface and mark the path of the groove using a pencil or a marking gauge. Make sure to wear protective eyewear and follow all safety precautions when handling power tools. Carefully guide the saw along the marked line, applying steady pressure to create a clean and straight cut. Take your time to ensure accuracy, and make multiple passes if necessary until the desired depth of the groove is achieved.
Using A Chisel For Precision
Once the initial cut is made, achieving precision in the groove requires the use of a chisel. Select a chisel that matches the width of the groove and place it at the beginning of the cut. Use a mallet to gently tap the chisel, gradually working it along the length of the groove to remove any remaining material and refine the edges. Take care to maintain a consistent depth and angle to ensure a smooth and uniform groove. Periodically check the groove’s dimensions and adjust as needed, using light and controlled movements to avoid overcutting. Finally, test the fit of the intended component within the groove to ensure a snug and accurate match.
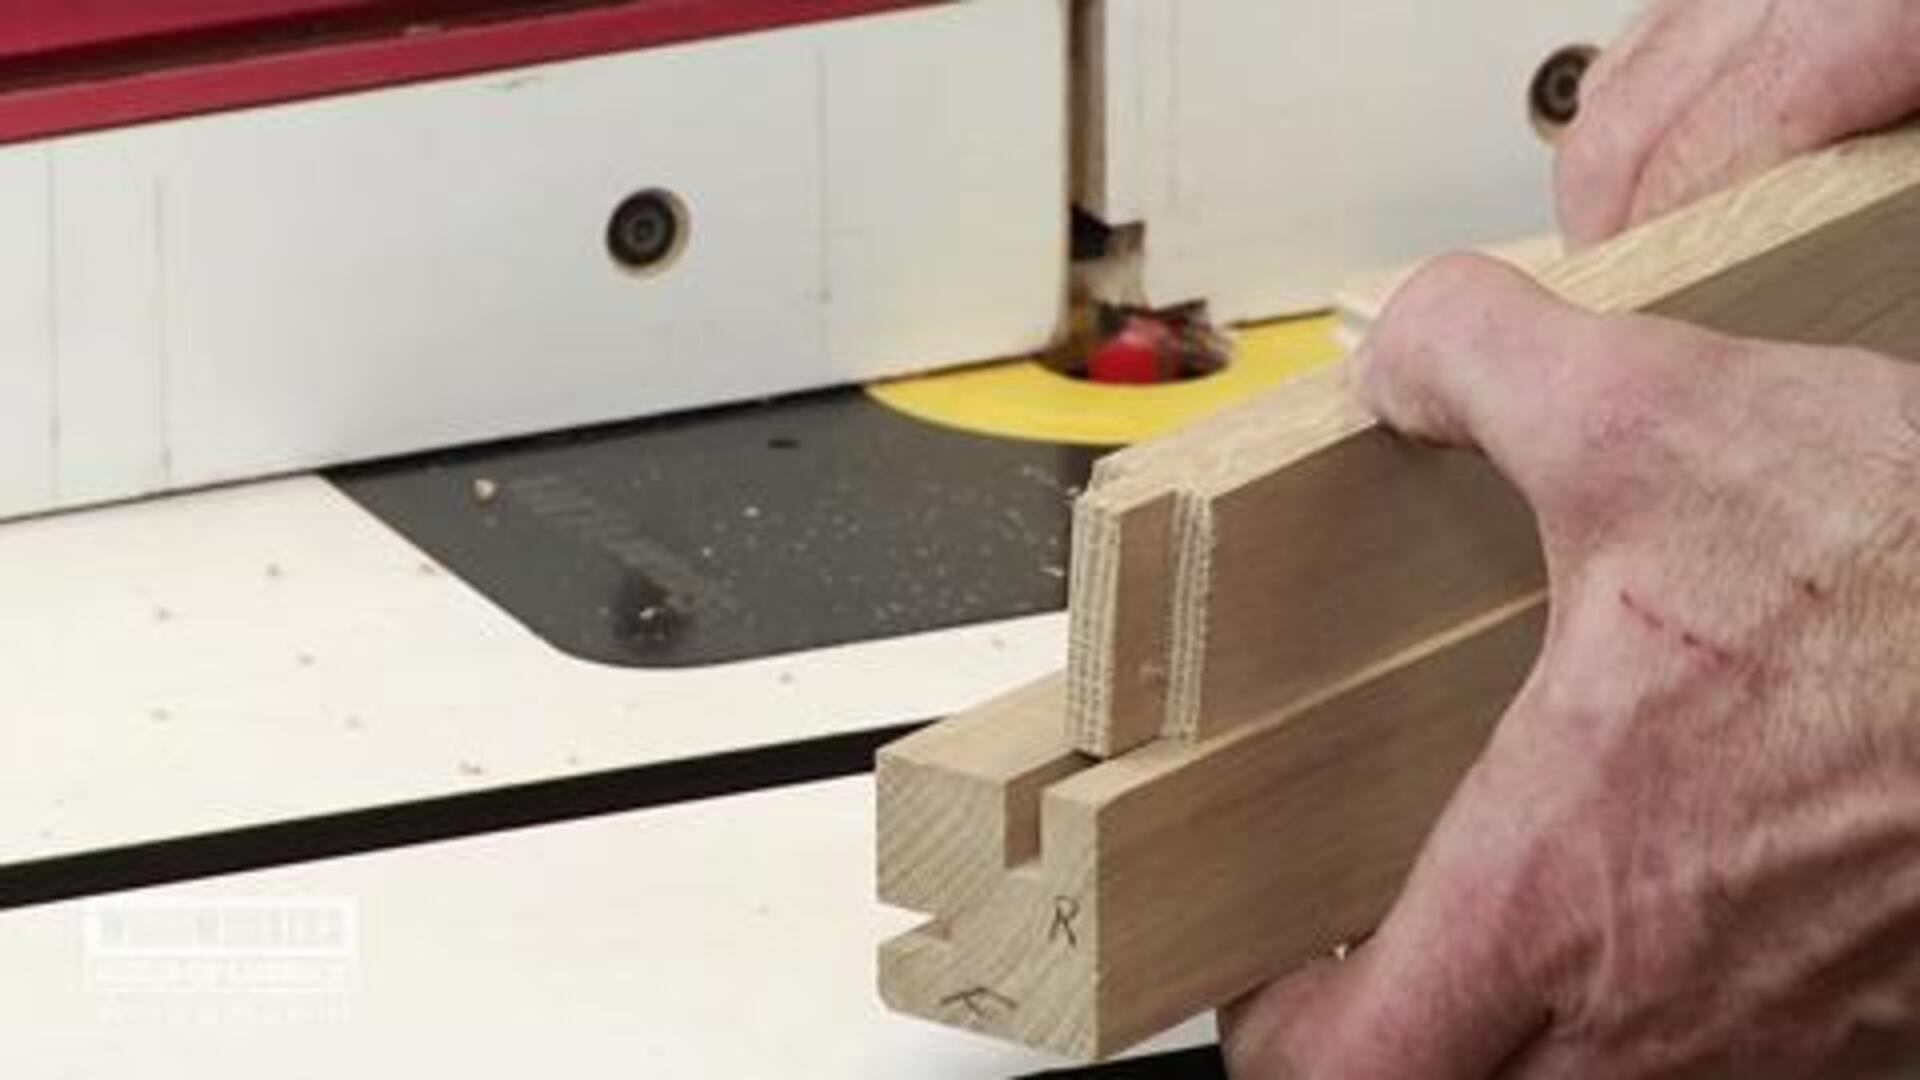
Credit: www.wwgoa.com
Maintaining Accuracy And Precision
When it comes to woodworking, maintaining accuracy and precision is essential, especially when cutting a groove in wood. The success of your project depends on the consistency of the groove’s depth and width, as well as achieving smooth edges. In this section, we will explore two crucial aspects of maintaining accuracy and precision: checking depth and width consistency and achieving smooth edges.
Checking Depth And Width Consistency
Ensuring that the depth and width of your groove remain consistent is crucial for a professional finish. To achieve this, follow these steps:
- Measure the desired depth and width for your groove using a measuring tape or ruler. Mark these measurements visibly on the wood to serve as a guide.
- Select an appropriate router bit or blade that matches the required groove dimensions.
- Secure the wood firmly in place using clamps or a vise, ensuring that it doesn’t move during the cutting process.
- Start cutting the groove slowly and steadily, making sure to keep the router or saw steady. Avoid rushing the process to maintain accuracy.
- Periodically stop and measure the groove’s depth and width as you progress to ensure it matches your desired measurements. Make any necessary adjustments along the way.
Achieving Smooth Edges
Smooth edges are not only aesthetically pleasing but also contribute to the functionality of the groove. Follow these tips to achieve smooth edges:
- Select a high-quality router bit or saw blade specifically designed for smooth cuts. Ensure it is sharp and in good condition.
- Take your time when cutting the groove, using a steady and controlled motion. Rushing can lead to rough edges and an inconsistent groove.
- Consider using sandpaper or a file to smooth out any imperfections or rough spots after cutting the groove. This step will help achieve a clean and polished finish.
- Regularly clean the router bit or saw blade during the cutting process to remove any wood debris that may cause friction and result in rough edges.
By following these steps, you can maintain accuracy and precision when cutting a groove in wood. Ensuring consistent depth and width, as well as achieving smooth edges, will contribute to the overall quality of your woodworking project.
Finishing Touches
Enhance your woodworking projects by learning how to cut a groove in wood for those finishing touches. This technique adds both functionality and visual interest to your creations, allowing you to create custom joinery or decorative elements easily. Mastering this skill will elevate the quality of your finished woodworking projects.
Sanding The Groove
Once you have cut a groove in wood, it is essential to sand it down to ensure a smooth finish. Sanding helps remove any rough edges or splinters that may have been left behind during the cutting process. Smooth and polished grooves not only look aesthetically pleasing but also provide a comfortable grip when using the wood for its intended purpose.
To sand the groove, follow these simple steps:
- Start by selecting an appropriate sandpaper grit. For initial sanding, use a rougher grit such as 80 or 120 to remove any larger imperfections. As you progress, move to a finer grit such as 180 or 220 for a smoother finish.
- Wrap the sandpaper around a small sanding block or a dowel that fits comfortably inside the groove. This will help you maintain a consistent sanding surface as you work.
- Gently sand the inside of the groove, applying even pressure and moving in a back-and-forth motion. Be careful not to over-sand or create uneven surfaces.
- After sanding with the coarse grit, switch to a finer grit sandpaper and repeat the process. This step will further refine the surface texture and remove any remaining roughness.
- Once you are satisfied with the smoothness of the groove, use a soft, dry cloth to wipe away any dust or residue left from the sanding process.
Applying A Finish
Applying a finish to your grooved wood not only enhances its appearance but also protects it from moisture, dirt, and wear. The right finish can add depth and richness to the wood’s natural color, making it truly stand out.
Here are a few popular finishes you can consider:
- Stain: Wood stain adds color and brings out the natural beauty of the wood grain. Choose a stain that complements the overall aesthetic of your project and carefully apply it to the groove using a brush or a clean cloth. Allow the stain to penetrate the wood for the recommended time before wiping off any excess.
- Paint: If you prefer a solid color for your groove, painting is an excellent option. Use a paintbrush or roller to apply a coat of paint evenly over the groove. Let it dry completely before adding additional coats if desired.
- Clear finish: For a more natural look, consider using a clear finish such as varnish or polyurethane. Apply the finish according to the manufacturer’s instructions, making sure to cover the entire groove evenly. Multiple coats may be required to achieve the desired level of protection and sheen.
Whether you choose to stain, paint, or apply a clear finish, ensure that you allow sufficient drying time between each coat. Additionally, follow proper ventilation guidelines and work in a well-ventilated area to promote drying and reduce fumes.
Frequently Asked Questions For How To Cut A Groove In Wood
What Is The Best Tool For Cutting A Groove In Wood?
The best tool for cutting a groove in wood is a router. It is a versatile power tool that can create precise and clean cuts for grooves. Its rotating bit can be adjusted for different depths and widths of grooves.
What Are Some Methods Of Cutting A Groove?
Types of groove-cutting methods include using a groove-cutting machine, a circular saw, a router, a dado blade, or a chisel and mallet. Each method has its unique advantages and is used based on the specific requirements of the project.
How Do I Make Grooves Without A Router?
You can make grooves without a router using a table saw a dado blade, or a circular saw with a guide. Start by marking the groove’s location, then carefully cut along the marked line with your chosen tool. Remember to use safety precautions and take your time for precise results.
How Do You Cut A Straight Groove In Wood?
To cut a straight groove in wood, follow these steps:
1. Measure and mark where you want the groove.
2. Use a straightedge or a guide to keep your saw or router in line.
3. Make multiple passes, cutting a shallow groove to achieve the desired depth.
4. Take your time and maintain a steady hand for accuracy.
5. Sand or smooth the groove as needed.
Conclusion
Cutting a groove in wood is a simple yet essential woodworking skill that opens up numerous opportunities for creating beautiful and functional pieces. By following the steps outlined in this guide, you can confidently tackle this task and enhance your woodworking projects.
With the right tools and techniques, you’ll be well on your way to mastering the art of cutting grooves in wood.