How to Cut an Inside Corner on Crown Molding: Expert Tips and Techniques
To cut an inside corner on crown molding, use a miter saw to make a 45-degree cut on one end of the molding and a 45-degree angle in the opposite direction on the other end. This will allow the two pieces to fit together seamlessly in the inside corner.
Trim work can add a touch of elegance to any room and crown molding is a popular choice for finishing. However, cutting an inside corner on crown molding can be a bit tricky, especially for beginners. With the right tools and techniques, you can achieve a professional-looking result.
We’ll provide you with step-by-step instructions on how to cut an inside corner on crown molding, so you can enhance the beauty of your home with confidence.
Crown Molding Inside Corner Mastery
Cutting an inside corner on crown molding can be a tricky task, but with the right techniques and tools, you can achieve a professional finish that adds a touch of elegance to any room. In this section, we’ll delve into the essential steps for mastering the inside corners of crown molding, along with the necessary materials and tools required to ensure precision and accuracy in your cuts.
Understanding The Basics Of Crown Molding Interior Corners
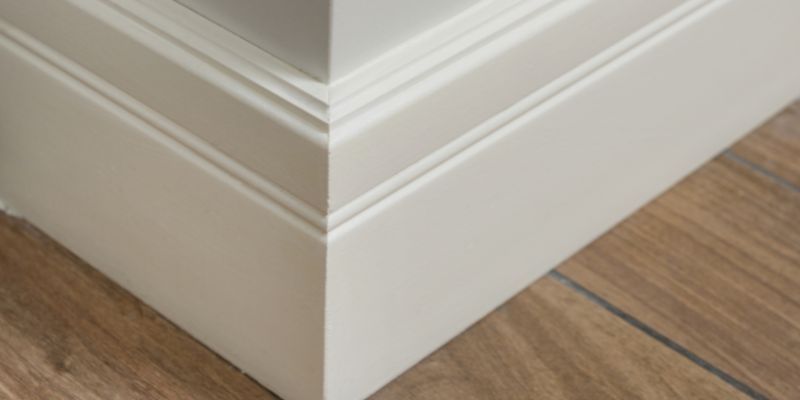
Before diving into the cutting process, it’s essential to understand the basics of crown molding interior corners. Crown molding is designed to fit seamlessly into the corners of a room to create a polished and cohesive look. However, inside corners present a unique challenge due to the angle at which the two pieces of molding meet.
When cutting an inside corner on crown molding, it’s crucial to have a solid grasp of the angle and measurement calculations to ensure a snug fit without gaps or overlaps. By familiarizing yourself with the fundamentals of crown molding interior corners, you’ll be better equipped to approach the cutting process with confidence and precision.
Materials And Tools Necessary For The Perfect Cut
For flawless inside corner cuts on crown molding, having the right materials and tools at your disposal is paramount. Here’s a breakdown of what you’ll need:
- Crown Molding: Select the appropriate size and style of crown molding for your project.
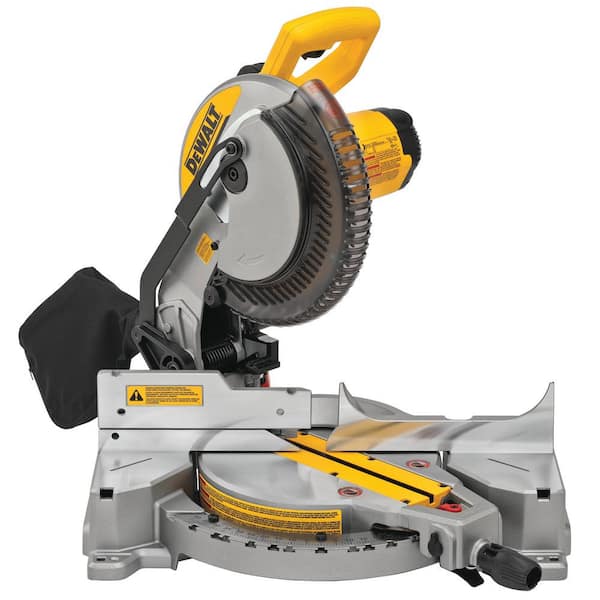
- Miter Saw: A high-quality miter saw with the ability to make precise angled cuts is essential for achieving clean inside corner joints.
- Protractor or Angle Finder: To accurately measure and determine the angle at which the two pieces of molding will meet.
- Pencil and Marking Tools: For marking the cutting lines on the molding to ensure accuracy.
- Clamps: Securing the molding in place during the cutting process for stability and safety.
- Safety Gear: Always wear protective eyewear and consider using ear protection when operating power tools.
Preparing To Cut Crown Molding Corners
Cutting an inside corner on crown molding requires precision and attention to detail. Before diving into the cutting process, it’s essential to set up your workspace, gather the necessary materials, and take accurate measurements to ensure a seamless installation. Additionally, choosing the right saw for cutting crown molding is crucial for achieving clean and precise cuts. Let’s explore the key steps for preparing to cut crown molding corners.
Setting Up Your Workspace And Securing Materials
Before starting the cutting process, make sure your workspace is well-organized and equipped with the essential tools and materials. Create a clutter-free area to safely maneuver the crown molding and operate the saw. Ensure you have the following materials readily available:
- Crown molding pieces
- Measuring tape
- Pencil
- Safety goggles
- Sawhorses or workbench
Measuring And Marking For Precision
Precision is key when cutting crown molding corners. Use a measuring tape to accurately measure the length of each wall where the crown molding will be installed. Once measured, mark the molding pieces with a pencil to indicate the exact angles for cutting. Double-check the measurements to avoid errors that could result in ill-fitting corners.
Choosing The Proper Saw For Cutting Crown Molding
When it comes to cutting crown molding, choosing the right saw is essential for achieving clean and precise cuts. A compound miter saw is often the tool of choice for cutting crown molding due to its ability to make both miter and bevel cuts. Ensure that the saw blade is sharp and properly aligned to achieve smooth and accurate cuts.
Expert Tips For Inside Corner Cuts
Analyzing the crown molding profile for complex angles
When it comes to cutting an inside corner on crown molding, analyzing the crown molding profile is crucial for achieving precise cuts. The intricate nature of crown molding profiles often presents complex angles, making it essential to understand the intricacies of the design before proceeding with the cutting process. By analyzing the crown molding profile, you can identify the specific angles and contours, facilitating a more accurate and seamless cutting process.
Ensuring Accurate Cuts With Advanced Techniques
When it comes to ensuring accurate cuts for inside corners, advanced techniques can significantly improve the precision of the cutting process.
- Utilizing a miter saw with a bevel function allows for precise angle adjustments, ensuring a perfect fit for inside corners.
- Employing a coping saw to cope the moldings results in accurate cuts that conform seamlessly to the profile of the adjacent molding, enhancing the overall finish.
- Using digital angle finders and protractors aids in determining the exact angles required for complex cuts, guaranteeing a precise and snug fit for inside corners.
Coping Method Versus Mitering For Inside Corners
Coping method and mitering are two primary techniques used for cutting inside corners when installing crown molding. Understanding the differences between these methods is essential for achieving optimal results.
| Technique | Description |
|---|---|
| Coping Method | The coping method involves cutting the profile of one molding to fit the contours of the adjoining molding, resulting in a seamless and tight joint that accommodates any irregularities in the wall. |
| Mitering | Mitering involves cutting the ends of the moldings at precise angles to create a flush joint at the inside corner. While mitering is suitable for straight inside corners, coping is preferred for corners with irregularities or deviations. |
Techniques For Seamless Joints
When cutting an inside corner on crown molding, achieving seamless joints is crucial for a professional and polished finish. The right techniques and attention to detail can make all the difference, ensuring your crown molding installation looks seamless and flawless. In this article, we will explore the precise methods and tricks for achieving seamless joints when cutting an inside corner on crown molding.
Fine-tuning Cuts For A Snug Fit
One of the essential techniques for achieving seamless joints when cutting an inside corner on crown molding is fine-tuning the cuts for a snug fit. Proper measurement and precise cutting are key to ensuring that the molding pieces fit together seamlessly. Before making any cuts, it’s crucial to accurately measure the angles of the inside corner to ensure a tight and precise fit. Utilizing a miter saw with adjustable angles can aid in achieving the perfect cuts for a professional finish.
Smoothing And Adjustment Tricks For Flawless Joints
After making the cuts, it’s important to focus on smoothing and adjustment to ensure flawless joints. Utilize sandpaper or a sharp utility knife to refine the edges of the crown molding for a perfect fit. This step is essential for removing any imperfections and achieving a seamless connection between the molding pieces. Additionally, using a coping saw to fine-tune the edges can further enhance the fit, allowing for a flawless joint that seamlessly merges the two pieces of crown molding.
The Role Of Caulk And Filler In Completing The Inside Corner
Completing the inside corner with the use of caulk and filler plays a significant role in achieving seamless joints. Caulk can be used to fill small gaps and imperfections along the joint, ensuring a smooth transition between the molding pieces. Utilizing filler to address any larger gaps or inconsistencies can further enhance the seamless finish, providing a professional and polished look to the inside corner of the crown molding installation.

Avoiding Common Inside Corner Pitfalls
Cutting an inside corner on crown molding requires precision and attention to detail. By avoiding common pitfalls, understanding how to handle warped or uneven surfaces, and troubleshooting gaps and misalignments, you can achieve a flawless result. Let’s delve into each of these aspects to ensure you can master the art of cutting inside corners on crown molding.
Common Cutting Mistakes And How To Prevent Them
One of the common mistakes when cutting an inside corner on crown molding is inaccurate measurement. To prevent this, use a miter saw with an angle adjustment to ensure precise cuts. Another mistake is not properly aligning the molding before cutting, leading to uneven results. Make sure to securely clamp the molding in place and check for any gaps or misalignments before making the cut.
Handling Warped Or Uneven Surfaces Effectively
When dealing with warped or uneven surfaces, it’s crucial to adapt your cutting technique. Consider using a coping saw to trim the molding for a seamless fit. Additionally, adjusting the miter saw angle to compensate for the irregularities in the wall can help in achieving a tighter joint. Always allow for extra material when cutting for warped surfaces to make necessary adjustments.
Troubleshooting Gaps And Misalignments After The Cut
If you encounter gaps or misalignments after making the cut, there are steps you can take to rectify the situation. Utilize wood filler to fill in any small gaps and sand it down for a smooth finish. In case of misalignments, carefully recut the molding with a coping saw to ensure a snug fit. Taking the time to troubleshoot and address these issues post-cutting will result in a polished, professional look.
Frequently Asked Questions On How To Cut An Inside Corner On Crown Molding
How Do You Measure And Cut Crown Molding For Inside Corners?
To measure and cut crown molding for inside corners, first, measure the length needed for the molding. Then, use a miter saw to cut the molding at a 45-degree angle. Make sure to hold the molding against the saw fence in the same position it will be installed.
What Are The Best Tools For Cutting An Inside Corner On Crown Molding?
The best tools for cutting an inside corner on crown molding are a miter saw and coping saw. The miter saw is used to make precise 45-degree angle cuts, while the coping saw is used to create detailed cuts to match the profile of the molding for a seamless fit.
How Can I Ensure A Perfect Fit When Cutting An Inside Corner On Crown Molding?
To ensure a perfect fit when cutting an inside corner on crown molding, always double-check the measurements and angles before cutting. It’s also important to practice cutting scrap pieces before making cuts on the actual molding to ensure precision and accuracy.
What Are Some Common Mistakes To Avoid When Cutting Inside Corners On Crown Molding?
Common mistakes to avoid when cutting inside corners on crown molding include not properly supporting the molding during cutting, miscalculating the angles, and rushing the cutting process. Taking the time to measure accurately and making precise cuts can help avoid these errors.
Conclusion
In mastering the art of cutting inside corners on crown molding, precision and patience are essential. With the right tools and techniques, you can achieve seamless results that elevate the aesthetics of any space. Remember to measure accurately, use proper cutting techniques, and take your time to ensure a flawless finish.
Happy molding!