How to Cut Crown Molding With a Miter Saw: A Complete Guide
To cut crown molding with a miter saw, measure the length, use a compound miter angle, and make precise cuts. A well-rounded Crown molding can add an elegant touch to any room, but cutting it can be a tricky task.
Using a miter saw is an effective way to achieve precise and accurate cuts. However, it requires careful measurement and a compound miter angle for the corners. By following the right steps and techniques, you can successfully cut crown molding with a miter saw and achieve professional-looking results.
We will guide you through the process of cutting crown molding using a miter saw, ensuring that your project turns out beautifully.
The Importance Of Proper Crown Molding Cuts
When it comes to installing crown molding, ensuring accurate and precise cuts is essential. The skillful execution of each cut significantly impacts the overall appearance and visual appeal of your space. Understanding the significance of accurate crown molding cuts can help you enhance the aesthetics and achieve a polished look.
Understand The Significance Of Accurate Crown Molding Cuts
Precise crown molding cuts are crucial for several reasons. Let’s explore some of the key reasons why accurate cuts are essential:
Enhance The Visual Appeal Of Your Space With Precise Cuts
Properly cut crown molding adds elegance and sophistication to any room. It seamlessly bridges the gap between the walls and the ceiling, creating a harmonious transition and enhancing the overall visual appeal. Accurate cuts ensure that the molding fits perfectly, eliminating any unsightly gaps or uneven joints that may compromise the aesthetic beauty of the space.
A well-executed crown molding installation not only uplifts the style of the room but also adds a touch of luxury and grandeur. It elevates the overall ambiance, making the space feel more refined and polished. So, by paying attention to precise cuts, you can transform your ordinary room into an extraordinary space.
In addition to its visual impact, accurately cut crown molding also adds value to your home. Potential buyers or visitors will be impressed by the attention to detail and craftsmanship, increasing the overall appeal and marketability of your property.
To achieve precise cuts when working with crown molding, it is crucial to use the right tools and techniques. A miter saw is an indispensable tool for this purpose, as it allows you to make precise angles and bevel cuts with ease. Whether you are a DIY enthusiast or a professional carpenter, mastering the art of cutting crown molding will enable you to create stunning and professional-looking finishes.
Now that we have explored the importance of accurate crown molding cuts let’s dive deeper into the techniques and tips for cutting crown molding with a miter saw. Understanding the process and practicing your skills will empower you to achieve flawless results and bring out the true potential of your living space.
Choosing The Right Miter Saw For Crown Molding Cuts
When it comes to cutting crown molding, having the right tools is essential. A miter saw is an indispensable tool for achieving precise and clean cuts. However, choosing the right miter saw for crown molding cuts can be a bit overwhelming, considering the variety of options available in the market. To help you make an informed decision, let’s explore the factors you should consider when selecting a miter saw for crown molding cuts and understand the different types of miter saws available.
Factors To Consider When Selecting A Miter Saw For Crown Molding Cuts
There are several factors to consider when choosing a miter saw for crown molding cuts. These factors will ensure that you have a saw that meets your specific needs and provides accurate and efficient cuts.
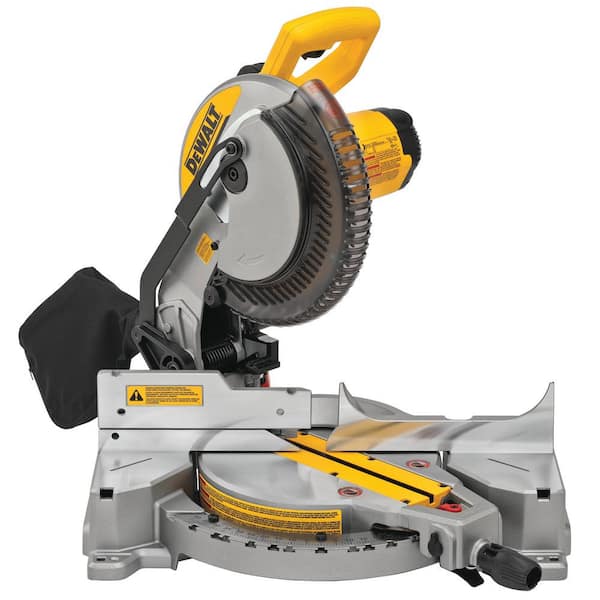
- Blade Size: One of the most crucial factors to consider is the blade size. Crown molding often requires larger blades for cutting at different angles. Look for a miter saw with a blade size of at least 10 inches to handle crown molding effectively.
- Miter and Bevel Range: The miter and bevel range of a miter saw determines its versatility for crown molding cuts. Ensure that the saw you choose has a wide range of miter angles, typically from 0 to 45 degrees on both sides, and a good bevel range for making compound cuts.
- Power and Motor: To handle the cutting demands of crown molding, a powerful motor is necessary. Look for a miter saw with a high horsepower rating and sufficient RPM (rotations per minute) to tackle various types of wood efficiently.
- Laser Guide: A laser guide can be immensely helpful in achieving accurate cuts. It projects a beam onto the workpiece, indicating the exact line where the blade will cut. This feature can significantly enhance your precision and reduce errors.
- Dust Collection: Crown molding cuts can generate a substantial amount of dust. Choose a miter saw that incorporates an effective dust collection system to keep your workspace clean and enhance visibility while making cuts.
Understanding The Different Types Of Miter Saws Available
Now that we have looked at the factors to consider, let’s explore the different types of miter saws available. Each type has its own advantages and capabilities, catering to various needs and preferences.
| Type of Miter Saw | Description |
|---|---|
| Standard Miter Saw | A standard miter saw is the most common type, primarily used for making straight crosscuts and miter cuts. It is an excellent choice if you mainly work with crown molding that does not require compound cuts. |
| Compound Miter Saw | A compound miter saw allows you to make bevel cuts in addition to the miter cuts. It is ideal for crown molding that requires angled cuts along both the horizontal and vertical planes. |
| Sliding Compound Miter Saw | A sliding compound miter saw provides the added benefit of sliding arms that allow you to cut wider pieces of crown molding. It offers increased cutting capacity and is suitable for larger projects. |
Understanding the different types of miter saws will help you choose the one that best suits your specific crown molding cutting requirements. Evaluate the features and capabilities of each type and select the miter saw that aligns with your needs.
By considering the factors mentioned and being aware of the various types of miter saws available, you can make an informed decision and choose the right miter saw for cutting crown molding. Remember, investing in a quality miter saw will not only enhance your woodworking experience but also allow you to achieve precise and professional-looking crown molding cuts.
Preparing Your Workspace For Crown Molding Cuts
Ensure your workspace is properly prepared for crown molding cuts by following these steps to cut crown molding with a miter saw. Create clean and precise cuts for a professional finish.
Clearing The Area And Ensuring A Safe Working Environment
Before you start cutting crown molding with a miter saw, it’s crucial to prepare your workspace properly. Clearing the area and ensuring a safe working environment not only reduces the risk of accidents but also allows you to focus solely on the task at hand. Here are a few essential steps to take:
- Remove any obstacles or clutter that may hinder your movement or cause accidents.
- Check that the space is well-lit to ensure proper visibility while making precise cuts.
- Clear away any debris or dust from previous projects to maintain a clean work area.
- Secure loose items or materials that could pose a safety hazard during the cutting process.
- Wear appropriate safety gear, including safety glasses and ear protection, to protect yourself from any flying debris and loud noises.
Gathering The Necessary Tools And Materials For The Project
Before you can begin cutting crown molding with a miter saw, it’s essential to gather all the necessary tools and materials needed for the project. Having everything within reach will save you time and ensure a smooth workflow. Make sure you have:
- A reliable miter saw that can make precision cuts at various angles.
- A sturdy workbench or table to secure the crown molding during cutting.
- Proper measuring tools such as a tape measure, a combination square, or an angle finder.
- Quality crown molding, ensuring it is the correct size and design for your project.
- Clamps or fasteners to secure the crown molding in place.
- Sharp saw blades specifically designed for cutting crown molding.
- A pencil or marker to mark the measurements and angles on the molding.
- A dust collector or vacuum to clean up any sawdust generated during the cutting process.
By clearing the area and gathering the necessary tools and materials, you are taking important steps towards ensuring a successful crown molding cutting project. With a clean and safe workspace, as well as the right equipment at your disposal, you’ll be well-prepared to achieve accurate and professional-looking cuts with your miter saw.
Measuring And Marking The Crown Molding
Accurate measurements are crucial for cutting crown molding with precision. In this section, we will guide you through the step-by-step process of measuring and marking your crown molding, ensuring a perfect fit for your project.
Step-by-step Instructions For Measuring And Marking Crown Molding
- Start by ensuring that your miter saw is properly set up and adjusted for cutting crown molding. Refer to the manufacturer’s instructions for your specific saw model.
- Begin your project by measuring the length of the wall where you will be installing the crown molding. Use a tape measure to get an accurate measurement from one corner to the other. Be sure to include any corners or gaps in your measurement.
- Next, measure the height of the wall from the floor to the ceiling. This measurement will help you determine the angle at which you should cut your crown molding.
- Now, it’s time to calculate the length of your crown molding pieces. Measure the longest wall first and add a few extra inches to allow for any mistakes or adjustments that may need to be made during installation. Repeat this step for all remaining walls.
- Once you have determined the length of the crown molding pieces, mark the measurements on the backside of the molding using a pencil. Be sure to mark the top and bottom of each piece to avoid confusion during the cutting process.
- After marking the measurements, double-check your markings to ensure accuracy. It’s essential to measure twice and cut once to avoid any costly mistakes.
Tips For Accurate Measurements To Ensure A Perfect Fit
When it comes to measuring and marking crown molding, attention to detail is key. Here are some useful tips to help you achieve precision and a perfect fit:
- Use a high-quality tape measure to ensure accuracy in your measurements.
- When measuring the length, make sure to account for the saw blade’s kerf width. This will prevent your crown molding from being too short.
- Always measure from the longest side of the molding, especially for angled cuts.
- Consider making a test cut on a scrap piece of molding to ensure the accuracy of your measurements before cutting into your actual crown molding pieces.
- Take into account the direction of the crown molding when marking your measurements. Label each piece accordingly, noting whether it will be installed on the left or right side of a corner.
- If you are working on a large project with multiple pieces of crown molding, it can be helpful to create a detailed cutting list to keep track of your measurements and angles.
Setting Up The Miter Saw For Crown Molding Cuts
When it comes to cutting crown molding, having a miter saw is essential for achieving precise and professional-looking cuts. However, before you start cutting, it’s important to set up your miter saw properly to ensure accurate angles and bevels for different crown molding styles. In this section, we’ll explore how to adjust the miter saw angles and determine the proper miter and bevel settings for crown molding cuts.
Adjusting The Miter Saw Angles For Different Crown Molding Styles
When cutting crown molding, it’s crucial to have the correct miter saw angles to achieve seamless joints and perfect fits. The angle at which the saw blade meets the crown molding will depend on the type and style of your molding.
If you have a basic square-profile crown molding, you’ll typically set your miter saw to a 45-degree angle for both inside and outside corners. This means the saw blade will cut the molding at a 45-degree angle from left to right or right to left, depending on the corner type.
On the other hand, if you’re dealing with crown molding that has more complex profiles or is designed for sloped ceilings, you may need to adjust the miter saw angles accordingly. To determine the angles for your specific crown molding style, refer to the manufacturer’s instructions or consult online resources for crown molding angle charts.
Exploring The Proper Miter And Bevel Settings For Crown Molding Cuts
Aside from the miter saw angles, you’ll also need to set the appropriate miter and bevel settings for crown molding cuts. The miter setting refers to the horizontal angle at which the saw blade will make the cut, while the bevel setting determines the vertical angle or tilt of the blade relative to the saw’s base.
To achieve perfect joints and snug fits, the miter setting should match the miter angle of your crown molding corners. For example, if you have a 45-degree inside corner, set your miter saw to a 45-degree angle for both left and right cuts. This will ensure that the crown molding pieces fit together seamlessly.
Additionally, the bevel setting will depend on whether you’re making an inside or outside corner cut. For inside corners, the bevel setting is typically set at 0 degrees, as the blade should remain vertical. On the other hand, outside corners may require a bevel setting of 45 degrees or more, depending on the molding profile and the desired look.
It’s always a good idea to make test cuts on scrap pieces of crown molding to ensure the miter and bevel settings are accurate before cutting the actual molding pieces. This way, you can make any necessary adjustments and avoid wasting materials.
Making Straight Cuts On Crown Molding
When it comes to cutting crown molding, making straight cuts is crucial for achieving a professional and polished finish. With a miter saw, you can easily achieve clean and precise cuts, resulting in a seamless installation. In this section, we will discuss the techniques for making straight cuts with a miter saw, ensuring that you can confidently tackle your crown molding project.
Techniques For Making Straight Cuts With A Miter Saw
When it comes to cutting crown molding, using a miter saw can make the process much simpler and more precise. Here are some key techniques to ensure that you make straight cuts:
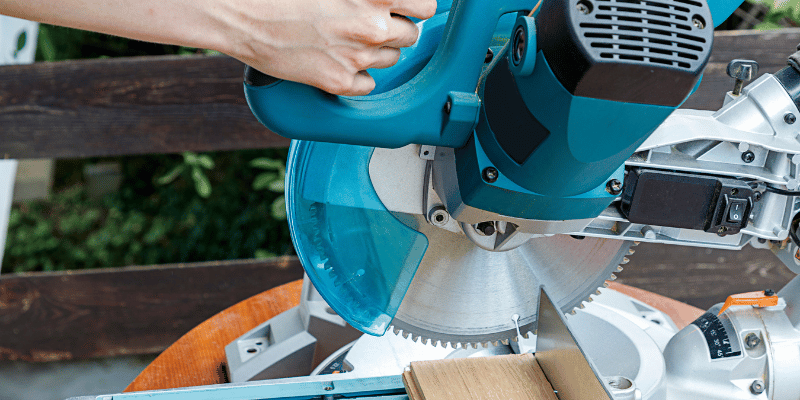
1. Align The Molding Properly
Before making any cuts, it’s essential to ensure that the crown molding is properly aligned on your miter saw. This involves positioning the molding securely against the saw’s fence and ensuring that it is level and flush against the base and fence. Taking the time to properly align the molding will help you achieve accurate and straight cuts.
2. Use The Correct Miter Angle
Choosing the correct miter angle is crucial for achieving straight cuts on crown molding. The miter angle refers to the angle at which the saw blade tilts to the left or right. Crown molding typically requires a compound miter cut, which involves both a miter angle and a bevel angle. Consult your crown molding’s installation instructions or use a miter angle calculator to determine the appropriate angles for your specific molding.
3. Make Test Cuts
Before making the final cuts on your crown molding, it’s a good idea to make test cuts on scrap pieces of molding. This allows you to fine-tune your technique and ensure that the miter saw is set up correctly. By making these test cuts, you can gain confidence and avoid any mistakes when it comes to cutting the actual crown molding.
4. Use Clamps For Stability
To ensure stability and accuracy while cutting your crown molding, consider using clamps to hold the molding securely in place. This will help prevent any movement or slipping, resulting in cleaner and more precise cuts.
5. Take Your Time And Maintain Control
Lastly, when cutting crown molding, it’s important to take your time and maintain control of the saw. Rushing through the cuts can lead to mistakes and uneven edges. Control the speed and motion of the miter saw, guiding it smoothly through the molding to ensure a clean and straight cut.
Creating Compound Miter Cuts For Crown Molding
When it comes to cutting crown molding with a miter saw, creating compound miter cuts is an essential skill to master. Compound miter cuts allow you to make precise and seamless joints for inside and outside corners, ensuring a professional and polished finish to your crown molding installation. In this section, we will delve into the intricacies of compound angles for crown molding cuts, equipping you with the knowledge and techniques needed to achieve flawless results.
Mastering Compound Miter Cuts For Inside And Outside Corners
Understanding and executing compound miter cuts for inside and outside corners is crucial for a successful crown molding installation. To achieve precise angles and seamless joints, follow these steps:
- Begin by measuring the angles of the corners where the crown molding will be installed. Use a protractor or an angle finder tool to accurately determine the angles.
- Next, calculate the miter angle by dividing the corner angle by two. For example, if the corner angle is 90 degrees, the miter angle would be 45 degrees.
- Determine the bevel angle, which is the angle between the flat side of the crown molding and the saw’s table. This angle is typically 45 degrees for most crown moldings.
- Set your miter saw to the calculated miter angle and the bevel angle.
- Place the crown molding on the miter saw, ensuring its back is against the fence and the bottom is against the table. Carefully make the cut, following the designated miter and bevel angles.
- Repeat these steps for each section of crown molding, adjusting the miter and bevel angles accordingly for inside and outside corners.
- Remember to measure twice and cut once, as accuracy is key when making compound miter cuts for crown molding.
Understanding The Intricacies Of Compound Angles For Crown Molding Cuts
When it comes to compound miter cuts for crown molding, the angles can be a bit tricky to comprehend. Here’s a breakdown of the key angles involved:
| Angle | Description |
|---|---|
| Miter Angle | The angle formed by the intersection of two pieces of crown molding at the inside or outside corner. This angle determines the direction and angle at which the two pieces will meet. |
| Bevel Angle | The angle formed by the intersection of the bottom surface of the crown molding and the saw’s table. This angle allows the crown molding to fit snugly against the wall and ceiling. |
| Corner Angle | The angle formed by the two walls at the inside or outside corner where the crown molding will be installed. This angle is used to calculate the miter angle. |
By understanding the purpose and significance of each angle, you can effectively calculate and set the miter and bevel angles on your miter saw, ensuring precise cuts for your crown molding.
Coping Crown Molding For Seamless Joints
Crown molding adds a touch of elegance and sophistication to any room, but achieving seamless joints can be a challenge. One technique that can help you achieve perfect joints is coping. Coping crown molding involves shaping the end of one piece to fit precisely against the face of another, resulting in a seamless joint that eliminates gaps and enhances the overall appearance. In this guide, we will walk you through the step-by-step process of coping crown molding using a miter saw.
Introduction To Coping As A Technique For Creating Seamless Joints
Coping is a woodworking technique that allows you to create seamless joints by cutting the profile of one piece to match the profile of another. When it comes to crown molding, coping is particularly useful because it allows you to deal with the irregularities that come with installing molding in corners and around architectural elements such as cabinets and doors. By coping crown molding, you can achieve tight-fitting, gap-free joints that give your project a professional and polished finish.
Step-by-step Instructions For Coping Crown Molding With A Miter Saw
Follow these step-by-step instructions to cope crown molding with a miter saw:
- Measure and mark your first piece of crown molding. Take precise measurements of your intended installation area and mark the piece accordingly. This will serve as a guide as you make your cope cuts.
- Set up your miter saw. Ensure your miter saw is set to a 45-degree angle. This will be the standard angle for cutting crown molding.
- Secure your crown molding. Place the crown molding flat on the miter saw table, with the bottom edge against the fence and the top edge facing upwards.
- Make the miter cut. Position the crown molding so that the top edge is facing upwards and the bottom edge is flat against the saw table and fence. Make your 45-degree miter cut following your marked measurement.
- Create the cope cut. Keep the miter saw at a 45-degree angle, but this time, tilt the saw in the opposite direction. This creates what is known as the “coping” cut. Cut along the profile of the molding, removing the excess material and leaving behind a shaped end that fits snugly against the face of the adjacent piece.
- Test the fit. Once you have made the cope cut, test the fit by placing the coped end against the face of the adjacent piece. The two should fit together seamlessly without any gaps or misalignments. Make any necessary adjustments to ensure a perfect fit.
- Repeat the process for other pieces. Follow the same steps for coping the remaining pieces of crown molding, taking measurements and making the appropriate cuts to achieve seamless joints throughout your installation.
- Secure your crown molding in place. Once you have coped all the necessary pieces, secure them in place using adhesives, nails, or finish screws. Ensure that each joint aligns perfectly and that there are no visible gaps or imperfections.
By following these step-by-step instructions, you can master the technique of coping crown molding with a miter saw, creating seamless joints that elevate the look and feel of your project.
Common Mistakes To Avoid When Cutting Crown Molding
Cutting crown molding can be a challenging task for beginners and even experienced DIY enthusiasts. However, by identifying and avoiding potential errors during the cutting process, you can ensure a smooth and successful project. In this section, we will outline some common mistakes to avoid when cutting crown molding and provide valuable tips for troubleshooting any issues that may arise.
Identifying And Avoiding Potential Errors During The Cutting Process
When it comes to cutting crown molding with a miter saw, there are several common mistakes that can occur. By being aware of these potential errors, you can take the necessary precautions to avoid them. Here are some important factors to consider:
- Incorrect miter saw angle: One of the most crucial elements of cutting crown molding is determining the correct miter saw angle. Many individuals make the mistake of not properly adjusting the angle to match the spring angle of the molding. This can result in ill-fitting joints and gaps between pieces. To avoid this, it’s essential to measure and calculate the correct angle before making any cuts.
- Improper measurement and marking: Precision is key when working with crown molding. Measuring and marking inaccurately can lead to uneven cuts and a less-than-perfect final result. Take your time to measure twice and mark clearly before making any cuts.
- Incorrect blade alignment: Another common mistake is improper blade alignment. If the blade is not properly aligned with the molding, it can cause the cut to be off and affect the overall fit and finish. Ensure that the blade is aligned correctly before making any cuts.
- Using the wrong blade: Choosing the correct blade for crown molding is essential for achieving clean cuts. Using blades that are too coarse or not designed for molding can result in rough edges and tear-out. Use a fine-toothed blade specifically designed for crown molding to ensure a smooth and precise cut.
Tips For Troubleshooting Common Crown Molding Cutting Issues
Even with proper precautions, issues can still arise when cutting crown molding. Here are some useful tips for troubleshooting common problems:
- Gaps and uneven joints: If you encounter gaps or uneven joints between pieces of crown molding, it could indicate an incorrect miter saw angle or an issue with the measurements. Check your measurements and recalibrate the miter saw angle if necessary. Additionally, ensure that your corners are aligned properly before making any cuts.
- Rough edges and tear-out: Rough edges and tear-out can occur if you’re using the wrong blade or if the blade is dull. Make sure you’re using a fine-toothed blade specifically designed for crown molding, and consider sharpening or replacing your blade if it is not cutting cleanly.
- Inaccurate cutting angles: If your cuts are consistently coming out at the wrong angles, it may be due to inaccurate measurement and marking. Double-check your measurements, ensure your miter saw is properly calibrated, and take your time to accurately mark your cuts before proceeding.
- Poor fit: If your crown molding pieces are not fitting together properly, it may be a result of incorrect measurements or inconsistent miter saw angles. Take the time to measure and mark accurately, and double-check your miter saw settings to ensure a precise fit.
By avoiding these common mistakes and following the troubleshooting tips provided, you can successfully cut crown molding with your miter saw and achieve professional-looking results for your projects.
Sanding And Finishing Crown Molding
Learn the step-by-step process of cutting crown molding with a miter saw for a perfect finish. This guide provides easy-to-follow instructions for sanding and finishing crown molding, ensuring a professional result for your project.
Properly Sanding Crown Molding For A Smooth And Polished Look
Sanding is an essential step in the process of cutting and installing crown molding. It helps to achieve a smooth and polished finish, ensuring that the crown molding looks its best when installed. Here are a few tips on how to properly sand crown molding:
- Start with coarse sandpaper: Begin the sanding process by using a coarse-grit sandpaper, such as 80 or 100 grit. This will help to remove any rough edges or imperfections on the surface of the crown molding.
- Move to a finer grit: After using the coarse sandpaper, switch to a finer grit, such as 150 or 180 grit. This will help to smooth out the surface and remove any remaining rough spots.
- Sand in the direction of the grain: When sanding crown molding, it’s important to sand in the direction of the grain. This will help to prevent any scratches or marks on the surface of the molding.
- Use a sanding block or sponge: To ensure an even sanding job, use a sanding block or sponge instead of just your hand. This will help to distribute the pressure evenly and prevent any uneven sanding marks.
- Check for smoothness: After sanding the crown molding, run your hand over the surface to check for smoothness. If there are any rough spots or imperfections, go back and sand those areas again until they are smooth.
By following these tips, you can ensure that your crown molding is properly sanded and ready for finishing.
Applying Finishes To Enhance The Appearance And Longevity Of The Crown Molding
In addition to sanding, applying finishes is another important step in the crown molding process. Finishes not only enhance the appearance of the molding but also provide protection against wear and tear. Here are some finishes you can use to enhance the beauty and longevity of your crown molding:
| Finish Type | Benefits |
|---|---|
| Paint |
|
| Stain |
|
| Varnish |
|
Before applying any finish, make sure to clean the crown molding thoroughly to remove dust and debris. Apply the finish according to the manufacturer’s instructions, using a brush or a sponge. Allow the finish to dry completely before installing the crown molding.
Applying finishes to your crown molding not only enhances its appearance but also adds an extra layer of protection, ensuring that it will last for years to come.
Installing The Cut Crown Molding
Once you have successfully cut your crown molding with a miter saw, it’s time to install it to complete your project. Proper installation is crucial to achieving a seamless and professional finish. In this section, we will discuss some helpful tips and techniques for securing the crown molding to your desired surface.
Tips For Successful Installation Of Cut Crown Molding
When installing your cut crown molding, keep the following tips in mind to ensure a successful installation:
- Measure twice, cut once: Before you begin installation, double-check your measurements to ensure a precise fit. Accuracy is key to achieving clean and tight corners.
- Use the right tools: Make sure you have the necessary tools on hand, including a finish nailer, a level, and a tape measure. These tools will help you secure the crown molding properly and ensure a straight and level installation.
- Plan your cuts: Before making any cuts, create a cutting plan that considers the length and angle of each piece of molding. This will help you avoid mistakes and minimize waste.
- Practice proper safety measures: Always wear appropriate safety gear, such as safety goggles and ear protection, when cutting and installing crown molding. Keep your work area clean and organized and use caution to prevent accidents.
Techniques For Securing Crown Molding To The Desired Surface
Securing crown molding to the desired surface requires careful attention to detail. Here are some techniques you can use to ensure a secure installation:
- Use adhesive: Applying a small amount of construction adhesive to the back of the molding can help provide additional support and stability. This is particularly useful when working with heavier or wider moldings.
- Use finishing nails: The most common method of securing crown molding is by using finishing nails. Make sure to position the nails close to the ceiling, where they will be less visible. Be careful not to overdrive the nails, as this can damage the molding.
- Use a nail gun: A pneumatic or electric finish nail gun can make the installation process faster and more efficient. It allows for precise placement of the nails and reduces the risk of splitting the molding.
- Use a level: Use a level to ensure that the crown molding is straight and level. This will help you achieve a professional-looking installation.
Maintaining Cut Crown Molding
Proper maintenance and care of your cut crown molding is essential to ensure its longevity and preserve its aesthetic appeal. By following these best practices, you can keep your crown molding looking pristine for years to come.
Best Practices For Maintaining And Caring For Your Cut Crown Molding
1. Regular Cleaning:
Clean your crown molding regularly to remove any dust, dirt, or grime that may accumulate over time. A gentle wipe-down with a soft cloth or a dusting brush can help preserve the shine and prevent buildup. Avoid using harsh cleaners or abrasive materials that can damage the molding’s finish.
2. Avoid Excessive Moisture:
Moisture can be detrimental to crown molding, causing it to warp or rot. Take precautions to prevent excessive moisture in areas where the molding is installed. Ensure proper ventilation and address any leaks or water damage promptly to protect your investment.
3. Inspect for Damage:
Regularly inspect your crown molding for any signs of damage, such as cracks, dents, or chips. Address these issues promptly to prevent further deterioration. Small repairs can be easily fixed with wood filler or touch-up paint to maintain the flawless appearance of the molding.
4. Avoid Extreme Temperatures:
Extreme temperature fluctuations can cause the crown molding to expand or contract, leading to warping or splitting. Ensure that the area where the molding is installed remains within a stable temperature range. If necessary, use insulation or other methods to regulate temperature and protect the molding.
5. Protect from UV Rays:
Direct exposure to sunlight can fade the color and degrade the finish of crown molding over time. Consider using window coverings or UV-protective films to shield the molding from harmful UV rays. This precaution will help maintain its vibrant look and prevent premature aging.
6. Secure Properly:
Ensure that your crown molding is securely fastened to the wall or ceiling to prevent any movement or structural damage. Use appropriate adhesive or nails and periodically check for any loose sections. Secure any loose sections promptly to maintain the integrity of the molding.
By incorporating these best practices into your crown molding maintenance routine, you can protect your investment and enjoy the timeless beauty that crown molding brings to your home.

Credit: www.amazon.com
Frequently Asked Questions On How To Cut Crown Molding With A Miter Saw
How Do I Cut Crown Molding With A Miter Saw?
To cut crown molding with a miter saw, start by measuring and marking your molding. Then, position the molding upside down and at an angle on the miter saw. Adjust the miter and bevel angles according to your specific molding type, and make a test cut to check the fit.
Once you’re satisfied, cut the rest of the molding.
What Type Of Miter Saw Blade Should I Use For Cutting Crown Molding?
For cutting crown molding, it’s recommended to use a 10 or 12-inch miter saw blade with a high tooth count. Look for a blade with 80 to 100 teeth, as this will help make cleaner cuts and reduce splintering. Additionally, ensure the blade has a negative hook angle, which prevents the material from being forcefully pulled towards the blade.
Can I Cut Crown Molding Without A Miter Saw?
While it is possible to cut crown molding without a miter saw, using a miter saw will result in more precise and efficient cuts. If you don’t have a miter saw, you can still use a coping saw or a compound miter box with a handsaw.
However, be aware that these methods may require more time and effort to achieve desired results.
Conclusion
Cutting crown molding with a miter saw can be a precise and efficient process when you follow the proper steps. By measuring accurately, setting the miter saw at the correct angles, and taking your time to make precise cuts, you can achieve professional-looking results.
Remember to always prioritize safety and use appropriate protective gear. With practice and patience, you’ll soon be ready to tackle any crown molding project with confidence. Happy cutting!