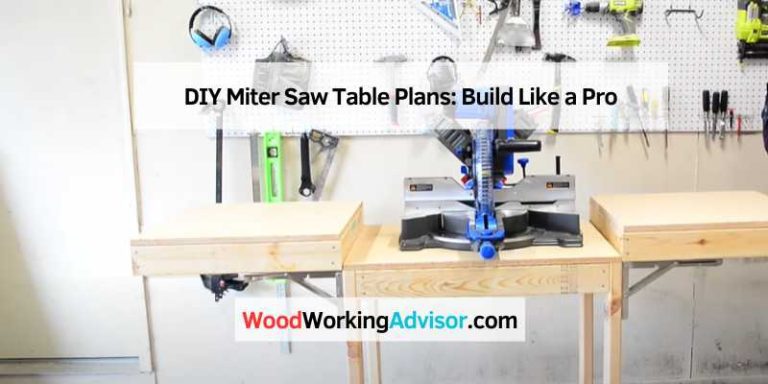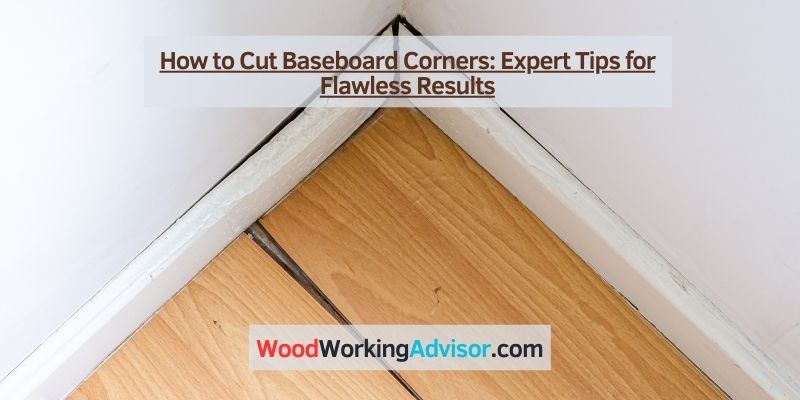
How to Cut Baseboard Corners & Angles (Miter Saw + Angle Guide)
To cut baseboard corners, use a miter saw set to 45 degrees for standard 90-degree walls — one 45° cut on each piece creates a tight miter joint. For inside corners, coping gives a tighter fit. For walls that aren’t square, calculate your cut angle using: (180° – wall angle) / 2.
Whether you’re installing baseboard in a new build or replacing worn trim, getting the corner cuts right is the difference between a professional finish and a gap-filled eyesore. This guide covers both inside and outside corners, standard and non-square walls, and gives you the exact angle formula so you’re never guessing at the saw.
- Standard 90° inside corner: Cope or miter at 45° on each piece
- Standard 90° outside corner: Miter at 45° on each piece (both pointing outward)
- Non-square walls: Use formula — cut angle = (180° − wall angle) / 2
- Best inside corner method: Coping (tighter fit, works even when walls aren’t square)
- Best outside corner method: Miter cuts (clean appearance on visible corners)
Essential Tools For Baseboard Cutting
When it comes to cutting baseboards, having the right tools is essential for achieving clean and precise corners. The process of cutting baseboard corners requires specific tools that serve different purposes. Understanding the role of each tool and having the proper equipment is crucial for achieving professional-looking results. In this section, we will explore the essential tools required for cutting baseboards, the role of each tool, and recommended brands.

List Of Necessary Tools For Cutting Baseboards
Before embarking on any baseboard cutting project, it’s crucial to have the following tools handy:
- Miter saw
- Miter box and hand saw
- Coping saw
- Combination square
- Tape measure
- Pencil
- Clamps
- Safety goggles and dust mask
Understanding The Role Of Each Tool
Each tool plays a specific role in the baseboard cutting process. Understanding the purpose of each tool is essential for achieving accurate and clean cuts:
| Tool | Role |
|---|---|
| Miter saw | Used for cutting precise 45-degree angles for inside and outside corners |
| Miter box and hand saw | Alternative to a miter saw for cutting angles on smaller baseboard pieces |
| Coping saw | For cutting intricate profiles and coping the ends of baseboards for seamless joints |
| Combination square | Ensures accurate measurements and helps in marking the cut lines |
| Tape measure and pencil | For measuring and marking the baseboard for accurate cuts |
| Clamps | Secure the baseboard in place for safe and precise cutting |
| Safety goggles and dust mask | Protective gear for safety during cutting and to minimize exposure to sawdust |
Recommended Brands And Where To Find Them
When it comes to selecting tools for baseboard cutting, reputable brands ensure quality and reliability. Some recommended brands for baseboard cutting tools include:
- DeWalt: Known for durable miter saws and high-quality hand tools
- Bosch: Offers a range of miter saws and measuring tools
- Irwin: Provides reliable clamps and cutting tools
- Stanley: Known for their combination squares and hand tools
You can find these reputable brands at major home improvement stores, online retailers, and specialty tool shops.
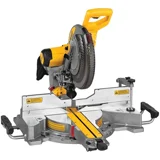
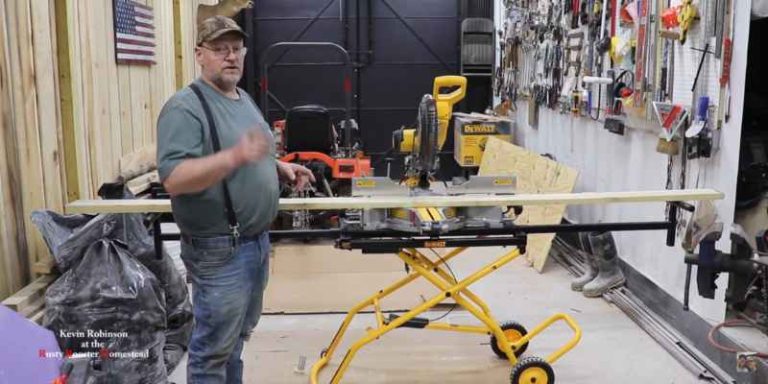
The go-to tool for cutting baseboard corners. The sliding compound design lets you miter and bevel in one pass — essential for both inside and outside corners on any wall angle.
- 0–60° miter range left & right
- 15-amp, 3800 RPM motor for clean crosscuts
- Increased crosscut capacity vs standard miter saws
- Includes blade wrench and material clamp
Preparing To Cut Baseboard Corners
When preparing to cut baseboard corners, it’s essential to ensure accurate measurements, stability, and clear markings for a professional finish. Here are the steps to follow for preparing to cut baseboard corners:
Measuring The Corner Angles Accurately
Before you start cutting your baseboard corners, it’s crucial to measure the corner angles accurately. Use an angle finder or a combination square to determine the angle of the corner. Place the tool against the wall and the baseboard to get an exact measurement, ensuring precise angles for a perfect fit.
Clamping The Baseboards For Stability
Once you have the measurements, it’s important to secure the baseboard in place for stability during the cutting process. Use clamps to hold the baseboard firmly against the saw’s fence, preventing any movement that could lead to inaccurate cuts. This step ensures that the baseboard remains steady and secure, resulting in clean and precise cuts.
Marking The Cut Lines Clearly
After securing the baseboard, mark the cut lines clearly to indicate where the cuts will be made. Use a pencil or a sharp knife to create unmistakable lines that will guide your saw. Clear markings help prevent errors and ensure that each cut is made accurately, contributing to a seamless installation of the baseboard.
Step-by-Step: How to Cut Baseboard Corners
Follow these steps in order for clean, professional baseboard corners — whether you’re doing inside corners, outside corners, or walls that aren’t square.

- Measure each wall section — Use a tape measure to find the exact length from corner to corner. Measure twice. For inside corners, measure to the longest point of the wall.
- Find the wall angle — Use a digital angle finder or sliding T-bevel pressed into the corner. Most walls measure 90°, but older homes can be 88°–92° or more. Record the exact angle.
- Calculate your cut angle — For 90° walls, each piece gets a 45° miter. For non-square walls, use: Cut angle = (180° − wall angle) ÷ 2. For an 88° wall, that’s (180 − 88) ÷ 2 = 46°.
- Set your miter saw — Dial in the calculated angle on the miter gauge. For inside corners, flip the saw direction for the second piece — one angled left, one angled right.
- Test cut on scrap first — Cut two scrap pieces at your calculated angle and hold them to the corner dry. Adjust in 0.5° increments until the joint closes tight with no visible gap.
- Cut the baseboard pieces — Place the baseboard face-up against the saw fence. Cut the first piece, then flip the saw direction and cut the second piece at the matching angle. For coped inside corners: cut one piece square to the wall, then cope the second piece’s profile with a coping saw.
- Test fit before nailing — Hold both pieces in position without fasteners. Check the joint at the corner. If there’s a gap at the front face, adjust the angle slightly. If there’s a gap at the back, the wall may need shimming.
- Fasten and finish — Secure with a finishing nail gun (16-gauge for baseboards). Fill nail holes with wood filler, caulk the top edge and corner joint, sand lightly, then paint for a seamless finish.
Expert Tips: How To Cut Baseboard Corners
Cutting baseboard corners may seem daunting, but with the right techniques and precision, you can achieve seamless and professional-looking results. Here are some expert tips on how to cut baseboard corners effectively.
| Corner Type | Definition | Best Cut Method |
|---|---|---|
| Inside Corner | Where two walls meet inward (forms a concave angle — like a room corner) | Coping — gives tighter fit; works even when walls aren’t perfectly square |
| Outside Corner | Where two walls meet outward (forms a convex angle — like a peninsula or column) | Mitering — 45° on each piece; clean, visible joint on exposed corners |

Choosing Between Miter Cuts And Coping For Inside Corners
When dealing with inside corners, you have the option of using either miter cuts or coping. Miter cuts involve cutting the baseboard at a 45-degree angle, while coping involves cutting the profile of the baseboard to fit over the profile of the adjacent baseboard. Both techniques have their advantages, with miter cuts being suitable for simpler corners, and coping offering better results for tighter inside corners.
The Importance Of Precise Angles In Miter Cuts
Precise angles are crucial when making miter cuts for baseboard corners. Any deviation from the accurate angle can result in unsightly gaps and misaligned corners. To ensure precise angles, using a quality miter saw and accurately measuring and marking the baseboard will be key to achieving a perfect fit.
Coping Technique For Tighter Inside Corner Joints
The coping technique is particularly useful for achieving a seamless fit at tighter inside corner joints. By carefully cutting the profile of the baseboard to match the profile of the adjacent piece, you can create a snug and professional-looking joint. This technique requires precision and attention to detail, but the results can significantly enhance the overall appearance of the baseboard corners.
How to Cut Baseboard Angles on Non-Square Walls
Most rooms aren’t perfectly square — walls often measure 88°, 92°, or even 135° at bay windows. Cutting baseboard angles on non-square walls requires a different approach than the standard 45° cut.
Use a sliding T-bevel or digital angle finder ($15–$30) to measure the actual wall angle, then apply this formula:
Fine-tune in 0.5° increments by test-cutting scrap pieces first. Once you dial in the right angle, cut all matching corners at that setting.
| Wall Angle | Miter Cut Angle (each piece) | Common Scenario |
|---|---|---|
| 90° | 45° | Standard room corner |
| 88° | 46° | Slightly out-of-square wall |
| 92° | 44° | Slightly out-of-square wall |
| 135° | 22.5° | Bay window or angled alcove |
Seamless Outside Corner Trims
Calculating The Correct Angles For Outside Corners
When it comes to achieving seamless outside corner trims, it’s crucial to calculate the correct angles for outside corners. This ensures a precise fit and a professional finish. Let’s delve into the process of calculating the angles for outside corners to achieve a flawless result.
Tips For Cutting Without Splintering The Wood
When cutting baseboard corners, it’s essential to utilize techniques that minimize splintering and ensure clean, sharp edges. Here are some effective tips for cutting baseboard corners without splintering the wood:
- Use a sharp, fine-toothed saw to produce clean cuts without splintering the wood.
- Apply painter’s tape along the cutting line to reduce splintering during the cutting process.
- Support the baseboard securely to prevent vibration, which can lead to splintering during cutting.
Sanding And Finishing Cuts For A Polished Look
After cutting baseboard corners, it’s important to sand and finish the cuts to achieve a polished and professional appearance. Implement the following steps to ensure a refined finish:
- Sand the edges: Utilize fine-grit sandpaper to smooth the cut edges and remove any roughness or splinters.
- Apply wood filler: Fill any gaps or imperfections with wood filler, then sand the filled areas to create a seamless surface.
- Use a primer and paint: Apply a high-quality primer and paint to the baseboards, ensuring a consistent and polished look for the finished corners.
Achieving Flawless Results Every Time
When it comes to cutting baseboard corners, achieving flawless results every time requires the right techniques and attention to detail. By mastering the following steps, you can elevate the appearance of your space with perfectly installed baseboards.
Techniques For Aligning And Securing Baseboards
Aligning and securing baseboards is crucial for a professional-looking finish. Achieve seamless corners by:
- Using a miter saw to cut precise 45-degree angles for inside corners and 22.5-degree angles for outside corners.
- Using a coping saw to carefully remove material from the back of one baseboard to create a snug fit with the intersecting board.
- Securing baseboards with precision by using a finishing nail gun and ensuring a flush fit against the wall.
Filling And Caulking For A Professional Finish
To create a seamless appearance, the following steps are essential for filling and caulking baseboard corners:
- Fill any gaps or nail holes with a high-quality wood filler, ensuring a smooth and even application.
- Apply a bead of caulk along the top and bottom edges of the baseboards, then use a caulk smoothing tool to achieve a clean finish.
- Wipe away any excess caulk with a damp cloth and allow it to dry completely before touching up with paint.
Painting And Touch-up Strategies For Baseboards
Proper painting and touch-up techniques are essential for flawless baseboard corners:
- Before painting, use painter’s tape to protect adjacent surfaces and achieve clean lines.
- Apply primer to the baseboards to ensure an even base for the final coat of paint.
- Paint the baseboards with a high-quality trim paint, using smooth, even strokes to achieve a professional finish.
- After the paint has dried, inspect the corners for any imperfections and touch up as needed for a perfectly polished appearance.

Frequently Asked Questions On How To Cut Baseboard Corners
What Angle Do I Cut Baseboard Corners For A 90-Degree Corner?
For a 90-degree corner, cut each baseboard piece at a 45-degree angle. Both pieces get a 45° miter cut — when joined, the two 45° angles add up to 90°. Use a miter saw for precise cuts and test on scrap wood first.
What Is The Difference Between Coping And Mitering Baseboard Corners?
Mitering cuts both pieces at 45° so they meet at the corner — quick and clean but can open up as wood expands and contracts. Coping cuts one piece square to the wall, then profiles the end of the second piece to overlap it — this gives a tighter fit that holds up better over time, especially on inside corners.
How Do I Cut Baseboard Corners On Walls That Aren’t Square?
Use a digital angle finder or sliding T-bevel to measure the actual wall angle. Then apply the formula: cut angle = (180° − wall angle) ÷ 2. For example, an 88° wall requires a 46° cut on each piece. Fine-tune in 0.5° increments on scrap wood until the joint closes tight.
Do I Need A Miter Saw To Cut Baseboard Corners?
A miter saw is the easiest and most accurate option, but not strictly required. A miter box with a hand saw works well for standard 45° cuts on straight baseboard. For non-square wall angles or compound cuts, a power miter saw gives far more precision and repeatability.
How Do I Cut Outside Baseboard Corners?
For outside corners on a standard 90° wall, set your miter saw to 45° and cut one piece angling left and the other angling right — both cut faces will point outward and meet flush at the corner. Secure with construction adhesive and finishing nails, then fill the joint line with caulk before painting.
Conclusion
In wrapping up, mastering the art of cutting baseboard corners is an essential skill for any DIY enthusiast or professional carpenter. With the right tools, techniques, and attention to detail, you can achieve precise and seamless corner cuts that will elevate the overall look of your space.
Practice makes perfect, so don’t be afraid to dive in and refine your abilities. With these tips in mind, you’ll be cutting baseboard corners like a pro in no time!