How to Master Cutting Crown Molding Corners: Expert Techniques Revealed
To cut crown molding corners, measure and mark the angles, then use a miter saw for precise cuts. When cutting an inside corner, set the saw to a 45-degree angle and position the molding upside down.
For outside corners, use the same process but position the molding right-side up. Remember to cut both ends of the molding at opposite angles to ensure a proper fit.
The Basics Of Cutting Crown Molding Corners: Expert Techniques Revealed
Discover expert techniques for cutting crown molding corners in this comprehensive guide. Learn how to perfect your precision cuts and achieve professional results every time.
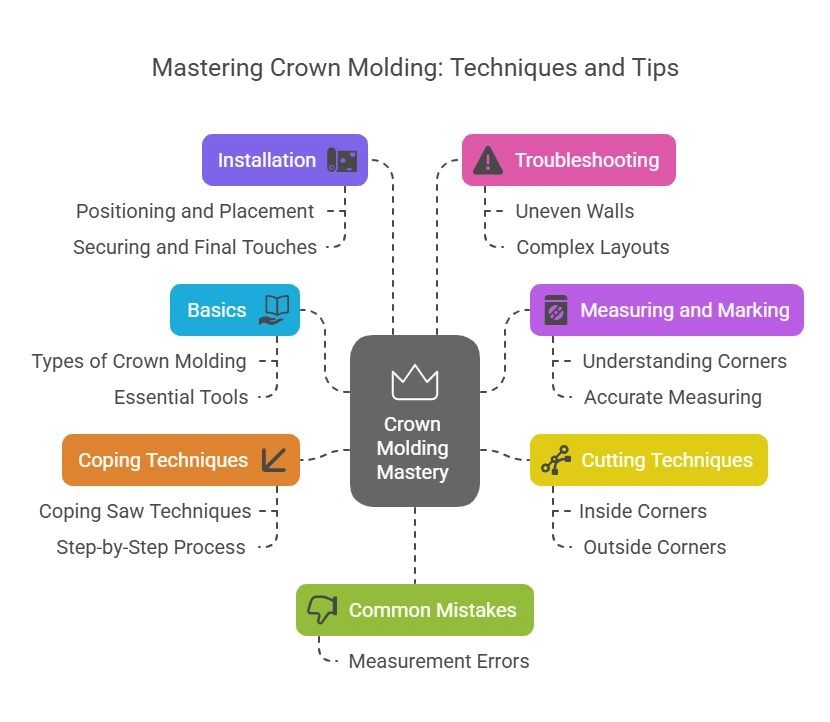
Cutting crown molding corners may seem challenging, but with the right techniques and tools, it can be a breeze. In this section, we will discuss the different types of crown molding, the essential tools and materials you’ll need, and expert tips to help you achieve seamless corners.
Different Types Of Crown Molding:
- Wood Crown Molding: This type of crown molding is a popular choice due to its classic and elegant appearance. It can be painted or stained to match your desired look.
- MDF Crown Molding: Made from medium-density fiberboard, MDF crown molding is a more affordable alternative to wood. It is versatile and easy to work with, making it a great option for budget-friendly projects.
- Polyurethane Crown Molding: Offering a lightweight and durable option, polyurethane crown molding is resistant to moisture and insects. It can be found in various designs and finishes to suit different styles.
Essential Tools And Materials:
To ensure successful crown molding installation, gather the following tools and materials:
- Miter Saw: A miter saw is essential for accurately cutting the crown molding at the correct angles.
- Coping Saw: A coping saw allows you to create precise and tight-fitting joints for inside corners.
- Measuring Tape: Accurate measurements are crucial for achieving seamless corners, so having a measuring tape on hand is essential.
- Pencil and Paper: Use a pencil to mark your measurements and make notes on a piece of paper to avoid any confusion during the cutting process.
- Safety Gear: Always prioritize safety by wearing goggles, a dust mask, and protective gloves.
Expert Tips For Cutting Crown Molding Corners:
- Cutting Techniques: When using a miter saw, remember to position the crown molding upside down and at a 45-degree angle. For inside corners, cut one piece with the miter saw set to the left, and the other piece with the miter saw set to the right. This technique allows for a seamless joint.
- Coping Method: Coping inside corners involves cutting along the profile of the molding to create a snug fit. Start by mitering the first piece, then use a coping saw to remove the waste material from the adjacent piece. This technique ensures tight joints that adapt to any irregularities in the wall.
- Make Test Cuts: Before cutting expensive crown molding, practice with scrap pieces to ensure your angles and cuts are accurate. This will help you gain confidence and avoid costly mistakes.
- Secure Properly: To secure crown molding, apply a strong adhesive along the back edge and nails at the top and bottom. Use a nail set to sink the nails slightly below the surface, creating a smooth finish that can be easily concealed with caulk or putty.
Now that you have an understanding of the different types of crown molding, the essential tools and materials needed, and some expert tips, you’ll be well-equipped to tackle cutting crown molding corners with confidence. Remember to take your time, measure accurately, and practice, and soon you’ll have beautifully finished corners that add elegance and sophistication to your space.

Measuring And Marking Crown Molding For Cutting
Learn how to measure and mark crown molding accurately before cutting, ensuring perfect corners. This informative guide walks you through the steps, making the process easy and precise.
Understanding Inside And Outside Corners:
Inside and outside corners are the two main types of corners when cutting crown molding. Understanding the difference between these corners is crucial to achieving precise and seamless results. Here are the key points to remember:
- Inside corners: These corners are formed when two walls meet at an angle, creating a concave shape. To cut crown molding for inside corners, you’ll need to measure and mark the angles correctly to ensure a snug fit.
- Outside corners: These corners are formed when two walls meet at an angle, creating a convex shape. When cutting crown molding for outside corners, you’ll also need to measure and mark the angles accurately for a seamless finish.
Properly Measuring For Accurate Cuts:
Accurate measurements are essential for cutting crown molding corners correctly. Here’s how to ensure your measurements are precise:
- Measure the wall length: Use a tape measure to determine the length of the wall where the crown molding will be installed. Take multiple measurements along the wall and note the longest measurement for accuracy.
- Determine the angle: Use an angle finder or a digital protractor to measure the angle of the corner where the crown molding will be installed. Make sure to note if it’s an inside or outside corner.
- Mark the measurements: Once you have the wall length and angle measurements, transfer them to the crown molding. Use a pencil or masking tape to mark the precise points where the molding will be cut.
- Double-check the measurements: Before making any cuts, double-check your measurements to avoid any mistakes. Ensure that the angles and lengths are accurate to prevent any issues during installation.
Remember, precision is key when measuring crown molding for cutting. Take your time and double-check your measurements to achieve a flawless finish.
Ready To Cut Crown Molding Corners Like A Pro:
By understanding the differences between inside and outside corners and properly measuring for accurate cuts, you’ll be well on your way to mastering the art of cutting crown molding corners. These steps will help you achieve precise and professional-looking results.
Now that you have a solid foundation, let’s move on to the next steps of actually cutting the molding and fitting it together for a seamless finish. Stay tuned for the upcoming sections as we guide you through the entire process.
Cutting Crown Molding For Inside Corners
Learn how to cut crown molding for inside corners with our step-by-step guide. Achieve precise cuts and seamless joints for a professional finish in your interior design projects.
Miter Saw Techniques For Inside Corner Cuts
Cutting crown molding for inside corners requires precision and the right techniques. Whether you’re a seasoned DIYer or a beginner, these miter saw techniques will help you achieve clean and accurate cuts for your crown molding projects. Follow these steps to master your inside corner cuts:
- Measure and mark: Take accurate measurements of the wall where you’ll be installing the crown molding. Mark the starting point for your cut and make note of any irregularities in the wall or ceiling.
- Cut at a 45-degree angle: Set your miter saw to a 45-degree angle to create the inside corner cut. Remember to position the crown molding upside down and against the saw fence to ensure the correct angle.
- Make a test cut: Before making the final cut on your actual molding, it’s a good idea to make a test cut with a scrap piece of crown molding. This will allow you to verify that the angles are correct and make any necessary adjustments.
- Use a coping saw: Once you’ve made the 45-degree angle cut, you’ll need to create a coping cut to achieve a tight fit for the inside corner. Use a coping saw to carefully remove the excess material from the backside of the molding, following the contour of the profile.
- Sand and refine: After coping the inside corner, use sandpaper or a file to smooth out any rough edges or imperfections. This will ensure a seamless fit when installing the crown molding.
- Dry fit before installation: Before permanently attaching the crown molding, do a dry fit to ensure the inside corner cuts are accurate and the pieces fit together seamlessly. Make any necessary adjustments or recuts if needed.
Choosing And Adjusting The Miter Angle
Selecting the right miter angle is crucial for achieving perfect inside corner cuts. Consider the following tips when choosing and adjusting the miter angle for your crown molding:
- Understand the spring angle: Crown moldings typically have a spring angle, which refers to the incline of the molding’s backside. Common spring angles include 38 degrees and 45 degrees. Make sure you know the spring angle of your crown molding before setting the miter angle on your saw.
- Test your angles: To ensure accuracy, it’s a good practice to test your miter angles with scrap pieces of crown molding. This will help you verify that your chosen angle aligns correctly with your crown molding’s profile and the wall’s angle.
- Adjust as needed: If your initial miter angle doesn’t create a tight inside corner fit, don’t worry. You can make small adjustments by fine-tuning the angle on your miter saw until you achieve the desired result.
Follow these miter saw techniques and tips for cutting crown molding inside corners, and you’ll be well on your way to creating professional-looking finishes for your home projects. With practice and attention to detail, you’ll be able to achieve precise cuts and stunning results every time.
Cutting Crown Molding For Outside Corners
Learn how to cut crown molding for outside corners with ease. This step-by-step guide will help you achieve precise cuts and seamless results for your crown molding projects. Master the art of cutting crown molding corners and bring elegance to your home.
When it comes to cutting crown molding for outside corners, it’s essential to have the right techniques and angles. This not only ensures a seamless and professional-looking finish but also saves you time and effort. In this section, we’ll explore useful miter saw techniques and different miter angles for outside corners.
Let’s get started!
Miter Saw Techniques For Outside Corner Cuts:
Positioning the crown molding:
Place the molding upside down on the saw table, with the bottom edge against the fence and the top edge facing up. This mimics the installation orientation.
Adjusting the miter saw angle:
Set the miter saw at a 45-degree angle for the corner cuts. This is the most common angle for outside corners.
Double-check and ensure that the saw is set to make the cut on the correct side of the molding.
Cutting the molding:
For the left side of the corner, position the molding on the left side of the saw and make the cut.
For the right side of the corner, position the molding on the right side of the saw and make the cut.
Exploring Different Miter Angles For Outside Corners:
90-degree corner:
When two walls meet at a perfect 90-degree angle, use a 45-degree angle on your miter saw for each side of the corner. This will create a seamless and tight joint.
Non-90-degree corner:
For walls that don’t form a perfect 90-degree angle, you’ll need to adjust the miter angles to achieve a precise fit.
Measure the angle using an angle finder or a digital protractor.
Divide the angle by two to determine the miter angles needed for each side of the corner.
Set your miter saw accordingly to achieve those angles.
Remember, practice makes perfect when it comes to cutting crown molding for outside corners. Take your time, measure accurately, and ensure your miter saw is set correctly for each cut. By following these techniques and exploring different miter angles, you’ll be able to achieve clean and professional-looking crown molding corners.
Coping Crown Molding For Perfect Inside Corners
Coping crown molding is essential for achieving seamless inside corners. Learn how to cut crown molding corners flawlessly with these expert tips and techniques.
Coping Saw Techniques For Precise Inside Corners
Coping crown molding for perfect inside corners requires the use of a coping saw, a versatile tool that allows for precise cutting. By mastering the art of coping saw techniques, you can achieve seamless corner joints that enhance the overall look of your crown molding installation.
Here are some key techniques to help you produce professional results:
- Proper Grip: Hold the coping saw with a firm grip to maintain control and accuracy throughout the cutting process.
- Angle of the Blade: Position the coping saw blade at an angle of approximately 45 degrees to create a beveled edge that matches the profile of the crown molding.
- Start with the Cope Cut: Begin by making the cope cut, which involves tracing the profile of the molding onto the end of the piece with a pencil or marker.
- Remove Waste Material: Carefully cut along the traced profile, removing the waste material behind the cope cut. Take your time to ensure clean and precise cuts.
- Filing and Sanding: Once the cope cut is complete, use a file or sandpaper to smooth any rough edges or imperfections, ensuring a seamless fit with the adjacent piece.
- Trial and Adjustments: Test the fit of the coped piece against the adjacent one, making any necessary adjustments with the coping saw or sanding tools until a perfect fit is achieved.
Step-By-Step Coping Process
To cope crown molding for inside corners, follow these step-by-step instructions for a flawless finish:
- Measure and Mark: Measure the length of the crown molding piece needed for the inside corner. Mark the measurement accurately using a pencil or marker.
- Cut the Molding: Using a miter saw, cut the molding at a 45-degree angle according to the marked measurement.
- Cope the End: Take the coped end of the molding where the inside corner will be. Begin by making a cope cut by tracing the profile of the molding onto the end using a pencil or marker.
- Coping Saw Work: With a coping saw, carefully follow the traced profile and cut away the waste material, leaving the desired shape behind.
- Check and Adjust: Test the coped end against the corresponding straight end of the adjacent piece. Make any necessary adjustments using the coping saw or sanding tools to achieve a smooth and seamless fit.
- Secure in Place: Apply adhesive or use finishing nails to secure the coped and straight ends of the crown molding together, ensuring a tight fit.
- Repeat the Process: Repeat the coping process for each inside corner, following the same steps to achieve identical results.
- Evaluate and Refine: Once all coped corners are installed, evaluate the overall fit and appearance of the crown molding. Make any final adjustments, such as sanding or filing, to achieve a flawless finish.
Mastering the coping technique for inside corners will elevate the visual impact of your crown molding installation. With a little practice and patience, you can achieve perfect inside corners every time, enhancing the elegance and charm of your living spaces.
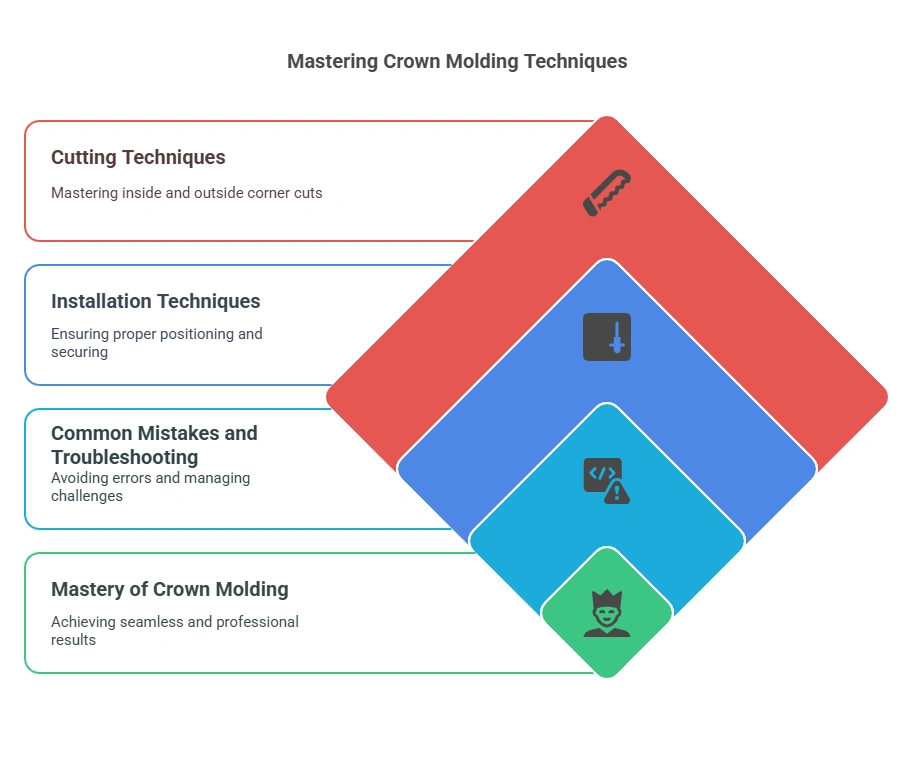
Installing Crown Molding For A Seamless Finish
Learn how to cut crown molding corners for a seamless finish on your next home improvement project. Follow these step-by-step instructions to achieve professional-looking results.
Proper Positioning And Placement
Proper positioning and placement of crown molding are crucial to achieving a seamless finish. Here are some key points to consider:
- Measure twice, cut once: Accurate measurements are essential for a flawless installation. Take precise measurements of the walls and corners where the crown molding will be installed.
- Identify and mark wall studs: Before installing the crown molding, locate and mark the position of wall studs. This will help ensure a secure attachment.
- Use a level: To guarantee a straight and even installation, make use of a level. Ensure that the molding is perfectly aligned with the horizontal and vertical planes.
- Cutting at correct angles: Cutting crown molding corners requires specific angle cuts. Measure and mark the angles accurately to achieve a tight fit.
- Miter saw for precise cuts: Utilize a miter saw for accurate cuts at the specified angles. A miter saw allows for precise and clean cuts, resulting in seamless corner joints.
- Dry fit before installation: Before securing the crown molding in place, perform a dry fit to confirm that the corners fit seamlessly. This step allows for any necessary adjustments to be made before permanently attaching the molding.
- Adhere to safety precautions: Always prioritize safety when using power tools. Wear appropriate protective gear, and follow the manufacturer’s instructions for operating machinery.
Securing And Final Touches
After positioning the crown molding, it’s time to secure it in place and add the final touches for a polished result. Consider the following:
- Use finishing nails: Secure the crown molding to the wall studs using finishing nails. Position the nails close to the top edge of the molding to easily conceal them later.
- Fill nail holes: Once the molding is securely attached, use wood filler to fill in the nail holes and any other imperfections. Smooth the filled holes with a putty knife for a seamless appearance.
- Caulk the edges: Apply caulk along the edges of the crown molding to fill any gaps or inconsistencies between the molding and the wall. A bead of caulk provides a clean and professional finish.
- Sand and paint: After the caulk has dried, lightly sand the crown molding to ensure a smooth surface. Wipe away any dust before applying the final coat of paint or stain to match your room’s decor.
- Pay attention to details: Take time to inspect the installed crown molding for any touch-ups needed. Ensure all joints are visually seamless and that the molding is securely attached.
By following these steps for positioning, securing, and adding the final touches, you’ll be able to install crown molding with ease and achieve a seamless finish that enhances the overall aesthetic of your space.
Common Mistakes To Avoid When Cutting Crown Molding
Learn how to cut crown molding corners without making common mistakes. Follow these guidelines to ensure a smooth and precise result.
Overlooking Measurement And Marking Errors
- One common mistake that many people make when cutting crown molding is overlooking measurement and marking errors. These errors can lead to inaccurate cuts and can affect the overall appearance and fit of the crown molding.
- To avoid this mistake, it is important to take precise measurements of the walls and corners where the crown molding will be installed. Use a tape measure and make sure to measure from the ceiling or floor to ensure accuracy.
- After taking measurements, mark the molding accordingly. Use a pencil to mark the back of the molding, indicating where cuts need to be made. Make sure to double-check your measurements and marks to avoid any errors.
- Another helpful tip is to create a cutting guide using a scrap piece of molding. This can help ensure that your cuts are accurate and match the angle of the corner.
- By paying attention to measurements and marking errors, you can avoid wasting materials and ensure that your crown molding fits perfectly in your space.
Troubleshooting And Tips For Challenging Corner Cuts
Discover troubleshooting tips for challenging corner cuts when it comes to cutting crown molding corners. This comprehensive guide provides easy-to-follow techniques to achieve precise results in your molding projects.
Dealing With Uneven Or Out-Of-Plumb Walls
Dealing with uneven or out-of-plumb walls can be a common challenge when cutting crown molding corners. Here are some troubleshooting tips to help you overcome this obstacle:
- Measure and mark: Start by measuring the length of each wall and marking the desired angle for the corner cut. Take multiple measurements and use the average to ensure accuracy.
- Adjust the saw: Use a compound miter saw to make the necessary angle cuts. Adjust the saw’s bevel and miter settings according to the marked angle and the direction of the corner (inside or outside).
- Coping method: If the walls are highly uneven, consider using the coping method. This involves cutting one piece of molding at a 90-degree angle and then using a coping saw to shape the end of the second piece to fit snugly against it. This technique helps create seamless corner joints, even on uneven walls.
- Shimming technique: In cases where the walls are slightly out-of-plumb, you can use shims to even out the gaps between the molding and the wall. Place thin wood shims behind the molding at strategic points to create a level surface for the crown molding to rest against.
- Sanding and caulking: Once the installation is complete, you may need to sand down any rough edges or uneven surfaces. Additionally, use caulk to fill any visible gaps or imperfections between the molding and the wall. This will give your finished project a polished and professional look.
Managing Complex Room Layouts
Managing complex room layouts can make cutting crown molding corners more challenging. Whether you have sloped ceilings, archways, or irregular room shapes, here are some tips to help you navigate these situations:
- Create a template: For rooms with unique angles or shapes, it can be helpful to create a template out of cardboard or poster board. Use a protractor and ruler to measure and transfer the angles accurately onto the template. This will serve as a guide when cutting the molding.
- Take accurate measurements: Measure the lengths of the walls precisely, especially in areas where the room layout deviates from standard 90-degree angles. Double-check your measurements to ensure that the molding will fit properly.
- Test cuts: Before cutting the actual crown molding, it’s a good idea to make test cuts on scrap pieces of wood. This will help you gauge the accuracy of your measurements and adjust as needed.
- Use flexible molding: If your room layout includes curved walls or archways, consider using flexible molding. This type of molding is designed to bend and conform to irregular shapes, making installation easier and providing a seamless finish.
- Seek professional help if needed: If you’re uncertain about cutting crown molding for complex room layouts, it may be wise to consult a professional. They have the expertise and experience to handle these challenges effectively.
Remember, with patience, attention to detail, and these troubleshooting tips, you’ll be able to overcome difficulties when cutting crown molding corners and achieve outstanding results in any type of room layout.
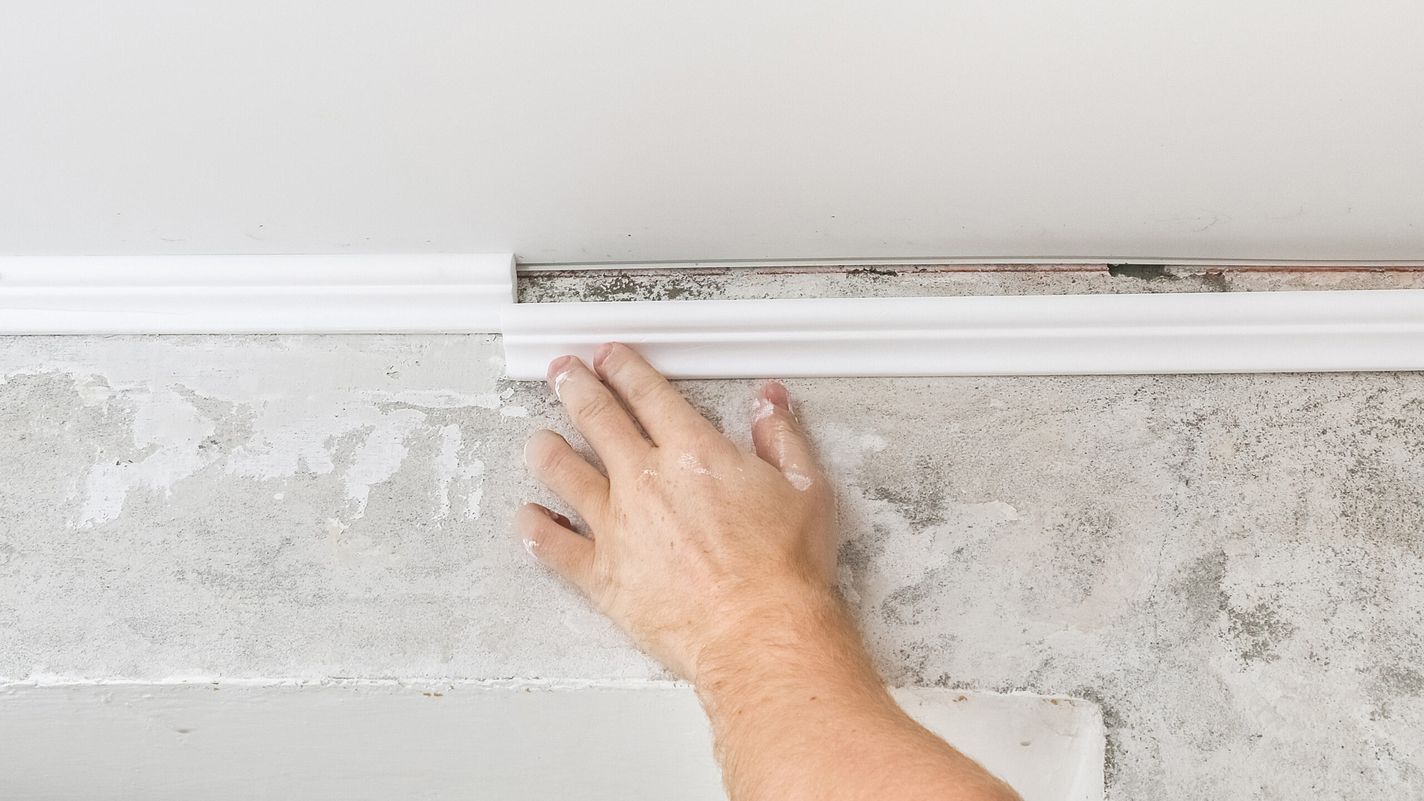
Credit: www.thisoldhouse.com
Frequently Asked Questions For How To Cut Crown Molding Corners
What Angle Do You Cut Crown Molding Corners?
Cut crown molding corners at a 45-degree angle for inside corners and a 90-degree angle for outside corners.
How Do You Cut Corners On Crown Molding?
To cut corners on crown molding, follow these steps:
1. Measure the angle where the two pieces of molding will meet.
2. Use a miter saw to cut the molding at the measured angle.
3. Make sure the two pieces fit together snugly.
4. Secure the molding in place using adhesive or nails. Remember, precision is key when cutting corners on crown molding.
How Do You Cut Crown Molding Inside Corners For Beginners?
To cut crown molding inside corners for beginners:
1. Measure the angles of the corners and transfer them to the molding.
2. Set the saw at the appropriate angle and make the cuts.
3. Place the molding in position and check for fit.
4. Make any necessary adjustments and secure the molding to the wall.
How Do You Cut Crown Molding 45 Degrees Inside Corners?
To cut crown molding at a 45-degree angle for inside corners, follow these steps:
1. Measure and mark the molding at a 45-degree angle.
2. Set your miter saw to 45 degrees.
3. Place the molding against the saw fence and cut.
4. Fit the cut ends together for a seamless inside corner joint. Remember to measure accurately and use caution when cutting to achieve the desired result.
Conclusion
To wrap up, cutting crown molding corners can be a challenging task, but with the right techniques and tools, it is certainly doable. Remember to measure carefully and make accurate angle cuts using a miter saw or coping saw. Don’t forget to use appropriate safety precautions when working with power tools.
Practice on scrap pieces of molding to perfect your technique before tackling your actual project. And if you need assistance, don’t hesitate to consult online tutorials or seek advice from professionals in the field. Whether you’re sprucing up your home or undertaking a woodworking project, mastering the art of cutting crown molding corners will add a touch of elegance and sophistication to any room.
So go ahead, take on the challenge, and transform your spaces into beautiful works of art. Happy molding!