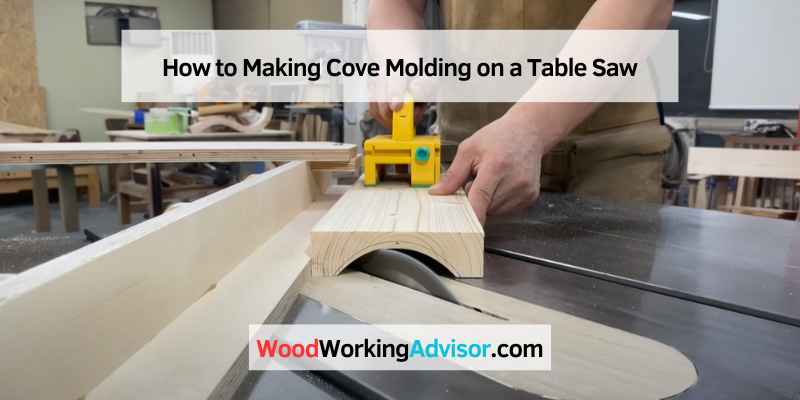
How to Making Cove Molding on a Table Saw
If you’re looking to add a touch of elegance to a table or piece of furniture, one way to do it is by adding cove molding. Cove molding is a type of trim with a concave curve on one side and is used to give an edge a softer look. While it may seem daunting, making cove molding on a table saw is relatively easy and only requires a few tools.
- Cut a cove molding template from scrap plywood using a jigsaw or scroll saw.
- Attach the template to the fence of your table saw with double-sided tape
- Align the blade of your saw with the outside edge of the template and raise it to half the thickness of the wood you’re using for your cove molding
- Turn on the saw and slowly feed your workpiece into it, following the contour of the template
- Once you’ve cut along the entire length of the board, please turn off the saw and remove your workpiece from it
- Use a hand plane or sander to smooth out any rough edges on your cove molding before installing it in its intended location
How Do You Make Coves With a Table Saw?
Coves are a molding type that can add interest and dimension to your woodworking projects. While they may seem like complex shapes, coves are pretty easy to make using a table saw. You’ll need to set up your table saw with a dado blade to get started.
The size of the dado blade will determine the width of the cove, so choose accordingly. Once the dado blade is installed, adjust the edge height so that it’s just shy of halfway through the thickness of the wood you’re using. With the dado blade in place and the correct size, make a test cut on a scrap piece of wood to ensure everything is lined up correctly.
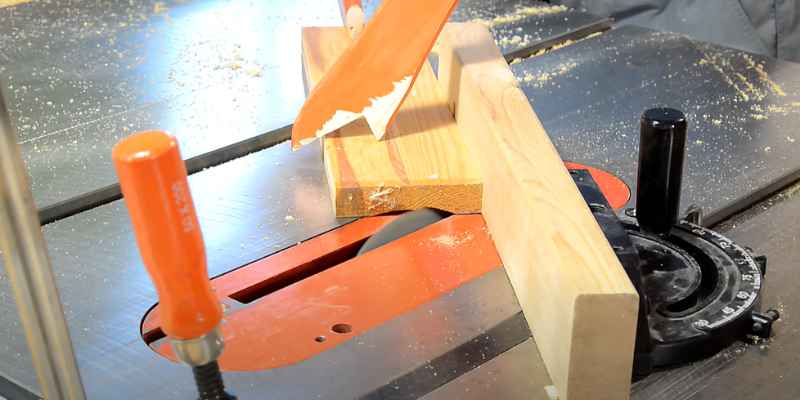
Once you’ve confirmed that your dado blade is installed correctly and aligned, it’s time to start cutting coves into your workpiece. To do this, position your workpiece against the fence so that one edge lines up with the outside edge of the dado blade (as shown in image one below). Then, holding onto the workpiece firmly with both hands, slowly feed it through the sawblade while keeping constant pressure against the fence and tabletop (image 2).
As you feed your workpiece through, you’ll see coves begin to take shape along each edge. Continue providing until your entire workpiece has been cut (image 3). And that’s all there is to it!
Now all that’s left to do is clean up rough edges with sandpaper, and you’re ready to move on to assembly or finish work as desired.
What Angle Do You Cut Cove Molding?
Cove molding is a type of trim used to transition between two surfaces or to provide decorative detail. It’s generally installed at the point where walls meet ceilings but can also be used on other types of architectural features. The angle at which you cut cove molding will depend on its intended purpose.
If you’re installing cove molding for purely decorative purposes, you can cut it at any angle you like. However, if the cove molding is established to create a smooth transition between two surfaces, the tip will need to be more precise. In this case, the information should match the end of the surface it’s being adhered to.
For example, if you’re installing cove molding on a wall that meets a ceiling at a 90-degree angle, you would need to cut the molding at a 90-degree angle.
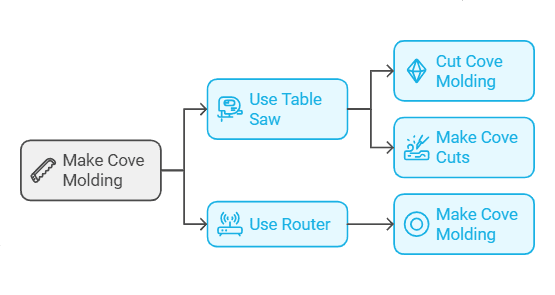
How Do You Make a Molding Table Saw?
You can make a molding table saw in a few different ways, but the most common method is to use a router. First, you will need to create a template for your saw. This can be done using a piece of cardboard or plywood the same size as your saw blade.
Next, trace the outline of your saw onto the template. Once the shape is traced, use a router to cut along the lines. Be sure to make the cuts deep enough so that your molding will fit snugly into them.
Finally, sand down rough edges; you should have a perfect molding table saw!
How Do You Cut Coves?
A cove is a type of concave molding or recess found in woodworking. It’s typically used to create decorative edges on furniture and cabinets. There are several ways to cut coves, but the most common is using a router with a cove bit.
This method requires two passes with the router for each side of the cove. First, you’ll need to mark out where the cove will go. Use a pencil and ruler (or a template if you have one) to draw a line around the perimeter of the cove.
Next, set up your router with a 1/2″ or 3/4″ Cove Bit. The size of the bit will determine the depth of the finished cove. Position the router so that the bit’s cutting edge is flush with the line you drew earlier.
Slowly guide the router along the line, being careful not to go too fast or apply too much pressure, which could cause damage to your workpiece. Repeat this process on both sides of your workpiece until you’ve cut all around it. You may need to make multiple passes on each side depending on how thick your piece is and how deep you’re cutting your coves.
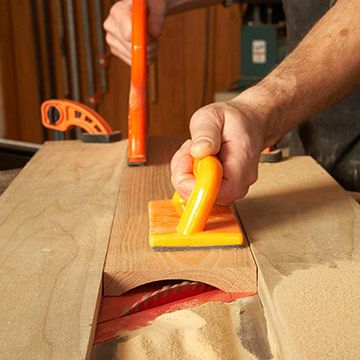
Credit: www.woodmagazine.com
How to Make Cove Molding With a Router
Cove molding is a great way to do it if you’re looking to add a touch of elegance to your home. Luckily, it’s also relatively easy to make with a router. Here’s how:
First, you’ll need to gather your materials. You’ll need a router with a 1/4″ spiral up-cut bit and some cove molding stock. You’ll also need a straight edge and some clamps.
Once you have everything gathered, set up your work area, so the straight edge is securely clamped down. Then, measure and mark your cut lines on the cove molding stock. Next, it’s time to start routing.
Position the router so that the bit is just above the surface of the wood, and slowly guide it along the marked line. Be sure to go slow and keep steady pressure on the router – if you go too fast or apply too much pressure, you risk damaging the wood or causing the router to veer off course. After you’ve made your cuts, sand down any rough edges and then stain or paint the molding to match your existing trim work.
And that’s it! With just a few simple steps, you can add beautiful cove molding to any room in your house.
How to Cut Cove Molding
Cove molding is a great way to do it if you’re looking to add a touch of elegance to your home. This molding is used to transition between two surfaces that meet at an angle, such as the ceiling and wall. Cove molding can be made from various materials, but most commonly, it’s made from wood or polyurethane.
Here’s a step-by-step guide on how to cut cove molding:
- Measure the length of the area where you’ll be installing the cove molding. Cut your molding piece(s) to size using a miter or hand saw.
2. Apply construction adhesive to the back of the molding piece (if using wood). Start at one end and work your way down.
3. Press the molding into place and hold for 30 seconds to allow the adhesive to set.
If you’re using polyurethane cove molding, no adhesive is necessary. Simply press it into place.
4. Use a nail gun or hammer and finishing nails to secure the molding in place every 8-12 inches (depending on its width). Be sure not to nail it too close to the edge of the molding, as this could cause it to crack.
5. Fill any gaps with caulk and smooth them out with your finger before allowing it time.
6. To dry completely (follow manufacturer’s instructions). Once dry, paint or stain your new cove Moldings. Enjoy!
Small Cove Molding
Small cove molding is an excellent option to add a touch of elegance to your home. This type of molding is typically used in high-end homes and can give your space a luxurious feel. Cove molding is made from various materials, including wood, plaster, and even plastic.
It’s essential to choose the suitable material for your project and the right size and style of molding to achieve the look you’re going for.
Conclusion
If you’re looking for a way to add character to your furniture, try making cove molding on a table saw. It’s a relatively simple process that can be done in just a few steps. First, set up your table saw with the blade tilted at 45 degrees.
Then, cut a piece of Cove molding to the appropriate length. Next, position the piece of molding against the fence and slowly feed it through the blade. Repeat this process until you have the desired amount of cove molding.
Once you’ve got your cove molding, you can use it to decorate any number of pieces of furniture. Give it a try and see how easy it is to add some extra personality to your home décor!