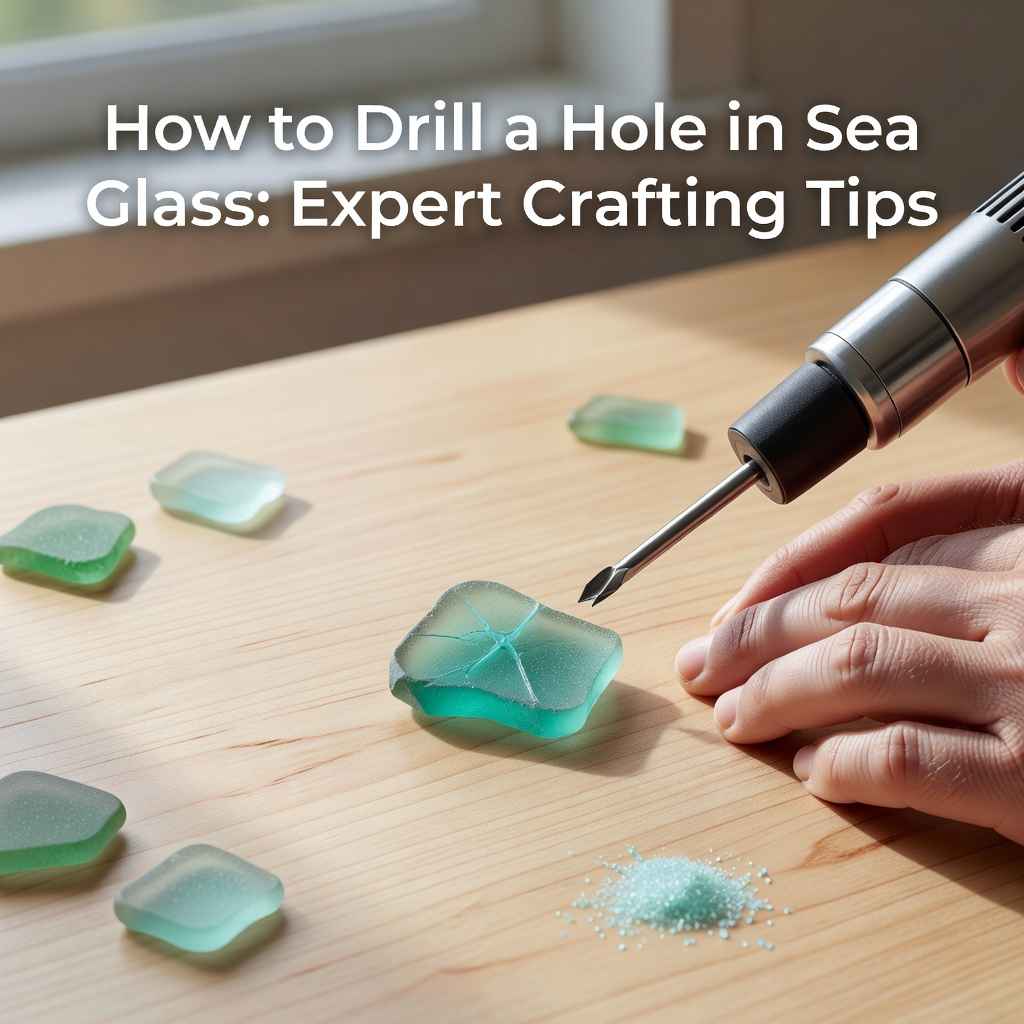
How to Drill a Hole in Sea Glass: Expert Crafting Tips
Drilling a hole in sea glass can seem tricky at first. Many people worry about breaking their precious finds or making a mess. But with the right approach, How to Drill a Hole in Sea Glass: Expert Crafting Tips becomes a straightforward and rewarding process.
This guide will walk you through each step simply and clearly. Get ready to turn your sea glass treasures into beautiful jewelry and crafts with confidence.
Getting Started How to Drill a Hole in Sea Glass
This section covers the essential preparations you need to make before you start drilling. We will explore the types of tools required, the safety measures you must take, and how to set up your workspace. Proper preparation is key to a successful and safe drilling experience, ensuring your sea glass remains intact and beautiful.
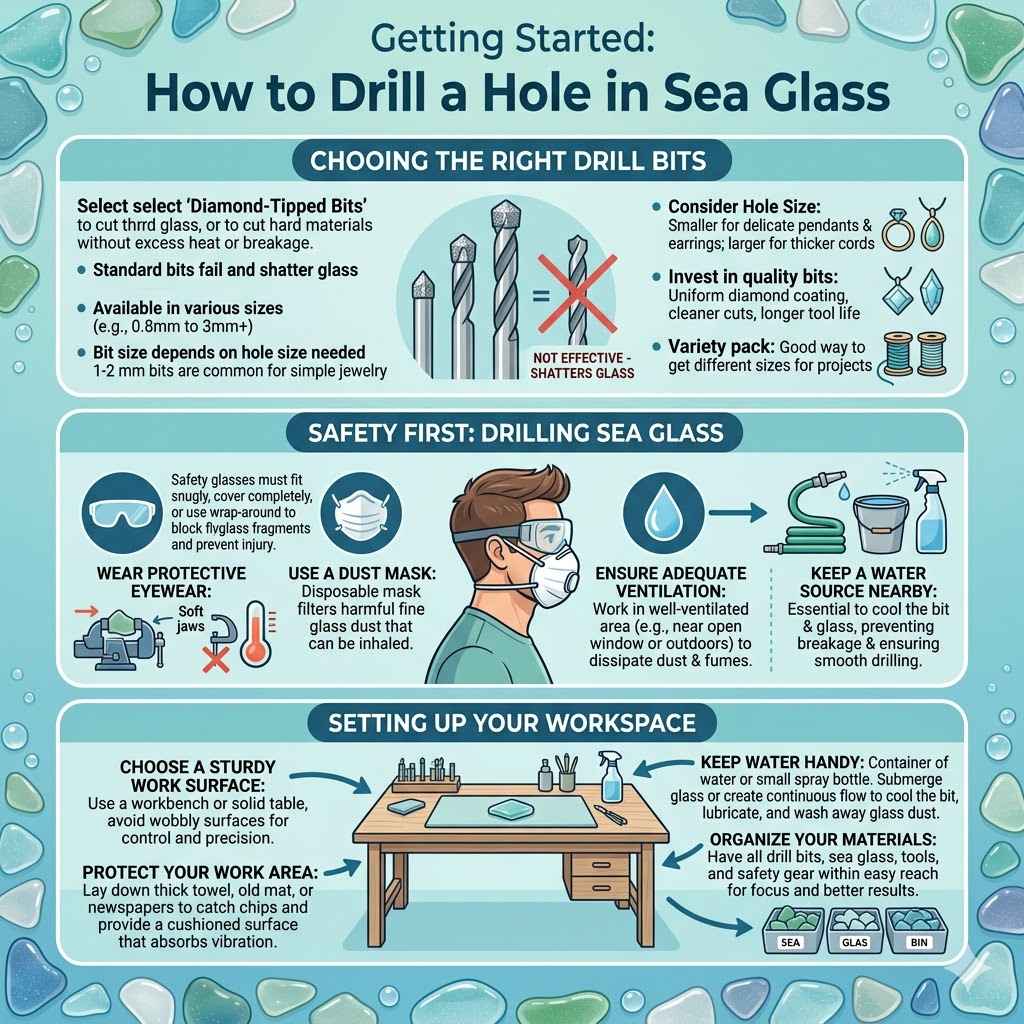
Choosing the Right Drill Bits
Selecting the correct drill bit is very important. For drilling holes in sea glass, diamond-tipped drill bits are the best choice. They are designed to cut through hard materials like glass and stone without causing excessive heat or breakage.
Standard metal drill bits will not work effectively and will likely shatter the glass.
Diamond-tipped bits come in various sizes. The size you choose will depend on the size of the hole you want to make. For simple jewelry making, like for a pendant, a bit around 1-2 millimeters is usually sufficient.
Larger bits can be used for bigger projects or if you want a more prominent hole.
The quality of the diamond bit matters. Higher quality bits have more uniformly distributed diamond particles, which leads to cleaner cuts and longer tool life. Investing in a good set of diamond drill bits will save you frustration and improve your results significantly.
You can find these at craft stores or online.
Diamond-tipped drill bits are essential for drilling glass.
These bits have a coating of industrial diamonds that allows them to grind through hard surfaces like glass. They create a clean cut and are far more effective than regular metal bits, which can generate too much heat and cause the glass to shatter. Always look for bits specifically labeled for glass or tile.
Consider the size of the hole needed.
Hole sizes typically range from 0.8mm to 3mm or more. Smaller holes are great for delicate pendants and earrings, while larger holes can be used for thicker cords or for creating a more prominent feature in a craft project. Measure the thickness of your sea glass and the cord you plan to use to decide on the best bit size.
Invest in a quality set of bits.
While cheaper bits may seem appealing, they often wear out quickly or produce rougher holes. Good quality diamond bits will last longer and give you a smoother drilling experience. Look for bits that mention being suitable for frequent use and producing clean results.
Buying a variety pack can be a good way to get different sizes for future projects.
Safety First Drilling Sea Glass
Safety is paramount when working with glass and power tools. Always wear safety glasses to protect your eyes from any flying glass shards. A dust mask is also recommended to avoid inhaling glass dust.
Ensure good ventilation in your workspace. You should also keep a water source nearby. Drilling glass generates heat, and water helps to keep the bit and glass cool, preventing breakage and making the drilling process smoother.
Secure your sea glass firmly before you start drilling. This prevents it from moving during the process. Using a small vise or a clamp with soft jaws can help hold the glass in place without damaging it.
Wear protective eyewear.
Safety glasses are a must. When drilling glass, small fragments can chip off and fly at high speeds. These fragments can cause serious eye injury.
Ensure your safety glasses fit snugly and cover your eyes completely. Consider wrap-around styles for maximum protection against debris coming from any angle.
Use a dust mask.
Drilling glass produces fine glass dust. Inhaling this dust can be harmful to your lungs over time. A simple disposable dust mask will filter out most of these particles, ensuring a safer working environment, especially if you are drilling for extended periods or in a confined space.
Ensure adequate ventilation.
Work in a well-ventilated area, ideally near an open window or outdoors. This helps to dissipate any glass dust and fumes that may be generated. Good airflow also helps to keep the ambient temperature lower, which is beneficial when dealing with heat generated during drilling.
Setting Up Your Workspace
Prepare a stable and flat surface for drilling. Cover the surface with a towel or an old cloth to catch any debris and provide a soft base for your materials. Having everything you need within easy reach will make the process smoother.
It is helpful to have a container of water or a small spray bottle filled with water. Keeping the drill bit and the glass wet during drilling is crucial for cooling and preventing breakage. Some crafters prefer to use a small bucket of water where they can submerge the glass as they drill.
Organize your sea glass pieces so they are easy to select and handle. Have your drill, drill bits, and safety gear all laid out and ready to go before you begin. A calm and organized workspace leads to better focus and results.
Choose a sturdy work surface.
A workbench or a solid table is ideal. Avoid wobbly surfaces that could cause the glass to move unexpectedly. Ensure there is enough space for your tools, water, and any spare pieces of sea glass.
A clean and uncluttered area allows you to concentrate on the task at hand.
Protect your work area.
Lay down a thick towel, an old mat, or some newspapers. This will catch any small glass chips that might escape and also provide a slightly cushioned surface. This prevents the glass from sliding as easily and can help absorb vibrations, making drilling more controlled.
Keep water handy.
Water is your best friend when drilling glass. It lubricates the drill bit, cools the glass, and helps to wash away glass dust. A small bowl of water or a spray bottle works well.
Some crafters even use a small pump to create a continuous water flow over the drilling area for optimal cooling.
The Drilling Process How to Drill a Hole in Sea Glass
This section details the actual steps involved in drilling a hole through sea glass. We will cover techniques for starting the hole, maintaining a steady hand, and managing the drilling speed to achieve a clean, smooth result without damaging the glass.
Starting the Hole
Before you start the drill, decide exactly where you want the hole. Mark the spot lightly with a pencil or a marker if needed, especially on darker glass. For sea glass, the location is often dictated by its shape and how you intend to use it, such as for a pendant.
Begin by holding the drill at a slight angle, about 45 degrees, to the glass. This helps the diamond bit to create a small groove or starting point. Once this groove is established, gradually bring the drill upright to a 90-degree angle.
Apply gentle, consistent pressure. Do not force the drill. Let the diamond bit do the work.
The cooling water is essential here; keep the area wet throughout this initial stage to prevent the glass from overheating and cracking.
Mark the drilling spot.
A light mark helps you aim accurately. For lighter glass, a pencil or chalk works. For darker glass, a permanent marker can be used, but ensure it doesn’t stain the glass.
Sometimes, the natural shape of the sea glass guides the placement of the hole, making it easier to decide.
Begin at an angle.
Instead of plunging straight down, start the drill at a 45-degree angle to the glass surface. This allows the diamond bit to create a shallow indentation or a starting groove. This helps to prevent the drill bit from ‘walking’ or slipping across the glass surface, ensuring you start precisely where you want.
Bring drill to 90 degrees.
Once a small indentation is made, slowly and carefully tilt the drill to a perpendicular (90-degree) angle. Maintain a steady hand and ensure the drill is aligned with the surface. This transition is critical for a clean entry into the glass and avoids putting unnecessary stress on the bit or the glass.
Drilling Techniques for Sea Glass
Once the hole has started, you will drill through the glass. Keep the drill moving in a slow, steady rotation. Avoid jerky movements.
Patience is key. Drilling too quickly can generate excessive heat and cause the sea glass to break.
Periodically lift the drill bit out of the hole while it is still spinning. This allows water to flush out glass dust and debris. It also helps to cool the bit and the glass.
Continue this process until you have drilled all the way through the piece.
If you are drilling multiple pieces, it is a good idea to let the drill bit cool down between pieces. This extends the life of your drill bit and reduces the risk of overheating the glass. Clean the hole gently after drilling to remove any residual dust.
Maintain a steady, slow rotation.
Power drills should be set to a low speed setting. High speeds generate more heat and vibration, increasing the risk of breakage. A slow, controlled rotation allows the diamond particles on the bit to grind away the glass effectively without causing thermal shock or mechanical stress.
Apply consistent, light pressure.
Never force the drill. Let the diamond bit do the cutting. Pushing too hard can cause the bit to bind, shatter the glass, or even break the drill bit.
Gentle, even pressure ensures a smooth cut and prevents undue stress on the sea glass.
Lift the drill periodically.
While drilling, lift the drill bit up and out of the hole briefly every few seconds. This action helps to clear out glass dust and debris from the hole and allows fresh water to cool the bit and the glass. This is vital for preventing overheating and ensuring a clean, smooth-edged hole.
Cooling and Lubrication Strategies
Water is the primary coolant and lubricant for drilling glass. Keeping the drilling area consistently wet is crucial. You can achieve this by dipping the sea glass in water, using a spray bottle, or even setting up a small pump to deliver a constant stream of water to the drilling site.
Some crafters use a few drops of cutting oil or a specialized glass drilling lubricant instead of plain water. These can sometimes provide better cooling and lubrication, leading to a smoother cut. However, water is usually sufficient for most sea glass projects.
Always ensure the water covers the point where the drill bit is making contact with the glass. If the water evaporates, stop drilling immediately and re-wet the area. Consistent cooling is more important than drilling speed.
Submerge the glass in water.
For smaller pieces of sea glass, you can simply submerge the entire piece in a shallow bowl of water. This ensures the drilling area is always lubricated and cooled. As you drill, the water will keep the glass from getting too hot, significantly reducing the chance of cracks.
Use a water spray bottle.
If submerging is not practical, a spray bottle filled with water is a good alternative. Continuously spray water onto the drilling site as you work. Keep spraying even after you have finished drilling to allow the area to cool down slowly.
Consider a water drip system.
For more extensive drilling or if you want maximum cooling efficiency, a simple water drip system can be set up. This involves positioning a container of water above your work area with a small tube or a valve to control a steady drip directly onto the drill bit and glass. This provides continuous lubrication.
Post-Drilling Care and Finishing
After successfully drilling your sea glass, there are a few final steps to ensure a polished look and long-lasting durability. This section will guide you through cleaning up the drilled hole and preparing your sea glass for its intended use.
Cleaning the Drilled Hole
Once you have finished drilling, it is important to clean out the hole thoroughly. You can use a small brush, like a toothbrush or a pipe cleaner, dipped in water to gently scrub away any remaining glass dust from inside the hole.
Rinsing the sea glass under running water is also effective. Ensure that all fine particles are washed away. Sometimes, a gentle puff of air can help dislodge stubborn dust.
A clean hole looks better and is easier to work with when you are adding findings or stringing it.
Inspect the edges of the hole. While diamond bits create clean holes, there might be very small burrs. You can gently smooth these with a fine-grit sandpaper or a polishing cloth specifically designed for glass.
Be very careful not to scratch the main surface of the sea glass.
Rinse thoroughly.
After drilling, rinse the sea glass piece under cool running water. This washes away loose glass particles and any remaining drilling lubricant. Ensure water flows through the newly drilled hole to flush out all debris effectively.
Gentle agitation with your fingers can help.
Use a small brush.
A pipe cleaner or a small, soft-bristled brush is excellent for cleaning the inside of the hole. Dip the brush in water and gently swab the inside of the hole to remove any stuck-on dust or residue. This ensures a clean, smooth opening for your jewelry findings or threads.
Inspect for burrs.
Examine the edges of the drilled hole carefully. Very fine glass dust can sometimes create slight burrs, which are tiny sharp edges. If you notice any, you can gently smooth them with a very fine grit sandpaper (like 1000-grit or higher) or a polishing cloth made for glass.
This is a delicate step to avoid scratching the main glass surface.
Finishing Touches for Jewelry
With the hole cleaned and smooth, your sea glass is ready for its transformation into jewelry. Depending on the project, you might use a jewelry bail, a jump ring, or simply thread it onto a cord or chain.
For pendants, a small jewelry bail that glues or crimps onto the top of the sea glass works well. Alternatively, a jump ring can be threaded through the hole. Ensure the jump ring is the right size for your cord or chain.
For earrings, you might attach ear wires directly through the hole or use a small dangle.
When selecting findings, consider their material. Sterling silver, gold-filled, or surgical stainless steel are good choices for longevity and to prevent reactions. Ensure the findings complement the color and style of your unique sea glass piece.
Attach jewelry bails.
Jewelry bails are often used for pendants. They can be glued onto the top of the sea glass or crimped in place. Choose a bail that matches the style and size of your sea glass.
Ensure the glue is strong and designed for glass and metal for a secure attachment.
Use jump rings.
Jump rings are small metal rings that can be opened and closed. They are ideal for connecting chains, clasps, or charms to the drilled hole in your sea glass. Use pliers to open and close them gently, ensuring a secure closure to prevent loss.
Thread cords or chains.
For a simple look, thread a leather cord, a silk ribbon, or a delicate chain directly through the drilled hole. Make sure the cord or chain is thin enough to pass through easily but strong enough to support the weight of the sea glass. This creates a minimalist and elegant piece.
Preserving Your Sea Glass Creations
Sea glass is naturally tumbled by the ocean, which gives it a smooth, matte finish. While it is durable, it is still glass. Avoid subjecting your sea glass creations to extreme temperatures or harsh impacts.
When cleaning your jewelry, use a soft cloth and mild soap. Avoid abrasive cleaners, as they can dull the finish or scratch the glass. Store your sea glass pieces separately to prevent them from scratching each other or other jewelry items.
Proper care will ensure your beautiful, handcrafted sea glass items remain treasures for years to come. Enjoy wearing or displaying the unique pieces you have made from beachcombing finds.
Handle with care.
Even though sea glass is smoothed by the sea, it is still a fragile material. Treat your sea glass jewelry with gentle care. Avoid dropping it or subjecting it to strong impacts, which could cause it to chip or break.
Store it in a soft pouch or a lined jewelry box when not in use.
Gentle cleaning methods.
To clean your sea glass creations, use a soft, damp cloth. For more stubborn dirt, a mild soap and water solution can be used, followed by a thorough rinse and drying with a soft cloth. Never use harsh chemicals or abrasive cleaning pads, as these can damage the surface and dull its natural sheen.
Protect from extreme conditions.
Avoid exposing your sea glass jewelry to extreme temperatures, such as very hot saunas or freezing outdoor conditions. Prolonged exposure to direct sunlight can also sometimes affect the colors of certain types of glass. Keep them away from strong perfumes or hairsprays, which can sometimes leave a residue.
Troubleshooting Common Issues
Even with careful preparation, challenges can arise when drilling sea glass. This section addresses some of the most common problems beginners face and offers practical solutions to overcome them, ensuring a smoother crafting experience.
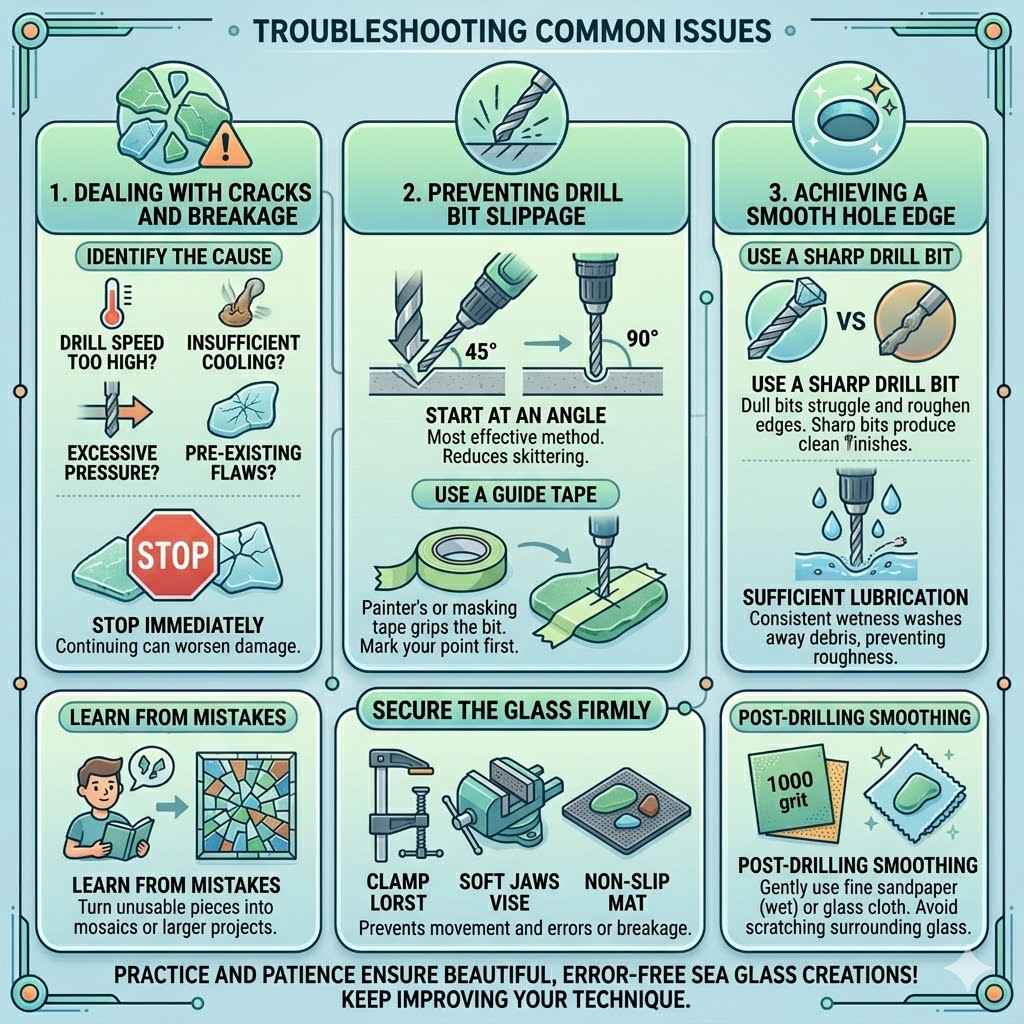
Dealing with Cracks and Breakage
The most feared outcome is the sea glass breaking or cracking. This often happens due to excessive heat, uneven pressure, or starting the drill incorrectly. If a small crack appears, sometimes it is possible to continue drilling very slowly and gently, and then use the piece for a mosaic or a less prominent craft.
However, if the glass breaks significantly, it is best to set it aside. Learn from the experience: perhaps the drill speed was too high, or the cooling was insufficient. Try to identify the cause to avoid repeating the mistake with your next piece.
Sometimes, sea glass has inherent flaws from its creation or how it was broken initially. These existing imperfections can be weak points. Always inspect your sea glass for any tiny fissures before you start drilling.
Identify the cause.
If your sea glass breaks, try to figure out why. Was the drill bit dull? Was the glass too hot?
Did you apply too much pressure? Was the glass already stressed? Understanding the reason helps prevent future breakage.
Common culprits are excessive heat, too much force, or a non-uniform structure in the glass itself.
Stop immediately.
If you notice a crack forming or hear an unusual sound, stop drilling immediately. Continuing can worsen the damage. Sometimes, minor cracks can be sealed or incorporated into a design, but significant breakage usually means the piece is lost for its original purpose.
Learn from mistakes.
Do not get discouraged if a piece breaks. Every crafter experiences this. Use it as a learning opportunity.
If the piece is still somewhat usable, consider turning it into a mosaic tile or a textured element in a larger art project. This can still yield beautiful results.
Preventing Drill Bit Slippage
Drill bit slippage is a common issue, especially when starting a hole. It can lead to inaccurate placement and scratches on the glass surface. Starting the drill at an angle, as mentioned earlier, is the best way to prevent this.
Another technique is to create a small guide mark using a piece of tape on the glass where you intend to drill. This tape can help stabilize the bit. Alternatively, a small dab of wax or putty can help keep the drill bit from wandering initially.
Ensuring your sea glass is firmly secured is also critical. If the glass moves even slightly during drilling, the bit can slip. A secure grip on the material being drilled is as important as a steady hand on the drill itself.
Start at an angle.
This is the most effective method. Begin drilling at a 45-degree angle to create a small groove, then gradually bring the drill to a 90-degree position. This gives the bit a stable point to start cutting, significantly reducing the chance of it skittering across the surface.
Use a guide tape.
Place a small piece of painter’s tape or masking tape on the spot where you want to drill. This tape can help “grip” the drill bit and prevent it from slipping during the initial contact. Mark your drilling point on the tape before applying it.
Secure the glass firmly.
Make sure the sea glass is stable and won’t move during the drilling process. Use clamps, a vise with soft jaws, or even a non-slip mat. Any movement of the glass while the drill is engaged can cause the bit to slip or bounce, leading to errors or breakage.
Achieving a Smooth Hole Edge
Sometimes, the edges of the drilled hole can be a bit rough or sharp. This can be due to using a worn-out drill bit, drilling too fast, or not using enough lubrication. Always use a sharp, good-quality diamond bit.
After drilling, the cleaning step is essential for smoothing the edge. Gently using a fine-grit sandpaper (wet sanding works best) or a polishing cloth can help. For very fine smoothing, some people use a Dremel tool with a small grinding bit on the lowest setting, but this requires extreme caution to avoid damaging the glass.
The goal is a smooth edge that won’t snag on cords or chains and looks aesthetically pleasing. Patience and the right finishing tools are key here.
Use a sharp drill bit.
A dull or worn diamond bit will struggle to cut effectively, leading to a rougher hole edge. Ensure your bit is in good condition and suitable for glass. A sharp bit grinds cleanly, producing a smoother finish with less effort and less risk of chipping.
Sufficient lubrication.
Proper cooling and lubrication during drilling are vital not just for preventing breakage but also for creating a smooth hole. Water or a lubricant helps to wash away debris, preventing it from building up and causing a rougher cut. Consistent wetness is key.
Post-drilling smoothing.
Even with perfect drilling, a slight roughness can remain. After rinsing and drying, gently use a very fine grit sandpaper (e.g., 1000 grit or higher) with water, or a specialized glass polishing cloth, to smooth the edges of the hole. A gentle touch is crucial to avoid scratching the surrounding sea glass.
Frequently Asked Questions
Question: What is the best drill for sea glass
Answer: The best drill for sea glass is a rotary tool like a Dremel or a flexible shaft drill. These tools offer precise control and low speed settings, which are crucial for delicate work on glass. You will also need specific diamond-tipped drill bits designed for glass and tile.
Question: Can I use a regular drill bit for sea glass
Answer: No, you cannot use a regular metal drill bit for sea glass. Regular drill bits are too hard and will likely shatter the glass due to excessive heat and friction. You must use diamond-tipped drill bits specifically made for drilling glass and stone.
Question: How do I prevent sea glass from breaking when drilling
Answer: To prevent sea glass from breaking, use a diamond-tipped drill bit, keep the glass and bit constantly cooled with water, apply gentle and consistent pressure, and drill at a slow, steady speed. Starting the drill at an angle also helps reduce stress on the glass.
Question: What size hole is best for sea glass jewelry
Answer: The size of the hole depends on what you plan to put through it. For most sea glass pendants and earrings, a hole size between 1mm and 2mm is common. This is sufficient for threading most jewelry cords, chains, and jump rings without being too large and weakening the glass.
Question: How long does it take to drill a hole in sea glass
Answer: The time it takes to drill a hole in sea glass can vary widely. Factors include the thickness and hardness of the glass, the size of the hole, the quality of your drill bit, and your technique. It can take anywhere from 30 seconds to several minutes per hole.
Patience is more important than speed.
Summary
Drilling sea glass successfully requires the right tools, careful preparation, and a patient approach. By using diamond-tipped bits, prioritizing safety, and employing proper cooling techniques, you can easily drill holes in your sea glass treasures. This guide has provided clear steps for preparation, drilling, and finishing, ensuring your sea glass creations are beautiful and durable.