How to Drill into a Stud: Mastering the Art of Precision
To drill into a stud, locate the stud using a stud finder, mark the spot, and use a drill bit slightly smaller than the diameter of the screw you plan to use. Position the drill perpendicular to the stud and apply steady pressure to drill.
Drilling into a stud is an essential skill for anyone wishing to hang heavy objects or install shelves securely. Whether you are a seasoned DIY enthusiast or a novice tackling their first project, knowing how to effectively drill into a stud is crucial.
By following a few simple steps, you can ensure that your drilling is accurate, safe, and delivers the desired results. In this guide, we will walk you through the process, discussing everything from finding the stud to drilling techniques and safety precautions. With the right tools and proper technique, you can confidently drill into a stud and complete your projects with ease. Let’s dive in and learn how to master this skill.
Understanding Studs
When it comes to home improvement projects, it’s essential to understand the basic structure of your walls. One crucial element is the existence of wooden or metal studs that provide support for the structure. Understanding studs is especially important when you need to drill into them for various purposes. In this blog post, we’ll explore what studs are, why you might need to drill into them, and how to identify them with precision.
What Are Studs?
Studs are vertical, load-bearing beams within the walls of your home. Typically made of wood or metal, studs provide structural stability and support for the wall. They are the framework upon which the drywall or other wall surfaces are attached. Studs are typically spaced at regular intervals, most commonly 16 or 24 inches apart.

Why Drill Into Studs?
Drilling into studs is a necessary step for various home improvement projects, such as hanging heavy wall decorations, installing shelves, or mounting a TV. By drilling directly into a stud, you ensure that your attachment is secure and can support the weight without damaging the wall or risking it coming loose over time. It’s always best to avoid drilling into just the drywall, as it lacks the required strength to hold heavier items securely.
Identifying Studs In Walls
Identifying studs in walls might seem challenging, but it’s relatively straightforward with the right tools and techniques. Here are a few methods that can help you locate studs:
- Using a stud finder: A stud finder is a handheld device that uses magnets or sensors to detect changes in the wall’s density. By moving the stud finder along the wall’s surface, you can pinpoint the exact location of studs.
- Knocking on the wall: By gently knocking on the wall, you can listen for subtle changes in sound that indicate the presence of a stud. Typically, studs produce a solid and firm sound compared to the hollow sound of the surrounding spaces.
- Measuring from known reference points: If you know the spacing of studs in your wall, you can measure a specific distance from a corner, window, or door frame to locate the approximate position of the studs.
Once you have identified the studs, mark their positions using a pencil or masking tape before proceeding to drill. This way, you can be confident that your drill bit will penetrate the stud accurately.
Preparing For Drilling
Learn how to successfully drill into a stud with these expert tips. Follow the guidelines for a smooth drilling process and avoid common mistakes.
Gathering The Necessary Tools
Before drilling into a stud, it’s important to gather the necessary tools to ensure a smooth and efficient process. Having the right tools not only makes the task easier but also helps to prevent damage to the stud. Here’s a list of essential tools you’ll need:
- Stud finder: Use a reliable stud finder to locate the studs accurately. This tool helps you determine the exact position of the studs behind the wall.
- Drill: Invest in a good quality drill with a variable speed setting. This allows you to adjust the drilling speed based on the material of the stud.
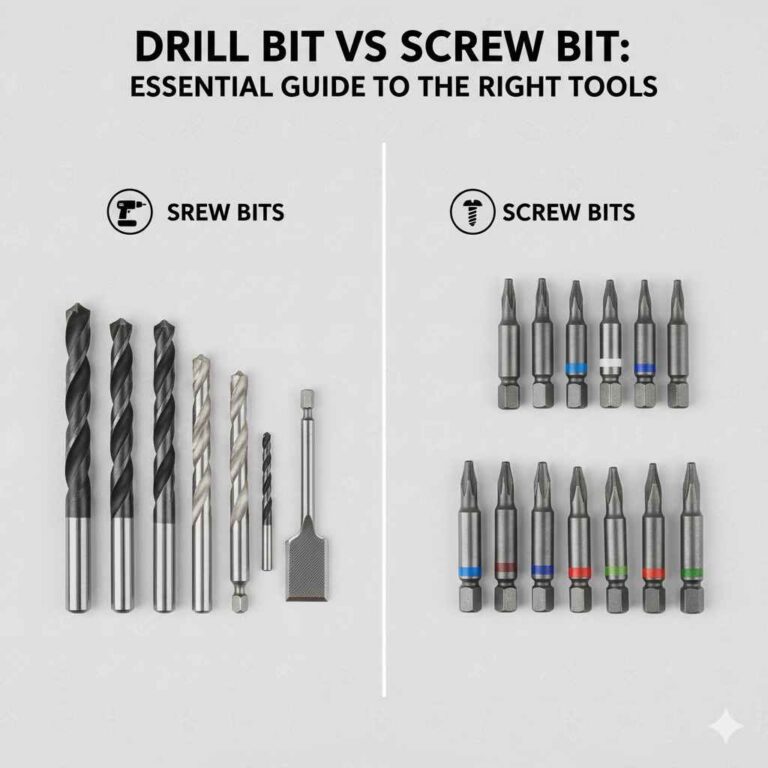
- Drill bits: Select the appropriate drill bits based on the size of the hole you need to make and the type of stud you are working with. Standard wood drill bits are typically suitable for most stud drilling tasks.
- Tape measure: Use a tape measure to mark the desired drilling location on the wall. This ensures accuracy during the drilling process.
- Protective gear: It’s important to wear safety glasses and gloves to protect yourself from any debris or potential accidents during the drilling process.
Locating Electrical Wires And Pipes
Before drilling into a stud, it’s crucial to identify the presence of any electrical wires or pipes that may be hidden behind the wall. Drilling into them can be dangerous and result in serious consequences. Follow these steps to locate electrical wires and pipes:
- Turn off the power: If you suspect the presence of electrical wires in the wall, turn off the power supply to that area of your house. This ensures that there is no current running through the wires during the drilling process.
- Use a wire/pipe detector: Use a reliable wire/pipe detector to scan the wall surface. These detectors can identify objects behind the wall, allowing you to steer clear of any potential risks.
- Mark the locations: Once the wires or pipes are identified, mark their location on the wall surface using masking tape or a pencil. This will serve as a visual reminder to avoid drilling in these areas.
- Proceed with caution: Even with the identification of wires or pipes, it’s always advisable to drill at a slight angle to reduce the risk of accidental damage. This ensures that the drill bit stays clear of any hidden obstacles.
Determining The Stud Spacing
Understanding the spacing between studs is crucial for accurate drilling. Studs are typically spaced at regular intervals, and knowing their position helps you avoid drilling into empty spaces or weaker sections of the wall. Here’s how you can determine the stud spacing:
- Measure from corner: Start by measuring the distance from the corner of the wall to the first stud. This measurement will vary based on the building standards in your area.
- Tap method: The tap method involves lightly tapping on the wall and listening for a solid thud. This indicates the presence of a stud. Mark this location and continue tapping along the wall to find the subsequent studs.
- Stud finder: As mentioned earlier, a stud finder is an invaluable tool for locating studs accurately. Follow the instructions provided with the stud finder to scan the wall surface and mark the stud positions.
- Mark stud locations: Once you have determined the stud positions, mark them with a pencil or masking tape. This makes it easier to identify the exact drilling points.
Drilling Into Studs
Drilling into studs is a crucial skill every DIY enthusiast should possess. Whether you’re hanging a heavy object on the wall or need to secure a shelf, drilling into studs ensures stability and safety. By locating the studs and following the correct process, you can confidently attach anything to your walls without worrying about it falling.
Choosing The Right Drill And Bit
Before you start drilling into the studs, it’s essential to select the right drill and bit for the job. A drill with sufficient power and torque will make the process easier and prevent any damage to the walls. For most stud drilling tasks, a corded or cordless drill with a variable speed control option is ideal.
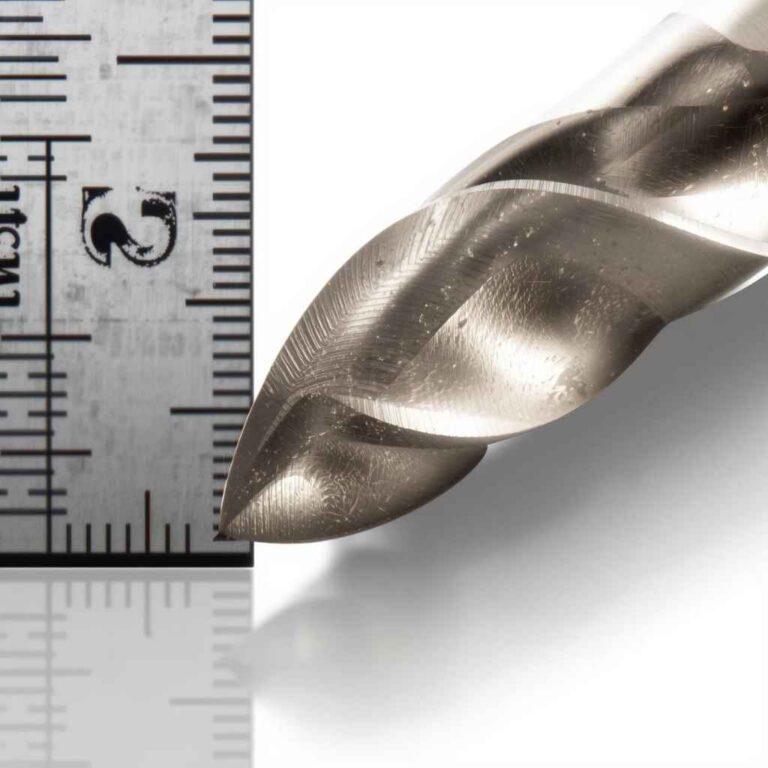
As for the drill bit, a high-quality twist bit specially designed for wood or metal drilling is recommended. The size of the bit depends on the type of screw or anchor you plan to use. Make sure to choose a bit that matches the size of the fastener, allowing for a secure and snug fit.
Marking The Drilling Spot
Precision is key when it comes to drilling into studs. Before you start drilling, it’s crucial to accurately mark the drilling spot on the wall. You can use a stud finder or follow specific techniques to locate the studs behind the drywall. Once you’ve identified the stud’s position, use a pencil or marker to mark the spot with a small ‘x’ or dot.
Drilling Into The Stud
Now that you’ve chosen the right drill and marked the drilling spot, it’s time to drill into the stud. Follow these steps to ensure a successful drilling process:
- Secure your work area: Remove any potential obstructions, such as furniture or decorations, from the surrounding area to provide enough space to work.
- Put on safety gear: To protect your eyes from flying debris, wear safety goggles. Additionally, wearing gloves can provide a better grip on the drill.
- Select the appropriate speed: Adjust the drill’s speed setting to a moderate level. This can prevent the drill bit from overheating or causing the material to splinter.
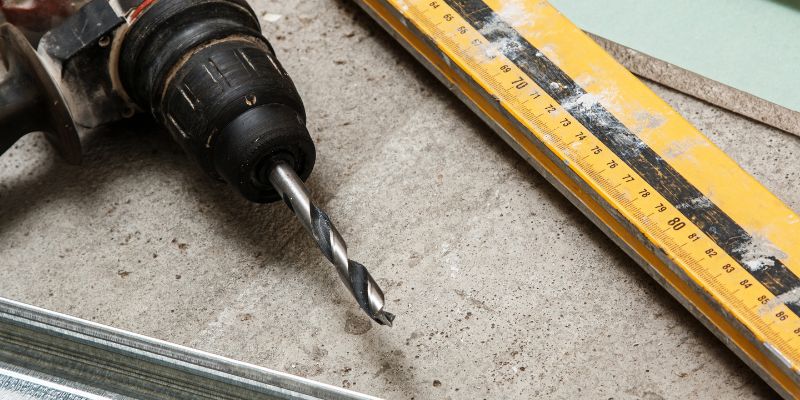
- Position the drill: Hold the drill perpendicular to the wall, aligning it with the marked spot on the stud.
- Apply steady pressure: With a firm grip on the drill, apply steady pressure and begin drilling slowly. Avoid exerting too much force, as it can break the drill bit or damage the wall.
- Monitor the depth: As you drill, periodically pull out the bit to check the depth. This will help ensure that you don’t drill too far or not deep enough.
- Remove the drill bit: Once you’ve reached the desired depth, release the drill’s trigger and carefully remove the drill bit from the hole.
Following these steps will help you drill into studs accurately and securely. Remember to always measure twice, drill once, and take your time when working with power tools to ensure a job well done.
Frequently Asked Questions For How To Drill Into A Stud
Can I Drill Through A Stud?
Yes, you can drill through a stud. However, it is important to use the correct tools, such as a drill bit designed for wood, and to take necessary precautions to avoid damaging electrical wires and plumbing.
Why Can’t I Drill Into The Stud?
Drilling into a stud may be difficult because the stud might be too close to the edge of the wall or the drill bit may not be long enough. It’s important to find the exact center of the stud and use the right drill bit.
Using a stud finder can help locate the stud accurately.
Is It Safe To Drill Into Stud With Outlet?
Drilling into a stud with an outlet can be safe if done correctly. However, it is important to turn off the power, use a stud finder, and drill carefully to avoid damaging the wiring.
Do You Need To Drill A Hole Before Screwing Into Stud?
Yes, it is generally recommended to drill a hole before screwing into a stud. Drilling a hole helps prevent the wood from splitting and provides a secure anchor for the screw.
Conclusion
To conclude, drilling into a stud is an essential skill for anyone tackling DIY projects or home improvements. By following the step-by-step techniques outlined in this guide, you can ensure a secure and sturdy installation that withstands the test of time.
Remember to use the right tools and take proper safety precautions to avoid any mishaps. With practice, you’ll become a pro at locating and drilling into studs, allowing you to confidently take on various projects in your home. So go ahead, grab that drill, and start enhancing your living space!