How to Burn Wood Designs with a Torch | Doing It Safely, Without Toxic Fumes
To burn wood designs with a torch, first, choose a suitable piece of wood and design your pattern. Then, use a hand torch to carefully burn the design into the wood, ensuring even and consistent burning.
Burning wood designs with a torch is a creative and dynamic way to add unique, natural, and rustic accents to woodwork projects. Whether you’re a woodworking enthusiast or a DIY hobbyist, this technique offers endless possibilities for creating personalized and visually appealing pieces.
By utilizing a few simple tools and techniques, you can achieve intricate and captivating designs on various wooden surfaces. In this guide, we will explore the step-by-step process of burning wood designs with a torch, along with tips and tricks for achieving professional-looking results. So, let’s dive into the exciting world of pyrography and unleash your creativity through this captivating art form.
Gathering Necessary Materials
Before you can begin the process of burning wood designs with a torch, it’s essential to gather the necessary materials to ensure the safety and success of the project. The following sections outline the specific materials required for this crafting technique, including wood, torch, and safety equipment.
Wood
To start, you’ll need a piece of high-quality wood. Opt for a smooth and clean piece of wood that is free from knots and imperfections. Popular choices include pine, poplar, or basswood due to their soft and even grain, making them ideal for wood burning projects. Additionally, ensure the wood is properly cured and dried to prevent cracking or warping during the burning process.
Torch
The torch you select for this project is critical. Choose a butane torch with a small, precise flame, allowing you to control the heat and create detailed designs. Many crafting and hardware stores offer torches specifically designed for wood burning. Ensure the torch is equipped with a comfortable grip, reliable ignition, and adjustable flame settings for optimal control.
Safety Equipment
When working with open flame, it’s crucial to prioritize safety. Safety equipment such as protective goggles, gloves, and a fire-resistant surface is essential to prevent accidents and injuries. Goggles safeguard your eyes from sparks and debris, while heat-resistant gloves protect your hands from direct contact with the torch and hot wood. Lastly, a fire-resistant surface, such as a metal sheet or ceramic tile, provides a safe working area and reduces the risk of unintentional fires.

Setting Up Your Work Area
Setting up your work area is an essential first step when it comes to burning wood designs with a torch. Creating the right environment will not only ensure safety, but also facilitate a more successful and enjoyable crafting experience.
Choosing A Well-ventilated Space
When burning wood with a torch, it’s crucial to work in a well-ventilated area to minimize the risk of inhaling smoke and fumes. If possible, set up your workspace in a location with good airflow, such as near an open window or outdoors. Adequate ventilation will also help to disperse any odors or vapors that may arise during the burning process.
Protecting The Work Surface
Before you begin, be sure to protect your work surface to prevent any damage from the heat of the torch. You can place a heat-resistant mat, such as a silicone or ceramic pad, underneath your wood piece to shield the underlying surface from scorch marks or burns. Additionally, consider using a non-flammable covering for the surrounding area to further safeguard against accidental fires or damage.
Understanding The Torch
Learn how to use a torch to create intricate wood designs with ease. Our comprehensive guide covers everything from the basics to advanced techniques, so you can master the art of wood burning and explore your creativity. Whether you’re a beginner or an experienced artist, you’ll find valuable tips and tricks to bring your designs to life.
The torch is a versatile tool for burning wood designs, bringing out unique patterns and textures. Before embarking on your wood burning project, it’s essential to grasp the different types of torches available and how to choose the right one for your specific design requirements.
Types of torches
When it comes to wood burning, there are primarily two types of torches to consider:
1. Propane torches: These are common and widely used for wood burning projects. They offer a consistent flame and are suitable for various design intricacies.
2. Butane torches: These torches are smaller and more portable, making them ideal for smaller woodworking designs. They provide a precise flame, allowing for detailed and intricate work.
Choosing the right torch for your project
To ensure a successful wood burning project, it’s crucial to select the right torch for your specific needs. Consider the following factors when choosing a torch:
– Flame control: Look for a torch that offers precise flame control, allowing you to adjust the intensity based on the intricacy of your design.
– Ergonomics: Choose a torch that feels comfortable to handle for extended periods, especially if you have a larger project in mind.
– Safety features: Prioritize torches with safety features such as a stable base and a safety lock to prevent accidental ignition.
– Versatility: If you anticipate working on a variety of wood designs, opt for a torch that offers versatility in terms of flame size and temperature.
– Budget considerations: While there are premium torch options available, consider your budget and select a torch that meets your design requirements without exceeding your financial constraints.
By understanding the different types of torches and carefully selecting the right one for your project, you can achieve stunning wood burning designs that showcase your creativity and craftsmanship.
Preparing The Wood
The process of preparing the wood before burning designs with a torch is crucial for achieving high-quality results. Proper preparation ensures that the wood surface is smooth, free from imperfections, and ready to accept the burn marks efficiently. This section outlines the essential steps to follow when preparing the wood for your torch-burning project.
Selecting The Right Type Of Wood
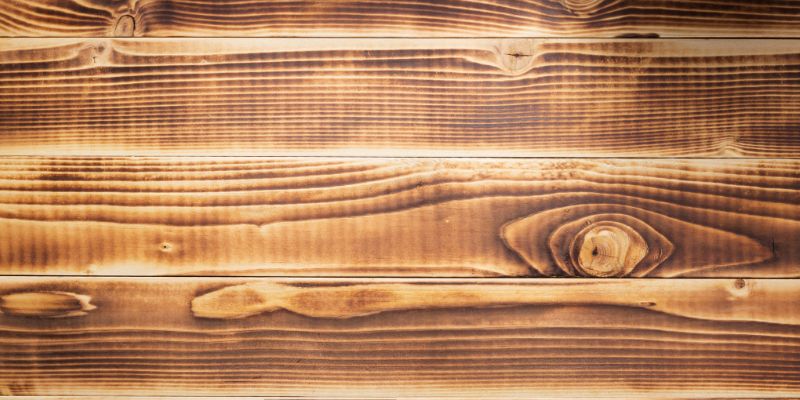
Choosing the appropriate type of wood is the first step in preparing for wood burning. Hardwoods such as oak, birch, and maple are ideal for this technique due to their density and resistance to burning. These woods result in crisp and clear burn lines, making them perfect for intricate designs. Softwoods like pine and cedar are not recommended as they tend to produce splotchy, uneven burns.
Sanding And Preparing The Wood Surface
Before starting the wood burning process, it’s essential to sand the wood surface thoroughly. Begin with a coarse-grit sandpaper to remove any rough spots or imperfections. Gradually move to finer-grit sandpaper to create a smooth and even surface. Ensure the entire surface is free from dust and debris by wiping it down with a clean cloth or using compressed air. This preparation enhances the wood’s ability to accept the burn marks, resulting in a more uniform and professional-looking design.
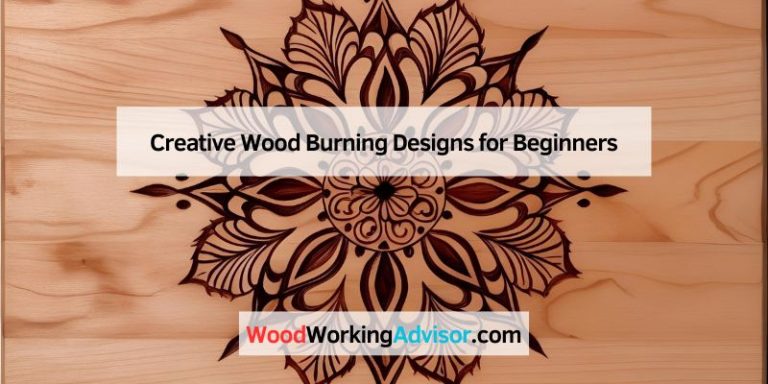
Generating Artistic Designs
Sketching Your Design On The Wood
Sketching your design directly onto the wood can be a great way to start your torch burning project. With a pencil, lightly outline your design to guide your torch work. This allows for a personalized and freehand design. Remember, the more detailed your sketch, the more intricate and detailed your burnt wood design will be.
Using Stencils For Intricate Patterns
Utilizing stencils can help you achieve highly detailed and precise patterns. Stencils can be especially useful for creating intricate designs such as mandalas, paisleys, or geometric shapes. Once the stencil is securely in place, gently burn along the edges to transfer the pattern onto the wood, creating a clear guide for your torch work. This method ensures each design comes out crisp and well-defined.
Adding Depth And Shadows
Burning wood designs with a torch offers endless creative possibilities. One of the key techniques to elevate your wood-burning projects is adding depth and shadows. By mastering layering burn marks for depth and using different torch angles for shadow effects, you can infuse your creations with striking and nuanced visual appeal.
Layering The Burn Marks For Depth
Layering burn marks is a fundamental strategy for achieving depth in wood-burning designs. To create depth, start by burning the initial outline of your design lightly. Then, gradually retrace and darken specific areas to create shadows and depth. By varying the pressure and duration of the torch application, you can build up layers of burn marks, adding dimension and realism to your artwork. This approach is particularly effective for creating texture and bringing intricate designs to life.
Using Different Torch Angles For Shadow Effects
Mastering the use of various torch angles is essential for achieving compelling shadow effects in wood-burning designs. To create striking shadows, experiment with holding the torch at different angles to the wood surface. Angling the torch closer to the surface can produce deeper, more pronounced shadows, while holding it at a distance can create softer, more diffused shadow effects. By strategically positioning the torch in relation to the design, you can manipulate shadows to enhance the overall visual impact of your artwork.
Applying A Protective Finish
Burning wood designs with a torch not only adds a rustic charm but also requires a protective finish to preserve the beauty and longevity of your project. Choosing the right protective finish and applying it properly are crucial to achieving a professional-looking result. In this section, we’ll explore the steps for choosing the right finish and proper application techniques to ensure your wood designs endure over time.
Choosing The Right Finish For Your Project
When selecting a protective finish for your wood designs, it’s essential to consider the type of wood you’re working with, the desired level of protection, and the final look you want to achieve. Polyurethane, lacquer, and varnish are common options for wood finishes, each offering different levels of durability and gloss. Here’s a quick comparison:
| Finish Type | Durability | Gloss Level |
|---|---|---|
| Polyurethane | High | Satin to high gloss |
| Lacquer | Medium to high | High gloss |
| Varnish | High | Satin to high gloss |
Consider the specific needs of your wood project and choose a finish that best suits your requirements. Additionally, ensure that the finish is compatible with the burning techniques used to create the designs.
Proper Application Techniques
Once you’ve chosen the right finish, the next step is to apply it properly to enhance the appearance and durability of your wood designs. Here are some key techniques to consider:
- Clean the wood surface thoroughly to remove any dirt, dust, or debris that could affect the finish’s adhesion.
- Apply the finish in thin, even coats to prevent drips and ensure uniform coverage.
- Sand between coats to promote adhesion and smooth out any imperfections.
- Follow the manufacturer’s instructions for drying and curing times to allow the finish to fully harden and protect the wood.
Adhering to these application techniques will result in a flawless protective finish that accentuates the burned wood designs while safeguarding them from environmental elements.
Safety Precautions
When burning wood designs with a torch, safety precautions are of utmost importance to ensure a risk-free and enjoyable crafting experience. By following key safety measures, you can protect yourself and those around you from potential hazards.
Using Safety Goggles And Gloves
Ventilating The Workspace Properly
Display And Preservation
When it comes to preserving and displaying your wood-burned art, proper techniques and materials ensure your masterpiece stands the test of time. Framing your wood-burned art and carefully preserving the design are essential for longevity and aesthetic appeal.
Framing Your Wood-burned Art
One of the best ways to showcase your wood-burned designs is by framing them. A well-chosen frame not only complements the artwork but also protects it from external elements. When framing your wood-burned art, remember to use acid-free backing boards and UV-blocking glass to prevent fading and discoloration over time.
Tips For Preserving The Wood And Burn Design
Preserving the integrity of the wood and the burn design requires a combination of proper storage, handling, and protective finishes. Here are some tips to help ensure your wood-burned art remains in pristine condition:
- Protective Finishes: Apply a clear, protective finish such as polyurethane or lacquer to seal and protect the wood surface and the burn design.
- Avoid Direct Sunlight: Display your wood-burned art away from direct sunlight to prevent fading and deterioration.
- Proper Storage: When not on display, store your wood-burned art in a cool, dry place away from moisture and extreme temperatures.
- Gentle Cleaning: Use a soft, dry cloth to gently dust off the surface of the wood-burned art. Avoid using water or harsh cleaning chemicals that could damage the design.
Sharing Your Artwork
Once you’ve created stunning wood designs using a torch, sharing your artwork with the world can be just as satisfying as creating it. From capturing the intricate details in photographs to leveraging social media and online platforms, there are various ways to showcase your wood-burning masterpieces and connect with fellow art enthusiasts.
Photography Tips For Capturing The Details
When it comes to photographing your wood-burned creations, attention to detail is key. To effectively convey the texture and depth of your artwork, consider these photography tips:
- Utilize natural light to highlight the contrasts and tones of the wood
- Experiment with different angles to capture the intricate patterns and designs
- Use a macro lens to capture the fine details and create visually impactful images
- Employ a neutral background to ensure your artwork remains the focal point
Utilizing Social Media And Online Platforms
Sharing your wood-burning art on social media and online platforms can help you reach a larger audience and connect with potential buyers or enthusiasts. Consider the following steps to effectively showcase your artwork:
- Create dedicated social media accounts or profiles exclusively for your wood-burning art
- Post high-quality images of your artwork along with engaging captions to captivate your audience
- Engage with the art community by participating in relevant hashtags, challenges, and discussions
- Utilize online platforms such as Etsy, Shopify, or your own website to sell and exhibit your wood-burning creations
Frequently Asked Questions On How To Burn Wood Designs With A Torch
How Do You Burn Wood Art With A Torch?
To burn wood art with a torch, first, choose the type of wood and a suitable torch. Then, sketch your design on the wood. Next, carefully burn the wood using the torch, moving it slowly across the surface to create the desired effect.
Finally, finish and protect the wood with a sealant.
How Do You Burn A Pattern Into Wood?
To burn a pattern into wood, use a wood burning tool to create the design. First, transfer the pattern onto the wood. Then, carefully trace the lines with the wood burning tool, applying even pressure. Adjust the heat and speed as needed for different wood types.
How Do You Burn Images Onto Wood?
To burn images onto wood, use a wood burning tool to trace the design onto the wood surface. Adjust the temperature according to the wood type and slowly burn the image onto the wood. Remember to practice and work in a well-ventilated area for safety.
How Do You Torch Wood To Make It Look Old?
To torch wood for an aged look, use a blowtorch to lightly scorch the surface. Move the flame in a circular motion to create a natural appearance. Allow the wood to cool before brushing off any loose carbon residue. Finish with sanding and a protective sealant for a weathered effect.
Conclusion
To sum up, wood burning with a torch is a versatile and artistic technique that allows you to create stunning designs on wood. With the right tools and safety precautions, you can unleash your creativity and bring your designs to life.
Whether you’re a beginner or experienced artist, this method offers endless possibilities for crafting unique and personalized pieces. Explore the world of wood burning and let your creativity shine!