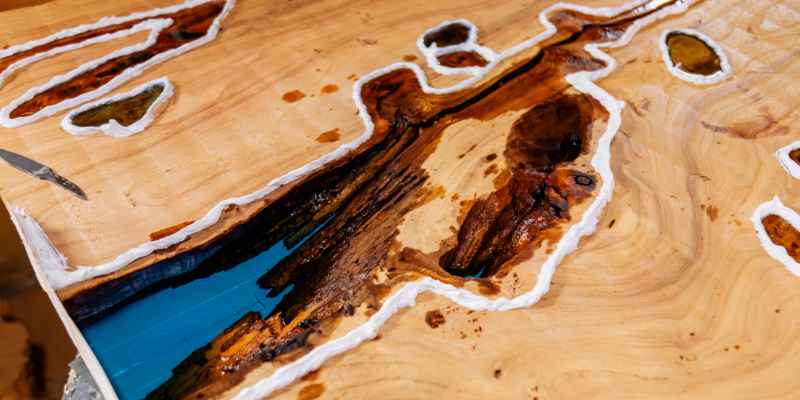
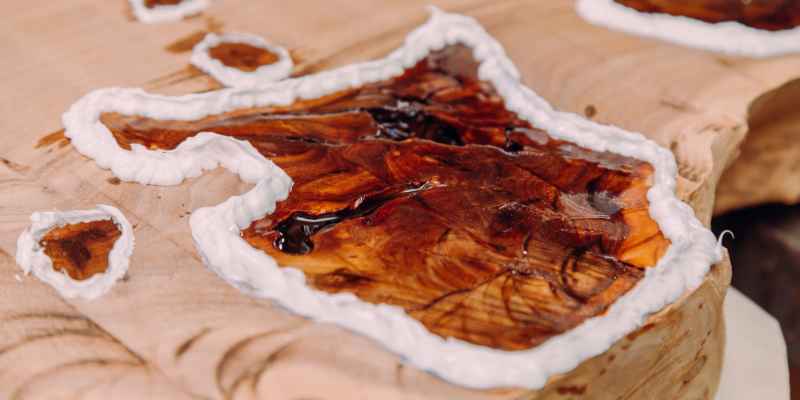
To fill cracks in wood with epoxy, follow these steps: clean the crack with a suitable cleaner, apply epoxy filler to the crack, and smooth the surface. Then, allow the epoxy to cure before sanding and finishing the wood.
This process will effectively repair and restore the wood’s appearance and strength. Cracks in wood are a common issue, especially in older or weathered pieces. Luckily, epoxy can be a reliable solution for repairing and strengthening these cracks. By carefully following these steps, you can easily fill cracks in wood with epoxy and achieve a seamless and durable repair.
Read on to learn more about the process and tools necessary for this task.
Preparing The Crack And Surrounding Area
Before you can fill cracks in wood with epoxy, it is crucial to properly prepare the crack and the surrounding area. This step will ensure the best results and a strong, durable repair. There are three important steps involved: cleaning the crack, removing loose wood fibers, and sanding the surface.
Cleaning The Crack
Begin by cleaning the crack to remove any dirt, dust, or debris. This will allow the epoxy to bond securely to the wood. Use a soft brush or a vacuum cleaner to remove loose particles from the crack. If the crack is particularly dirty, you can use a damp cloth to wipe away grime. Ensure that the crack is completely dry before proceeding to the next step.
Removing Loose Wood Fibers
Next, it is vital to remove any loose wood fibers from the crack. Use a sharp chisel or a utility knife to carefully remove any loose or splintered wood. Be gentle to avoid causing further damage to the wood. By removing these loose fibers, you create a clean surface for the epoxy to adhere to. Take your time and ensure that the crack is clean and free of any loose wood fibers.
Sanding The Surface
After cleaning and removing loose wood fibers, sanding the surface is the final step to preparing the crack and surrounding area. Use a fine-grit sandpaper to gently sand the edges of the crack. This will smooth out any rough edges and provide a better surface for the epoxy to adhere to. Sand in the direction of the wood grain to avoid further damage. Once you have sanded the crack, wipe away any dust or debris with a clean cloth or brush.
By following these steps to prepare the crack and surrounding area, you ensure a strong bond between the epoxy and the wood. This preparation process sets the foundation for a successful and long-lasting repair.

Mixing And Applying Epoxy
Filling cracks in wood with epoxy is a simple yet effective way to repair and strengthen wooden surfaces. Epoxy is a type of adhesive that, when mixed and applied correctly, offers a durable and lasting fix. In this guide, we will walk you through the process of mixing and applying epoxy to fill cracks in wood.
Choosing The Right Epoxy
Before you start, it’s important to choose the right epoxy for your project. There are different types of epoxy available, each with its own set of properties and uses. Consider the following factors when selecting epoxy:
- Strength: Depending on the size and severity of the crack, you may need epoxy with different levels of strength. Check the product’s specifications to ensure it can handle the load.
- Color: Epoxy comes in various colors, including clear. Choose a color that matches the wood or suits your aesthetic preferences.
- Drying Time: Some epoxy formulations have longer or shorter drying times. Consider the time you have available and the urgency of the repair.
Mixing The Epoxy Components
To achieve a strong and effective bond, it’s crucial to mix the epoxy components correctly. Follow these steps:
- Gather the materials: Prepare the epoxy kit, which usually includes two separate components – resin and hardener.
- Measure the components: Use a measuring cup or scale to ensure that you mix the components in the correct ratio, as specified by the manufacturer. This step is essential to achieve optimal strength and bonding properties.
- Mix thoroughly: Pour the resin and hardener into a mixing container and stir them together using a wooden stick or a plastic spatula. Make sure to scrape the sides and bottom of the container to ensure all the components are mixed properly.
- Watch the pot life: Epoxy has a limited working time known as the “pot life.” Be aware of this duration and work efficiently to apply the epoxy before it starts to harden.
Applying The Epoxy Into The Crack
With the epoxy mixture ready, it’s time to apply it into the crack:
- Clean the crack: Remove any loose debris or dirt from the crack using a brush or compressed air. This step ensures a clean surface for better adhesion.
- Fill the crack: Slowly pour the epoxy mixture into the crack, starting from the bottom and working your way up. Use a putty knife or a scraper to push the epoxy into the crack and ensure it fills the entire void.
- Smooth the surface: Once the crack is filled, use a putty knife to level the epoxy surface. Smooth out any excess epoxy and create a flush finish with the surrounding wood.
- Allow curing time: Let the epoxy cure according to the manufacturer’s instructions. Avoid disturbing or putting stress on the repaired area during the curing process.
Sanding And Finishing
To fill cracks in wood with epoxy, follow these simple steps for a flawless sanding and finishing process.
Sanding The Epoxy Surface
After the epoxy has completely cured and hardened, it’s time to sand the surface for a smooth finish. Sanding not only helps to level the epoxy but also prepares it for further finishing and blending with the existing wood texture.
Here’s a simple step-by-step guide to sanding the epoxy surface:
- Gather the necessary supplies, including sandpaper (preferably 120-grit and 220-grit), a sanding block, and safety gear like a dust mask and eye protection.
- Begin with the 120-grit sandpaper, using long, even strokes to sand the epoxy. This will help remove any rough spots or unevenness on the surface. Make sure to sand in the direction of the wood grain for a more natural look.
- Switch to the 220-grit sandpaper for a finer finish. Again, sand in the direction of the wood grain, applying light pressure to avoid sanding through the epoxy.
- Periodically wipe away the dust with a damp cloth or sponge to better see your progress and ensure a clean working surface.
Matching The Wood Texture
Once you have sanded the epoxy surface to your satisfaction, it’s time to blend it seamlessly with the surrounding wood texture. This step is crucial for achieving a polished and professional look.
Here are a few tips for matching the wood texture:
- Examine the existing wood texture and grain pattern. Take note of the direction and depth of the grain to recreate it accurately.
- Use a small knife, chisel, or sanding tool to carefully mimic the wood grain onto the epoxy surface. Take your time and work in small sections for a precise result.
- After recreating the wood texture, sand the epoxy surface lightly with fine-grit sandpaper to blend it further with the surrounding wood.
Applying Wood Finish
The final step in filling cracks in wood with epoxy is applying a suitable wood finish to protect the surface and enhance its appearance.
Here’s what you need to do:
- Choose a wood finish that matches the existing finish on your furniture or wooden object. Test the finish on a small, inconspicuous area to ensure a good match.
- Apply the wood finish evenly to the epoxy surface and the surrounding wood, following the manufacturer’s instructions. Use a clean brush or a lint-free cloth for smooth application.
- Allow the finish to dry completely according to the product guidelines. This may involve multiple coats and sanding between coats for a flawless finish.
- Once the finish has fully cured, give the entire surface a final sanding with fine-grit sandpaper for a polished and uniform look.

Frequently Asked Questions For How To Fill Cracks In Wood With Epoxy
What Is The Best Resin For Filling Wood Cracks?
The best resin for filling wood cracks is epoxy resin. It’s durable and provides a strong bond.
How Do You Fill Holes In Wood With Epoxy?
To fill holes in wood with epoxy, follow these steps:
1. Clean the area around the hole.
2. Mix the epoxy according to the manufacturer’s instructions.
3. Fill the hole with the epoxy using a putty knife or syringe.
4. Remove any excess epoxy with a scraper.
5. Let the epoxy cure completely before sanding and finishing the wood.
How Do You Fill Big Cracks In Wood?
To fill big cracks in wood, follow these steps: Clean the crack using a utility knife or chisel. Apply wood filler into the crack, smoothing it out with a putty knife. Let it dry and sand it down if needed.
Finish by applying stain or paint to match the wood’s color.
How Do You Fill Cracks In A Wood Table With Resin?
To fill cracks in a wood table with resin, follow these steps:
1. Clean the cracks and remove any loose debris.
2. Mix the resin according to the instructions.
3. Apply the resin using a syringe or small brush.
4.Allow the resin to cure completely.
5. Sand and polish the area for a smooth finish.
Conclusion
In sum, filling cracks in wood with epoxy is a straightforward and effective solution. By following the step-by-step process outlined in this blog post, you can restore the integrity and beauty of your wooden surfaces. Whether you’re fixing furniture or repairing a deck, epoxy offers a durable and long-lasting fix.
Remember to prepare the area, mix the epoxy correctly, and apply it evenly for the best results. Now you can confidently tackle any crack in your wood and enjoy the satisfaction of a job well done.


