How to Finish Cedar for Outdoor Use: Best Sealers, Stains & Clear Finishes
To finish cedar for outdoor use, clean and sand the wood to open the grain, then apply a penetrating oil, semi-transparent stain, or clear sealer rated for exterior exposure. The right cedar wood finish protects against UV fading, moisture, and mildew — while preserving the wood’s natural color and grain.
Clean the cedar surface, sand with 80–120 grit, and let it dry to below 20% moisture. Apply a penetrating exterior oil or semi-transparent stain using a brush, working into all joints and end grain. Most exterior cedar finishes require reapplication every 1–3 years.
Understanding The Characteristics Of Cedar Wood
Cedar wood is a popular choice for outdoor use due to its natural characteristics. To ensure its durability, finish cedar wood with weather-resistant products to protect it from moisture and UV damage.
Cedar wood is known for its exceptional qualities that make it a popular choice for outdoor use. From natural pest and decay resistance to its unique moisture content and low density, cedar exhibits traits that contribute to its long-lasting durability.
Below, we delve into the key characteristics of cedar wood:
Natural Pest And Decay Resistance:
- Cedar naturally repels pests: The inherent aroma and chemical properties of cedar wood act as a deterrent to insects and pests, minimizing the risk of infestation.
- Resistant to decay: The natural oils present in cedar wood make it highly resistant to decay, ensuring that it remains durable even in outdoor environments.
- Lesser need for chemical treatments: Owing to its natural resistance, cedar requires fewer chemical treatments and preservatives compared to other types of wood.
High Moisture Content:
- Retains moisture: Cedar wood possesses a relatively high moisture content, allowing it to retain moisture for an extended period. This moisture retention helps prevent cracking and warping caused by environmental factors.
- Stability in high humidity: The high moisture content of cedar wood makes it resilient in areas with high humidity, such as coastal regions.
- Reduced risk of shrinkage: Thanks to its ability to retain moisture, cedar wood experiences minimal shrinkage, ensuring the integrity of structures and surfaces.
Softwood With Low Density:
- Softwood qualities: Cedar belongs to the softwood family, which means it has certain characteristics distinct from hardwoods. It is easier to work with, making it a favorite among carpenters and DIY enthusiasts.
- Low density: Cedar wood has a low density, contributing to its lightweight nature. This characteristic simplifies handling and installation processes, while still providing sturdy and long-lasting results.
- Easy to cut and shape: The low density of cedar wood facilitates easy cutting, shaping, and carving, making it customizable for various outdoor projects.
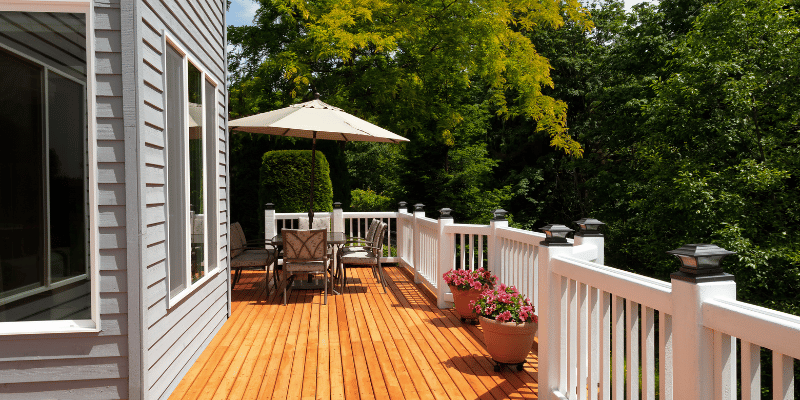
Cedar wood’s natural pest and decay resistance, high moisture content, and softwood characteristics with low density make it an excellent choice for outdoor applications. These unique attributes make cedar a durable, visually appealing, and easy-to-work-with option for a wide range of outdoor projects such as decks, fences, and furniture.
Preparing Cedar For Finishing
Learn how to prepare cedar for outdoor use with our step-by-step guide. Discover the best finishing techniques that will protect and enhance the natural beauty of your cedar wood, ensuring long-lasting and stunning results.
Sanding And Smoothening The Wood Surface:
To ensure a smooth and professional finish for your outdoor cedar project, it’s crucial to start by preparing the wood surface properly. One essential step in this process is sanding. Here’s what you need to know:
- Start with a coarse sandpaper: Begin by using a coarse-grit sandpaper to remove any roughness or imperfections on the cedar surface. This will help create a smooth canvas for the finish to adhere to.
- Gradually work your way to finer grits: As you progress with sanding, switch to finer grit sandpaper to achieve a smoother surface. This will also help remove any visible scratches left by the coarse sandpaper.
- Use a sanding block or electric sander: To ensure even sanding and minimize the risk of uneven surfaces, use a sanding block or an electric sander. This will provide better control and consistency throughout the sanding process.
- Sand in the direction of the wood grain: Always sand in the direction of the wood grain to avoid creating unnecessary marks or grooves. This will result in a more seamless and professional-looking finish.
Removing Dirt, Dust, And Debris:
Before applying any finish to your cedar, it’s important to clean the wood surface thoroughly. Here are some effective ways to remove dirt, dust, and debris:
- Use a soft-bristle brush or broom: Start by gently sweeping or brushing off any loose dirt, dust, or debris from the surface of the cedar. This will help prevent these particles from becoming trapped under the finish.
- Consider using compressed air: If there are hard-to-reach areas or fine dust particles, using compressed air can be highly effective in blowing away the debris. Ensure to wear protective eyewear and a mask when using compressed air.
- Wipe down with a damp cloth: For stubborn dirt or sticky residue, lightly dampen a cloth with water or a mild detergent solution and gently wipe the surface of the cedar. Be careful not to oversaturate the wood.
- Allow the wood to dry completely: After cleaning, make sure to allow the cedar to dry completely before proceeding with the finishing process. This will ensure proper adhesion of the finish and prevent any moisture-related issues.
Moisture Content Testing:
Assessing the moisture content of the cedar is essential in determining the right time to apply a finish. Here’s how you can test the moisture content:
- Use a moisture meter: Invest in a reliable moisture meter designed for wood to get accurate readings of the cedar’s moisture content. Follow the manufacturer’s instructions to obtain precise measurements.
- Test multiple areas: To ensure an accurate assessment, test different sections of the cedar, including both the surface and deeper layers. This will help identify any inconsistencies in moisture content.
- Wait for optimal moisture levels: Ideally, the cedar should have a moisture content of around 12% or lower before applying a finish. This prevents any potential issues that may arise from trapped moisture during the finishing process.
- Allow for acclimation if needed: If the moisture content is too high, allow the cedar to acclimate to the environment for a few days or weeks until it reaches the desired moisture level. This will result in a more stable and lasting finish.
Preparing cedar for finishing is a crucial step in ensuring a beautiful and long-lasting outdoor project. By following these guidelines and taking the time to properly sand, clean, and assess the moisture content, you can achieve outstanding results with your cedar woodwork.
Choosing The Right Finishing Techniques
Discover the right finishing techniques to protect cedar for outdoor use. Learn how to enhance durability and maintain the natural beauty of your cedar with expert tips and solutions.
Cedar is a popular choice for outdoor projects due to its natural beauty and durability. However, to ensure its longevity and maintain its appearance, it is essential to finish cedar properly. Here are some key finishing techniques to consider:
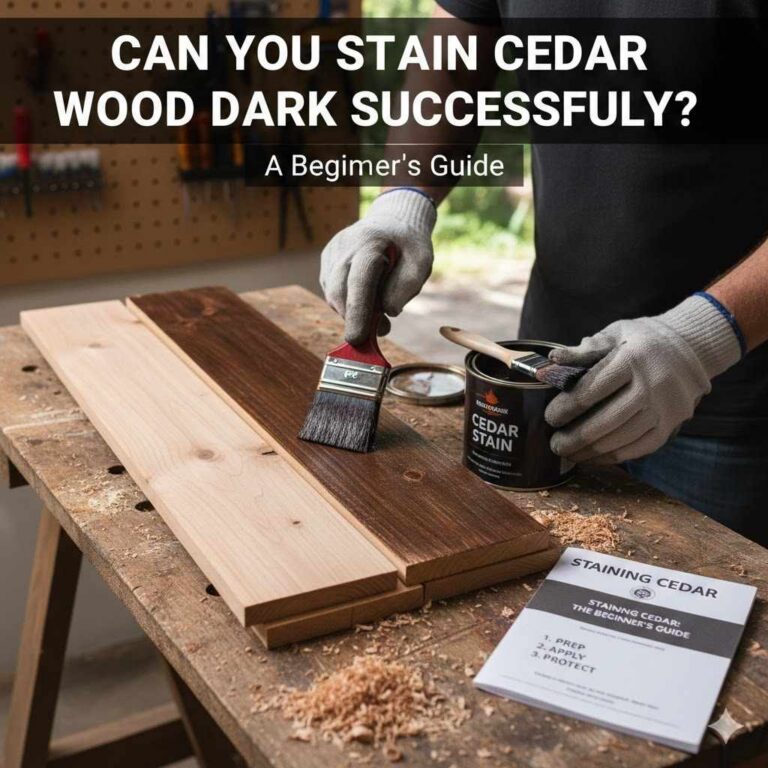
Staining For Color Enhancement And Uv Protection:
Staining cedar not only enhances its natural beauty but also provides protection against harmful UV rays. Consider the following points when choosing and applying a stain:
- Use an oil-based or semi-transparent stain to allow the cedar’s grain to shine through.
- Prioritize a stain that offers UV protection, as it helps prevent fading and discoloration.
- Ensure the cedar is clean and dry before applying the stain.
- Use a brush or roller to evenly distribute the stain, following the manufacturer’s instructions.
- Consider applying multiple thin coats for better absorption and longevity.
Sealing For Moisture And Weather Resistance:
Sealing cedar is crucial to protect it from moisture damage and the wear and tear of unpredictable weather conditions. Take note of the following tips for sealing cedar:
- Choose a sealer specifically designed for cedar’s unique properties.
- Clean the cedar thoroughly before sealing to remove any dirt, debris, or mold.
- Apply the sealer evenly using a brush, roller, or sprayer, and ensure complete coverage.
- Allow sufficient drying time between coats, following the manufacturer’s recommendations.
- Consider applying multiple coats for maximum protection, paying attention to the end grain, which is more susceptible to moisture penetration.
Applying Protective Topcoats For Durability:
To enhance the longevity of cedar, applying protective topcoats adds an extra layer of defense against everyday wear and tear. Consider the following guidelines when selecting and applying a topcoat:
- Opt for a clear or tinted topcoat that offers protection against weathering, UV rays, and mildew.
- Ensure the cedar is free from dust and debris before applying the topcoat.
- Use a brush, roller, or sprayer to apply the topcoat evenly, following the manufacturer’s recommendations.
- Consider applying multiple coats to achieve the desired level of durability.
- Allow ample drying time between coats and before subjecting the cedar to heavy use.
Remember, the right finishing techniques not only enhance the appearance of cedar but also protect it from the elements, ensuring its longevity for years to come. Take the time to choose the appropriate stains, sealers, and topcoats for your outdoor cedar projects, and follow the application instructions carefully for optimum results.

Clear Cedar Finish vs. Stain vs. Sealer: Which Is Best?
Choosing the best exterior finish for cedar depends on how much color you want to add, how often you want to reapply, and the level of UV and moisture protection needed.
| Finish Type | UV Protection | Color | Lifespan | Best For |
|---|---|---|---|---|
| Clear sealer | Low (no pigment) | Natural/none | 1–3 years | New cedar, natural look |
| Semi-transparent stain | Moderate | Enhances grain | 2–5 years | Decks, fences, siding |
| Solid stain | High | Opaque | 3–5 years | Weathered or rough cedar |
| Penetrating oil | Moderate | Enhances natural tone | 1–2 years | Furniture, cedar posts |
Clear cedar finish is a cedar wood finish with no added pigment — it lets the natural grain show fully, but it offers the least UV protection and must be reapplied most frequently. Semi-transparent stains are the most popular choice for treating cedar for outdoor use because they balance color, UV protection, and a longer service life. For the best exterior finish for cedar overall, Ready Seal semi-transparent stain is highly rated — it combines stain and sealer in one application.
Our Top Pick
Ready Seal 512 Exterior Stain and Sealer for Wood
Semi-transparent penetrating formula that works as both stain and sealer in one application — no primer required. UV-resistant, mildew-resistant, and rated for cedar decks, fences, and siding. Reapply every 2–4 years.
Check Price on AmazonBest Practices For Staining Cedar
Discover the best practices for staining cedar to ensure a durable and attractive finish for outdoor use. Follow these guidelines to achieve optimal results, including proper surface preparation, choosing the right stain, and applying multiple coats for enhanced protection.
Staining cedar is an essential step to protect and enhance its natural beauty when using it for outdoor purposes. The right stain can help preserve the wood’s durability, while also providing an appealing finish that complements your outdoor space. In this section, we’ll explore the best practices for staining cedar, including choosing the appropriate stain type, preparing the cedar surface, and applying the stain evenly.
So let’s dive in and discover how to achieve excellent results with your cedar staining project.
Choosing The Appropriate Stain Type:
- Oil-based stain: Offers superior penetration and durability, making it ideal for protection against moisture and UV rays.
- Water-based stain: Provides easy application and cleanup, along with quicker drying times. It is also less odorous than oil-based stains.
- Semi-transparent stain: Enhances the natural beauty of cedar by allowing the wood grain to show through, while still providing protection and color.
- Solid stain or paint: Offers maximum protection and color coverage, but may hide the wood’s natural grain.
Preparing The Cedar Surface For Staining:
- Clean the wood: Remove any dirt, dust, or mildew from the cedar surface using a wood cleaner or warm soapy water. Rinse thoroughly and let it dry completely.
- Sand the wood: Smooth out any rough areas or splinters by lightly sanding the cedar. Start with a coarse-grit sandpaper and gradually move to finer grits for a smooth finish.
- Apply a wood conditioner: Cedar is known for its absorbent properties, so applying a wood conditioner before staining can help prevent blotchy or uneven staining.
Applying The Stain Evenly And Consistently:
- Stir the stain: Before applying the stain, give it a good stir to ensure uniformity throughout the can.
- Test on a small area: Apply a small amount of stain on a hidden area of the cedar to determine the desired color and absorption rate.
- Use a brush, roller, or sprayer: Choose a staining method that suits your preference and the size of your project. Brushes offer more control, while rollers and sprayers are efficient for larger areas.
- Work in manageable sections: Stain one section at a time, following the wood’s natural grain and applying even coats. Avoid overlapping strokes to prevent uneven color distribution.
- Wipe off excess stain: After applying the stain, use a clean cloth or brush to wipe off any excess. This helps prevent drips, pooling, and uneven drying.
By following these best practices for staining cedar, you can ensure a long-lasting and visually appealing finish that will enhance the beauty of your outdoor projects. Remember to choose the right stain type, prepare the cedar surface properly, and apply the stain evenly for optimal results.
Effective Techniques For Sealing Cedar
Discover six effective techniques for sealing cedar to ensure its durability and longevity for outdoor use. From choosing the right products to proper application methods, this guide provides valuable insights on how to finish cedar and protect it from the elements.
Cedar is a popular wood choice for outdoor projects due to its natural beauty and durability. However, to ensure its longevity, proper sealing is essential. Follow these effective techniques for sealing cedar to protect it from weathering and rot, allowing you to enjoy your outdoor space for years to come.
Selecting The Right Sealant For Cedar:
- Choose a high-quality oil-based sealant specifically designed for cedar. Look for a product that is water repellent, UV resistant, and provides mold and mildew protection.
- Opt for a clear or transparent sealant if you want to maintain the natural color and grain of the cedar. If you prefer a different hue, consider a tinted sealant to achieve the desired look.
- Check the label to ensure that the sealant is suitable for exterior use and offers long-lasting protection against moisture and sun exposure.
Preparing The Cedar For Sealing:
- Begin by thoroughly cleaning the cedar surface. Use a brush or broom to remove any dirt, debris, or loose wood particles. Consider using a mild soap solution or a wood cleaner formulated specifically for cedar.
- Rinse the cedar with clean water and allow it to dry completely. This step is crucial to ensure proper adhesion of the sealant.
- Sand the cedar surface using fine-grit sandpaper to smooth any rough areas or imperfections. Sanding not only enhances the appearance but also helps the sealant penetrate the wood more effectively.
Applying The Sealant To Ensure Complete Coverage:
- Before starting, ensure that the weather conditions are suitable for sealing. Avoid applying sealant on a rainy or extremely humid day.
- Stir the sealant thoroughly to ensure an even consistency. Apply the first coat using a brush, roller, or sprayer. Work in the direction of the wood grain for a more seamless finish.
- Allow the first coat to dry as per the manufacturer’s instructions. Generally, it may take a few hours to a full day for the sealant to dry completely. Apply a second coat for enhanced protection and durability.
- Pay attention to ensuring complete coverage, making sure that all sides and edges of the cedar are sealed properly. This step is crucial to prevent moisture from seeping into the wood.
- After applying the final coat, allow the cedar to dry and cure according to the sealant’s instructions before subjecting it to heavy use or exposure to the elements.
By following these effective techniques for sealing cedar, you can prolong its lifespan and maintain its natural beauty. Remember to select the right sealant, thoroughly prepare the cedar surface, and apply the sealant evenly to ensure complete coverage. With proper sealing, your outdoor cedar projects will be protected against the elements, allowing you to enjoy them for years to come.
Enhancing Durability With Protective Topcoats
Protective topcoats enhance the durability of cedar for outdoor use, providing long-lasting protection against weathering and other environmental factors. The application of these topcoats ensures that your cedar stays in excellent condition, making it ideal for outdoor projects and furniture.
Understanding The Different Types Of Topcoats
There are several types of topcoats available for finishing cedar for outdoor use. Each type offers different levels of durability and protection against various elements. Here are the main types of topcoats to consider:
- Oil-based topcoat: Provides deep penetration and enhanced moisture resistance. It enhances the natural beauty of cedar while offering good protection against UV damage.
- Water-based topcoat: Offers excellent moisture resistance and quick drying time. It provides a clear protective layer to prevent water damage.
- Clear or transparent topcoat: Allows the natural color and grain of cedar to shine through while providing protection against UV rays and moisture.
- Semi-transparent topcoat: Enhances the natural color of cedar while imparting a hint of color. It offers moderate UV protection and moisture resistance.
- Solid or opaque topcoat: Offers the most durability and protection against UV damage and moisture. It completely covers the natural grain of cedar but provides a solid barrier against the elements.
Applying The Topcoat To Protect Against Uv Damage And Moisture
Applying a topcoat to cedar not only enhances its durability but also offers protection against UV damage and moisture infiltration. Here’s how to apply a topcoat effectively:
- Clean the cedar surface: Before applying the topcoat, ensure that the cedar is free from any dirt, dust, or old finish. Use a brush, sandpaper, or a cleaning solution to clean the surface thoroughly.
- Select the appropriate topcoat: Consider the type of topcoat that best suits your needs and the specific requirements of your project.
- Follow the manufacturer’s instructions: Read and follow the instructions provided by the topcoat manufacturer for proper application techniques and recommended drying times.
- Apply in thin, even coats: Using a brush, roller, or sprayer, apply the topcoat in thin, even coats to ensure proper coverage and avoid drips or puddles.
- Allow proper drying time: Allow each coat to dry completely before applying subsequent layers. This ensures that the topcoat bonds effectively with the cedar surface.
- Sand between coats: For a smoother finish, lightly sand the surface between each coat of topcoat to remove any imperfections or raised grain.
- Apply multiple coats: Depending on the desired level of protection, apply multiple coats of topcoat. This will create a stronger barrier against UV damage and moisture.
- Consider maintenance and reapplication: Keep in mind that topcoats may require periodic maintenance and reapplication, especially in outdoor environments with harsh weather conditions. Regular inspection and reapplication of topcoat will help maintain the cedar’s durability and beauty.
Maintaining And Reapplying Topcoats As Needed
To ensure the long-term durability and beauty of your cedar finish, regular maintenance and reapplication of topcoats may be necessary. Here are some guidelines for maintaining and reapplying topcoats:
- Inspect the cedar surface: Periodically inspect the cedar for signs of wear, damage, or fading of the topcoat. This will help determine if reapplication is needed.
- Clean the surface: Before reapplying the topcoat, clean the surface using a mild detergent or cleaner specifically designed for wood surfaces.
- Lightly sand the surface: To ensure proper adhesion of the new topcoat, lightly sand the surface to remove any old finish or rough areas.
- Apply the topcoat: Follow the same application steps as mentioned earlier, ensuring that you apply thin, even coats and allow sufficient drying time between each coat.
- Monitor for maintenance needs: Regularly monitor the condition of the topcoat. If you notice signs of wear or decreased protection, consider adding an additional coat to maintain the desired level of durability.
- Keep up with regular maintenance: Depending on the type and quality of the topcoat, maintenance may be required every 1-3 years. This involves inspecting the surface, cleaning if necessary, and reapplying the topcoat as directed by the manufacturer.
- Protect from harsh weather conditions: To maximize the lifespan of your cedar finish, take steps to protect it from extreme weather conditions. This may include providing shade, shelter, or using protective covers when necessary.
- Enjoy the long-lasting beauty: By staying proactive with maintenance and reapplication, your cedar finish will maintain its beauty and durability for years to come.
Extending The Lifespan Of Cedar Finishes
Extend the lifespan of your cedar finishes with these outdoor-friendly techniques. Protect your cedar from weathering and decay to ensure long-lasting beauty in your outdoor spaces.
Cedar is a popular choice for outdoor projects due to its durability and natural resistance to rot and decay. However, proper care and maintenance are essential to ensure the longevity of cedar finishes. By following these guidelines, you can enhance the lifespan of your cedar finishes, keeping them looking beautiful for years to come.
Regular Cleaning And Maintenance:
- Remove debris: Regularly sweep away dirt, leaves, and other debris from the cedar surface to prevent buildup.
- Gentle cleaning: Use a mild detergent mixed with water to clean the surface of cedar. Avoid harsh chemicals that can damage the wood.
- Scrubbing: Use a soft-bristle brush or sponge to scrub the cedar surface gently. This will help remove any stubborn stains or grime.
- Rinse thoroughly: After cleaning, rinse the cedar thoroughly with water to ensure all detergent residue is removed.
- Periodic resealing: Depending on the climate and wear, consider resealing your cedar finishes every 1-2 years to protect against moisture and UV damage.
Regular cleaning and maintenance play a crucial role in preserving the condition and appearance of your cedar finishes.
Inspecting For Damage And Signs Of Wear:
- Visual examination: Regularly inspect your cedar finishes for any signs of damage, such as cracks, splits, or warping. Pay close attention to areas that are exposed to frequent moisture or direct sunlight.
- Pest infestation: Check for any signs of pest infestation, including holes or chew marks. Address any pest issues promptly to prevent further damage to the cedar.
- Mold and mildew: Look for any growth of mold or mildew on the cedar surface. Promptly remove it using a mixture of water and a mildew cleaner.
- Fading or discoloration: Monitor the color of your cedar finishes. If you notice any significant fading or discoloration, it may be time to refinish or reseal the wood.
Regular inspections allow you to address any issues early on, preventing further deterioration and extending the lifespan of your cedar finishes.
Repairing And Refinishing As Necessary:
- Sanding: If you spot any rough or splintered areas, lightly sand them down to restore a smooth surface.
- Filling cracks: Fill any cracks or splits with a suitable cedar filler product. Ensure it matches the color of your finish for a seamless repair.
- Refinishing: If the cedar finish has become worn or faded, consider refinishing the surface. Choose a high-quality exterior wood stain or sealant that offers UV protection.
- Applying protective coating: Once the refinishing is complete, apply a protective coating to safeguard the cedar against moisture, UV rays, and other elements.
By repairing and refinishing your cedar finishes as necessary, you can revive their appearance and maintain their integrity for an extended period.
Remember, proper care and maintenance are vital to enhance the lifespan of cedar finishes. Regular cleaning, thorough inspections, and timely repairs/refinishing will help protect your cedar furniture, decks, or other projects from the elements and ensure they continue to provide beauty and functionality in your outdoor space.
Troubleshooting Common Cedar Finishing Issues
Learn how to troubleshoot common cedar finishing issues and achieve a perfect finish for outdoor use. Discover expert tips and techniques to ensure your cedar projects look beautiful and last for years to come.
Cedar is a popular choice for outdoor projects due to its natural beauty and durability. However, when finishing cedar, certain issues may arise that can affect the appearance and longevity of the wood. Understanding and addressing these common finishing issues is essential to ensure your cedar projects look their best and withstand the elements.
In this section, we will explore three common cedar finishing issues: fading or discoloration, peeling or flaking finishes, and mold or mildew growth.
Fading Or Discoloration
Exposure to sunlight and UV rays can cause cedar to fade or develop a grayish appearance over time. Here are some potential causes and solutions:
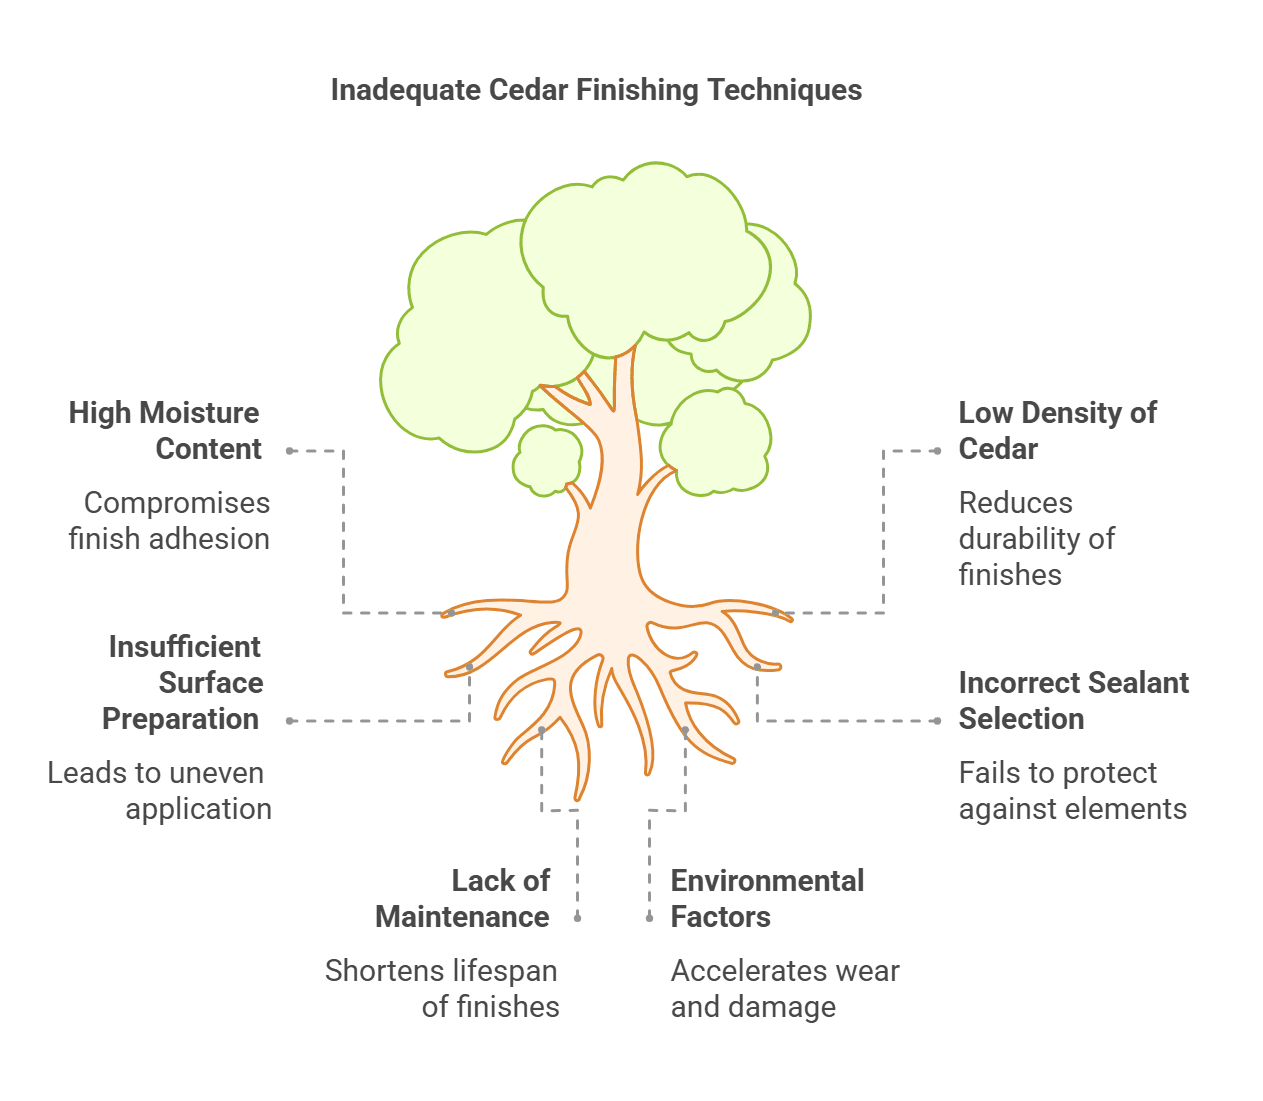
- Improper surface preparation: Insufficient sanding or cleaning prior to applying the finish can result in uneven absorption and discoloration. Make sure to properly prepare the cedar surface before applying the finish.
- Lack of UV protection: Cedar finishes without built-in UV inhibitors may fail to protect the wood from fading. Choose a finish that specifically provides UV resistance to prevent discoloration.
- Inadequate maintenance: Neglecting regular maintenance and reapplication of protective finishes can lead to color fading. Follow the manufacturer’s instructions for maintenance and reapplication to keep your cedar looking vibrant.
Peeling Or Flaking Finishes
When a cedar finish starts to peel or flake, it not only affects the appearance but also exposes the wood to potential damage. Consider the following factors that may contribute to this issue:
- Poor adhesion: Inadequate surface preparation, such as failing to remove old finishes or not properly cleaning the wood, can result in poor adhesion and subsequent peeling. Ensure the cedar surface is clean and free from any previous finishes before applying a new one.
- Incorrect finish selection: Not all finishes are suitable for cedar, and using an incompatible product can lead to peeling. Choose a finish explicitly designed for outdoor cedar applications to minimize the risk of peeling or flaking.
- Inconsistent application: Inconsistencies in how the finish is applied, such as using too much or too little product, can lead to uneven drying and subsequent peeling. Follow the manufacturer’s instructions for proper application techniques.
Mold Or Mildew Growth
Cedar’s natural properties make it resistant to rot and decay, but it can still be susceptible to mold and mildew growth. Here are some potential reasons for mold or mildew growth on cedar and how to address them:
- Moisture exposure: Excessive moisture or prolonged exposure to water can create a favorable environment for mold and mildew growth. Ensure proper drainage and consider using a finish that contains additives to inhibit mold and mildew growth.
- Lack of ventilation: Poor airflow around cedar structures can promote moisture accumulation and increase the chances of mold and mildew growth. Ensure there is adequate ventilation around your cedar projects, such as leaving sufficient gaps between boards.
- Existing mold or mildew infestation: If you notice mold or mildew on your cedar, it is crucial to address the issue promptly. Clean the affected areas with a solution of water and mild detergent, then apply a fungicidal treatment before recoating with a suitable finish.
By being aware of these common cedar finishing issues and taking proactive steps to address them, you can ensure that your outdoor cedar projects remain beautiful and resilient for years to come. Proper preparation, choosing the right finish, and maintaining your cedar will help protect it from fading, peeling, and mold or mildew growth.
Frequently Asked Questions About How To Finish Cedar For Outdoor Use
How Do You Finish Cedar For Outdoor Use?
To finish cedar for outdoor use, start by cleaning the wood with a mild detergent solution. Sand the surface to remove any rough spots. Apply a waterproof finish such as a clear wood sealer or a water-based stain. Repeat the process every few years to maintain the protection.
Conclusion
Cedar is an excellent choice for outdoor projects, thanks to its natural durability and resistance to rot and insects. By following the right steps, you can finish cedar to enhance its natural beauty while also protecting it from the elements.
Start by preparing the cedar by cleaning and sanding it. Next, choose a finish that is specifically designed for outdoor use and apply it using a brush or sprayer. Make sure to coat all sides of the cedar, including the ends.
Allow the finish to dry completely before handling the wood. Regular maintenance, such as reapplying the finish every few years and regularly cleaning the wood, will help prolong the life of your cedar project. By taking the time to properly finish your cedar, you can ensure that it will look beautiful and withstand the test of time in your outdoor space.