How to Fix a Warped Cabinet Door: Quick & Easy Solutions
To fix a warped cabinet door, remove the door and apply gentle pressure to straighten it. Use clamps and a flat surface for best results.
Warped cabinet doors can be a common issue in kitchens and bathrooms. This problem often arises from moisture exposure or temperature fluctuations. Fixing a warped door is essential for maintaining the appearance and functionality of your cabinets. Addressing the issue promptly can prevent further damage and prolong the life of your cabinetry.
Simple tools and a bit of patience can restore your cabinet door to its original condition. Follow these steps to ensure your cabinet doors remain straight and functional. This guide will help you achieve professional results with minimal effort.
Introduction To Warped Cabinet Doors
Warped cabinet doors are common in homes. Heat and humidity often cause warping. Poor-quality wood is also a factor. Long-term exposure to moisture is another reason. Improper installation may lead to warping too.
Heat and humidity are top causes. Poor-quality wood warps easily. Water damage is also a big cause. Improper installation can result in warping. Direct sunlight can warp doors over time.
Warped doors do not close properly. Gaps appear between the door and frame. The door may look twisted. Hinges may seem misaligned. The door may not sit flush.
Materials And Tools Required
Gather a clamp, wood glue, sandpaper, and a straightedge. Ensure a workbench and protective gear are available.
Choosing The Right Materials
Pick high-quality wood for the repair. Use wood glue for bonding. Ensure you have sandpaper for smoothing. Choose clamps to hold the wood. Get screws and a screwdriver. Opt for wood filler for gaps. Select a paint or stain.
Essential Tools For The Job
- Wood glue
- Sandpaper
- Clamps
- Screws
- Screwdriver
- Wood filler
- Paint or stain
Initial Assessments And Preparations
Examine the cabinet door closely to identify the extent of the warp. Gather necessary tools like clamps and a straight edge.
Inspecting The Extent Of Warping
First, check how much the door is bent. Use a straight edge tool. Place the tool on the door. Look for gaps between the door and tool. Measure the gaps with a ruler. Write down the measurements. This helps you understand the problem. Knowing the extent helps in fixing it.
Preparing The Workspace
Clear the area around the cabinet. Remove items inside the cabinet. Gather your tools. You will need clamps, screws, and wood glue. Have a clean cloth ready. Make sure there is good lighting. This will help you see better. A well-prepared space makes work easier.
Humidity Control Techniques
Proper humidity control can effectively fix a warped cabinet door. Use a dehumidifier to reduce moisture levels and straighten the wood.
Balancing Moisture Levels
Keep the air balanced. Use a humidifier in dry places. Use a dehumidifier in wet places. Both devices help in balancing moisture.
Using Humidifiers And Dehumidifiers
A humidifier adds moisture to the air. It helps in dry weather. A dehumidifier removes moisture. It helps in damp weather. Use them wisely to fix warped doors.
Manual Adjustment Methods
Place the door on a flat surface. Use weights to push it down. Leave it for 24 hours. Check if it is flat.
Place the door between two flat boards. Use clamps to hold them tight. Keep it clamped for two days. Check the shape after removing clamps.
Heat And Moisture Treatment
Fix a warped cabinet door by using heat and moisture treatment. Apply a damp cloth and a heated iron to the warped area. This method helps the wood absorb moisture and regain its original shape.
Applying Controlled Heat
Use a hairdryer or heat gun. Set it to medium heat. Move the heat tool back and forth. Keep it 6 inches away from the door. Heat the warped area for 10 minutes. Do not stay in one spot. Always keep moving.
Moisture Application For Bending Back
Use a damp cloth. Place it on the warped area. Let it stay for 30 minutes. Remove the cloth. Apply gentle pressure to the door. Bend it back slowly. Repeat if needed.
Securing And Reinforcing The Door
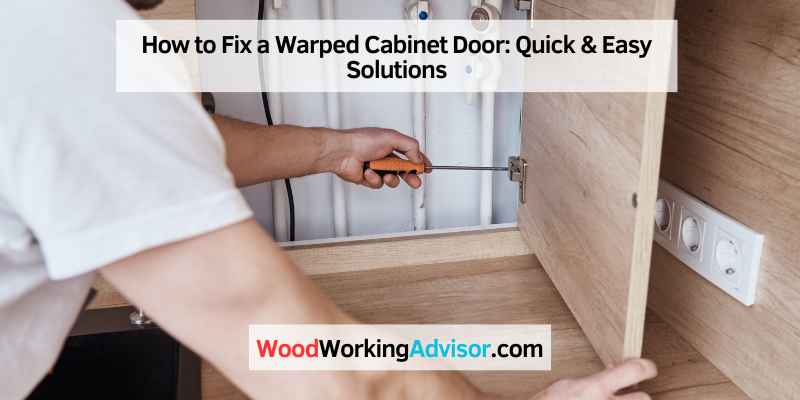
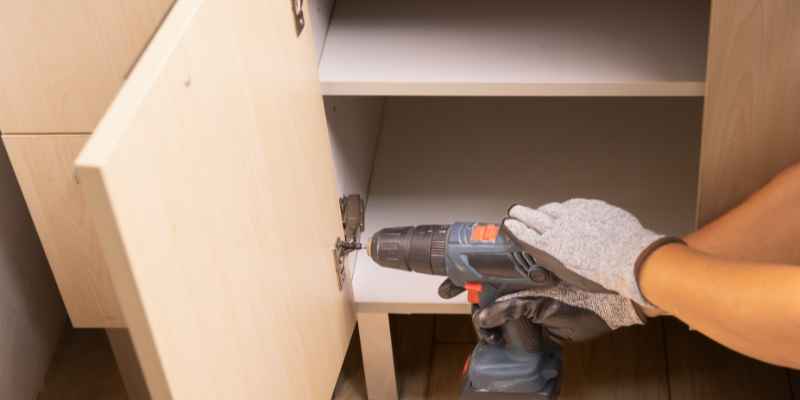
First, remove the cabinet door. Place it on a flat surface. Use a drill to make pilot holes. Insert screws into the pilot holes. Tighten the screws to secure the door. This will help straighten the door. Make sure screws are evenly spaced. Check if the door is now straight. Repeat if necessary.
Install braces on the back of the door. Use a ruler to mark brace positions. Attach braces using screws. Tighten the screws firmly. This will keep the door stable. Braces can be metal or wood. Choose a material that matches the door. Check the door for stability. Adjust if needed.
Finishing Touches
Start by sanding the cabinet door. Use fine-grit sandpaper for smooth results. Wipe away dust with a damp cloth. Apply a primer coat evenly. Let it dry completely before painting. Use a brush or roller for paint. Paint in thin layers to avoid drips. Allow each coat to dry fully. Apply a second coat if needed. Ensure the surface is smooth and even. Let the paint cure overnight.
Gather all screws and hardware. Align the door with the cabinet frame. Hold the door steady. Screw in the top hinge first. Move to the bottom hinge next. Tighten the screws securely. Reattach the handle or knob. Check the door’s alignment. Adjust hinges if needed. Ensure the door closes properly. Test it a few times. Make final adjustments to hardware if needed.
Preventive Measures For Future Warping
Clean the cabinet doors regularly with a soft cloth. Avoid using water directly on the wood. Use a dry cloth to remove dust and dirt. Check the hinges to ensure they are tight. Tighten any loose screws if needed. Apply a wood polish to protect the surface. This helps in keeping the wood healthy. Ensure that the doors close properly. Adjust the hinges if the doors are not aligned.
Keep the room at a steady temperature. Avoid placing cabinets near heat sources. Use a dehumidifier to control moisture levels. Excessive moisture can cause wood to warp. Ensure proper ventilation in the room. This helps in maintaining a stable environment. Keep the cabinet doors open sometimes to allow air flow. This helps in reducing humidity inside the cabinet.
When To Call A Professional
For severely warped cabinet doors, professional assistance ensures proper alignment and durability. Complex repairs often demand expert tools and skills.
Assessing The Severity Of Damage
Check if the door is very bent or twisted. Light warping can be fixed at home. Severe warping needs expert hands. Look at the door’s material too. Wood and MDF react differently to fixes. Also, check the hinges and screws. Loose parts may cause more warping.
Benefits Of Professional Repair
Professionals have the right tools. They know how to fix severe issues. They can save time and effort. They ensure the repair lasts long. They also provide a warranty. This gives peace of mind. Also, they can spot other hidden issues.
Frequently Asked Questions
How Do You Fix A Warped Door Without Removing It?
To fix a warped door without removing it, use a damp towel and an iron. Apply heat to reshape the door. Place heavy objects against the door to maintain its shape as it cools. Ensure the door is properly sealed and painted to prevent future warping.
Is It Possible To Straighten A Warped Door?
Yes, you can straighten a warped door. Use clamps and a straight edge or apply heat and moisture.
How To Straighten A Kitchen Cabinet Door?
To straighten a kitchen cabinet door, tighten the hinge screws. Adjust the hinges using a screwdriver. Check alignment and make minor adjustments.
How To Keep Cabinet Doors From Warping?
Store wood in a dry area before using. Seal all sides with paint or varnish. Install hinges properly. Avoid placing cabinets near heat sources. Regularly check for moisture.
Conclusion
Fixing a warped cabinet door is simpler than it seems. Follow these steps for a quick solution. Regular maintenance helps prevent future warping. Keep your cabinets in top shape and enjoy a smooth, functional kitchen. For more tips on home repairs, explore our blog and stay informed.