How to Fix Uneven Stain on Hardwood Floors: Expert Tips and Tricks
To fix uneven stain on hardwood floors, first sand down the affected area and remove any remaining stain. Then, apply a new coat of stain to achieve a uniform color.
Identifying Stain Issues On Hardwood Floors
Uneven stain on hardwood floors can be a frustrating problem to deal with. Not only does it affect the overall appearance of your floors, but it can also be a sign of underlying issues that need to be addressed. In this section, we will discuss how to identify stain issues on hardwood floors, assess the extent of uneven staining, differentiate between various types of discolorations, and recognize signs that your floors might need a professional evaluation.
Assessing The Extent Of Uneven Staining
Before you can fix the uneven stain on your hardwood floors, it is important to assess the extent of the problem. This involves closely examining the affected areas and determining how widespread the staining is. Start by visually inspecting the floors and noting any areas that appear darker or lighter than the rest of the floor. Use your sense of touch to determine if the staining is only on the surface or if it has penetrated deeper into the wood.
Differentiating Between Various Types Of Hardwood Floor Discolorations
Uneven staining on hardwood floors can be caused by a variety of factors, and it is essential to differentiate between different types of discolorations to effectively fix the problem. Common types of discolorations include:
| Type of Discoloration | Description |
|---|---|
| Water stains | These stains are caused by water or other liquids being left on the floor for an extended period. They usually appear as dark spots and can be challenging to remove. |
| Chemical stains | Chemical stains can occur when certain substances, such as cleaning products or spilled chemicals, come into contact with the hardwood floor. These stains can vary in color and may require specialized treatment. |
| Sunlight exposure | Excessive exposure to sunlight can cause the wood to fade or change color over time. These discolorations are often uniform and affect larger areas of the floor. |
| Bleaching | Bleaching can occur when the use of harsh chemicals or improper cleaning techniques strip away the finish and color of the wood. These stains may appear lighter than the surrounding areas. |
Recognizing Signs That Your Floors Might Need A Professional Evaluation
While some uneven staining issues can be resolved with DIY methods, there are certain signs that indicate your floors might need a professional evaluation. These signs include:
- Persistent or deep stains that cannot be removed with regular cleaning.
- Warping, buckling, or cracking of the floorboards.
- An unpleasant odor coming from the stained areas.
- Insects or pests infesting the affected areas.
If you notice any of these signs, it is best to consult a professional hardwood flooring expert who can assess the situation and recommend appropriate solutions.
Preparing For Stain Correction
When it comes to hardwood floors, uneven stain can be an unsightly issue that tarnishes the overall look of your space. However, fear not! With the right preparation, tools, and materials, you can easily fix this problem and restore the beauty of your hardwood floors. In this section, we will guide you through the steps of preparing for stain correction, ensuring a smooth and successful process.
Clearing The Area: Furniture And Rug Removal Tips
Before embarking on the stain correction journey, it is important to clear the area to ensure easy access to the affected floor. Here are some helpful tips for removing furniture and rugs without causing any damage or scratches:
- Start by removing any rugs or mats that cover the stained area. Roll them up carefully and set them aside in a safe location, away from any potential spills or stains.
- Next, tackle the furniture. Begin by moving lightweight items, such as chairs and small tables, to a different room. For heavier pieces, consider using furniture sliders or felt pads to prevent scratching the floor as you move them.
- If you have any larger furniture that cannot be easily moved, such as bookshelves or cabinets, protect the floor underneath by placing furniture coasters or blankets to prevent any accidental damage.
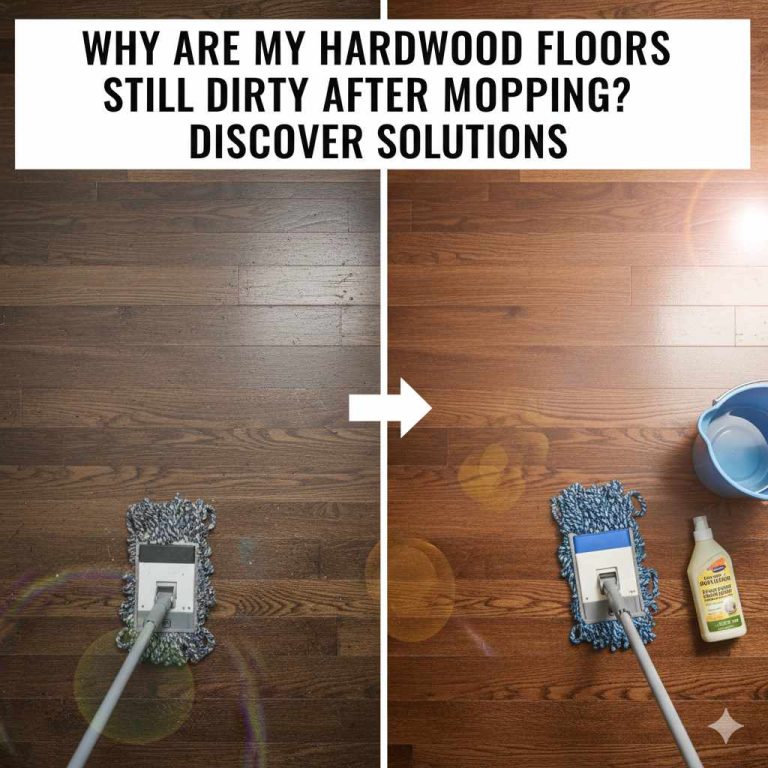
Cleaning The Surface: Best Practices For Hardwood Floors
Once the area is cleared, it is essential to clean the surface of your hardwood floors thoroughly. This ensures optimal adhesion of the new stain. Follow these best practices to ensure a pristine cleaning process:
- Begin by sweeping the floor to remove any loose dirt or debris. This will prevent scratching the surface during the cleaning process.
- Use a pH-neutral hardwood floor cleaner that is specifically designed for hardwood surfaces. Dilute the cleaner according to the manufacturer’s instructions and mop the entire area.
- Avoid using excessive water while mopping, as it can cause damage to the wood. Instead, use a slightly damp mop or microfiber cloth to gently clean the surface.
- Pay special attention to any stubborn stains or sticky residue. If needed, use a mild solvent or hardwood floor cleaner specifically formulated to remove tough stains. Always test a small, inconspicuous area first to ensure it does not cause any discoloration or damage.
- Finally, allow the floor to dry completely before proceeding with the stain correction process. This will ensure that the new stain adheres evenly to the surface.
Selecting The Right Tools And Materials For The Job
To achieve the best results, it is crucial to select the right tools and materials for the stain correction process. Here are some key considerations:
- Choose a high-quality wood stain that matches the current color of your floors. Consider factors such as wood species and finish to ensure a seamless blend.
- Gather all the necessary tools, such as paintbrushes, foam applicators, or staining pads. Ensure they are clean and in good condition to prevent any unwanted streaks or marks.
- Additionally, have a clean cloth or rag handy for wiping away excess stain and blending the color evenly.
- Lastly, protect yourself by wearing gloves and using proper ventilation when working with stain products.
By following these guidelines and preparing your hardwood floors for stain correction properly, you are on your way to achieving beautifully restored floors that will enhance the aesthetic appeal of your space.
Expert Tips For Sanding Floor Imperfections
Looking for expert tips on fixing uneven stain on hardwood floors? Discover effective techniques for sanding floor imperfections and achieving a flawless finish for your flooring.
Understanding The Significance Of Sanding In The Stain Correction Process
When it comes to fixing uneven stain on hardwood floors, sanding plays a crucial role in the correction process. Sanding not only helps to remove the uneven stain, but it also prepares the surface for a fresh layer of stain. By sanding the floor, you are essentially creating a smooth and uniform surface, ready for the application of a new stain that will blend seamlessly with the rest of the flooring. Understanding the significance of sanding will allow you to achieve exceptional results and restore the beauty of your hardwood floors.
Choosing The Right Sandpaper Grit For Your Hardwood Floors
Choosing the right sandpaper grit is essential for achieving optimal results during the stain correction process. The selection of sandpaper grit depends on the severity of the imperfections on your hardwood floors. Here’s a guide to help you choose the appropriate grit:
| Imperfection Severity | Sandpaper Grit |
|---|---|
| Minor scratches or shallow stains | 120-150 grit |
| Deeper scratches or moderate stains | 80-100 grit |
| Deep scratches or stubborn stains | 40-60 grit |
Step-by-step Guide To Effective Sanding Techniques
To achieve excellent results when sanding your hardwood floors, follow these step-by-step sanding techniques:
- Start by ensuring the floor is clean and free of any debris or furniture.
- Begin sanding with a coarser grit sandpaper, focusing on the areas with the most noticeable imperfections.
- Move the sandpaper in the direction of the wood grain, using smooth and even strokes. Avoid applying excessive pressure, as it may damage the flooring.
- Continue sanding, gradually transitioning to finer grit sandpaper, until the entire surface is smooth and the imperfections are minimized.
- After sanding, thoroughly clean the floor to remove any dust or particles.
- Inspect the floor for any remaining imperfections. If necessary, repeat the sanding process with a finer grit sandpaper to achieve a flawless finish.
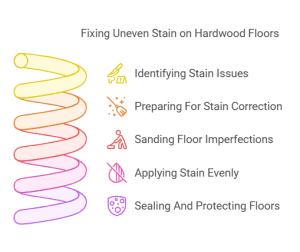
Applying Stain Evenly On Hardwood Floors
Learn how to fix uneven stain on hardwood floors and achieve a smooth and even finish. Follow these expert tips for applying stain evenly and restoring the natural beauty of your hardwood floors.
Detailed Process For Mixing And Applying Stain
Mixing and applying the stain evenly on hardwood floors is crucial to achieving a beautiful and uniform finish. By following a detailed process, you can ensure that your stain application is flawless. Here’s a step-by-step guide to help you:
- Prep the surface: Before you start staining, it’s important to prepare the hardwood floor properly. Clean the floor thoroughly, removing any dust, dirt, or debris. Ensure the surface is dry and free from any previous coatings or finishes.
- Choose the right stain: Select a stain color that complements your interior design and enhances the natural beauty of the wood. Consult with a professional or conduct a test patch to make sure you’re happy with the chosen stain.
- Protect surrounding areas: Use painter’s tape or plastic sheets to protect walls, baseboards, and furniture from accidental stain spills or splatters.
- Stir the stain: Gently stir the stain to ensure the color pigments are evenly distributed. Avoid shaking the can vigorously, as this may introduce bubbles, causing an uneven application.
- Test on a small area: Before applying the stain to the entire floor, it’s essential to conduct a test patch. Select an inconspicuous area or a spare piece of wood to make sure the stain color and application method are satisfactory.
- Apply the stain: Using a staining brush or a lint-free cloth, apply the stain in the direction of the wood grain. Start at one corner of the room and work your way towards an exit point, ensuring a continuous application to avoid overlapping marks.
- Wipe off excess stain: After applying the stain, allow it to penetrate the wood for the recommended time stated on the product label. Then, using a clean cloth or rag, gently wipe off any excess stain to achieve an even color.
- Allow drying time: Give the stained floor ample time to dry according to the manufacturer’s instructions. Avoid walking or placing furniture on the floor until it is completely dry to prevent smudges or imprints.
- Apply additional coats if desired: If a deeper or darker color is desired, repeat the staining process, ensuring proper drying time between each coat. Multiple coats can help achieve a richer and more uniform appearance.
How To Avoid Common Staining Mistakes
While applying stain to hardwood floors, it’s important to be aware of common mistakes that can lead to an uneven or blotchy finish. By recognizing and avoiding these errors, you can ensure a successful staining project. Here are a few tips to help you:
- Read and follow product instructions: Always carefully read and adhere to the instructions provided by the stain manufacturer. This includes mixing ratios, drying times, and recommended application techniques.
- Test on a small area first: Before staining the entire floor, test the stain on a small, inconspicuous area or a spare piece of wood. This allows you to assess the color and the staining technique, ensuring it meets your expectations.
- Use the right tools: Invest in high-quality staining brushes or lint-free cloths specifically designed for applying stains. Using the correct tools can help achieve a smoother and more even application.
- Avoid over-application: Applying too much stain can lead to an uneven and blotchy appearance. Follow the manufacturer’s guidelines for the recommended amount of stain to apply.
- Work in small sections: To prevent the stain from drying too quickly and causing visible lines or overlapping, divide the floor into manageable sections. Apply the stain evenly to each section before moving on to the next.
- Keep a wet edge: When working on larger areas, make sure to maintain a wet edge to avoid visible lines or uneven color variations. This means overlapping each stroke with the previous one while the stain is still wet.
- Protect against humidity: Avoid staining hardwood floors during excessively humid weather conditions. High humidity can interfere with proper drying, potentially leading to an uneven finish.
Expert Tricks For Achieving A Uniform Finish
To achieve a uniform finish when staining hardwood floors, expert tricks can prove invaluable in obtaining exceptional results. Consider the following tips:
- Use a pre-stain conditioner: Particularly for softer woods such as pine or maple, applying a pre-stain conditioner helps prevent uneven color absorption and blotchiness.
- Sand the wood properly: Ensure the hardwood floor is sanded correctly before applying the stain. A smooth and even surface allows for better absorption and distribution of the stain.
- Apply stain in the right conditions: Choose a time when the humidity is within the recommended range specified by the stain manufacturer. Ideal temperature and humidity conditions can contribute to a more even and flawless finish.
- Work with the grain: Stick to the direction of the wood grain when applying the stain. This ensures a natural-looking finish and minimizes the appearance of brush or cloth marks.
- Consider a gel stain: Gel stains tend to be less likely to result in an uneven appearance than liquid stains. Their thicker consistency allows for better control and reduced blotching.
- Inspect and touch up if needed: Once the stain has dried, inspect the floor for any uneven spots or missed areas. Touch up any imperfections with a small brush or cloth, blending them seamlessly into the rest of the stained floor.
Sealing And Protecting Your Newly Stained Floors
Protect your newly stained hardwood floors with proper sealing techniques. Learn how to fix uneven stain on your floors to achieve a smooth and flawless finish.

Selection Of Appropriate Sealants For Hardwood Floors
Choosing the right sealant for your newly stained hardwood floors plays a crucial role in ensuring their long-lasting protection. There are different types of sealants available, but it’s important to select one that suits your specific flooring type and stain application. Here are a few options to consider:
| Sealant Type | Benefits |
|---|---|
| Polyurethane | A durable and water-resistant option that provides excellent protection against daily wear and tear. It comes in different finishes, such as gloss, semi-gloss, and satin, allowing you to choose the desired sheen level. |
| Water-Based | Environmentally friendly and dries quickly. It offers good protection against scratches and UV damage but may require more coats for optimal durability. |
| Wax | A traditional choice that provides a warm and natural look. However, it requires regular maintenance and reapplication to keep the floors protected. |
It’s essential to follow the manufacturer’s instructions when selecting the sealant for your hardwood floors. This ensures compatibility with your stained floors and helps achieve the desired finish and level of protection.
Tips For A Smooth Application Of Sealant
To ensure a flawless finish when applying the sealant on your newly stained hardwood floors, consider the following tips:
- Clean the Floors: Thoroughly clean the floor surface before applying the sealant. Remove any debris, dust, or dirt using a vacuum cleaner or a broom.
- Proper Ventilation: Ensure proper ventilation in the room to allow for proper drying of the sealant. Open windows or use fans to aid in the drying process.
- Apply Thin and Even Coats: Apply the sealant in thin and even coats using a brush, roller, or applicator pad. This helps prevent streaks, bubbles, and uneven drying.
- Follow Drying Time: Allow each coat of sealant to dry completely before applying the next one. This ensures optimal adhesion and durability.
By following these tips, you can achieve a smooth and professional-looking sealant application on your newly stained hardwood floors.
Maintenance Advice For Long-lasting Stain And Sealant Results
To maintain the beauty and effectiveness of your stained and sealed hardwood floors, consider the following maintenance advice:
- Regular Cleaning: Sweep or vacuum the floors regularly to remove dirt and debris that can cause scratches over time.
- Use Protective Pads: Place felt pads under furniture legs to prevent scratches and dents when moving or rearranging furniture.
- Wipe Spills Immediately: Clean up any spills promptly to prevent staining or damage to the sealant. Use a soft, damp cloth for gentle and effective cleaning.
- Avoid Excessive Moisture: Avoid excessive moisture on hardwood floors as it can damage the stain and sealant. Use mats or rugs in areas prone to spills or humidity, such as kitchens and bathrooms.
- Periodic Recoating: Over time, the sealant may wear off due to foot traffic and daily use. Consider periodically recoating your hardwood floors to maintain their protection and rejuvenate their appearance.
By following these useful maintenance tips, you can ensure the long-lasting beauty and protection of your stained and sealed hardwood floors.
Frequently Asked Questions For How To Fix Uneven Stain On Hardwood Floors
How Do You Fix Uneven Wood Stain?
To fix uneven wood stain, sand the surface to remove the existing stain. Clean the wood thoroughly, ensuring no dust or debris remains. Apply a new coat of stain evenly, following the wood grain. Allow it to dry completely before applying a protective finish.
Why Does My Wood Floor Stain Look Blotchy?
Wood floor stains may appear blotchy due to uneven application or moisture-related issues. Uneven application can occur if the stain is not thoroughly mixed or applied too thin or thickly. Moisture-related issues, such as uneven absorption or the presence of trapped moisture, can also result in blotchiness.
It’s essential to ensure proper stain application techniques and address any moisture concerns for a consistent and even finish.
How Do You Blend Stain On Hardwood Floors?
Blend stain on hardwood floors by following these steps:
1. Start by sanding the floor to remove any previous finishes.
2. Clean the floor thoroughly to remove dust and debris.
3. Apply the stain evenly with a brush or cloth.
4. Let the stain sit for the recommended time.
5. Wipe off any excess stain and allow the floor to dry before applying a protective finish.
Can You Sand And Refinish One Spot On Hardwood Floors?
Yes, you can sand and refinish one spot on hardwood floors.
Conclusion
Fixing uneven stain on hardwood floors requires careful preparation and attention to detail. By assessing the extent of the issue, sanding the affected area, and applying a balanced stain, you can achieve a seamless and beautiful finish. Remember to follow the recommended products and techniques to ensure long-lasting results.
Take the necessary precautions to protect yourself and your floors during the process.