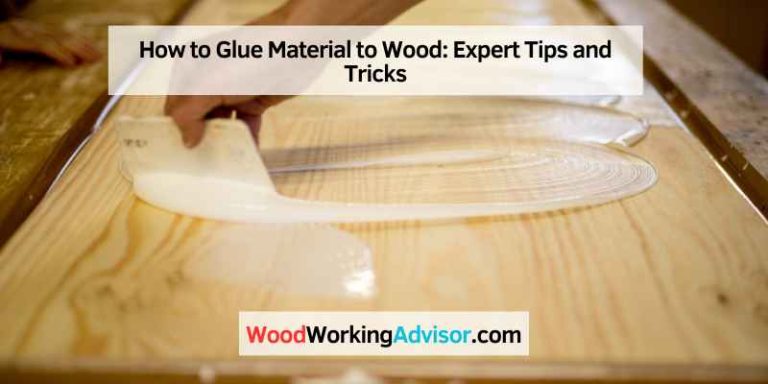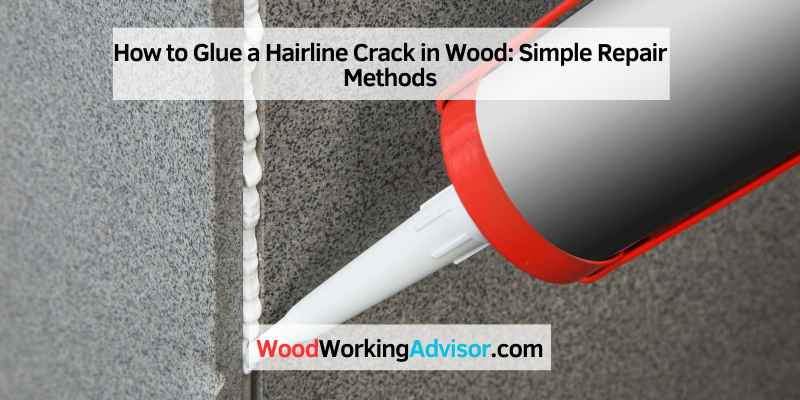
How to Glue a Hairline Crack in Wood: Simple Repair Methods
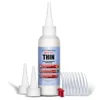
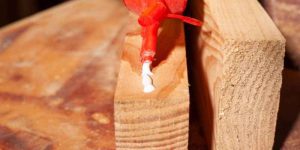
To glue a hairline crack in wood, use thin (water-thin) CA glue, not thick gel CA or Gorilla super glue. Thin CA has a watery 2-5 cP viscosity that wicks into the crack by capillary action, while thick/gel formulas just sit on top. Run a bead along the crack and let it draw itself in, or use a glue applicator or thin veneer to help it along.
Repairing a hairline crack in wood may seem like a daunting task, but it can be a relatively easy fix with the right glue and technique. Hairline cracks can occur on cutting boards, butcher blocks, doors, front door panels, chess boards, wood furniture, table tops, chopping boards, wood cutting boards, and wood filler.
This article will outline the necessary steps on how to glue a hairline crack in wood, ensuring that the crack is successfully repaired. By following the guidelines on what glue to use and how to apply it, anyone can fix a hairline crack in wood and restore it to its former glory.
Common Causes Of Hairline Cracks In Wood
Hairline cracks in wood can be caused by changes in temperature and humidity, age, or improper drying of the wood. To glue a hairline crack in wood, carefully apply fresh CA glue or a thin layer of wood glue using a piece of veneer or hobby knife blade to ensure the glue goes deep into the crack.
Sand the surface and apply a second layer of glue if necessary.
the tight space that a hairline crack provides. Another trick is to mix sawdust from the same wood species as the one you’re repairing with glue, creating a putty that is easy to apply and blends in with the wood. But before we dive into the best methods for fixing hairline cracks, let’s take a look at the most common causes of them:
Dryness
Dryness is one of the most common causes of hairline cracks in wood. Wood that is too dry will shrink, causing stress that can result in cracks. This is especially true for indoor furniture or objects exposed to central heating systems, which can dehumidify the air and dry out the wood.
Temperature Changes
Fluctuations in temperature can also cause hairline cracks in wood. Like dryness, temperature changes can create stress on the wood that leads to cracking. This is especially true for outdoor objects like doors and window frames, which are exposed to the elements and can experience significant temperature changes.
Humidity
Humidity is another factor that can cause hairline cracks in wood. When wood absorbs moisture, it expands. Too much moisture can cause the wood to expand beyond its limit, resulting in cracks as the wood dries and contracts. This is especially true for objects that are exposed to high humidity levels, such as wooden bowls or cutting boards that are often washed with water.
Now that we know the common causes of hairline cracks in wood, it’s time to dive into the best methods for fixing them.
Thin CA Glue vs. Thick Gel CA: Why Viscosity Matters Here
This is the detail most hairline-crack guides skip, and it’s the difference between a repair that holds and one that just sits on the surface. Thin (water-thin) CA glue has a viscosity of roughly 2 to 5 centipoise — close to water — which lets it travel into a hairline fissure through capillary action alone. Run a thin bead along the outside of the crack and it draws itself in within seconds, no clamping needed.
Thick or gel CA glue (including most “Gorilla” brand super glue) is formulated to do the opposite: resist running and stay put on vertical surfaces or wider gaps. That’s an asset for gap-filling joints, but it means gel CA will not wick into a true hairline crack — it just beads up on top, leaving the actual fissure unglued underneath a hardened surface skin. If your crack is wide enough to see daylight through or press a thumbnail into, a gap-filling glue or wood filler is the better tool; for genuine hairline cracks, thin CA is the one built for the job.
Water-thin instant adhesive built to wick into hairline cracks by capillary action.
- Best for: genuine hairline cracks — not wide gaps or missing chunks
- Why we picked it: its 2-5 cP viscosity flows into a crack on its own, unlike thick gel CA or Gorilla glue
- Main drawback: too thin for gap-filling — use wood filler instead for wider cracks


As an Amazon Associate, we earn from qualifying purchases.
Materials Required For Repair
To glue a hairline crack in wood, you will need thin CA glue (sometimes labeled “wicking” or “water-thin” CA) — not the thick gel or Gorilla-brand super glue often reached for by default. Thick, gap-filling formulas are built to stay put on a joint, so they can’t wick into a fissure this narrow; thin CA is specifically designed to flow in on its own. You’ll also need the best wood filler, such as Minwax Stainable Wood Filler or Elmer’s Carpenter’s Wood Filler, to fill in the crack.
Finally, you’ll need something thin, like a piece of veneer or the blade of a hobby knife, to force the glue deep into the crack.
When it comes to repairing hairline cracks in wood, there are a few key materials you’ll need to ensure a successful fix. These materials include wood glue, wood filler, clamps, and sanding paper. Each material plays a crucial role in repairing and restoring any damage to your wooden furniture, doors, or cutting boards. Let’s take a closer look at each of the materials required for repair, and how they contribute to a smooth and seamless restoration.
Wood Glue
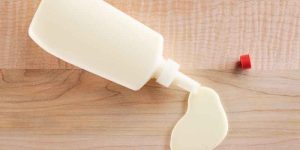
Wood glue is an essential material needed to fix hairline cracks in wood. It’s a type of adhesive that works by penetrating the fibers of the wood, creating a strong bond and ensuring the longevity of the repair. When using wood glue, it’s important to choose a high-quality brand and apply it liberally to the crack. A glue applicator can be used to help get the glue into every nook and cranny of the crack for a thorough repair.
Wood Filler
Sometimes, a hairline crack in wood can be too wide or deep to fix with just glue alone. This is where wood filler comes in. Wood filler is a putty-like substance that is applied to the crack after the glue has been applied and dried. It fills in any gaps and creates a smooth, even surface that can be sanded down to match the rest of the wood. It’s important to choose a filler that matches the type and color of your wood to ensure a seamless restoration.
Clamps
Clamps are crucial for holding the wood in place while the glue dries. They are used to firmly press the pieces of wood together, allowing the glue to create a strong bond. It’s important to choose the right size and type of clamp for your project to ensure that the wood is held securely without cracking or splitting further.
Sanding Paper
After the glue and filler have dried and the clamps have been removed, sanding paper is used to smooth out any rough edges and ensure the surface is even. When sanding, start with a lower grit and work your way up to a higher grit for a smooth finish. This is an important step to give the repaired area a finished look and ensure it blends in seamlessly with the rest of the wood.
In conclusion, having the right materials on hand is crucial when it comes to repairing hairline cracks in wood. By using wood glue, wood filler, clamps, and sanding paper, you can restore your wooden furniture, doors, or cutting boards to their former glory. Make sure to take your time and follow these steps carefully for a successful repair.
Using Wood Glue To Fix Hairline Cracks
To fix a hairline crack in wood, you can use wood glue for an easy and quick solution. First, clean the crack and apply a small amount of glue, then press the wood together and let it dry completely for a strong repair.
Hairline cracks in wood can be a real headache. These tiny little cracks can cause bigger problems if not fixed right away. Luckily, you can fix these cracks easily with wood glue. This method is cost-effective and simple, and the best part is that you can do it yourself. Check out the following steps to fix a hairline crack in wood using wood glue.
Examining the Crack
Before starting the repair process, examine the crack carefully. Determine the length, depth, and location of the crack. If the crack is very narrow, you can glue it without clamping. But if the crack is wider, you will need to clamp it to ensure a proper bond. Clean the crack from any debris or dust with a soft brush or a dry cloth.
Preparing the Surface
The next step is to prepare the surface for gluing. If the crack is too narrow, you can skip this step. But if it’s wider, it’s best to notch the crack with a chisel to create a groove for the glue to penetrate. Then, sand the surface lightly to smooth any rough spots.
Applying the Glue
Now it’s time to apply the glue. Use a small brush to apply a liberal amount of wood glue to the crack. Ensure that the glue fills the entire length of the crack. Wipe off any excess glue with a clean, damp cloth. If you have notched the crack, fill the groove with glue as well.
Clamping and Drying
The next step is to clamp the crack. Use a clamp to hold the wood tightly together. Make sure to tighten the clamp to close the gap fully. Let the glue dry for about 24 hours. If the glue is not fully dry, the clamps may loosen, and the crack may open up again.
Sanding the Surface
Once the glue has dried completely, sand the surface lightly. Sand it gently by hand with fine-grit sandpaper until the surface is smooth and even. When you are done sanding, stain or finish the wood surface to match the surrounding wood.
In conclusion, fixing a hairline crack in wood using wood glue is an easy process. However, it’s essential to examine the crack, prepare the surface, apply the glue, clamp, and let the glue dry. Finally, sand the surface and finish the wood to match the surrounding area. With these simple steps, you can fix an unsightly crack and restore the beauty of your wood surface.
Fixing Hairline Cracks With Wood Filler
Learn how to fix hairline cracks in wood by using wood filler. Follow simple techniques such as applying the filler, removing the excess and sanding for a perfect finish. Use of glue applicator and sawdust can also aid in repairing these cracks.
knife to spread it evenly along the crack. But when it comes to hairline cracks, it can be tricky to get the glue in without making a mess or having it drip everywhere. One of the best ways to get glue into a hairline crack is to use a glue injector. However, before you get to that point, you need to first choose the right filler, clean and prepare the surface, apply the filler, and sand and finish the wood. In this post, we’ll focus on how to fix hairline cracks with wood filler, covering each step in detail.
Choosing The Right Filler
Before you can start fixing a hairline crack in wood, you need to choose the right filler. There are different types of wood fillers available, such as epoxy, latex, and cellulose-based fillers. A good wood filler should have the following characteristics:
- It should be easy to apply and spread evenly
- It should dry quickly and be sandable
- It should be paintable and stainable
- It should be able to withstand the expansion and contraction of the wood
Once you’ve decided on the right wood filler, it’s time to move on to cleaning and preparing the surface.
Cleaning And Preparing The Surface
To ensure the wood filler adheres to the surface properly, you need to clean and prepare the surface first. Start by removing any loose or damaged wood around the crack with a chisel or sandpaper. Then, using a clean, dry cloth or brush, remove any dust, debris, or old glue from the crack.
If you’re using a water-based filler, dampen the crack slightly with a wet cloth before applying the filler. This will help the filler to stick to the wood and prevent it from drying out too quickly.
Applying The Filler
Before applying the wood filler, make sure to read the manufacturer’s instructions carefully. Some fillers require mixing, while others can be used straight out of the tube.
Squeeze a small amount of the filler onto a putty knife or scraper and push it into the crack, smoothing it out as you go. Make sure to fill the crack completely, without overfilling it. If the filler shrinks as it dries, you can apply a second coat to fill in the gap.
Sanding And Finishing
Once the wood filler has dried completely, it’s time to sand and finish the wood. Start by using fine-grit sandpaper to sand the filled area until it’s smooth and level with the surrounding wood. Make sure to sand evenly, without over-sanding or creating a dip in the wood.
After sanding, wipe the surface with a damp cloth to remove any sanding dust. Then, you can finish the wood with paint, stain, or a clear coat, depending on your preference.
In conclusion, fixing hairline cracks with wood filler is a great way to restore the beauty and functionality of your wood furniture, cutting board, or other woodworking projects. With the right filler, preparation, and finishing, you can repair hairline cracks and prevent further damage to your wood.
Alternative Methods For Hairline Crack Repair
Repairing hairline cracks in wood can be done through gluing the crack with fresh, thin CA glue (not thick Gorilla-brand super glue, which won’t wick in). To get the glue into the crack, thin pieces of veneer or a hobby knife blade can be used.
Wood filler may also be used as an alternative method for crack repair.
Dealing with a hairline crack in wood can be tricky, especially if it is in an area where you can’t easily access it. Glue can be a reliable solution for repairing hairline cracks, but using the wrong glue or applying it improperly can lead to further damage. As such, it is essential to consider alternative methods to repair the crack to ensure a successful outcome. In this post, we will look at three alternative methods: using epoxy resin, using cyanoacrylate glue (CA glue), and stabilizing the crack with butterfly/bowtie keys.
Using Epoxy Resin
Epoxy resin is an effective adhesive for fixing hairline cracks in wood. It is easy to use, and once set, it creates a strong bond that can hold the wood together for years. To use epoxy resin for hairline crack repair, follow these steps:
1. Clean the area around the crack thoroughly to remove any dirt, dust, or debris.
2. Apply epoxy resin along the crack using a toothpick or a small brush.
3. Use a clamp or tape to hold the wood together while the glue sets. Leave it to dry for at least 24 hours.
Using Cyanoacrylate Glue (CA Glue)
Cyanoacrylate glue (CA glue) is also a viable solution for repairing hairline cracks. It is a fast-drying adhesive that creates an instant bond. However, it is essential to note that it is not as strong as epoxy resin, but it still gets the job done. Here’s how to use CA glue for hairline crack repair:
1. Clean the area around the crack thoroughly to ensure a firm bond.
2. Apply a small amount of CA glue into the crack using a toothpick or a syringe applicator.
3. Using a thin plastic film, press the glue into the crack and hold it in place for at least 30 seconds.
4. Allow the glue to dry fully before removing the plastic film.
Stabilizing the Crack with Butterfly/Bowtie Keys
When a crack is too wide or unstable, using glue alone may not be enough. In such cases, stabilizing the crack with butterfly/bowtie keys can be a more effective solution. Bowtie keys are specially designed to fit into the crack and follow the wood’s grain, ensuring stability. Follow these steps to use bowtie keys:
1. Clean the crack thoroughly and make sure it is free of debris.
2. Using a chisel or saw, cut a slot on both sides of the crack.
3. Cut a bowtie key using a bandsaw or a scroll saw with a thickness that matches the slot.
4. Apply glue to the key with a toothpick or brush and press it into place.
5. Let the glue dry completely before sanding the surface.
Conclusion
Repairing hairline cracks in wood can seem challenging, but with the right technique and adhesive, it’s an easy fix. Whether you choose to use epoxy resin, CA glue, or stabilize the crack with bowtie keys, it is essential to take the necessary precautions and follow the correct steps. By doing so, you can restore your wood’s structural integrity and prevent further damage.
Preventing Hairline Cracks In Wood
To prevent hairline cracks in wood, it’s important to know how to properly glue them. Applying glue using a thin object like a hobby knife or veneer can get the glue deep into the crack and strengthen it. Using fresh CA glue or refrigerating it can help it stay better for longer, and filler such as Minwax Wood Filler can add extra reinforcement.
to apply a small amount of glue onto the edge of the blade and then push it into the crack. However, preventing hairline cracks in the first place is a much better solution. Here are a few tips to help you do just that:
Maintaining Optimal Humidity
Wood is a hygroscopic material, which means it absorbs moisture from the surrounding environment. Changes in humidity can cause it to expand or contract, leading to hairline cracks. To prevent this from happening, it’s important to maintain optimal humidity levels in your home. Ideally, the humidity should be between 30% and 50%. You can use a hygrometer to measure the humidity and a humidifier or dehumidifier to adjust it as needed.
Avoiding Extreme Temperatures
Just like changes in humidity, extreme temperatures can also cause wood to expand or contract, leading to hairline cracks. It’s best to keep wood furniture and objects out of direct sunlight and away from heating and cooling vents. If you have a wood-burning stove or fireplace, make sure there is adequate space between the wood and the heat source.
Moisturizing The Wood Regularly
Moisturizing the wood can help prevent hairline cracks by keeping it hydrated and supple. You can use a wood conditioner or a mixture of beeswax and mineral oil to moisturize the wood. Apply the conditioner or mixture with a soft cloth and buff it in gently. Be sure to follow the manufacturer’s instructions and repeat the process periodically to keep the wood moisturized.
By following these tips, you can help prevent hairline cracks in wood from forming in the first place. But if they do occur, you can use the techniques mentioned in our previous post to glue them and restore your wood to its former glory.
Frequently Asked Questions Of How To Glue A Hairline Crack In Wood
How Do You Fix A Cracked Hairline In Wood?
To fix a cracked hairline in wood, you can use simple methods such as glueing or filling the crack with wood filler. The best glue for hairline cracks is thin (water-thin) CA glue — not thick “Gorilla” brand super glue, which is too viscous to wick into a hairline fissure. To get glue into the crack, use a thin piece of veneer or the blade of a hobby knife.
Strengthening hairline cracks can be done using Titebond glue or CA glue.
What Is The Best Glue For Hairline Cracks?
Fresh CA glue is the best for hairline cracks. Additionally, it is advisable to keep it in a fridge for it to last longer. Avoid using “Gorilla” brand super glue for hairline cracks since it is very thick. Use a thin piece of veneer or the blade of a hobby knife to get normal white wood glue into a crack.
Titebond is the strongest glue for joining wood. Finally, mix the epoxy and heat it with a hairdryer to force wood glue into a crack.
What Is The Best Filler For Hairline Cracks In Wood?
The best filler for hairline cracks in wood is a stainable wood filler like Minwax Stainable Wood Filler, Elmer’s Carpenter’s Wood Filler, or Goodfilla Wood & Grain Filler. For getting wood glue into the crack, use a thin piece of veneer or the blade of a hobby knife to ensure a good glue job.
Fresh CA glue is also a good option, but it is not recommended for hairline cracks.
How Do You Get Wood Glue Into A Hairline Crack?
To get wood glue into a hairline crack, use a thin piece of veneer or the blade of a hobby knife. This ensures glue goes deep into the crack. It’s best for long, even cracks. Forcing glue involves mixing epoxy and heating it with a hair dryer to make it more fluid.
Use Titebond for strong joints. CA is best for hairline repairs but causes staining. Use fresh CA glue kept in the fridge. The best wood filler for hairline cracks is Minwax Stainable Wood Filler.
Conclusion
Fixing hairline cracks in wood is a simple process that can be done easily with the right approach. By using the appropriate filler and glue, securing the wood together, and sanding off any excess material, you can restore your wooden piece to its original condition with relative ease.
It is important to note that maintenance and care should be provided to the repaired area regularly to avoid future issues. So, follow the above tips and techniques to fix those hairline cracks efficiently using the right tools and materials.