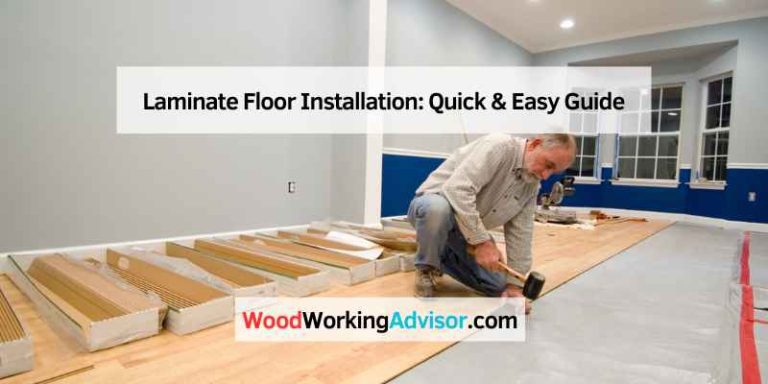
How To Install Laminate Flooring On Plywood: Essential Guide
Mastering laminate flooring on plywood is achievable! This guide breaks down the process into simple, actionable steps, ensuring a beautiful, durable floor for your home even if you’re new to DIY. We’ll cover everything from prepping your subfloor to the final click of the laminate planks.
Welcome, fellow DIYers! Today, we’re tackling a common home improvement project: installing laminate flooring over a plywood subfloor. Maybe you’ve seen those beautiful laminate floors and thought, “I could do that!” But then you start thinking about the steps, and it feels a bit overwhelming. Don’t worry, I’ve been there! Many homeowners hesitate because they’re unsure about the process, worried about mistakes, or think it requires professional skills. The good news is, with a clear plan and a little patience, installing laminate flooring on plywood is a rewarding project you can absolutely nail. This guide will walk you through every étape, ensuring your new floor looks fantastic and lasts for years. Let’s get started on transforming your space!
Why Choose Laminate Flooring on Plywood?
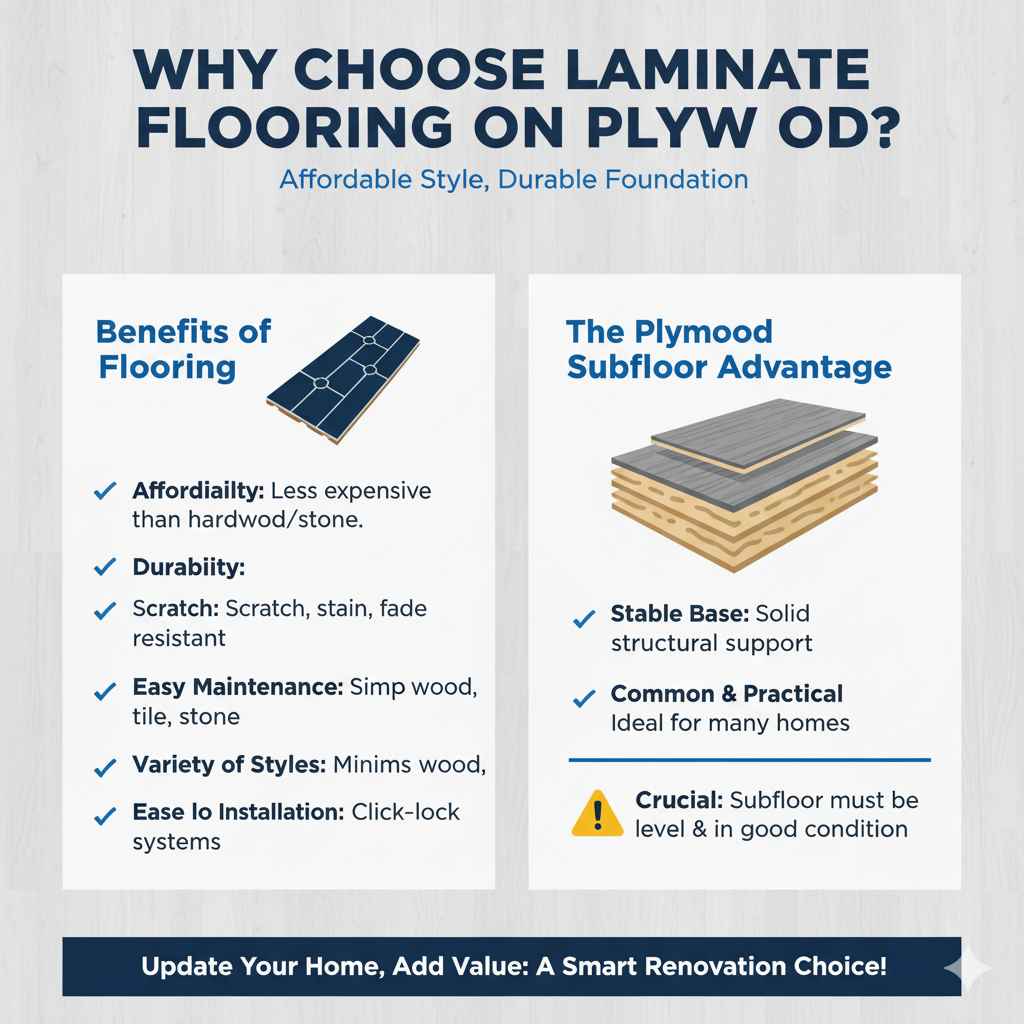
Laminate flooring offers a fantastic blend of durability, affordability, and aesthetic appeal. It mimics the look of hardwood, tile, or stone without the hefty price tag or demanding upkeep. When paired with a plywood subfloor, it creates a stable and reliable foundation for your new floor. Plywood subfloors are common in many homes, making this a practical choice for a wide range of renovation projects. It’s a smart way to update your home’s look and feel while adding value.
Benefits of Laminate Flooring
- Affordability: Generally less expensive than real hardwood or natural stone.
- Durability: Resistant to scratches, stains, and fading, making it ideal for high-traffic areas.
- Easy Maintenance: Simple to clean with sweeping and occasional damp mopping.
- Variety of Styles: Available in countless designs to match any décor.
- Ease of Installation: Many systems use a click-lock mechanism that simplifies the process significantly.
The Plywood Subfloor Advantage
Your existing plywood subfloor, if in good condition, serves as an excellent base for laminate. It’s a solid surface that provides good structural support. However, its condition is crucial for a successful installation. We’ll cover how to assess and prepare it properly.
Assessing and Preparing Your Plywood Subfloor
The secret to a flawless laminate floor is a perfectly prepped subfloor. Think of it as the foundation of a house – if it’s not solid and level, the whole structure suffers. Even the best laminate can buckle, creak, or develop gaps if laid on a poor subfloor.
Step 1: Clear the Area
First things first, you need a completely empty room. Remove all furniture, rugs, and anything else that might be in your way. This gives you the space to work comfortably and prevents damage to your belongings.
Step 2: Inspect the Plywood
Carefully examine your plywood subfloor. Look for:
- Soft Spots or Rot: Any areas that feel spongy or show signs of water damage need to be repaired or replaced.
- Loose Boards: If any plywood sheets are loose, they can cause squeaking. Secure them to the joists below using screws. Drive the screws flush or slightly below the surface of the plywood.
- Damage: Check for significant cracks, gouges, or splintered areas.
If you find damaged sections, it’s best to cut out the affected area and replace it with a new piece of plywood of the same thickness. Ensure the new piece is securely screwed down.
Step 3: Check for Levelness
A level subfloor is critical. Use a long, straight level or a metal yardstick to check for dips and high spots. Minor imperfections (less than 1/8 inch over a 6-foot span) can often be managed with underlayment, but significant variations need attention.
For low spots, you can use a leveling compound specifically designed for subfloors. Follow the manufacturer’s instructions for mixing and application. For high spots, you might need to carefully sand them down or use a floor scraper. It’s important that the subfloor is as flat as possible for the best results.
Step 4: Vacuum Thoroughly
Once your subfloor is sound and level, give it a really good vacuuming. You want to remove every speck of dust, dirt, and debris. Any grit left behind can get pressed into the laminate planks or damage the underlayment.
Tools and Materials You’ll Need
Gathering all your tools and materials before you start is key to a smooth installation. Having everything on hand prevents frustrating trips to the store mid-project.
Essential Tools:
- Tape Measure
- Pencil
- Utility Knife or Heavy-Duty Scissors (for underlayment)
- Broom and Dustpan, or Vacuum Cleaner
- Safety Glasses
- Work Gloves
- Knee Pads
- Pry Bar (for removal of old flooring, if applicable)
- Rubber Mallet or Tapping Block (used with a pry bar, to gently nudge planks into place)
- Saw (Miter saw, Jigsaw, or Circular Saw are useful for cutting planks to size)
- Chalk Line and Chalk Reel (optional, for long, straight lines)
- Spacers (to maintain expansion gaps around walls)
- Optional but Recommended: Moisture Meter
Materials:
- Laminate Flooring Planks
- Underlayment (specific to laminate flooring – check manufacturer recommendations)
- Moisture Barrier (if installing over concrete or in basements, even if laminating over plywood)
- Wood Screws (if securing plywood)
- Leveling Compound (if needed)
- Wood Filler or Putty (for minor imperfections)
Understanding Underlayment
Underlayment is a critical layer between the subfloor and the laminate. It provides cushioning, noise reduction, and helps to smooth out minor subfloor imperfections. Many laminate planks come with attached underlayment, but if yours doesn’t, you’ll need to purchase it separately. There are various types, including foam, felt, and cork. Choose one recommended by your laminate flooring manufacturer for optimal performance. Some underlayments also have a built-in moisture barrier, which is beneficial, especially in damp environments.
You can learn more about subfloor preparation and underlayment choices on resources like Building Science Information, which offers deep dives into building material science.
Planning Your Laminate Layout
A little planning goes a long way to ensure your floor looks its best and is installed efficiently. This involves deciding on the direction of your planks and calculating how many you’ll need.
Direction of Planks:
Typically, laminate planks are laid parallel to the longest wall in the room. This helps to create a sense of spaciousness. However, you can also lay them perpendicular to the longest wall, or even diagonally. For very long or narrow rooms, laying planks across the narrow width can make the room appear wider. Consider the direction of natural light; laying planks towards the windows can make seams less noticeable.
Calculating Material Needs:
Measure your room at its widest and longest points, and multiply these numbers to get your square footage. Always buy about 10-15% extra flooring to account for cuts, mistakes, and future repairs. Manufacturers often provide online calculators for this. A little extra ensures you don’t run short and can even match dye lots if a repair is needed years down the line.
Step-by-Step: Installing Laminate Flooring on Plywood
Now for the exciting part – laying the floor! These steps are designed to be straightforward, guiding you through the process from start to finish.
Step 1: Install the Underlayment
Roll out your chosen underlayment across the entire subfloor. If it has a plastic moisture barrier, ensure this side faces up. If you’re using separate underlayment and moisture barrier, install the moisture barrier first, overlapping seams by about 6 inches and taping them with a waterproof tape. Then, lay the underlayment, butting seams together or overlapping slightly as recommended by the manufacturer. Trim excess with a utility knife. Many underlayments come with tape attached to its edge to help seal seams.
Step 2: Begin Laying Planks (The First Row)
Start in a corner, usually the one farthest from the door so you can work your way out of the room. Place the first plank with its tongue side facing the wall. You will need to cut off the tongue on the side facing the wall to create a straight edge. Use spacers (usually 1/4 to 1/2 inch) between the plank and the walls to allow for expansion. Laminate flooring, like wood, expands and contracts with changes in humidity and temperature. This expansion gap is crucial to prevent buckling.
Connect the next plank to the first by angling its tongue into the groove of the first plank and then lowering it. Continue this across the length of the first row. For the last plank in the row, you may need to cut it to fit. Measure the remaining space, allowing for the expansion gap, and cut the plank to size. Use the piece cut off from the end of the first plank to start the second row, as long as it’s at least 6 inches long. This ‘staggered’ or ‘offset’ pattern creates a more natural and stronger floor.
Step 3: Laying Subsequent Rows
The key to a beautiful laminate floor is a staggered pattern. This means the seams in adjacent rows shouldn’t line up. Aim for an offset of at least 6 inches. Start the second row with the cut-off piece from the first row, if it’s long enough. If not, cut a new plank to a suitable length (at least 6 inches longer than the plank in the first row).
To connect a new plank to the previous row, angle the long edge tongue into the groove of the plank in the row you’re working on. Then, lower the plank. Next, connect the end of this new plank to the end of the plank already in place in its row. This often involves angling the short end tongue into the short end groove and then tapping gently with a tapping block and rubber mallet, or by using a pull bar, to ensure a tight, seamless fit. Continue laying planks, ensuring each row is offset from the last.
Step 4: Cutting Around Obstacles
You’ll inevitably encounter doorways, vents, or pipes. For door frames, you’ll want to undercut them. Slide a piece of laminate and the underlayment beneath the door trim so the laminate butts up against the wall behind the trim. This provides a clean, professional look. Use a jigsaw to cut around curves for pipes or irregular shapes. Always remember to leave an expansion gap around any fixed objects.
Step 5: The Final Row
The last row is often the trickiest. You’ll likely need to rip (cut lengthwise) the planks to fit your remaining space. Measure the distance from the edge of the installed planks to the wall, remembering to subtract your expansion gap. Cut the planks to this width. You may need to use a pull bar to ‘hook’ the last row into place against the wall.
Step 6: Install Trim and Transitions
Once all the planks are laid, remove the spacers. You’ll need to cover the expansion gaps around the perimeter of the room. Install baseboards or quarter-round molding to hide these gaps and give your floor a finished look. For doorways and transitions to other flooring types, use appropriate transition strips (like T-molding or reducers) which often click into a track system or are glued in place.
Table: Laminate Flooring Installation Tips
Here’s a quick reference to some common installation challenges and their solutions.
| Problem | Solution | Why It Matters |
|---|---|---|
| Gaps between planks | Ensure planks are properly locked. Use a tapping block and rubber mallet to gently tap planks together. Check for debris in the grooves. | Gaps allow moisture in and reduce stability. |
| Buckling or bowing | Verify expansion gaps around the perimeter (walls, cabinets, etc.) are adequate. Ensure you haven’t installed too close to fixed objects. | Expansion space is crucial for laminate’s natural movement. |
| Squeaking sounds | Check subfloor for loose boards and secure them. Ensure underlayment is flat and properly installed. Make sure laminate planks are fully connected. | Squeaks can indicate movement between subfloor and flooring layers. |
| Uneven appearance | Ensure subfloor is perfectly level. Stagger plank seams appropriately (at least 6 inches apart). | Subfloor flatness and plank staggering contribute to a professional look. |

Frequently Asked Questions (FAQ)
Q1: Can I install laminate flooring directly over old vinyl flooring?
A1: Generally, yes, if the old vinyl is securely adhered, flat, and smooth. Remove any loose or peeling sections. Always check the laminate manufacturer’s warranty, as some may not cover installation over existing flooring.
Q2: Do I need a moisture barrier over plywood?
A2: It depends on the location and condition. If the plywood subfloor is in a basement, over an unheated space, or in a high-humidity area like a bathroom (though laminate is not recommended for most bathrooms), a moisture barrier is highly recommended. Many underlayments include one.
Q3: How do I cut laminate planks neatly?
A3: A miter saw provides the cleanest cuts for straight edges. A jigsaw is best for curves and intricate cuts around obstacles. Always cut with the decorative side down if using a jigsaw to minimize chipping.
Q4: What’s the deal with expansion gaps?
A4: Laminate flooring expands and contracts due to changes in temperature and humidity. The expansion gap around the perimeter of the room (typically 1/4 to 1/2 inch) allows for this movement without the planks buckling or lifting.
Q5: How long does it take to install laminate flooring?
A5: For a typical 150-200 sq ft room, it can take anywhere from a weekend to a few days, depending on your experience level, the complexity of the room (e.g., number of corners, doorways), and how efficiently you work.
Q6: Can I install laminate flooring in a bathroom?
A6: While some laminates are marketed as water-resistant, it’s generally not recommended for bathrooms or areas with prolonged direct water exposure. Water can seep into seams and cause swelling or damage. If you must, choose a highly water-resistant laminate and seal all edges and seams diligently.
Maintaining Your New Laminate Floor
Once your beautiful new laminate floor is installed, a little care will keep it looking great for years. Regular cleaning is key.
- Sweep or Vacuum: Regularly sweep or vacuum your floors to remove grit and dirt that can scratch the surface. Use a soft brush attachment for your vacuum.
- Damp Mopping: For tougher messes, use a damp mop. It should be barely wet – never soggy. Too much water can damage laminate. A microfiber mop is ideal.
- Avoid Harsh Cleaners: Stay away from abrasive cleaners, ammonia-based products, or oil soaps, as they can dull the finish or leave a residue.
- Protect from Furniture: Use felt pads on the legs of all furniture to prevent scratches.
- Address Spills Immediately: Wipe up any liquid spills as soon as they happen.
For more detailed care advice, consider resources like This Old House often provides practical cleaning and maintenance tips for various home materials.
Conclusion
There you have it! Installing laminate flooring over a plywood subfloor is a very manageable DIY project that can dramatically upgrade your home’s appearance and value. By taking the time to prepare your subfloor meticulously, gathering the right tools, and following these step-by-step instructions, you can achieve professional-looking results without the professional price tag. Remember the importance of expansion gaps, staggered seams, and careful cutting. You’ve got this! Enjoy your beautiful, durable new floor.