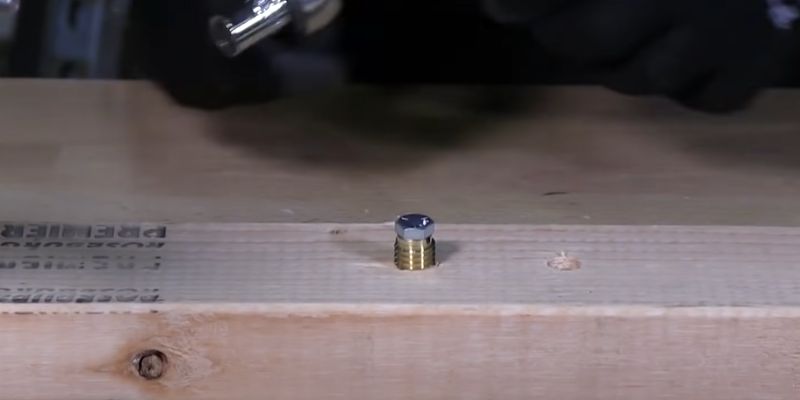
To install threaded inserts for wood, drill a hole in the wood, apply some glue to the insert, and then screw the insert into the hole using a screwdriver or a drill. The threaded insert will offer a strong and secure anchor point for screws or bolts to be attached to the wood.
Threaded inserts are commonly used in woodworking projects to provide added strength and durability in areas where screws or bolts are repeatedly inserted and removed. Whether you’re working on a furniture assembly, repairing stripped screw holes, or adding metal hardware to your project, installing threaded inserts is a simple process that can greatly enhance the functionality and longevity of your woodwork.
In this guide, we will walk you through the step-by-step process of installing threaded inserts for wood, so you can tackle any woodworking project with confidence.
Choosing The Right Threaded Inserts
Choosing the right threaded inserts for wood installation requires careful consideration of factors like material type, size, and installation method. Whether it’s for furniture, DIY projects, or industrial applications, understanding the process will ensure a secure and long-lasting connection.
When it comes to installing threaded inserts for wood, it is crucial to choose the right type of inserts to ensure a secure and durable connection. The type of insert you select will depend on several factors, including the application, material, and load requirements. In this section, we will explore the different types of threaded inserts available and the key factors to consider when making your choice.
Types Of Threaded Inserts
Threaded inserts come in a variety of styles, each designed to suit specific applications. Here are some commonly used types:
- Insert Type A: These are the most basic type of threaded inserts, often used for light-duty applications. They feature an internal thread and are easily installed using a screwdriver or an installation tool.
- Insert Type B: These inserts have external threads and are commonly used in molding applications. They provide a more secure connection, making them suitable for heavier loads.
- Insert Type C: Designed for precision applications, these threaded inserts have external threads and provide excellent resistance to pull-out forces. They are commonly used in furniture manufacturing and cabinetry.
- Insert Type D: These inserts are suitable for softer materials like particle board or plastic. They feature external threads and have flanges or fins that prevent them from being pulled through the material.
Factors To Consider When Choosing Inserts
When selecting the right threaded insert for your project, there are several factors to take into account. These factors will help you determine the most suitable insert for your application:
- Material: Consider the material you will be inserting the threaded insert into. Different materials require different types of inserts for secure connections and maximum durability.
- Load Requirements: Evaluate the load requirements of your application. If you anticipate heavy loads or significant pulling forces, choose an insert that offers high pull-out strength.
- Installation Method: Determine the available resources and tools for installation. Some inserts require specific tools or techniques, while others can be easily installed using basic hand tools.
- Insert Size: Ensure the selected insert is compatible with the hole size and depth in your material. The insert should fit snugly to provide a strong and reliable connection.
- Budget: Consider the overall budget for your project. Different types of inserts have varying costs, so it’s important to choose an option that meets your requirements without exceeding your budget.
By considering these factors and selecting the appropriate threaded inserts, you can ensure a successful installation that provides a strong and long-lasting connection in your wood projects.

Essential Tools And Materials
Installing threaded inserts in wood requires the use of certain tools and materials to ensure a smooth and successful process. By having the right equipment at hand, you’ll be able to effortlessly insert the threaded inserts and make your wood projects more durable and versatile. In this section, we will discuss the essential tools and materials needed for this installation process.
Tools For Insert Installation
- Power Drill: A power drill is an essential tool for creating holes in wood where the threaded inserts will be installed.
- Drill Bit: Choose a drill bit that matches the size of your threaded inserts. It should be slightly smaller than the diameter of the insert itself to ensure a snug fit.
- Tapping Tool: This tool helps to create threads within the drilled hole, allowing the inserts to screw in smoothly.
- Driver or Wrench: Depending on the type of threaded insert used, you will need a driver or a wrench to tighten the inserts securely into the wood.
- Sanding Block: This tool helps in smoothing any rough edges or surfaces of the wood before and after the installation process.
- Clamps: Clamps are useful for securely holding the wood piece in place while you drill and insert the threaded inserts.
- Measuring Tape: Accurate measurements are crucial for proper insertion placement, so keep a measuring tape handy.
- Protective Gear: To ensure your safety, wear protective gear such as safety glasses and gloves during the insertion process.
Materials Needed For The Process
- Threaded Inserts: Select the appropriate threaded inserts based on the size and type of wood project you are working on.
- Wood Pieces: Have the desired wood pieces ready on which you will be installing the threaded inserts.
- Adhesive (Optional): In some cases, using adhesive can provide extra stability and prevent the inserts from loosening over time.
Having the right tools and materials from the beginning will make the installation process of threaded inserts for wood much easier and more efficient. Ensure that you have all the required tools and materials on hand before starting the installation, as it will save you time and frustration down the line.
Step-by-step Installation Process
In this section, we will guide you through the step-by-step installation process of threaded inserts for wood. By following these simple instructions, you will be able to effectively and securely install threaded inserts in your wood projects, ensuring a strong and reliable connection for various applications.
Preparing The Wood Surface
Before you begin the installation process, it is crucial to prepare the wood surface to ensure that the threaded inserts can be installed properly. Here’s how to prepare the wood surface:
- Choose the location on the wood where you want to install the threaded insert.
- Mark the center of the location using a pencil or marker.
- Use a drill bit that matches the outer diameter of the threaded insert to create a pilot hole at the marked center.
- Ensure that the depth of the pilot hole matches the length of the threaded insert for a secure fit.
Installing The Threaded Inserts
Now that the wood surface is prepared, you can move on to installing the threaded inserts. Follow these steps for a successful installation:
- Begin by applying a small amount of wood glue inside the pilot hole to enhance the grip of the threaded insert.
- Insert the threaded insert into the pilot hole and use a threaded insert installation tool to drive it into the wood until it is flush with the surface.
- Ensure that the threaded insert is securely seated in the wood and aligned properly for future use.
Tips For Successful Installation
Discover the best techniques for successfully installing threaded inserts in wood. Learn the step-by-step process, from selecting the right tools to completing the installation with precision. Master the art of adding threaded inserts to wood for a seamless and secure finish.
Ensuring Proper Alignment
Proper alignment is crucial when installing threaded inserts for wood to ensure a successful installation. The following tips will help you achieve proper alignment:
- Mark the insertion point: Before installation, mark the exact point where you want to insert the threaded insert. This will serve as your guide and prevent any misalignment.
- Use a center punch: To further aid in proper alignment, use a center punch to create a small indentation at the marked insertion point. This will prevent the drill bit from wandering and help maintain accuracy during drilling.
- Select the right drill bit: Choose a drill bit with the same diameter as the external threads of the threaded insert. Using the correct size drill bit will ensure a snug fit and prevent any wobbling or loose inserts.
- Drill straight and true: During the drilling process, make sure to keep the drill bit perpendicular to the wood surface. Drill slowly and steadily to prevent any sideways movement which could lead to misalignment.
- Apply even pressure: When inserting the threaded insert, apply even pressure to ensure it goes in straight and flush with the surface. Using a T-handle or a threaded insert installation tool can help provide the necessary stability and control.
Troubleshooting Common Installation Issues
Despite following proper alignment techniques, you may encounter some common installation issues. Here are a few troubleshooting tips to overcome these challenges:
| Installation Issue | Troubleshooting Tip |
|---|---|
| Insert not going in smoothly | Check if the hole size matches the external threads of the threaded insert. Redrilling the hole using the correct size drill bit can usually resolve the issue. |
| Insert not sitting flush with the surface | Ensure that the drilled hole is deep enough to accommodate the entire length of the threaded insert. If necessary, deepen the hole using the drill bit. |
| Insert getting stripped or damaged | Be careful not to overtighten the insert during installation, as this can cause stripping or damage. Use the appropriate torque or hand-tighten with caution. |
By following these tips for proper alignment and troubleshooting common installation issues, you’ll be well-equipped to install threaded inserts for wood successfully. The key is to take your time, maintain precision, and make any necessary adjustments along the way.

Frequently Asked Questions On How To Install Threaded Inserts For Wood
Do You Glue Threaded Inserts For Wood?
Yes, threaded inserts for wood can be glued.
How Do You Attach A Threaded Rod To Wood?
To attach a threaded rod to wood, drill a hole slightly larger than the diameter of the rod. Insert the rod into the hole and secure it by tightening a nut against a washer on one side of the wood.
This creates a strong and stable connection between the threaded rod and the wood surface.
Are Threaded Inserts Stronger Than Screws?
Yes, threaded inserts are generally stronger than screws as they distribute the load more evenly. This makes them suitable for heavy-duty applications.
How Do You Install Thread Locking Inserts?
To install thread-locking inserts, follow these steps:
1. Drill a hole into the material.
2. Tap the hole with a tap tool.
3. Insert the locking insert using a thread insert installation tool.
4. Tighten the insert securely.
5. Ensure the insert is properly aligned and functioning before use.
Conclusion
Installing threaded inserts for wood can greatly improve the durability and functionality of your woodworking projects. By following the simple steps outlined in this guide, you can enhance the stability of your wood joints and create long-lasting, reliable pieces. With practice and the right tools, you can master the process of installing threaded inserts and open up new possibilities for your woodworking endeavors.


