How to Join Plywood 90 Degrees: Master the Art of Perfect Angled Connections
To join plywood at a 90-degree angle, use a combination of glue and screws or nails. First, apply wood glue to the edges, then clamp them together.
Next, insert screws or nails at regular intervals to secure the joint. Finally, allow the glue to dry before removing the clamps and sanding any rough edges. Joining plywood panels at a 90-degree angle can be a simple and effective way to create sturdy and durable woodworking projects.
Whether you’re working on a DIY furniture piece or building a cabinet, knowing how to join plywood properly is essential for achieving a professional finish. We will guide you through the process of joining plywood at a 90-degree angle using a combination of glue and screws or nails. By following these steps, you’ll be able to create strong, seamless joints that will stand the test of time.
Getting Started
Joining plywood at a 90-degree angle can be a challenging task, but with the right guidance and tools, you can achieve a seamless and sturdy joint. In this section, we will walk you through the process of getting started with joining plywood at a 90-degree angle. From choosing the right plywood to gathering the necessary tools, we’ve got you covered.
Choosing The Right Plywood
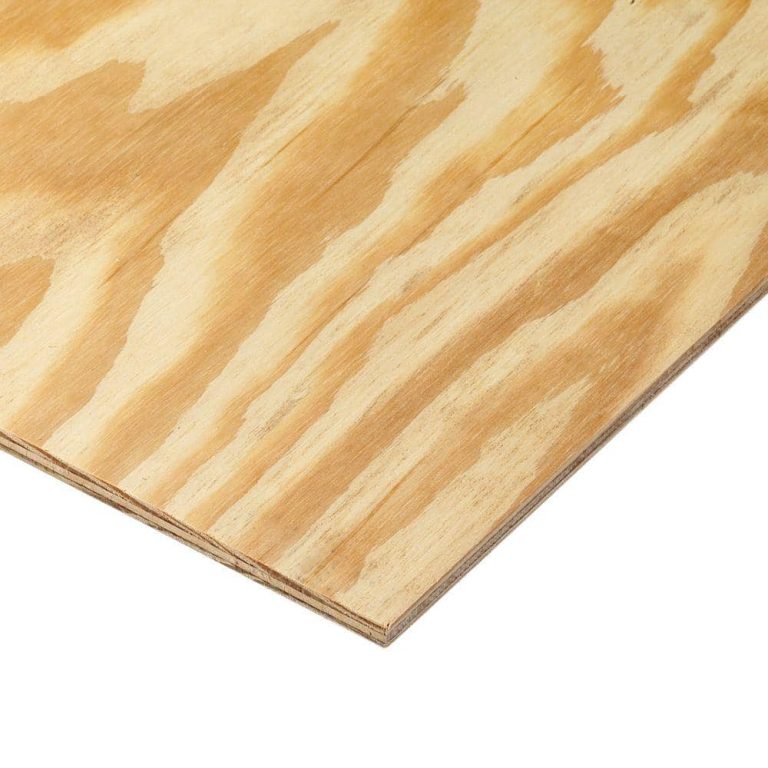
When it comes to joining plywood at a 90-degree angle, selecting the right plywood is crucial for a successful joint. Consider the following factors:
- Grade: Ensure the plywood you choose is of the highest grade possible. This will guarantee its strength and durability.
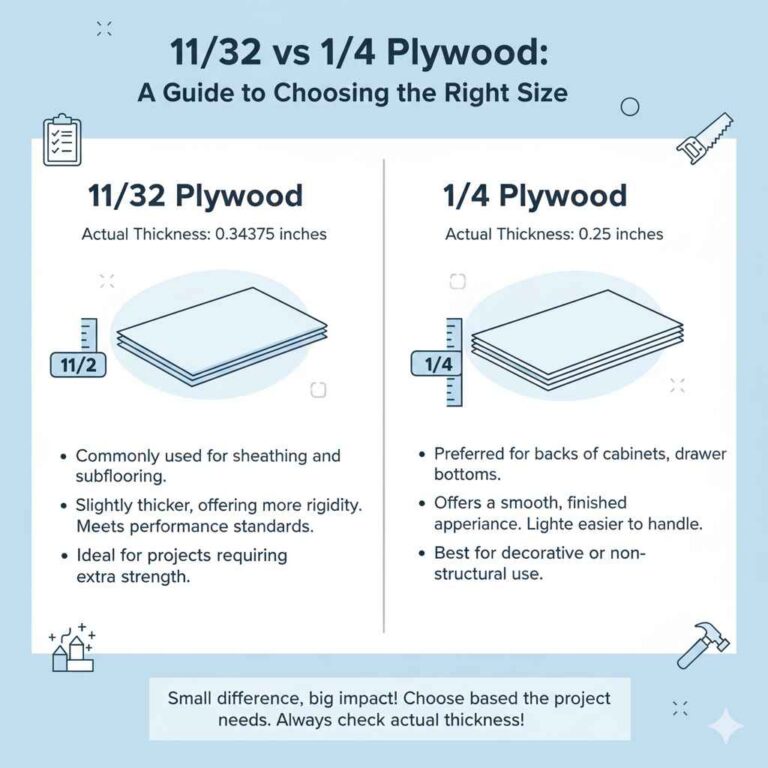
- Thickness: Opt for a thicker plywood as it provides better stability and support for the joint.
- Size: Determine the appropriate size of plywood based on the dimensions of your project.
- Type: Choose the type of plywood that suits the specific needs of your project, such as hardwood plywood or marine plywood.
Gathering The Necessary Tools
Before you begin joining plywood at a 90-degree angle, gather the necessary tools to ensure a smooth and efficient process. Here is a list of essential tools you will need:
| Tools | Description |
|---|---|
| Table Saw | A table saw will help you accurately cut the plywood to the desired size and shape. |
| Measuring Tape | Measurements are crucial for achieving precise cuts and proper alignment. |
| Clamps | Clamps will hold the plywood pieces together during the joining process, ensuring a secure bond. |
| Sanding Block | Smooth out any rough edges or imperfections in the plywood to ensure a seamless joint. |
| Wood Glue | A high-quality wood glue will provide a strong and reliable bond between the plywood pieces. |
| Screws | Depending on the size and type of plywood, you may need screws to reinforce the joint and add extra strength. |
By choosing the right plywood and gathering the necessary tools, you are now ready to move on to the next steps of joining plywood at a 90-degree angle. In the following sections, we will guide you through the cutting, gluing, and fastening processes to help you achieve a sturdy and professional-looking joint.
Understanding 90 Degree Joints
To join plywood at 90-degree angles, understanding 90-degree joints is crucial. It helps in creating strong and secure connections. Use techniques such as dado joints, rabbet joints, and pocket hole joinery to achieve sturdy and precise 90-degree joins in plywood.
When it comes to joining plywood at a 90-degree angle, it is important to understand the concept of 90-degree joints. Simply put, a 90-degree joint is an angled connection formed between two pieces of plywood that meet at a right angle. These joints are commonly used in woodworking projects, from building furniture to constructing cabinets.
Exploring Different Joint Options
There are various joint options available for joining plywood at a 90-degree angle. Each option offers its own advantages and considerations. Let’s take a closer look at some of the most common joint options:
Importance Of Accuracy In Angled Connections
Accuracy plays a crucial role when it comes to angled connections in plywood. Achieving precise measurements and angles ensures a strong and reliable joint. Here’s why accuracy is essential:
- Strength: A well-fitted joint that provides a tight and secure connection between plywood pieces will result in a stronger overall structure.
- Stability: Accurate 90-degree joints create a stable foundation for your woodworking project, preventing wobbling or shifting over time.
- Aesthetics: Precise joints give your plywood project a professional and polished appearance, enhancing its visual appeal.
To ensure accuracy in angled connections, it is important to use appropriate tools such as a square, miter saw, or a router with a 90-degree guide. Taking the time to measure and align your plywood pieces accurately before joining will yield the best results.
Now that we have explored the different joint options and understand the importance of accuracy in angled connections, let’s dive deeper into how to join plywood at a 90-degree angle.
Joining Plywood At 90 Degrees
There are several techniques you can employ to join plywood at a 90-degree angle. Some of the most common methods include:
- Butt Joint: This is the simplest and most basic form of joining two plywood pieces. It involves placing the edges of the plywood together and connecting them with screws, nails, or glue.
- Dovetail Joint: In this joint, notches in the shape of interlocking “tails” and “pins” are cut into the plywood edges, creating a strong and decorative connection.
- Miter Joint: A miter joint involves cutting the ends of two plywood pieces at a 45-degree angle, resulting in a clean and seamless joint.
- Biscuit Joint: This joint involves cutting a semi-circular slot in the ends of the plywood and inserting a biscuit-shaped piece of wood or composite material, creating a strong bond.
Remember, whatever joint option you choose, accuracy and precision are paramount. Take the necessary measurements, use appropriate tools, and ensure a snug fit for a successful 90-degree joint.
Techniques For Joining Plywood At 90 Degrees
When it comes to woodworking projects, knowing how to join plywood at 90 degrees is essential for creating sturdy and professional-looking structures. There are several techniques for achieving this, each with its own set of advantages and considerations. Whether you’re a beginner or a seasoned woodworker, mastering these techniques can elevate the quality of your projects. Below, we delve into three effective methods for joining plywood at 90 degrees.
Using Pocket Holes
Pocket hole joinery is a popular method for joining plywood at 90 degrees due to its simplicity and strength. By using a pocket hole jig, you can create angled holes in one piece of plywood, allowing screws to be driven into the adjoining piece at the desired angle. This method is ideal for creating strong and secure joints, making it suitable for a wide range of woodworking projects, from cabinets to furniture.
Utilizing Dowel Joints
Dowel joints offer a classic and reliable way to join plywood at 90 degrees. This technique involves drilling aligned holes into the plywood pieces, and then inserting dowels coated in adhesive. Once the adhesive dries, the dowels effectively lock the pieces together, providing a clean and durable joint. Dowel joints are favored for their ability to maintain alignment during assembly and their aesthetically pleasing finish, making them a go-to choice for many woodworkers.
Mastering The Art Of Mortise And Tenon Joints
Mortise and tenon joints are a traditional and time-honored method for joining plywood at 90 degrees. This technique involves creating a mortise (a rectangular slot) in one piece of plywood and a tenon (a projecting piece) in the other. When fitted together and secured with adhesive or pegs, mortise and tenon joints create a robust and visually appealing connection. While mastering this method may require more precision and skill, it offers unparalleled strength and longevity for your woodworking projects.
Tips For Achieving Perfect Angled Connections
Joining plywood at a 90-degree angle can be a challenging task, but with the right techniques, it can be accomplished easily. In this section, we will discuss three essential tips that will help you achieve perfect angled connections for your plywood projects. These tips include ensuring proper clamping, selecting the correct adhesives, and achieving clean and smooth angled surfaces.
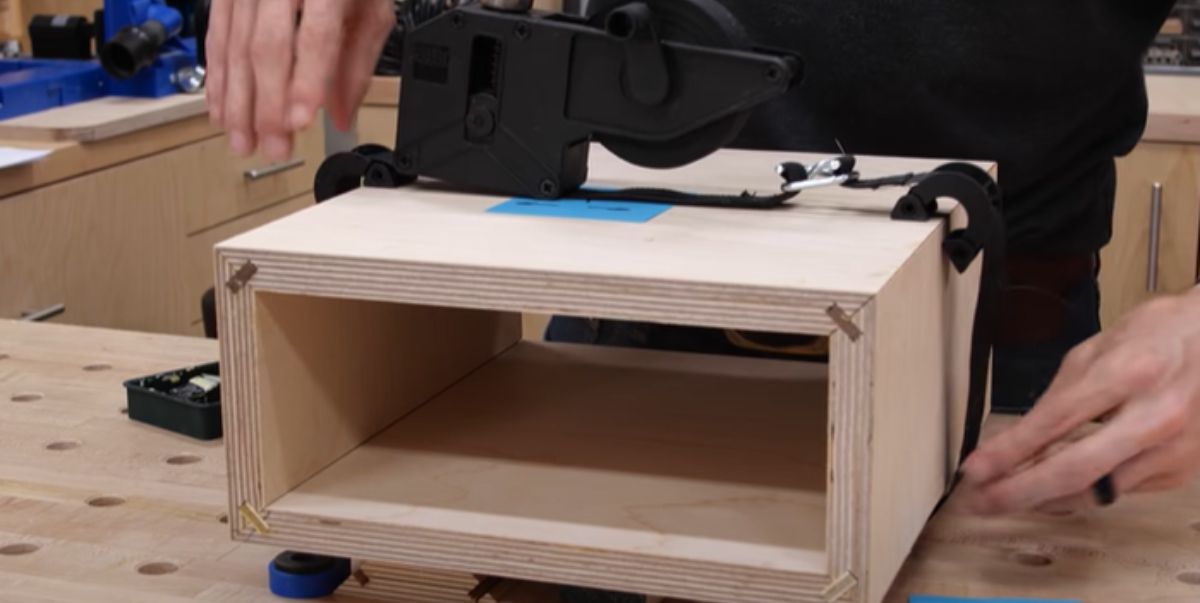
Ensuring Proper Clamping
Proper clamping is crucial to ensure a strong and secure joint when joining plywood at a 90-degree angle. Here are a few tips to help you achieve the best clamping results:
- Use clamps that are suitable for the width of your plywood. Ensure that the clamps provide enough pressure without causing damage to the wood.
- Position the clamps diagonally across the joint. This will help create an even distribution of pressure and maintain the 90-degree angle.
- Apply pressure gradually when tightening the clamps. This will prevent any sudden movement or shifting of the plywood pieces.
Selecting The Correct Adhesives
Choosing the right adhesive is essential for achieving a strong and durable joint when joining plywood at a 90-degree angle. Consider the following tips when selecting adhesives:
- Opt for a high-quality wood adhesive that is specifically designed for plywood. These adhesives have superior bonding strength and flexibility.
- Ensure that the adhesive you choose is suitable for both interior and exterior applications, depending on the project’s requirements.
- Apply the adhesive evenly and generously on the mating surfaces of the plywood to ensure a solid bond.
Achieving Clean And Smooth Angled Surfaces
Obtaining clean and smooth angled surfaces is vital for achieving a professional finish when joining plywood at a 90-degree angle. Consider the following tips for a seamless result:
- Sand the angled edges of the plywood before joining them. This will help remove any imperfections or rough surfaces that may affect the joint’s quality.
- Ensure that the angled surfaces are precisely aligned before applying adhesive and clamping them together. This will help maintain the desired 90-degree angle.
- Wipe away any excess adhesive that squeezes out during the clamping process. Use a damp cloth or sponge to achieve clean and tidy joints.
Finishing Touches
Joining plywood at a 90-degree angle can be achieved with the right techniques. Learn how to create seamless connections for those finishing touches to your woodworking projects.
Sanding And Smoothing The Joints
Once you have successfully joined the plywood at a 90-degree angle, the next step is to give it a professional-looking finish. This involves sanding and smoothing the joints, providing a seamless and polished appearance.
Start by using coarse-grit sandpaper, such as 80 grit, to smooth out any rough edges or imperfections on the joined plywood. Sand in a back-and-forth motion, exerting light pressure. Be sure to wear protective gloves and a dust mask to shield yourself from any potentially harmful particles.
After you have achieved a smooth surface with the coarse-grit sandpaper, it’s time to move on to finer-grit sandpaper, like 120 or 150 grit. This will further refine the joints and create a more even texture. Remember to sand in the same back-and-forth motion, ensuring there are no uneven patches or bumps.
Once you are satisfied with the smoothness of the joints, use a damp cloth or sponge to wipe away any dust or debris. This will help ensure a clean surface for the next step in the finishing process.
Applying A Professional Finish
Applying a professional finish is crucial in enhancing the overall appearance and durability of your joined plywood. This final step will give your project a polished and refined look, as well as protect it from moisture, scratches, and other damage.
Before applying any finish, thoroughly clean the surface of the plywood to remove any remaining dust or debris. This can be done using a tack cloth or a clean, damp cloth. Allow the surface to dry completely before proceeding.
Option 1: Paint
If you prefer a painted finish, choose a high-quality primer designed for plywood. Apply a thin and even coat of primer using a brush or roller, following the manufacturer’s instructions. Once the primer has dried, lightly sand the surface with fine-grit sandpaper to remove any brush strokes or imperfections.
Next, choose a topcoat paint that suits your desired aesthetic and the purpose of the joined plywood. Apply two to three thin coats, allowing each coat to dry completely before applying the next. This will ensure a smooth and consistent finish. Finally, let the paint cure according to the manufacturer’s instructions before using or installing the plywood.
Option 2: Varnish or Sealant
If you prefer a natural wood finish, varnish or sealant can be an excellent choice. Ensure the plywood is clean and dry before starting the application process. Use a brush or a clean cloth to apply a thin and even coat of the varnish or sealant, following the product’s instructions.
Allow the first coat to dry completely, then lightly sand the surface with fine-grit sandpaper to remove any raised grain or imperfections. Apply additional coats, sanding in between, until you achieve your desired level of protection and sheen. Be sure to let the final coat cure fully before using the plywood.
By following these steps to sand and smooth the joints and applying a professional finish, you can ensure that your joined plywood not only looks impeccable but also stands the test of time. Whether you opt for a painted or natural wood finish, your plywood project will be ready to impress!
Frequently Asked Questions On How To Join Plywood 90 Degrees
How Do You Join Wood At A 90 Degree Angle?
To join wood at a 90-degree angle, use a method like butt joints, miter joints, or pocket hole joinery. These techniques create strong and secure connections between the wood pieces, ensuring stability and durability in your projects.
How Do You Join Plywood At Angles?
To join plywood at angles, use a miter saw for precise cutting and join the pieces with wood glue and screws for a strong bond. Ensure the angles are accurate and smooth for a tight fit. Sand the edges for a seamless finish.
How Do You Join Two Pieces Of Wood Lengthwise?
To join two pieces of wood lengthwise, use these steps:
1. Apply wood glue to the edges of the wood.
2. Align the pieces and clamp them together.
3. Drill holes for dowels or screws.
4. Insert dowels or drive screws to secure the joint.
5. Allow the glue to dry completely before removing the clamps.
How Do You Join Two Pieces Of Wood In The Corner?
To join two pieces of wood in the corner, use a technique called miter joint. Cut the ends at a 45-degree angle and fit them together. Apply wood glue to secure the joint. Finally, reinforce with screws or nails for added strength.
Conclusion
Joining plywood at a 90-degree angle can be achieved using various methods such as biscuits, dowels, or screws. Each method has its strengths and weaknesses, so choose the one that best fits your project. By following the right techniques, you can ensure a strong and durable joint for your woodworking projects.