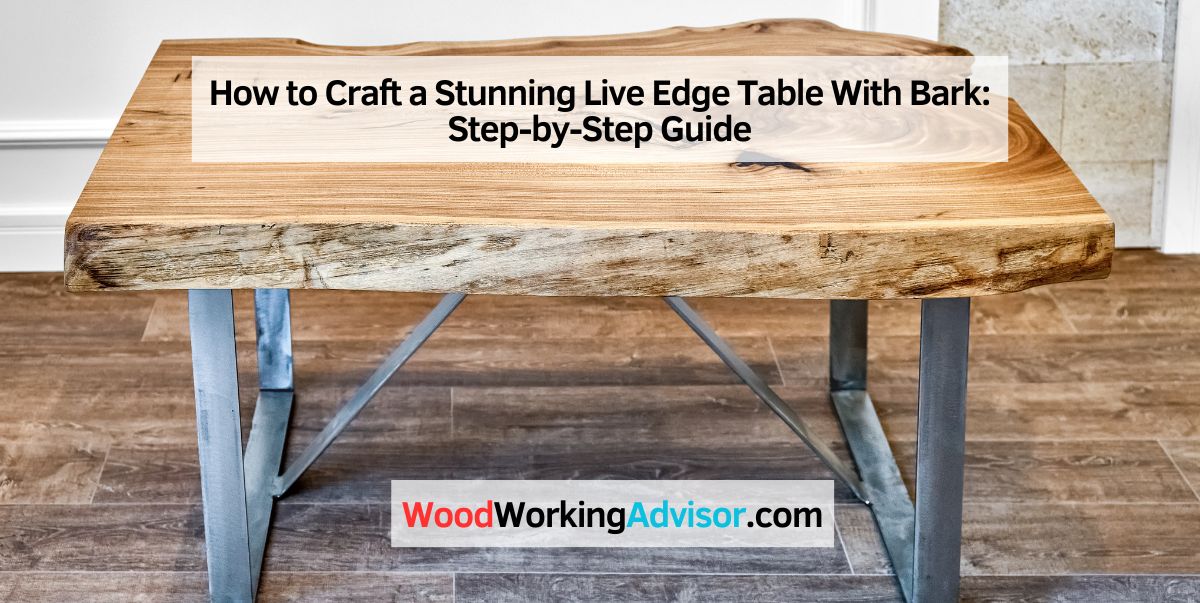
How to Make a Live Edge Table With Bark
To make a live edge table with bark, start by selecting a suitable piece of wood with the desired live edge and bark intact. Carefully clean and sand the wood, ensuring the bark remains intact during the process.
Apply a protective finish to the wood and allow it to dry thoroughly. Finally, attach sturdy legs to complete your live edge table. Live edge tables with bark offer a unique and rustic touch to any home decor. The natural beauty of the wood’s live edge and the presence of bark can bring a touch of nature indoors.
Creating your own live edge table with bark is an exciting and rewarding DIY project. However, it requires careful planning and preparation to ensure the preservation of the wood’s natural elements. We will guide you through the step-by-step process of making a live edge table with bark, helping you to create a stunning and one-of-a-kind piece of furniture for your home.
Choosing The Right Wood
Selecting the right wood for crafting a live edge table with bark is crucial. Choosing a durable and visually appealing wood species such as walnut or maple can enhance the natural beauty of the table. Consider the wood’s grain pattern, color, and strength to achieve the desired aesthetic and functionality.
When it comes to creating a live edge table with bark, one of the most crucial aspects is choosing the right wood. The type of wood you select will have a significant impact on the overall appearance and durability of your table.
Selecting The Live Edge Slab
The first step in choosing the right wood for your live edge table is selecting the live edge slab. This slab is what will form the tabletop and provide that unique, natural edge that gives live edge furniture its charm.
When selecting the slab, there are a few factors to consider:
- Size: Measure the space where you plan to place your table and choose a slab that fits proportionately. Keep in mind the length, width, and thickness of the slab.
- Species: Different wood species have distinct grain patterns and colors. Consider the aesthetic you want to achieve and choose a wood species that aligns with your vision, like oak, walnut, maple, or cherry.
Take a look at this table for a quick comparison of popular wood species:
| Wood Species | Grain Pattern | Color |
|---|---|---|
| Oak | Straight or wavy | Light to medium brown |
| Walnut | Straight, wavy, or curly | Dark brown to purplish-black |
| Maple | Straight, wavy, or curly | Light to medium brown |
| Cherry | Straight or curly | Reddish-brown |
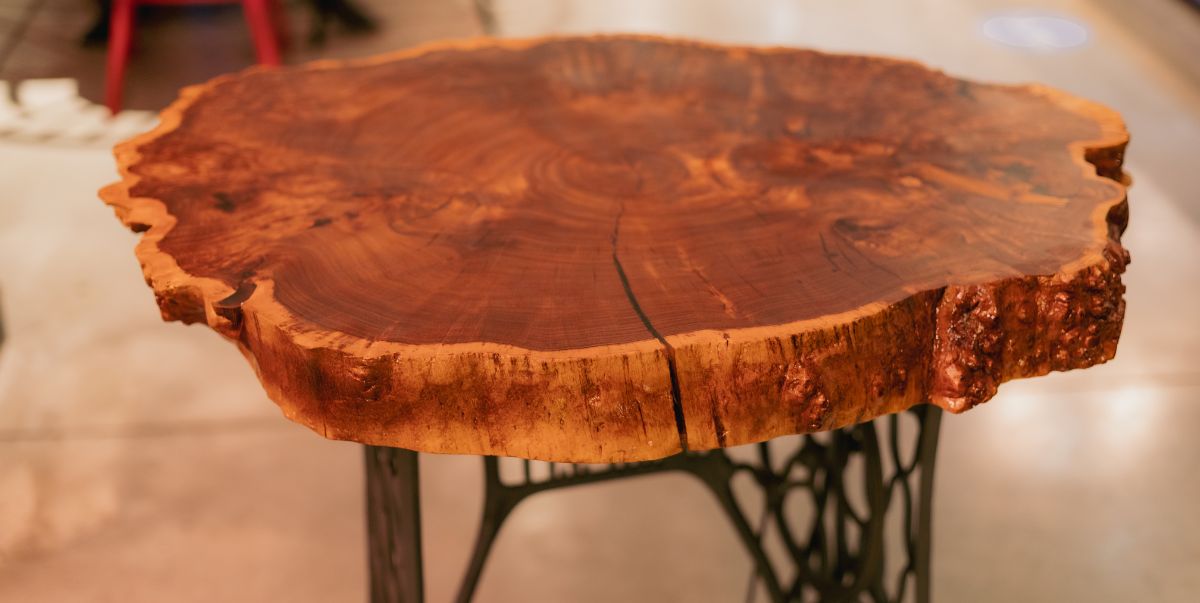
Considering The Bark
In addition to the live edge, the presence of the bark on the slab can add a unique touch to your table. The bark adds an organic and rustic appeal, creating a connection to nature.
However, it’s essential to consider the bark’s condition and stability:
- Integrity: Ensure that the bark is intact and firmly attached to the wood slab. Loose or flaky bark could lead to issues such as peeling or cracking over time.
- Treatment: Depending on your preferences, you may choose to keep the bark in its natural state or apply a protective sealant to preserve it and prevent potential decay.
By carefully selecting a live edge slab and considering the bark’s condition, you can ensure that the wood you choose will result in a stunning live edge table with bark.
Preparing The Materials
Making a live edge table with bark is a rewarding and creative project that adds a rustic touch to your home decor. Before you can begin crafting your table, it’s important to properly prepare the materials. This includes gathering the necessary tools and equipment, as well as inspecting and cleaning the slab you’ll be using.
Gathering Tools And Equipment
Before starting your live edge table project, you’ll need to gather a few essential tools and equipment. Having everything you need at hand will ensure a smooth and efficient process.
| Tools | Equipment |
|---|---|
|
|
Inspecting And Cleaning The Slab
Once you have gathered all the necessary tools and equipment, it’s time to inspect and clean the slab you’ll be using for your live edge table. This step is crucial to ensure the quality and longevity of your finished piece.
- Start by carefully examining the slab for any cracks, knots, or other imperfections. These natural aspects are what make live edge tables unique, but you’ll want to ensure they won’t compromise the structural integrity.
- Use a hand saw or chainsaw to trim off any excess bark or uneven edges. This will give your table a cleaner and more polished appearance.
- Next, use a router to smoothen the edges of the slab. Pay close attention to any areas where the bark may have separated from the wood, as these should be carefully blended to maintain the natural aesthetic.
- With the slab properly cleaned and trimmed, it’s time to sand it. Use an orbital sander with coarse-grit sandpaper to remove any rough spots or blemishes. Gradually switch to finer-grit sandpaper for a smoother finish.
- Remember to wear safety goggles, gloves, and a dust mask while working with power tools and sanding. These precautions will protect you from any potential hazards or fine dust particles.
Designing The Table
Welcome to the world of live edge table design! Crafting a live edge table with bark is a unique and beautiful way to bring nature into your home. When it comes to designing the table, there are several key factors to consider in order to create a stunning piece that fits seamlessly into your space. Let’s dive into the process of designing your live edge table.
Deciding On Table Dimensions
When deciding on the dimensions for your live edge table, consider the space where it will be placed. Take accurate measurements to ensure the table fits perfectly and allows for comfortable movement around it. Additionally, think about how many people you’d like the table to accommodate. Whether it’s a cozy two-person table or a grand dining table, the dimensions will play a crucial role in the overall design.
Creating A Blueprint
Before beginning construction, it’s important to create a detailed blueprint for your live edge table. Consider the shape and style that will best complement your space. A blueprint can help visualize the finished product and allows you to make necessary adjustments before starting the construction phase. Ensure that the blueprint includes measurements, materials, and any specific design features you want to incorporate.
Crafting The Live Edge Table
Crafting the Live Edge Table involves various steps such as cutting and shaping the slab, as well as finishing and polishing the table to perfection. In this section, we will delve into these steps in detail and guide you through the process of creating a stunning Live Edge Table with bark.
Cutting And Shaping The Slab
When it comes to crafting a Live Edge Table, one of the most crucial steps is cutting and shaping the slab. Here’s a breakdown of how to achieve the desired shape and size for your table:
1. Measure and mark the desired dimensions on the slab using a tape measure and marker.
2. Secure the slab firmly on a workbench or sawhorse using clamps to ensure stability during the cutting process.
3. Use a chainsaw or a reciprocating saw with a carbide-tipped blade to make the initial cuts along the marked lines. Take caution and wear appropriate safety gear during this step.
4. Next, use an angle grinder with a specialized grinding disc to refine the shape and edges of the slab. This allows you to create smooth and rounded edges that enhance the natural beauty of the Live Edge Table.
5. Carefully remove any rough or uneven portions of the slab using a belt sander or handheld planer. This step is crucial to ensure a level surface for your table.
Finishing And Polishing
Once you have successfully shaped the slab, it’s time to focus on finishing and polishing the Live Edge Table:
1. Start by sanding the entire surface of the table using progressively finer grit sandpaper. Begin with a coarse grit and gradually move towards a finer grit for a smooth and polished finish.
2. Pay extra attention to the live edge and bark areas, as these sections require special care to highlight their unique features. Use a handheld sanding block for precise sanding in these areas.
3. After sanding, apply wood stain or finish of your choice to enhance the natural color and grain of the slab. Use a brush or cloth to evenly distribute the stain and let it dry according to the manufacturer’s instructions.
4. Once the stain is dried, apply multiple coats of clear varnish or polyurethane to protect the table and provide a glossy finish. Allow each coat to dry completely before applying the next one.
5. To bring out the natural glow of the Live Edge Table, complete the process by buffing the surface with a soft cloth. This step adds a final touch of elegance to your masterpiece.
Crafting a Live Edge Table involves precision and attention to detail. By following these cutting, shaping, finishing, and polishing steps, you can create a stunning piece of furniture that showcases the raw beauty of the wood with its live edge and bark intact.
Final Touches
After successfully completing the major steps of creating a live edge table with bark, it’s time to focus on the final touches. These final steps will give your table a polished finish and ensure its durability for years to come.
Attaching Table Legs
Attaching the table legs is an essential step that provides stability and support to your live edge table. Using a drill and screws, carefully attach each leg to the designated corners of the table. Make sure to align the legs evenly and double-check their levelness using a carpenter’s level. This will ensure that your table stands firm and steady.
Applying Protective Finish
Applying a protective finish is crucial to enhance the natural beauty of the wood and shield it from potential damage. There are various options for protective finishes such as polyurethane, varnish, or tung oil. Choose a finish that suits your aesthetic preferences and follow the manufacturer’s instructions for proper application.
Before applying the protective finish, lightly sand the entire surface of your table using fine-grit sandpaper. This will help smoothen any rough patches and ensure an even application of the finish. Once the sanding is complete, use a brush or a lint-free cloth to evenly coat the entire surface with the protective finish. Allow ample drying time between each coat, and apply multiple layers for optimal protection.
Frequently Asked Questions Of How To Make A Live Edge Table With Bark
Will Bark Stay On A Live Edge Table?
Yes, the bark will stay on a live edge table.
How Do You Seal Bark On A Live Edge Table?
To seal the bark on a live edge table, follow these steps: clean the surface, apply a wood sealer, let it dry, sand the edges, and then seal it again for added protection. Regular maintenance will help preserve the natural beauty of the table.
Can You Leave The Bark On A Live Edge River Table?
Yes, leaving the bark on a live edge river table is possible. However, it requires careful sealing to prevent decay and insect infestation.
What Is The Best Wood For A Live Edge Table?
The best wood for a live edge table is typically hardwoods like oak, walnut, or maple, as they offer durability and beautiful natural grains. These woods are known for their strength, stability, and ability to handle the unique live edge design.
Conclusion
Incorporating live edge with bark into your table design adds a natural, organic touch to your space. By following the steps outlined in this guide, you can create a unique, eye-catching piece that brings the beauty of the outdoors inside.
Experiment with different wood species and finishes to personalize your live edge table with bark and showcase your woodworking skills. Elevate your home decor with this stunning and distinctive furniture piece, and enjoy the satisfaction of crafting something truly one-of-a-kind.