How to Make a Rolling Pin
To make a rolling pin, gather a cylindrical wooden dowel and sand it down until smooth.
Choosing The Right Wood
To create a rolling pin, it’s crucial to select the right wood. Opt for harder woods like maple or cherry for durability and a smooth finish. Avoid soft woods as they may dent or splinter under pressure, impacting the quality of your baked goods.
When it comes to making a rolling pin, one of the most crucial decisions you need to make is choosing the right wood. The type of wood you select can greatly impact the functionality and durability of your rolling pin. In this section, we will explore the differences between hardwood and softwood, as well as the importance of grain orientation.
Hardwood Vs. Softwood
Hardwood and softwood refer to the classification of wood based on its physical characteristics, rather than its hardness. While hardwood is often associated with being harder, it’s important to note that there are exceptions to this generalization. Here are some key differences between the two:
| Hardwood | Softwood |
|---|---|
| Derived from deciduous trees | Derived from coniferous trees |
| Generally denser and more durable | Typically less dense and less durable |
| Resistant to wear and tear | More prone to dents and scratches |
When it comes to choosing the wood for your rolling pin, it’s recommended to opt for hardwood. Hardwoods like maple, beech, and cherry are commonly used due to their resilience and ability to withstand the pressure exerted during rolling. These woods also have a smooth grain, which reduces the likelihood of sticking to the dough.
Grain Orientation
Aside from the type of wood, grain orientation is another essential factor to consider. The grain refers to the direction of the wood fibers, which can either run parallel or perpendicular to the length of the rolling pin.
For optimal results, it is advisable to choose a rolling pin with the grain running parallel to its length. This orientation helps to prevent the rolling pin from warping or splitting over time, ensuring its longevity. Additionally, a parallel grain allows for smooth and even rolling, providing better control over the dough’s thickness and consistency.
In conclusion, selecting the right wood and grain orientation are vital aspects of making a rolling pin. By choosing a hardwood with a parallel grain, you can ensure that your rolling pin is both durable and functional, guaranteeing many years of hassle-free baking.
Preparing The Wood
If you’re looking to make your own rolling pin, one of the first steps is to prepare the wood you’ll be using. This involves cutting the wood to the right size and then smoothing and sanding it to create a smooth, even surface.
Cutting The Wood To Size
Start by selecting a piece of hardwood for the rolling pin. Maple, birch, and cherry are popular options due to their durability and resistance to moisture. It’s important to choose a well-seasoned piece of wood to avoid any warping or cracking.
Using a measuring tape, mark the desired length for your rolling pin. Typically, a length of around 18-20 inches works well. Use a pencil to draw a straight line across the wood at the marked length.
Now, it’s time to cut the wood. Use a saw, preferably a handsaw or a jigsaw, to carefully cut along the marked line. Take your time and make smooth, even cuts to ensure a straight edge. If you have access to a miter saw or a band saw, these tools can provide even more precision.
Once you’ve made the initial cut, double-check the length and make any adjustments if necessary. Remember, it’s always better to cut a little longer than needed, as you can trim off any excess later.
Smoothing And Sanding
After cutting the wood to size, the next step is to smooth and sand the surface. This is crucial for creating a rolling pin that glides effortlessly over dough.
Start by using a handheld plane or a rasp to remove any rough edges and uneven areas on the wood. Work slowly and carefully, using light pressure to avoid taking off too much material.
Once the rough spots are taken care of, it’s time to sand the wood. Begin with a coarse-grit sandpaper (around 80 grit) to remove any remaining imperfections. Sand in the direction of the grain to avoid scratching the wood.
Gradually move to finer-grit sandpaper (around 120 grit, then 220 grit) to create a smooth finish. Sanding in between each grit helps to refine the surface further. Finally, wipe away any dust with a clean cloth or tack cloth.
At this point, you should have a beautifully prepared piece of wood ready to be transformed into a rolling pin. The next step is to shape and finish the wood to your liking, which we’ll cover in the next section.
Shaping The Rolling Pin
Shaping the rolling pin is an essential step in creating a functional and beautiful kitchen tool. The process involves meticulously crafting the handles and refining the body on a lathe to achieve the desired shape and smoothness. Let’s delve into the details of shaping the rolling pin.
Creating The Handles
To start shaping the rolling pin, the handles must be carefully crafted. Begin by selecting high-quality wood such as maple or cherry. Using a saw, cut the wood into two equal-length pieces. Carve out the handles using a chisel, ensuring a comfortable grip and symmetrical design. It’s vital to sand the handles to a smooth finish, providing a pleasing tactile experience for the user.
Turning The Body On A Lathe
Once the handles are shaped, the body of the rolling pin is turned on a lathe. Select a suitable wood piece and secure it onto the lathe. Gradually shape the wood using gouges and chisels, ensuring an even and cylindrical form. Pay attention to the dimensions and smoothness of the body, as it directly impacts the functionality of the rolling pin. The lathe allows for precise shaping, resulting in a professional finish.
Adding Finishing Touches
After constructing your rolling pin, it’s important to add the finishing touches that will not only enhance its functionality but also make it visually appealing. These final steps will take your homemade rolling pin to the next level, ensuring a smooth and enjoyable baking experience.
Sealing The Wood
Before moving on to the decorative elements, it’s crucial to seal the wood of your rolling pin to protect it from moisture and prolong its lifespan. Sealing the wood also prevents any unwanted flavors or odors from being absorbed into your dough.
To seal the wood, start by sanding down the rough edges and surfaces using fine-grit sandpaper. This will create a smooth surface for the sealer to adhere to. Next, choose a food-safe sealer such as mineral oil or beeswax. Apply a thin layer of the sealer to the entire surface of the rolling pin using a clean cloth or brush.
Allow the sealer to dry completely according to the instructions on the product packaging. This step ensures that the wood is adequately protected and ready for the next phase of the finishing process.
Decorative Elements
Adding decorative elements to your rolling pin not only adds a personal touch but also makes it an attractive kitchen utensil. There are numerous creative options to consider, depending on your personal style and preferences.
One popular and simple way to add a decorative element is by carving patterns or designs onto the wooden surface of the rolling pin. Use a carving tool or a woodburning pen to create intricate or simple designs that suit your aesthetic. This allows for endless customization and a unique rolling pin that stands out in your kitchen.
If carving is not your cup of tea, there are other ways to add decorative elements. Consider wrapping the handles of the rolling pin with colorful twine or ribbons to add a pop of color. You can also attach small charms or beads to the ends of the rolling pin to create a whimsical and playful look.
Remember to ensure that any decorative elements you choose are securely attached and won’t interfere with the functionality of the rolling pin. You want the rolling pin to be both visually appealing and functional.
By following these steps and adding the finishing touches to your homemade rolling pin, you’ll have a unique and beautifully crafted kitchen tool that will make your baking endeavors even more enjoyable. Get creative, have fun, and let your imagination run wild as you personalize your rolling pin to perfectly suit your style!
Testing And Using Your Rolling Pin
Now that you have successfully crafted your homemade rolling pin, it’s time to put it to the test and use it for your baking endeavors. In this section, we will discuss how to check for smoothness, as well as the joy of baking with your very own creation.
Checking For Smoothness
Before using your rolling pin, it’s important to ensure that it is smooth and free from any imperfections that could affect your dough. To check for smoothness, run your hand along the surface of the rolling pin, paying close attention to any rough patches or irregularities.
If you notice any rough spots, you can gently sand them down using fine-grit sandpaper. Remember to be cautious and avoid removing too much material, as this may alter the shape and balance of your rolling pin.
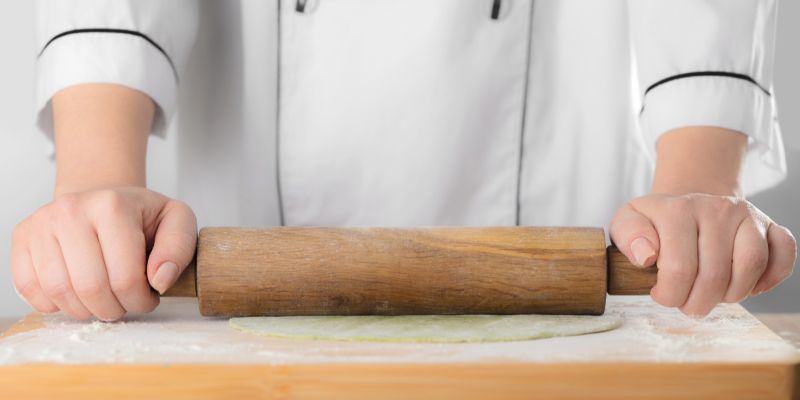
Baking With Your Homemade Rolling Pin
Now that your rolling pin is smooth and ready to be used, it’s time to dive into the joy of baking. Here are a few tips to maximize your baking experience with your homemade rolling pin:
- Use a dusting of flour: Dust your work surface and rolling pin with a light coating of flour to prevent your dough from sticking.
- Roll with gentle pressure: Apply even and gentle pressure while rolling your dough to achieve an even thickness. Avoid pressing too hard, as it may result in an unevenly rolled dough.
- Rotate and flip: As you roll your dough, be sure to rotate and flip it periodically. This ensures that the dough is rolled evenly from all angles, resulting in a uniform thickness.
- Chill your rolling pin: To prevent the dough from sticking to your rolling pin, you can chill it in the refrigerator for a few minutes before use. This can be particularly helpful when working with sticky or delicate doughs.
- Clean and store properly: After each use, make sure to clean your rolling pin with warm water and mild soap. Avoid soaking it in water for an extended period, as this may damage the wood. Once clean, allow it to air dry completely before storing it in a dry place.
By following these tips and making the most of your homemade rolling pin, you’ll be able to achieve perfectly rolled dough for all your baking creations. Enjoy the satisfaction that comes with using a tool you crafted yourself!
Credit: www.worldmarket.com
Frequently Asked Questions On How To Make A Rolling Pin
Can You Make Your Own Rolling Pin?
Yes, you can make your own rolling pin. Get a cylindrical piece of wood, smooth it, and shape the ends.
What Kind Of Wood Do You Use To Make A Rolling Pin?
A rolling pin is typically made from hardwood, such as maple or beech, for its durability and smoothness.
What Can I Use As A Rolling Pin If I Don’t Have One?
You can use a sturdy bottle or a smooth, cylindrical object like a glass to roll out dough. Another option is using a clean, sanitized can from your pantry. These alternatives make good makeshift rolling pins in a pinch.
How Do You Improvise A Rolling Pin?
To improvise a rolling pin, you can use a smooth cylindrical object like a glass bottle or a PVC pipe. Make sure it’s clean and dry before using it to roll out dough.
Conclusion
In crafting your own rolling pin at home, you can create a truly unique and personalized kitchen tool that reflects your creativity and style. By following the simple steps outlined in this guide, you can experience the joy and satisfaction of using a rolling pin that you’ve made with your own hands.
Embrace the process and enjoy the rewarding results of your craftsmanship!