How to Make a Wooden Arch: DIY Guide for Beginners
To make a wooden arch, measure and cut the desired length and shape of the wood, then join the pieces together with screws or glue.
Introduction To Wooden Arch Crafting
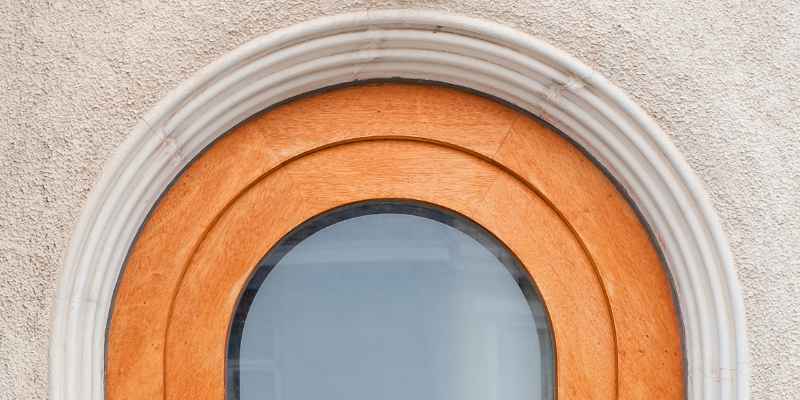
Making a wooden arch can add a touch of elegance and charm to any outdoor space. It serves as a beautiful entrance to a garden, a pathway, or a decorative element in a backyard. Crafting a wooden arch provides an opportunity to showcase creativity and woodworking skills while enhancing the visual appeal of the surroundings. In this guide, we will explore the process of creating a wooden arch, starting with the choice of wood and the necessary tools and materials.
Why Choose Wood?
Wooden arches are favored for their natural beauty, durability, and versatility. Wood provides a classic, rustic look that complements various outdoor settings. It can be easily customized to match the existing decor and can withstand different weather conditions. Moreover, wood offers a sustainable and eco-friendly option for crafting an arch, making it an environmentally conscious choice.
Tools And Materials Needed
Before embarking on the wooden arch crafting journey, it is essential to gather the necessary tools and materials. The following table outlines the tools and materials required for this project:
| Tools | Materials |
|---|---|
|
|
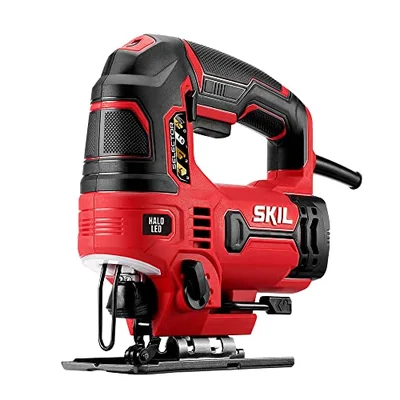
SKIL 6 Amp Corded Jig Saw
A variable-speed jigsaw is the easiest way for a beginner to cut the curved arch sections cleanly, without the learning curve of a band saw.
Best for: cutting the curved arch pieces and mitered joints
Why we picked it: variable speed and orbital action make curved cuts in 2x lumber controllable for a first-time builder
Main drawback: corded, so you’ll need an extension cord if working away from an outlet
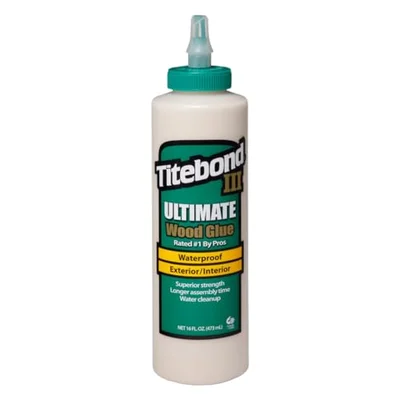
Titebond III Wood Glue
Best for: gluing the mitered arch joints before screwing
Why we picked it: fully waterproof, so glued joints hold up outdoors
Main drawback: shorter open time than PVA glue, so dry-fit first

HORUSDY Bar Clamps (8-Pack)
Best for: holding mitered joints tight while glue cures
Why we picked it: having several clamps on hand lets you glue up multiple joints at once instead of one at a time
Main drawback: plastic frame, not rated for the heaviest clamping pressure
As an Amazon Associate we earn from qualifying purchases.
Designing Your Arch
When it comes to designing your wooden arch, there are several key considerations to keep in mind. From selecting the right wood to drawing your design, each step plays a crucial role in the overall outcome of your project. In this section, we will explore the essential elements of designing your wooden arch, providing you with the knowledge and guidance needed to create a beautiful and structurally sound arch for your space.
Selecting The Right Wood
Choosing the right type of wood is essential for the strength and durability of your wooden arch. Hardwoods like oak and maple are ideal for their strength, while softwoods such as pine and cedar offer a more lightweight option. Consider the aesthetic appeal, structural integrity, and weather resistance of the wood to ensure it is suitable for your specific needs.
Drawing Your Design
Before you begin construction, it is crucial to have a clear and detailed design in place. Start by sketching out the desired shape and dimensions of your arch on paper. Consider the overall style, proportions, and any decorative elements you wish to incorporate. This drawing will serve as a blueprint for the construction phase, guiding you through the process and ensuring precise execution of your vision.
Safety First: Preparing Your Workspace
Before diving into the process of making a wooden arch, it’s crucial to ensure that your workspace is set up with safety as the top priority. Taking the necessary precautions and preparing your tools and equipment will help you carry out the project with peace of mind.
Safety Gear
Wearing the appropriate safety gear is essential when working with wood and power tools. Protective eyewear, ear defenders, and dust masks are indispensable for safeguarding your eyes, ears, and respiratory system from potential hazards. Additionally, gloves can provide a better grip and protect your hands from splinters and sharp edges.
Organizing Your Tools
Organizing your tools not only saves time but also reduces the risk of accidents. Keep all sharp cutting tools, such as chisels and saws, in a designated area, and ensure they are properly secured when not in use. Power tools should be inspected for any damage or defects before use, and cords should be free of tangles to prevent tripping.
Cutting The Wood
To make a wooden arch, the first step is cutting the wood to the required size. Use a saw to cut the wood into the shape and size needed for the arch. Make sure to measure accurately to ensure a precise fit.
Sand the edges to remove any roughness and create a smooth finish.
When it comes to making a wooden arch, cutting the wood is an essential step that requires precision and accuracy. The success of the project largely depends on how well you cut the wood. In this section, we’ll cover some tips and techniques for cutting the wood that will help you achieve a smooth and flawless finish.
Measuring Twice, Cutting Once
One of the golden rules of woodworking is to measure twice and cut once. This means that you should always double-check your measurements before making any cuts. Taking the time to measure accurately can save you from making costly mistakes that can ruin your entire project. Use a tape measure or ruler to measure the length and width of the wood you need to cut. Mark the wood with a pencil, and make sure the lines are straight and clear.
Techniques For Smooth Cuts
To achieve smooth cuts, you need to use the right tools and techniques. A handsaw or a circular saw is ideal for cutting wood. Make sure the blade is sharp and clean to avoid splintering the wood. Clamp the wood to a workbench or sawhorse to keep it steady while you cut. When cutting, use a slow and steady motion, and let the saw do the work. Avoid applying too much pressure, as this can cause the blade to bend or break. Once you’ve made the cut, use sandpaper to smooth out any rough edges.
Summary
Cutting the wood is a critical step in making a wooden arch. To ensure a flawless finish, always measure twice and cut once, use the right tools, and techniques. With these tips in mind, you’ll be able to cut the wood with precision and achieve the desired results.
Assembling The Arch
Crafting a wooden arch involves measuring, cutting, and assembling pieces with precision. Start by selecting quality lumber and creating a sturdy frame, then carefully fit the pieces together to form the arch shape. Sand and finish the arch for a polished final look.
Securing The Pieces Together
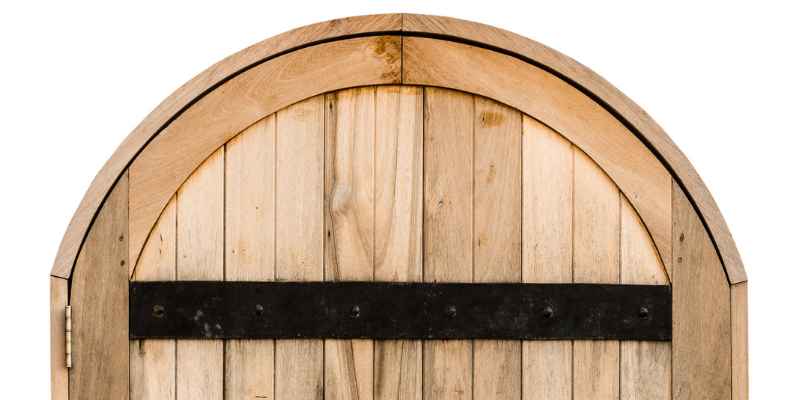
Lay the cut boards out flat in the arch shape first, dry-fitting every piece before any glue or screws go in. If you’re building the curved top from mitered sections (a common approach for a smooth arch), cut the boards at a 22.5-degree angle on each joint so six angled cuts come together in a half-circle. Glue each joint with exterior wood glue, then reinforce from behind with a pocket screw or a flat mending plate so the fasteners stay out of sight from the front.
Ensuring Stability And Durability
An arch standing on its own in a yard needs more than glued joints to survive wind and weather. Set the two side posts into post holes at least 24-30 inches deep, or bolt them to concrete anchors if you’re not digging in, and brace each post to its neighbor with a diagonal 2×4 until the structure is rigid. Adding a horizontal cross-brace partway up both sides, in addition to the arch at the top, keeps the whole frame from racking side to side once it’s in the ground.
Finishing Touches
After building the wooden arch, it’s time to focus on the finishing touches. This is the stage where you can transform your wooden arch into a beautiful and functional addition to your garden or yard. Here are some important finishing touches to consider:
Sanding For Smoothness
Sanding is an important step in finishing your wooden arch. It helps to smooth out any rough edges and prepare the surface for the final finish. Start with a coarse-grit sandpaper to remove any splinters or rough spots, then move on to a finer-grit sandpaper for a smoother finish. Be sure to sand along the grain of the wood to avoid scratches or damage.
Choosing The Right Finish
Choosing the right finish for your wooden arch is important for both its appearance and longevity. There are a variety of finishes to choose from, including paint, stain, and varnish. Paint is a good option if you want a solid color, while stain allows the natural beauty of the wood to shine through. Varnish adds a protective layer that can help prevent damage from weather and insects.
When choosing a finish, consider the climate and environment your wooden arch will be exposed to. If it will be exposed to direct sunlight or rain, you may want to choose a finish that offers UV protection or is water-resistant. It’s also important to follow the manufacturer’s instructions for application and drying times.
Additional Tips
Here are some additional tips to keep in mind when finishing your wooden arch:
- Wear protective gear such as gloves and a mask when sanding and applying finish.
- Apply the finish evenly and in thin coats to avoid drips or bubbles.
- Allow each coat to dry completely before applying the next.
- Consider adding a sealant to protect the finish and prolong the life of your wooden arch.
By following these tips and taking the time to properly finish your wooden arch, you can create a beautiful and durable addition to your outdoor space.
Decorating Your Arch
Decorating your arch with a wooden touch can add a rustic and charming feel to any event. To make a wooden arch, start by measuring the desired size and cutting the wooden planks accordingly. Then, assemble the planks using screws or nails and decorate it with flowers or other decorations to create a beautiful and unique arch.
Adding Personal Touches
A wooden arch is easiest to personalize while it’s still on the ground, before it’s anchored in place. Flowers and garlands work well woven directly into the top curve, where they get the most visibility; LED string lights tucked along the same curve extend that visibility into the evening for parties or events. For a wedding, ribbons, lace, and draped fabric along the posts are the most common finish; for a birthday or graduation, balloons, streamers, or a small banner across the top do the same job.
Ideas For Every Occasion
Match the decoration to the setting rather than defaulting to one style. A garden arch usually looks best left mostly bare, or dressed with a single climbing plant like clematis or roses so the woodwork itself stays visible. A corporate or event arch benefits from a simpler, more uniform color scheme (one or two colors, not a mix) so it reads well in photos. Whatever the occasion, attach decorations with removable wire, twine, or clips rather than staples or nails, so the wood isn’t left with holes once the event is over.
Maintenance And Care
When it comes to maintaining your wooden arch, proper care is essential to ensure its longevity and beauty.
Regular Check-ups
- Inspect for cracks or rot monthly
- Clear debris and dirt bi-weekly
Repairing Wear And Tear
- Fill cracks with wood filler immediately
- Apply wood sealant seasonally
Regular upkeep of your wooden arch will prevent costly repairs in the future.
Frequently Asked Questions
How Do You Make A Wooden Arch?
To make a wooden arch, start by choosing the type of wood that suits your project. Measure and cut the wood pieces to the desired length, ensuring they are all the same size. Use a jigsaw or a circular saw to create the curved shape of the arch.
Secure the pieces together using wood glue and screws. Finish by sanding the arch and applying a protective coat of paint or stain.
What Tools Do I Need To Make A Wooden Arch?
To make a wooden arch, you will need a few essential tools. These include a measuring tape, a saw (such as a jigsaw or circular saw), a drill, wood glue, screws, sandpaper, and a paintbrush or stain applicator. Optional tools may include clamps, a miter saw, and a sander for smoother finishes.
Be sure to wear appropriate safety gear while working.
Can I Use Different Types Of Wood For A Wooden Arch?
Yes, you can use different types of wood for a wooden arch. The choice of wood will depend on factors such as the desired appearance, durability, and budget. Common types of wood used for arches include cedar, redwood, pine, and oak.
Consider the specific qualities of each wood type and select one that suits your project requirements.
How Long Does It Take To Make A Wooden Arch?
The time it takes to make a wooden arch can vary depending on the complexity of the design, your experience level, and the tools available. Generally, it can take anywhere from a few hours to a couple of days to complete the project.
It is important to allocate enough time for measuring, cutting, assembling, and finishing the arch.
Conclusion
Crafting a wooden arch is a rewarding project that adds charm to your space. By following these steps, you can create a beautiful wooden arch to enhance your garden or home. Remember, patience and precision are key to achieving a stunning final result.
Happy woodworking!