
How to Master Angle Cuts on a Table Saw: Proven Techniques
To make angle cuts on a table saw, adjust the miter gauge for the desired angle and secure the workpiece against the fence. Then, carefully push the workpiece through the blade, maintaining control and accuracy throughout the cut.
Achieving precise angle cuts on a table saw is essential for various woodworking projects. Whether you are creating angled edges or joining pieces at specific angles, the table saw provides a reliable and efficient solution. By following a few simple steps, you can ensure clean, accurate, and safe angle cuts.
This article will guide you through the process, from adjusting the miter gauge to securely positioning the workpiece and executing the cut. Mastering the art of angle cuts on a table saw will enhance your woodworking skills and allow you to tackle an array of projects with ease.

Choosing The Right Blade
When it’s time to make angle cuts on a table saw, choosing the right blade is crucial for achieving clean and accurate results. Your choice of blade will depend on factors such as the material being cut and the desired angle, so it’s essential to consider the following key factors to ensure optimal performance.
Selecting The Right Tooth Configuration
The tooth configuration of a blade plays a significant role in determining the cut quality and efficiency. For angle cuts, choose a blade with a higher tooth count (e.g., 60-80 teeth) to ensure smoother cuts, especially when working with delicate materials or making fine angles. A higher tooth count helps to minimize tear-out and splintering, resulting in cleaner and more precise cuts.
Considerations For Different Materials
When cutting different materials, it’s essential to consider the specific characteristics and challenges posed by each material. For wood, select a blade with carbide-tipped teeth designed to handle solid wood or composite materials effectively. On the other hand, when cutting metal, opt for a blade with a specialized tooth configuration and hardness to withstand the demands of metal cutting. For plastics, it’s essential to use a blade specifically engineered to prevent melting and ensure clean, chip-free cuts.
Setting Up The Table Saw
Before you can start making angle cuts on a table saw, you need to ensure that your table saw is properly set up. This involves making sure that the blade is square to the table and adjusting the angle and fence accordingly. Follow these steps to set up your table saw for angle cuts:
Ensuring The Blade Is Square To The Table
- Start by checking if the blade is perpendicular to the table. This is crucial for accurate angle cuts.
- To do this, locate the blade tilt adjustment knob or lever on your table saw. It’s typically located on the front or side of the saw.
- Loosen the knob or lever and adjust the blade until it is perfectly square to the table.
- Use a combination square or a specialized square gauge to check the alignment. Place the square against the blade and the table, ensuring it rests flat against both surfaces.
- If the blade is not square, make small adjustments until it aligns perfectly. Tighten the knob or lever once you’re satisfied with the alignment.
Adjusting The Angle And Fence
- To make angle cuts, you’ll need to adjust both the angle and fence on your table saw.
- Locate the angle adjustment mechanism on your saw, usually located near the front or back.
- Loosen the angle adjustment knob or lever, and set it to the desired angle for your cut.
- Ensure the angle indicator is aligned with your desired angle.
- Once the angle is set, you’ll also need to adjust the fence. The fence is the guide that helps position your material for cutting.
- Loosen the fence adjustment knob or lever and position the fence at the desired distance from the blade.
- Make sure the fence locks securely into place and is parallel to the blade.
By properly setting up your table saw and ensuring the blade is square to the table, as well as adjusting the angle and fence correctly, you’ll be ready to make precise angle cuts. This process may take some time initially, but it’s crucial for achieving accurate and clean results. With practice, you’ll become more familiar with your table saw’s setup and be able to make angle cuts effortlessly.
Using Jigs And Guides
Discover how to achieve precise angle cuts on a table saw by utilizing jigs and guides. Enhance your woodworking skills with this effective technique.
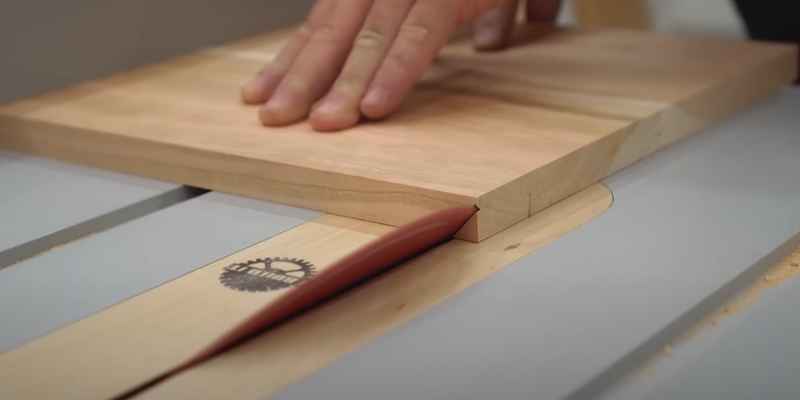
Making A Miter Sled For Accurate Cuts
One of the most effective ways to make angle cuts on a table saw is by using jigs and guides. They can help you achieve precise and repeatable cuts, ensuring your projects turn out perfectly every time.
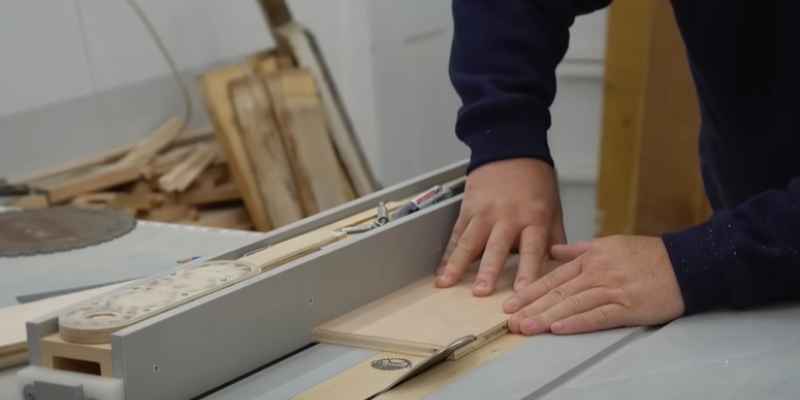
Using A Tapering Jig For Angled Tapers
When it comes to making angled tapers, a tapering jig can be a game-changer. This jig allows you to safely and accurately create tapered cuts on your table saw.
To make a miter sled for accurate cuts, follow these steps:
- Measure and cut a piece of plywood or MDF that is slightly larger than your intended workpiece.
- Attach two wooden runners on the bottom of the sled, making sure they fit snugly in the table saw’s miter slots.
- Attach a wooden fence to the front of the sled, ensuring it is square to the table saw’s blade.
- Secure your workpiece against the fence and use the sled to guide it through the blade, ensuring a precise and accurate angle cut.
Using a tapering jig for angled tapers is a straightforward process:
- Create a tapering jig by attaching a long, narrow strip of wood or metal to a baseboard.
- Position the jig in line with the desired angle cut.
- Secure your workpiece against the jig’s fence and guide it along the jig as you feed it through the table saw.
Remember, safety is paramount when using jigs and guides. Always wear appropriate safety gear, keep your hands away from the blade, and use a push stick or push block to move the workpiece through the saw.
By using these jigs and guides, you can ensure accurate and precise angle cuts on your table saw, giving your woodworking projects a professional finish.
Mastering Cutting Techniques
If you want to achieve consistent, precise angle cuts on a table saw, mastering cutting techniques is crucial. Understanding how to perform straightforward crosscuts will vastly improve your woodworking projects. This technique requires setting the saw blade to a 90-degree angle for cutting wood perpendicular to the grain. This simple yet fundamental method will help you achieve accurate angular cuts, regardless of the material’s thickness.
Perfecting Miter Cuts
Another essential skill for mastering angle cuts on a table saw is perfecting miter cuts. These angled cuts are commonly used for creating joints and frames with precise corners. By adjusting the saw blade to specific angles, such as 45 degrees, you can create seamless connections that enhance the overall aesthetic and structural integrity of your woodworking projects.
In addition to mastering these cutting techniques, understanding the importance of proper blade alignment and securing the workpiece with clamps or guides is crucial for achieving accurate and safe angle cuts on a table saw. With practice and attention to detail, you can elevate your woodworking skills and confidently tackle projects that demand precision angle cuts.
Tips And Tricks
Learn how to efficiently make angle cuts on a table saw. Mastering this technique can enhance your woodworking skills and expand your project possibilities. Follow these expert tips to ensure precision and safety when making angle cuts on your table saw.
Using Featherboards For Added Safety
Featherboards are essential accessories when it comes to making angle cuts on a table saw. Not only do they help keep your hands safely away from the blade, but they also provide a consistent and continuous pressure against the workpiece, preventing it from moving during the cut.
To use featherboards effectively, position them on the table and against the fence. Make sure they apply firm pressure to the workpiece, pushing it against the table and fence simultaneously. The feathers on the board should be facing in the direction opposite to the feed direction, creating resistance against any kickback.
Avoiding Tearout On Finished Surfaces
No woodworker wants to see unsightly tearout on their finished surfaces, especially when making angle cuts. Luckily, there are a few tricks to prevent this from happening.
Firstly, it’s crucial to choose the right blade for the job. A blade with a high tooth count, such as a fine-toothed crosscut blade, will help minimize tearout. Additionally, ensuring that the blade is sharp and properly aligned will contribute to cleaner cuts.
An often overlooked technique is using a sacrificial backing board when making angle cuts. By placing a piece of scrap wood behind the workpiece, you provide support and prevent tearout on the backside of the material. This simple trick can save you frustration and rework.
Remember to always move the workpiece slowly and steadily through the blade to reduce the chances of tearout. Let the blade do the work and avoid rushing the process. Lastly, double-check the fence and the angle settings on your table saw to ensure they are accurate before making the cut.
In conclusion, incorporating these tips and tricks into your angle cutting routine will significantly enhance your safety and the quality of the finished cuts. Remember to use featherboards for added safety and take the necessary precautions to avoid tearout on finished surfaces. Investing time and effort into mastering these techniques will undoubtedly pay off in the long run.
Conclusion
In mastering how to make angle cuts on a table saw, attention to detail and safety is key. With the right techniques, precision, and practice, anyone can achieve professional-looking results. Remember to measure twice and cut once, and always follow manufacturer recommendations for a safe and effective woodworking experience.
Happy cutting!